
I’ve owned by Unicubic U1 printer for a few years now. During that time, I learned a lot about many aspects of 3D printing. How a printer is assembled. How not to update the Marlin firmware and how to spend months calibrating. It’s been a great learning tool, and I’ve really enjoyed updating many aspects of it. But during the Spring of 2020, I really hit a wall with its capabilities. I had to decide if I should carry out some serious upgrades or buy an Ender 5 Pro.
The Unicubic U1 Limitations
I bought the Unicubic U1 as a trial to see what it could do and understand how I might use it. Not to forget, it was super cheap. In fact, the super cheap element is part of the reason I’ve had to learn so much about 3D printing. From updating the printer’s firmware to calibrating both the software and the hardware. It’s been quite an adventure updating the performance to something useable with dimensionally accurate parts and good layer bonding.

In the Spring of 2020, there was a sudden huge demand for PPE, a topic that was very close to home for me. And joining one of the global 3D Crowd Souring groups, I set out printing parts for visors and mask holders. The results, when printed in PLA material, were pretty good, certainly usable. But the PLA was not a prefered material. It’s hard to clean, easily deforms in use and has a general inability to meet CE requirements.
Instead, I needed to print in PETG only the Unicubic U1 wasn’t up to it. I already had some semi-transparent red PETG, which would be ideal, but the results were terrible. With a few days of tuning, I could remove most of the stringing and even get good bonding between the layers. But the results were far from consistent, and while functional, not up to the task. And that wasn’t including the problems with the filament clogging and air getting drawn into the hot end.
Upgrade Vs New Printer
Upgrading the existing printer
If I wanted to be more productive with 3D printing, I needed a better machine. There seemed to be two options available, upgrade the Unicubic or buy a new printer. Because the Unicubic is loosely based on the Anet A8, there are quite a few options for specific upgrades. A MOSFET control on the hotbed will help remove power fluctuations on the hot end and give a more consistent filament flow. A new extruded aluminium frame would provide a stiffened frame, more accurate movement of the print head and more dimensionally accurate prints. A higher-quality print head will give a better overall print finish and repeatable results.
The result of these combined small improvements would, hopefully, let me print something more useful with PETG filament. But even then, I will have some pretty shonky copy of a machine that was cheap when it was new. There is also no guarantee that it will print any better, and it will still be missing some recent technology updates. Not to mention the less than family-friendly power supply the original Unicubic shipped with.
Buying a new printer
The alternative option of a new printer looks more and more appealing the longer I research upgrades. And that brings me to the Ender series of printers from Creality. I have a few friends and colleagues with 3D Printers, and those with Creality printers all have a very high opinion of them. They have similar subjective views. Easy to assemble, quick to get good prints and well supported. There is nothing I like better than a well-supported tool.
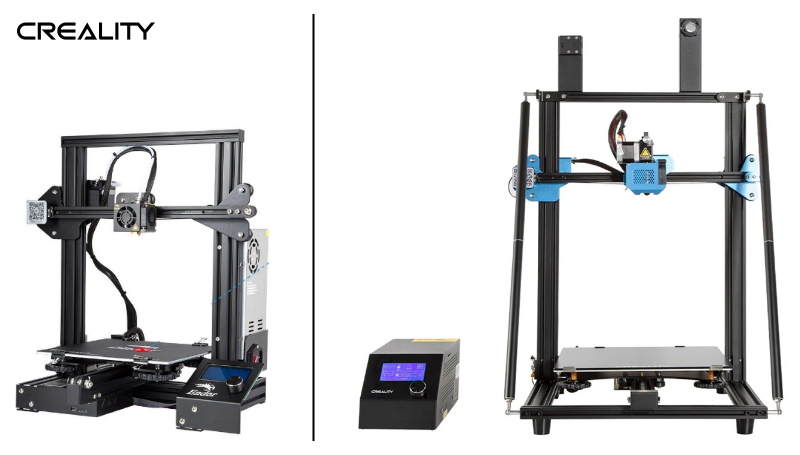
There is quite a range of Creality printers, too, from the entry-level Ender 3, which has a lot of similarity to the Unicubic, to the commercial level CR 10. I’m almost immediately drawn to the Ender 5, though. It has a big square frame that offers unrivalled stability, but rather than the head moving away from the bed during printing, the bed moves away from the head.
I’m a little nervous about the movement of the bed away from the print head, a concern that many online reviews echo. The print bed is only supported on one edge and so has the opportunity to flap around. But as I read more reliable reviews from places like All3DP, the more I find the reality is the bed is good and stiff and won’t start rocking. And if it does, there is a printable solution for that.

The decision now is which variant of the Ender5? There is the plain version, or for an extra £40 at the time, there is the Pro version. The Pro contains all the benefits of the base version. This includes the ‘all-in-one’ power supply and control board unit, and a remote extruder. It also includes some very worthwhile upgrades. The ‘silent’ control board is top of the list, which apparently uses different stepper motor controls for lower noise and high precision. Along with this is the ‘Capricorn’ filament tubing which reduces friction in the filament feed to the hot end, giving smoother prints. These upgrades are available on their own for around £50, so it’s a no-brainer to get the Ender5 Pro over the base model.
The Ender 5 Pro arrives.
It’s still not something I can immediately afford, so I’m forced to start the slow process of saving for it. Then, just after Christmas, there is a terrific offer on the printer on the UK Creality website. So finally, I can wave goodbye to the trusty little Unicubic and get something that bit more reliable, robust and better performing. And it doesn’t take long to arrive.
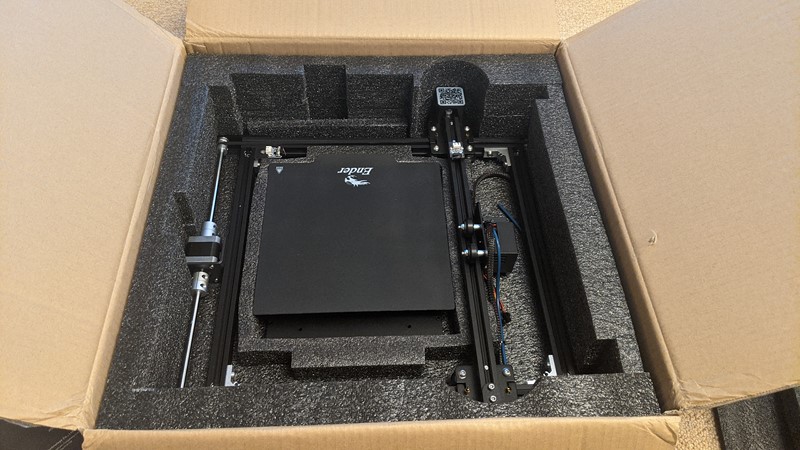
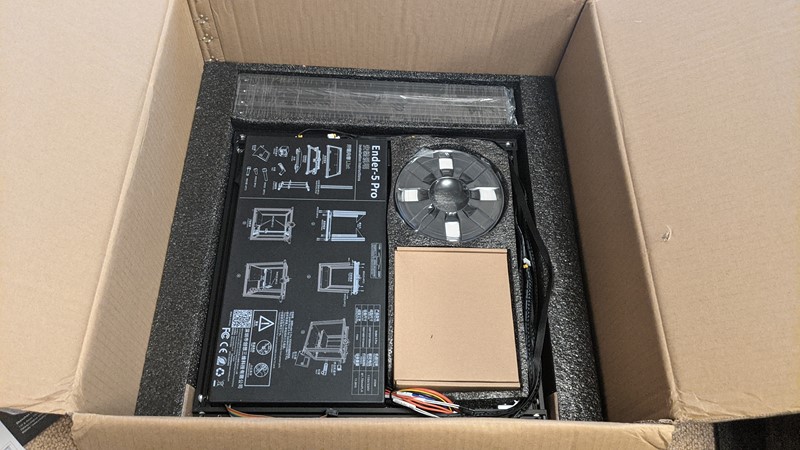
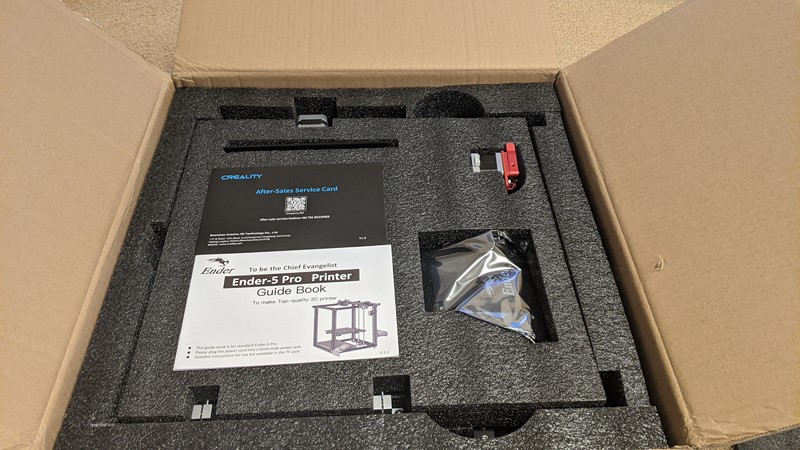
I won’t bore you with a long windy description of how the Ender5 is assembled. There are plenty of guides available online. And it’s effortless. The guide is quite well put together. There was only really one questionable step. Other than that, it was a case of just following each page. Most of the fiddly parts are already assembled in the box, making the build quite quick and satisfying. The packing and layout of the box contents are very impressive and deserve sharing.
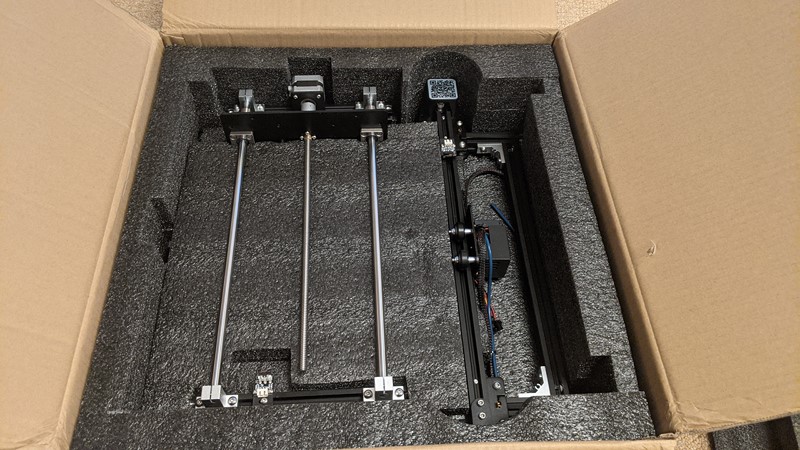
In pretty much no time at all, the frame of the printer, and all its doing bits, are assembled. There is one last step, though, wiring it all up. Each connection is clearly marked, so this seems simple enough. However, not a single cable seems to be the right length for the printer. There is no obvious path for them to follow, and the result is quite a mess. The picture below is the absolute neatest I could get the wiring.
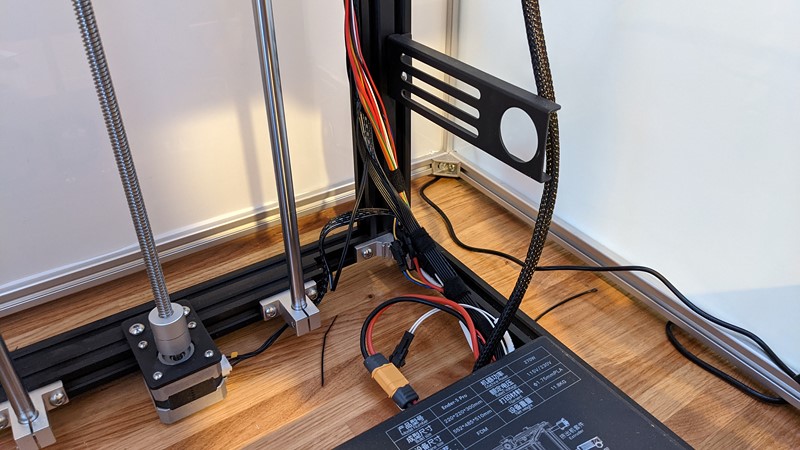
And it turns out that this is something inherent in the design. Perhaps to make it easier to assemble, the harness length and appearance is a common complaint of Ender5 owners. Several designs can be printed to try and improve or hide the wiring, but ultimately it’s something I have to live with. Even now, the pictures on the Creality website show how bad the wiring is.
Upgrades before even turning it on!
Before I even power up the printer for the first time, I’ve already ordered some upgrades. After my experience with the Unicubic, I know I’d want to use the Ender 5 with a print bed level sensor. I use the sensor in two ways. First, in manual mode, I can adjust the springs on the bed to as level as possible. Then in automatic mode, the printer will adjust the print nozzle height to remove any minor imperfections.
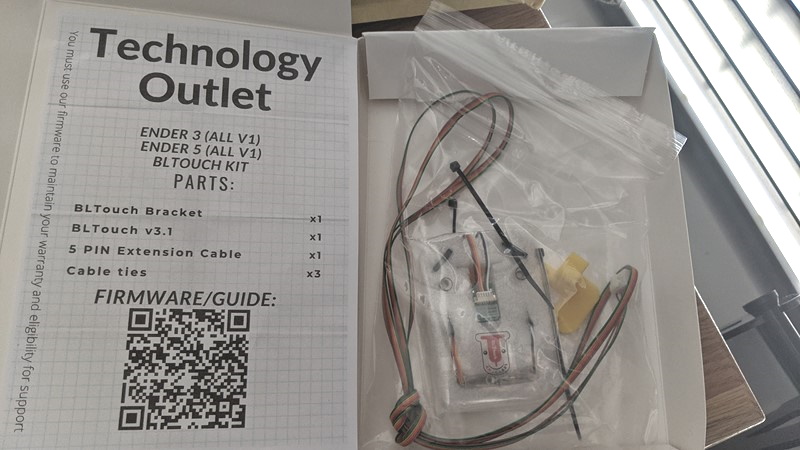
Given my previous experience with the BLTouch, I’ve bought another one! This is a slight upgrade over the one on the Unicubic and ordered directly from the UK 3D printer specialist, Technology Outlet. I’m using the Technology Outlet more and more as they have many parts for the Ender5, and their customer support is excellent. The simple kit includes everything needed to fit the BLTouch level sensor to the Ender5 print head.
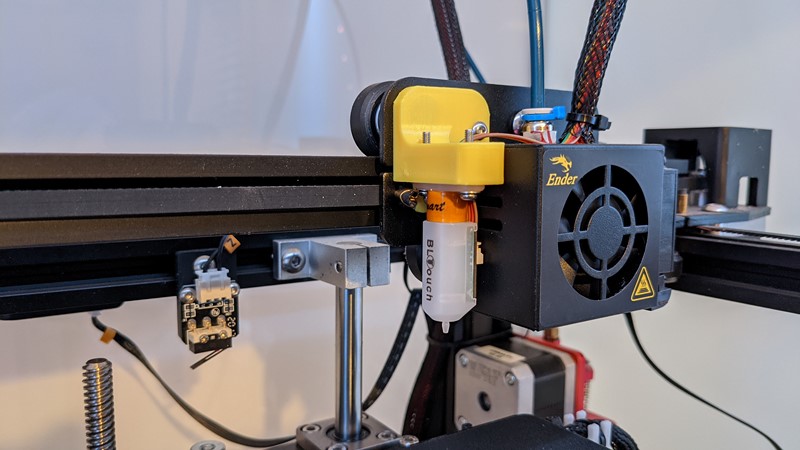
It’s not quite so plain sailing when I power up the printer for the first time. The firmware isn’t configured for the BLTouch, so I need to overwrite the factory software manually. Fortunately, my experience with the Unicubic has prepared me for this. So I’m able to flash the latest version of the Ender-branded Marlin firmware pretty quickly. This time.
First Print
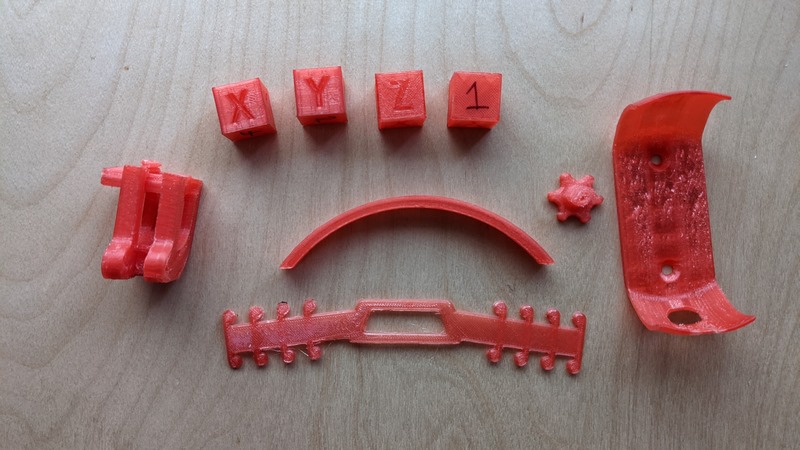
And so to the first print. I’m optimistic that the printer will work straight out of the box. I set it to print out the ubiquitous ‘XYZ’ calibration cube, and after the first layer is down, I walk away and leave it to print. The expectation, of course, is that I will return to a perfectly printed 20mm cube. However, the grim reality is a pile of filament spaghetti.
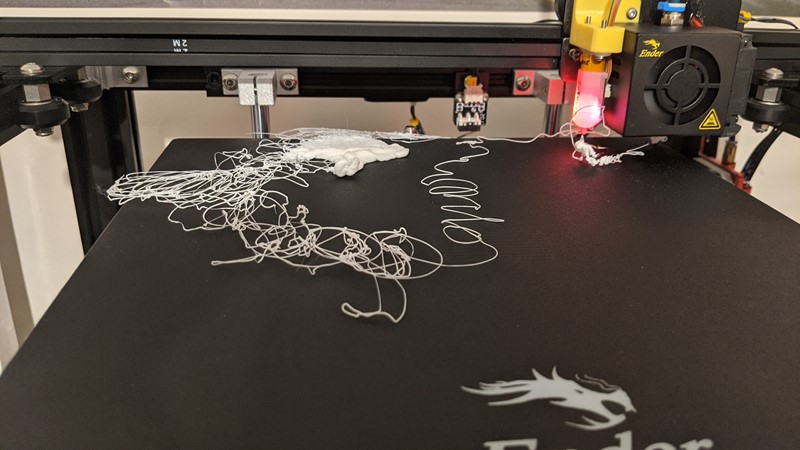
I really should have known better. However, it turns out it might not be my own optimism that is purely to blame. After reading up, it seems the firmware on the Creality website for use with the BLTouch has some bad settings. In fact, the lead screw (threaded bar) that makes the print bed go up and down is different in some models. For example, the software expects the printer to rise by 0.5mm, but my printer rises by closer to 1mm. This results in the extruder trying to print in thin air, way above the print bed, and creating some lovely spaghetti!
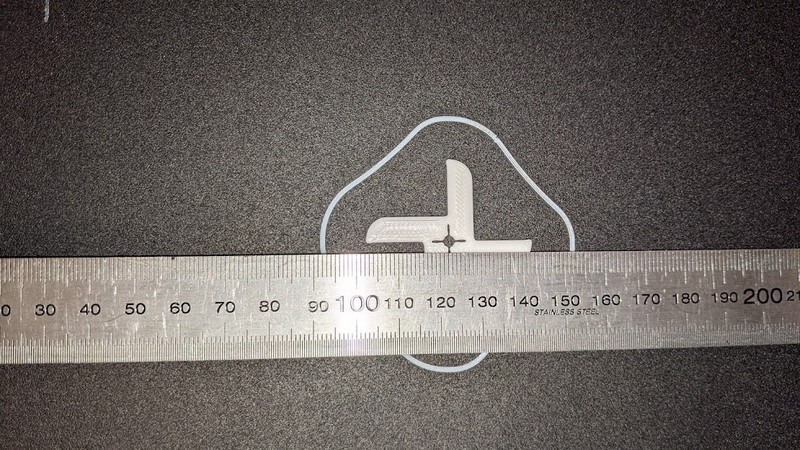
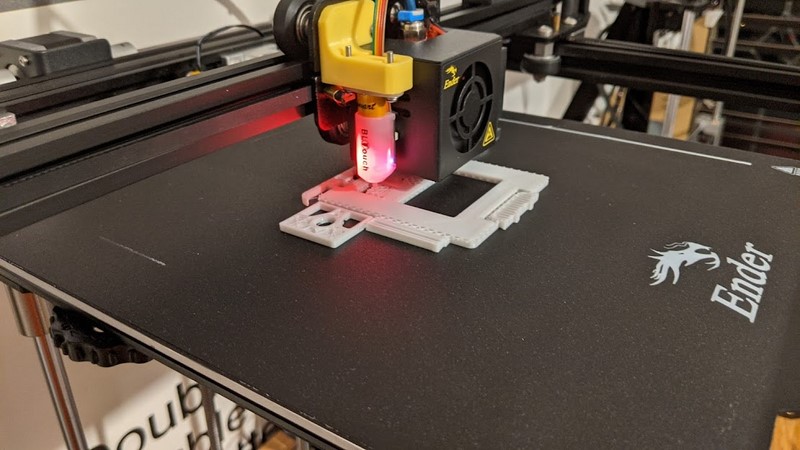
With my eagerness and ego dialled back a little, I found the problem with the firmware, changed the setting and reflashed the printer. I’m happy this has probably fixed the issue, but rather than crashing into a big print. I go with something a little smaller. The bed centre calibration piece in the picture above prints in a few minutes. And I don’t take my eyes off it for more than a second. Hurrah, it prints beautifully and shows me my bed centre is 2mm off to the right. I can work with that.
Printed upgrades
Over the next few months, I print an assortment of smaller and then larger parts. Some of the parts are for the kids, and some upgrades for the printer. The results are fantastic and only improve with small tweaks to the process. Remember my concern about the print bed bouncing around? There is a printable solution to that.
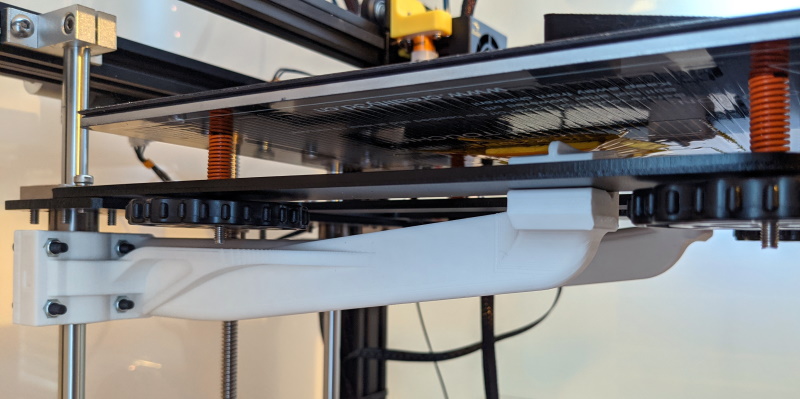
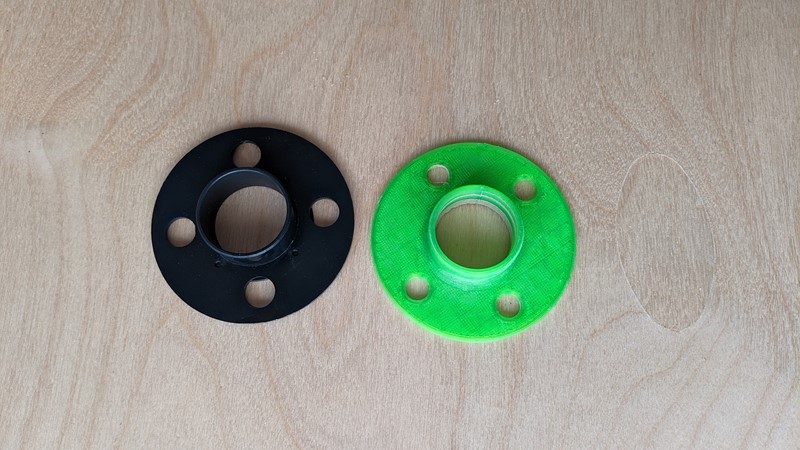
These printed bed supports bolt over the strut guides at one end and clip onto the print bed support plate at the other end. If I’m honest, I can’t see any print quality improvements with these arms in place, but the increase in rigidity is immediately apparent. Nevertheless, I’m delighted I’ve put these on, if only for the mental reassurance that the print bed is now good and solid. I’ve also printed off a few cable guides and strain relief.
Printing car parts
An ECU bracket for work is one of the first significant prints to come off the Ender5. As prints go, this design is both complicated and fiddly. Riddled with supports and fine detail, it’s not something that I could have managed with the Unicubic. The part is also being printed directly from a design intended for plastic injection moulding. As a result, this is by far the most complicated print I’ve ever attempted.
Many long nervous hours later, the final part emerges from the printer. As a proud dad of the newly created part, I completely forgot to take any pictures. Instead, showing it to anyone who will look, mainly my suffering other-half, who is less than impressed. The final result is smooth, has good layer bonding and is structurally sound. In fact, it’s now done many hundreds of miles screwed to a car and has so far held up to its job. Proud dad continues, as does my tendency to tell anyone close by how wonderful it is.
Practical Prints?
Not all the prints I make are for automotive use, though. Some are for more practical purposes. For example, during the summer, I needed to cut a circular hole through some floorboards, as you do. I have a tool for that, only I’ve ordered the wrong acme hole, and so my router guide is the wrong size.
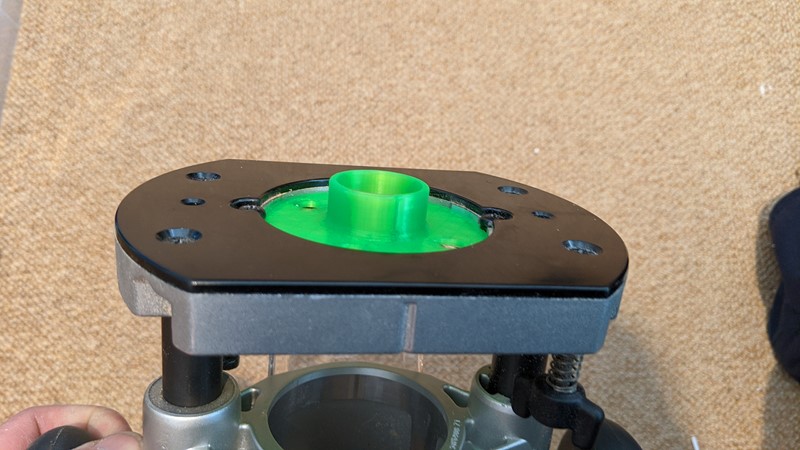
Taking the slightly too small router guide as a template, I hit Fusion 360 and started drawing. And it’s a reasonably simple design to create. In no time at all, I have a file I can feed into the 3D printer and print myself out of the sticky situation. I should probably have had more faith in the printer, as I order the genuine Makita metal part, just in case. It’s a five-day delivery period, though, so now I have a race on between the printed and bought part.
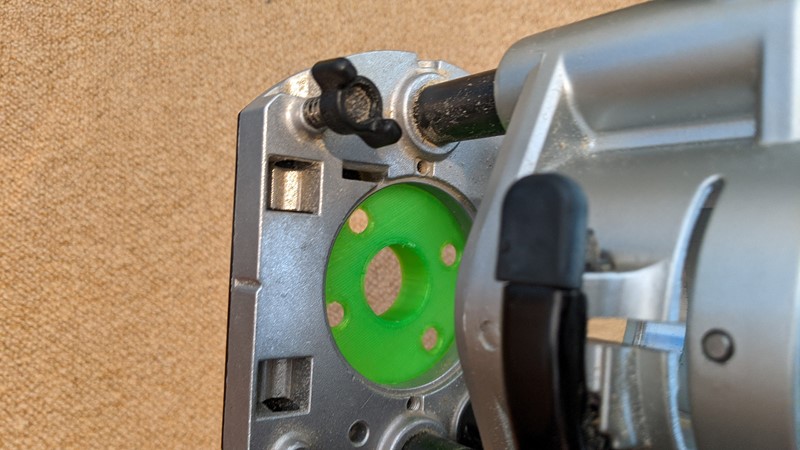
The printed solution works perfectly. First, the holes in the floorboards are cut precisely. Then the covers drop straight back into the gap. The guide worked brilliantly for something that I designed and printed. It also means I can fix the bathroom floor in a single day and not have to wait a week for parts to arrive. Better yet, the part hasn’t exploded into pieces, so I can use it again.
A few days later and the metal part arrives. Really I should send it back unopened, but I’m far too keen to see how close the printed part is to the bought part. And I have to admit it’s pretty darn close. The four vent holes used for dust extraction are definitely undersized, but otherwise, it’s a pretty close match.
The Ender 5 Pro, six months later
I’m really impressed with the reliable performance of the Ender 5 Pro compared to my previous printer. With the Creality machine, I can just set up the print file, put it in the card reader and leave the printer to it. Compared to the Unicubic, which I found I had to tweak and adjust continually, the Ender 5 Pro will print again and again. To date, my longest print was a total of 27 hours. It did have two moments where problems occurred. Neither ruined the print as the Ender5 has a pause function allowing me to make a change and restart the printing. Ultimately the cause of the print issue came down to being a small issue in the original build. The prints are much higher quality and come off the printer in about 30% less time than the Unicubic.
Overall the ease of use the Ender 5 Pro’s ease of use makes it a tool I can use daily. And it probably prints something off just about every week. And as my ability with Fusion 360 improves, I can design ever more complicated parts. Not just for work either, replacement parts for the Citroen BX are already appearing. It may have been twice the price of the original Unicubic, but it’s fantastic value for money. It was the right choice for me, and I can’t wait to share some of the projects I’ve been using it for!
M
PREV – UniCubic U1
NEXT – Citroën BX Boot Trim Clip
Back to 3d Printing Articles
Back to Workshop Articles
Amazon Affiliate Links – Things used in this article
BXProject is using Amazon Affiliate Links. It’s a quick way to show you what I have used in this article.
“As an Amazon Associate, I [may] earn from qualifying purchases.”
Since January 2024, Amazon has blocked embedding images, but I think the links are still valuable.