
Replacing heater taps is a topic that often comes up on the BXClub Forum and BXClub Facebook pages. In 2012, I had to do the job myself, so I took some time to write up the process. It’s a forum topic that has been used and referenced many times, but it never felt robust or complete. In this series of articles, I’ll revisit the topic and improve the step-by-step process of replacing the heater tap on the Citroen BX.
The article is broken down into several parts;
- Disconnecting the heater tap
- Removing the steering column
- Removing the heater tap and heater matrix
- Disassembling the heater tap and refurbishing
Parts of this article were originally published on the BXClub forum back in 2012
What is the Citroen BX heater tap?
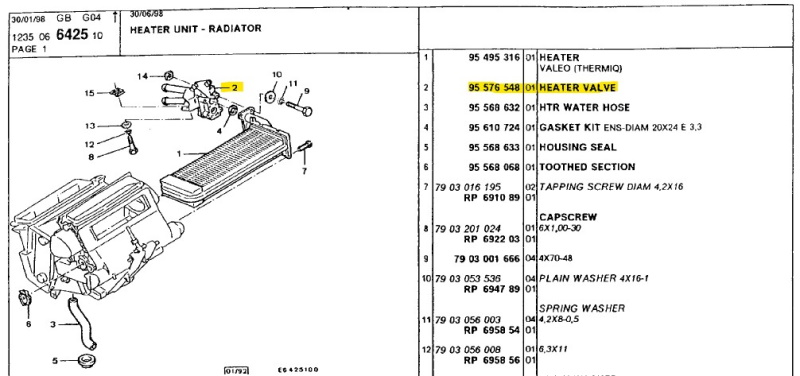
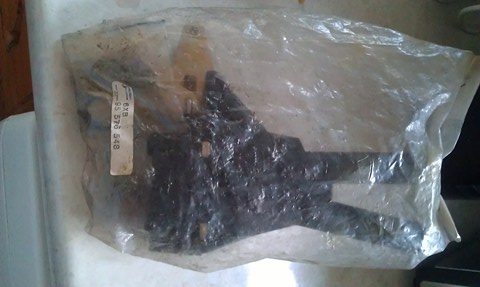
The heater tap, as it is commonly referred to, is a simple sliding valve. It regulates the flow of coolant from the engine into the cabin ventilation unit. The Citroen BX cabin temperature is adjusted by letting hot engine coolant into the heater matrix. Outside air is blown through a heater matrix to warm the air before it passes into the cabin. The heater tap regulates the flow of coolant and thus the vent temperature. For those playing along at home, the part number is 95 576 548. It has been ‘NFP’ (no longer available) for a very long time!
Why replace the heater tap?
There are a handful of reasons why you might want to replace the heater tap. But two reasons come up the most. During my BX adventures, I’ve replaced at least four heater taps that I can remember. And I’ve managed to break several more. I’m not the authority on them, but hopefully, you can learn from my experience.
I’ve deliberately forgotten how much this cost!
Failure by Snapped Pipes
The first one is simply that the pipes from the cabin to the engine bay have been snapped off. Overenthusiastic reattachment of the pipes, including over-tightening the jubilee clamps, is easily done. In fact, I’ve done it myself. The 30+ year old plastic is not a single polymer but is ‘filled’ with fibre reinforcement. As the VOCs leak out of the plastic, it becomes brittle. This is made worse by continuous heat cycling in the engine bay. It’s also common for the pipes to be snapped during engine removal. Either by forgetting to disconnect the pipes or the engine hitting the pipes on the way out.
Failure by blockage
It’s also common for the sliding mechanism of the tap to become blocked or silted up. This blockage is usually the result of poor maintenance. For example, a lack of periodic radiator flushing or incorrect coolant mix leads to a build-up of particulates in the coolant. The tap eventually strains these out. Eventually, the build-up blocks the movement of the valve. As a result, it becomes stuck in either the open or, more commonly, the closed position.
Part 1 – Disconnecting the heater tap
1.1 – Under bonnet disconnection
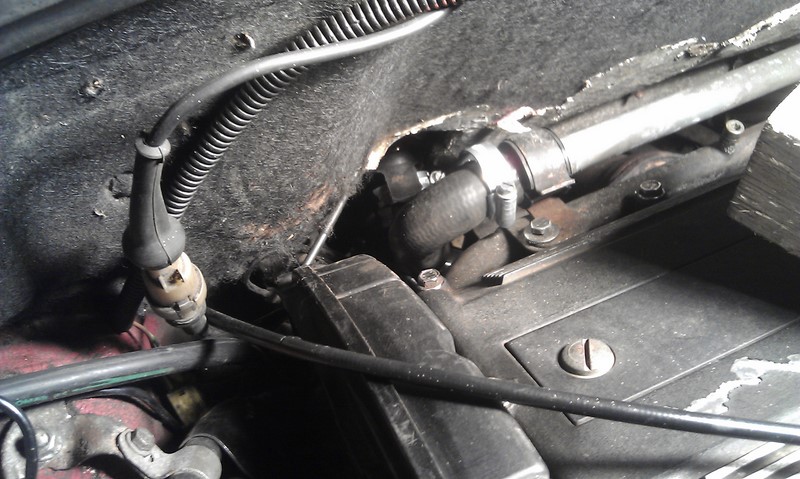
You can start in many places on this job. I prefer to start under the bonnet, and then you don’t have to return there until the very end. So you need to undo the two hoses that run from the engine to the heater pipes. The TD is probably the hardest, followed by the Citroen BX 16 Valve. There are many variations based on engine type, but the sequence for disconnection is the same. First, remove the top hose, then the bottom hose.
Initially, it can be daunting to be presented with a complete lack of access, but we are only making two pipe disconnections. No components really have to come out, although I usually remove the top hose and rail. The article assumes that you have completely drained down the coolant system, although it can be done without draining down if some precautionary steps are taken.
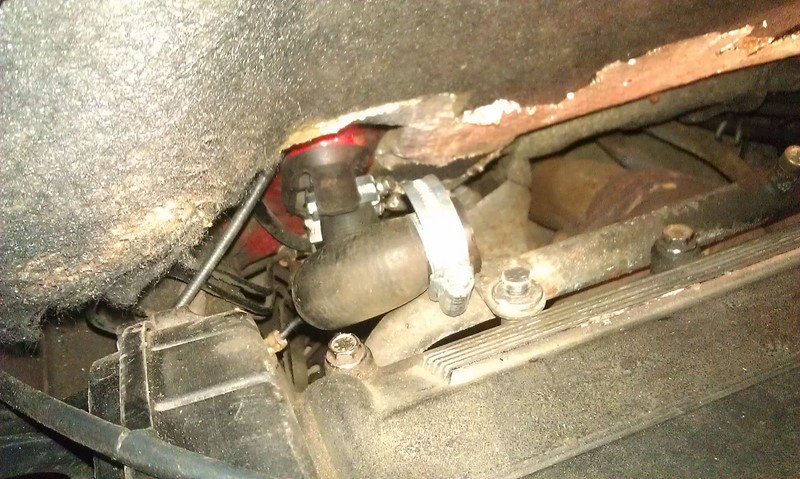
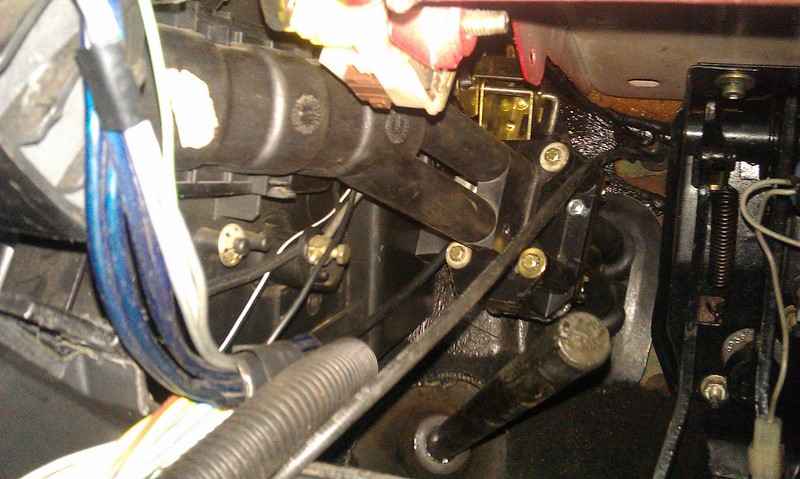
Gaining access to the tap ends.
Getting in a bit closer and perhaps access isn’t as bad as I first thought. I use a trolley jack under the rear engine mount to gently push the rear of the engine up. This forces the engine to rock forward on its mounts. An inch of upward travel on the trolley jack doubles the access to the pipes.
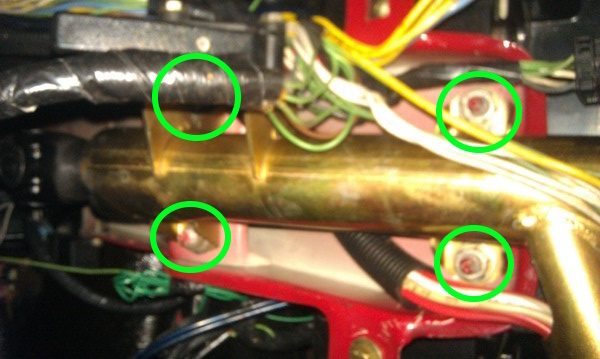
Disconnect the upper hose.
Start by disconnecting the top rail. Although the rail is not on all models, this is well worth doing for one extra hose clamp by the hydraulic pump. It will save you fighting the lower pipe, which is the one most commonly snapped! Because it’s a bit of a U-bend, there is always a bit of a coolant leak at this step.
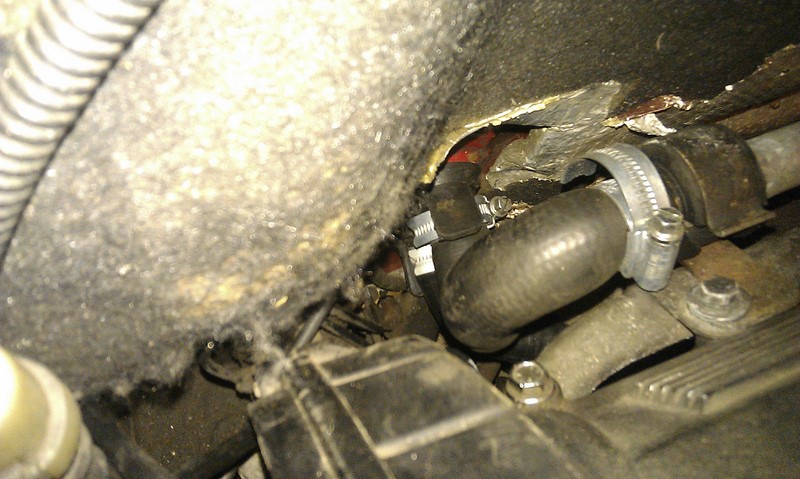
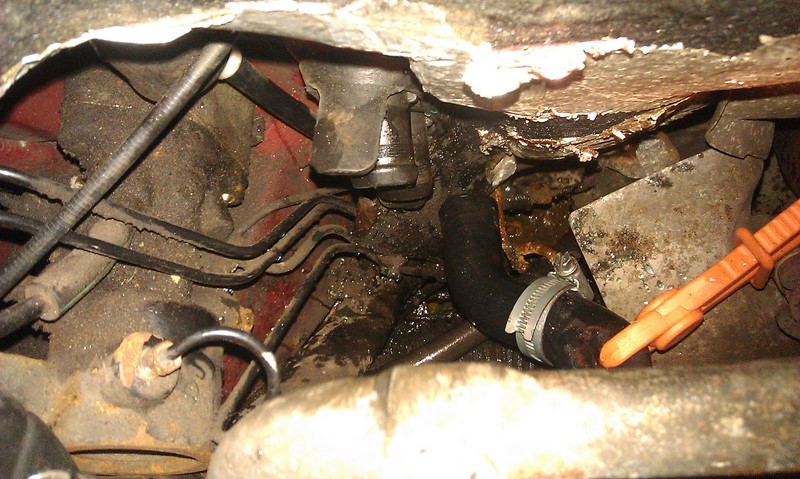
Disconnect the lower hose
With the top hose removed, you can start on the lower hose. This will drain ALL of the fluid in the engine through siphoning unless you do something about it. I’ve used a fuel line clamp, the orange pliers-looking thing (£5 in Halfords), to crimp the pipe. This stops too much coolant from escaping.
It’s worth noting that this bottom pipe goes into a plastic manifold on the back of the engine. Older cars may have an aluminium manifold. Both manifold types are very brittle by now and also easily snapped. For the BX 16Valve engine, the plastic coolant pipe manifold can still be bought new.
For now, that’s as much disconnection as is needed in the engine bay. You should think about letting the engine off the jack if you used one. There’s no benefit to straining the rubber engine mountings.
If you find the pipes have perished or the manifold failed, try contacting Chevronics for replacement parts. They currently list several pipes and manifolds for different models on their classic parts pages.
And if you have a Citroen BX 16 Valve, you can buy a whole set of hoses from Baker BM.
1.2 Removing the centre console trim
The heater tap is operated by a cable system connected to the rotating knobs on the centre console. To remove the tap, you’ll need to disconnect the cables. It is possible to make the disconnection only at the tap, but it’s hard going. In my experience, you end up snapping the white blower control panel behind the dash.
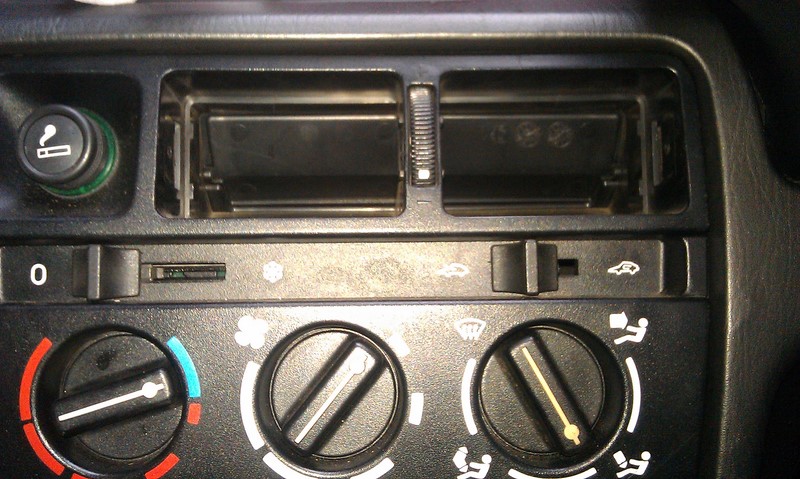
1.2.1 Removing the vents
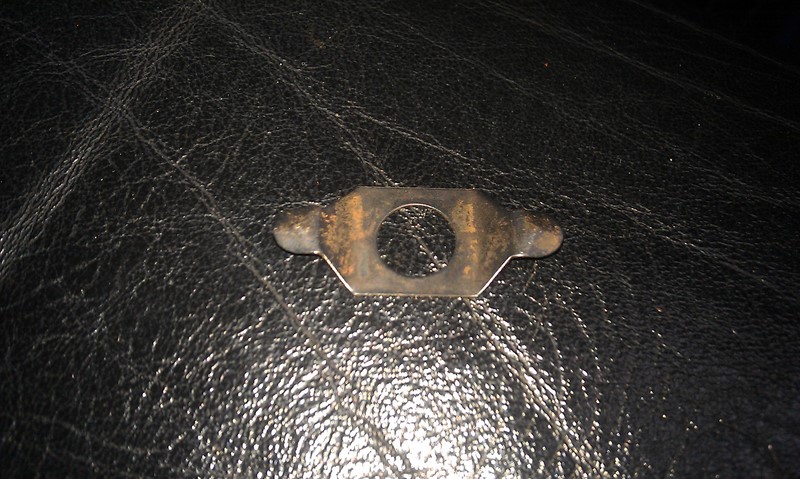
To remove the centre console trim, we start by taking the vents out. If you look down the outside of the centre vents, you’ll see a spring washer. This spring will escape into the car somewhere when you take the vent out, so CLOSE THE VENTS. Trust me, and you’ll be glad of this.

Did you close the vent? Okay, stick a wide flat-bladed screwdriver down the side of the vent and put slight sideways pressure on it. Then pull the vent out from the screwdriver side.
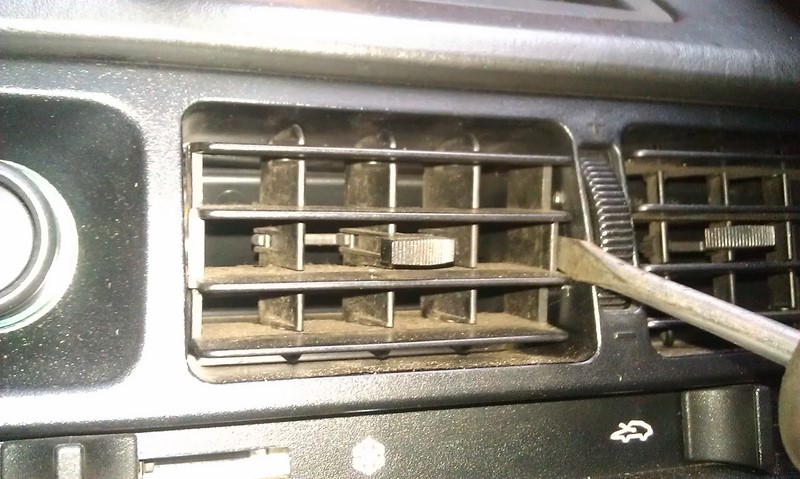
Don’t forget to recover the spring. If it doesn’t try to escape down the ducting, then check the back seats. They have a way of coming out somewhat explosively!
Repeat for the other vent, and we’re making progress. Unfortunately, there are a few more fixings to take out before the centre console trim can be removed.
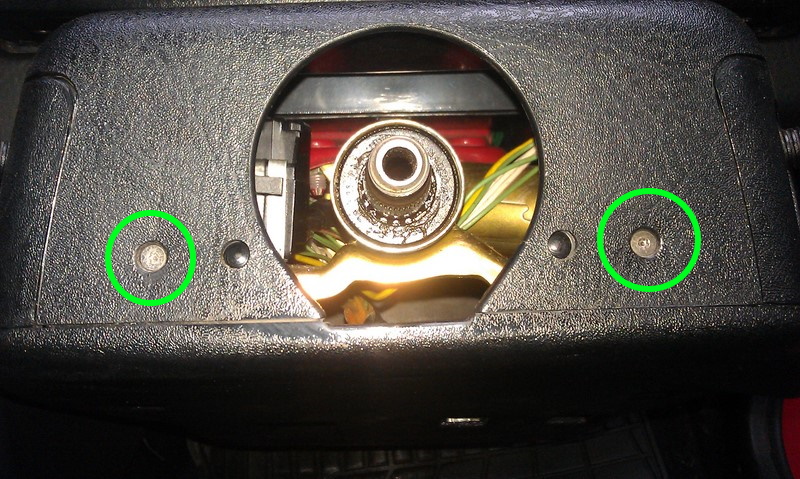
1.2.2 Accessing the screws
Pull the knobs off. Sometimes they’re stiff and take a bit of a wiggle. This is good. It means there not broken like most of them. With the knobs off, you need to remove the screws from behind the outer knobs. If you have aircon with the sliders like below, you’ll be tempted to pull them off. Don’t; they’re fixed. You’ll only break them!
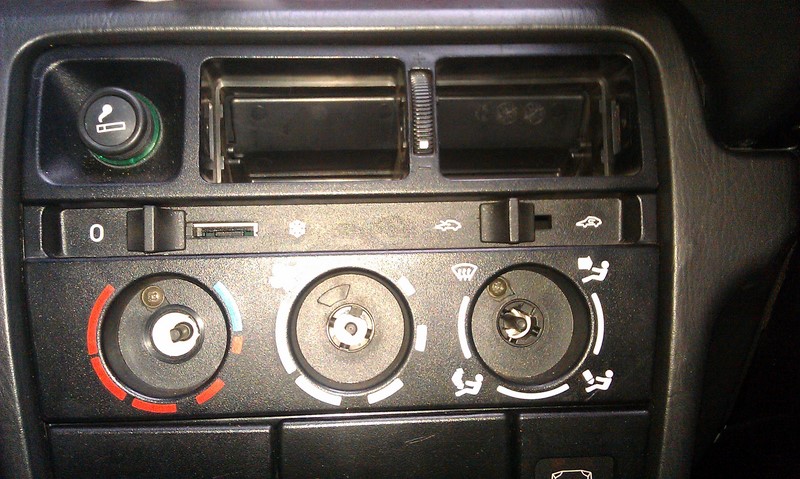
1.2.3 Removing the console trim
Finally, there are two big metal clips on either side of the vent aperture to release the console trim. Stick a screwdriver in, pull the spring out (lever the lip towards the aperture) and pull the console forward. Again, you can do one at a time or get fancy with screwdrivers and try to do both simultaneously.
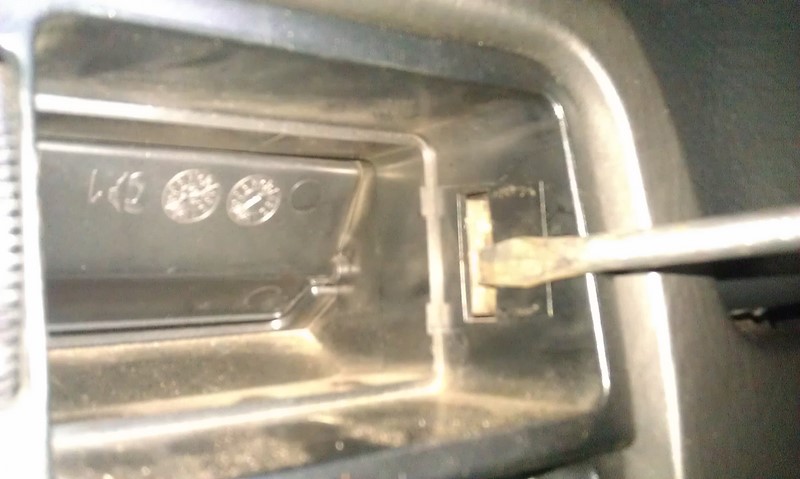
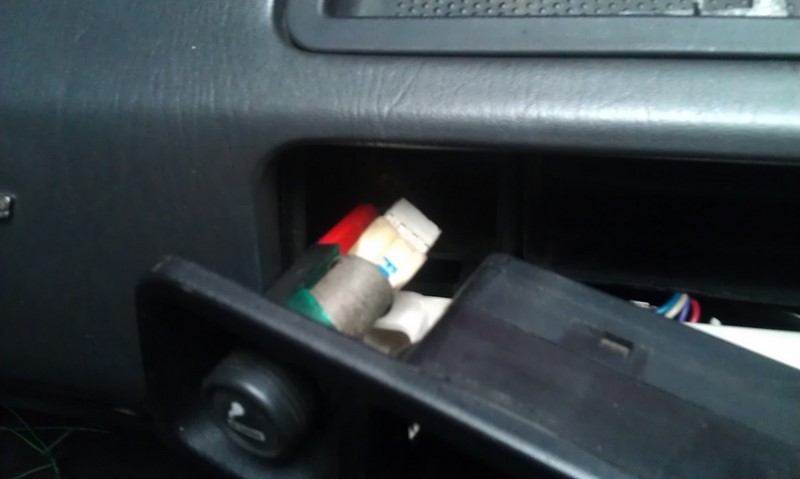
Once you’ve done both clips and pulled the fascia forward. You’ll need to disconnect the 12v outlet socket and the backlight power supply.
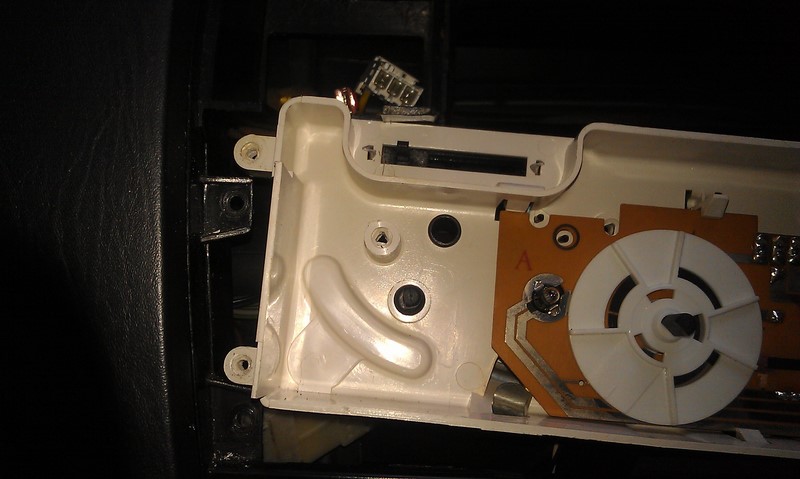
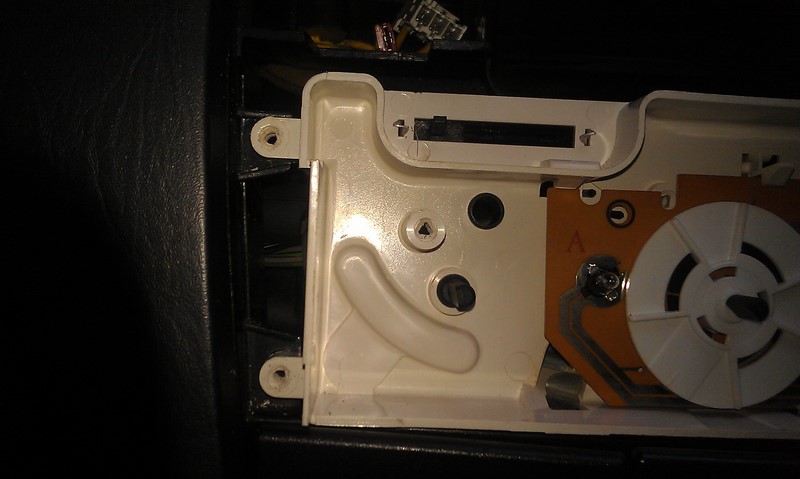
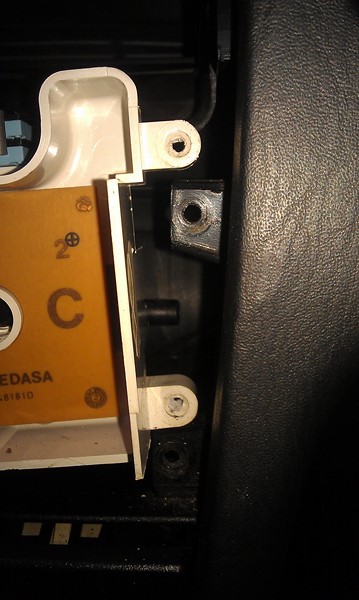
1.3 Disconnecting the heater tap from the blower control panel
With the centre console trim removed, you’ll then be with this, the blower control panel. You might notice that I have done the MAX Blower mod. I’m not sure why, but this has made no difference on my factory-fit air-con car. I suspect the AC wiring is a little different.
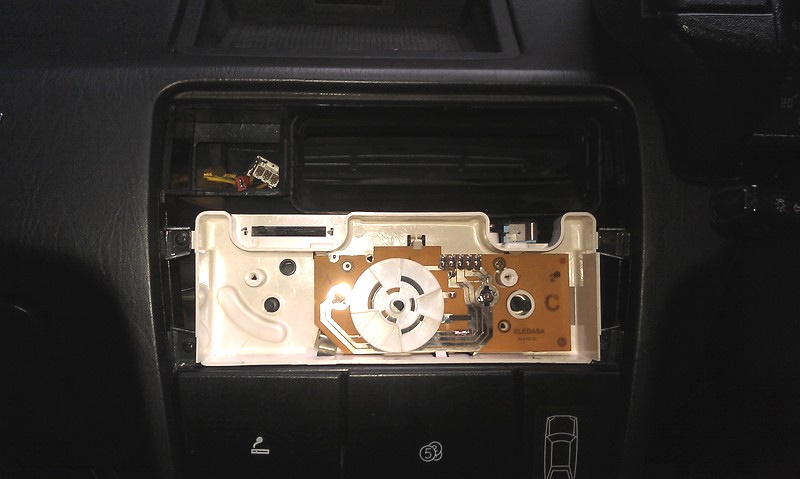
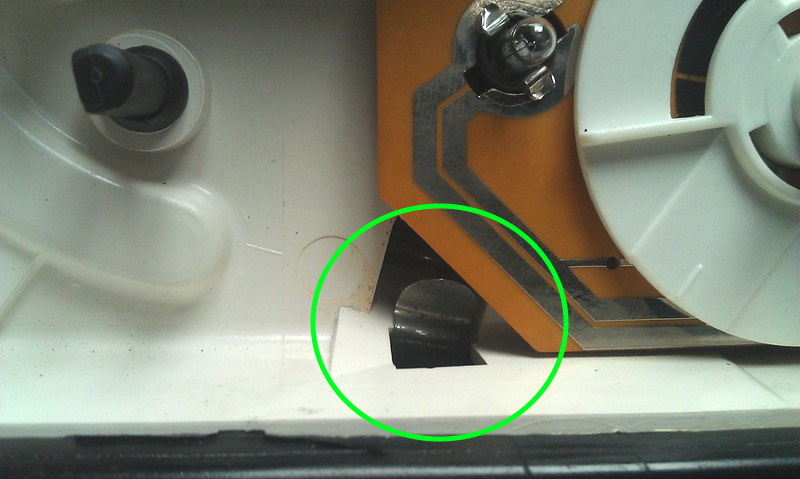
Notice this clip at the bottom of the circuit board. It holds the outer sheath of the Bowden cable, which controls the heater tap. These come off explosively and can be a nightmare to refind. Bear this in mind!
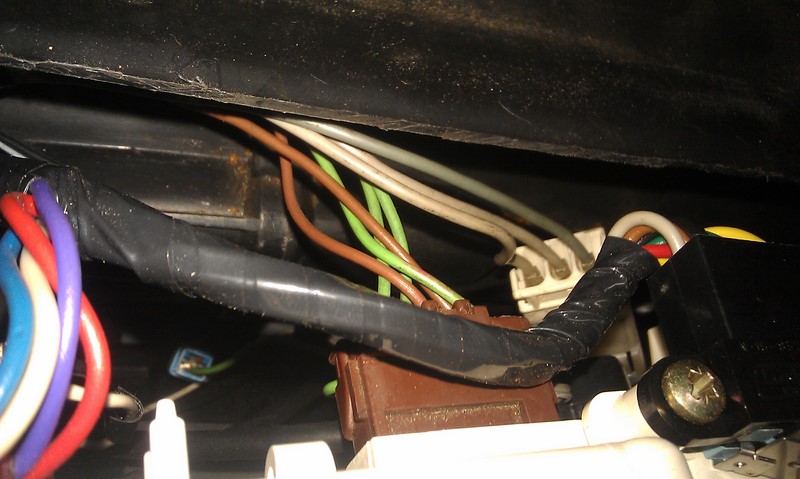
Remove the four screws that hold the control panel retainer in place, then lift the white lugs over the black lugs in the dash.
Then do the other side. If you’ve got air conditioning, the recirculation switch will foul the centre vent duct. Fortunately, the centre vent duct is incredibly pliable so that the switch will pass with some gentle force.
To get the retainer to roll forward, you’ll need to remove the brown plug. This plug supplies the blower and is often forgotten when reassembling!
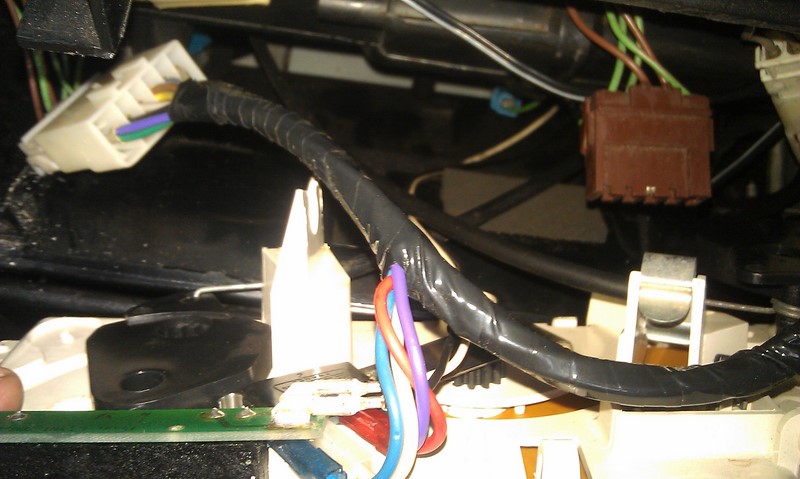
Remember that spring clip? Now is the time to undo it. The cable will be under tension, so the clip will try to escape. Consider this when you disconnect. You can also disconnect the cable end for the temperature selector. There’s no need to disconnect the other Bowden cable or the air conditioning loom if you don’t want to.
Part 2 – Removing the upper steering column
On a right-hand drive car, simply take the steering column out.
The need to take the column out can be debated for many hours. You can do the job without taking the upper column out. Experience has shown me that for the 5 minutes and 5 extra nuts it takes, take the column out. I’m going to whip the wheel off first, though. It makes access so much better.
2.1 Removing the steering wheel
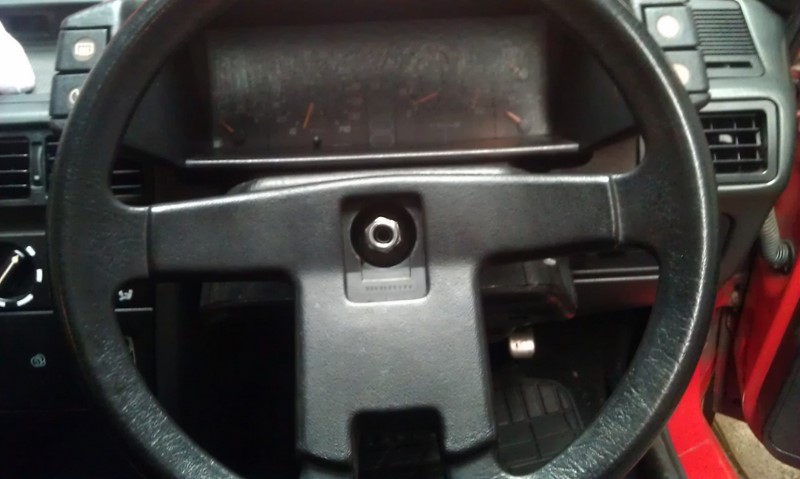
Before removing the steering wheel, it will help reassembly if you set the wheels in the straight-ahead position. Try to get the steering wheel as central as possible. Hopefully, this will let you put the steering wheel back on straight later.
Remove the centre cover from the steering wheel and loosen the 21mm nut. Grab the steering wheel at 12 and 6 and rock the wheel back and forth. Pushing the top while pulling the bottom, and then reverse. Repeat about 5 times, and it should free off. Once free, remove the nut and spring washed behind it, then remove the wheel.
2.2 Removing the steering column shroud
To access the steering column, we need to remove the lower steering column shroud. There are four screws in the corners. The screws are the ones that are sunk into the shroud. I’ll update the article with a decent picture when an opportunity arises.
Once the steering wheel is removed, two small screws also need removal for the shroud to drop. When you come to reassemble, these screws set the position of the shroud but DO NOT OVERTIGHTEN them.
Disconnect the wiring to the dimmer and the ‘doors open buzzer’ mounted on the lower steering column shroud.
2.3 Disconnecting the upper steering column
The aim isn’t to take the column off the car but to give maximum movement. But with a few extra wiring disconnections, you could take the whole upper column off the car if you wish.
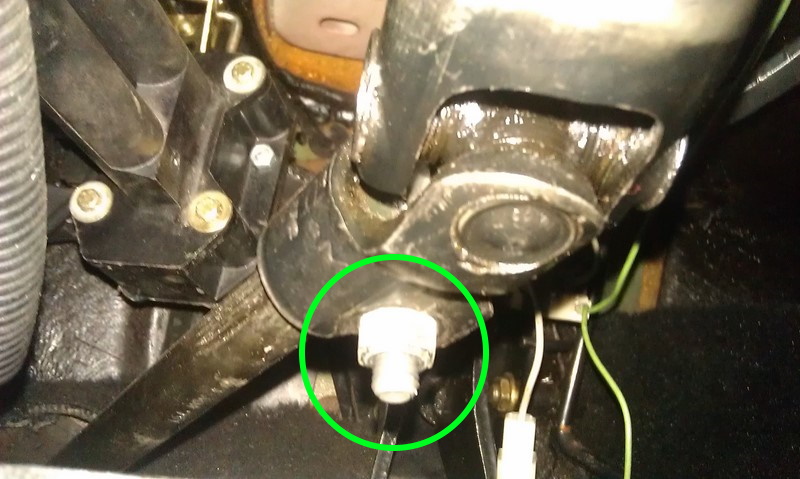
With the shroud removed, loosen the four nuts holding the upper steering column to the car. I recommend leaving the nuts on with a few turns to stop it from hitting you in the face and leaving a scar below your left eye.
We can undo the pinch bolt on the universal joint at the bottom of the upper steering column. The bolt only fits one way around, so don’t worry about marking it for re-fitment. You’ll need two 13mm spanners to undo it. The nut is oval, so don’t be too worried if it’s not super tight!

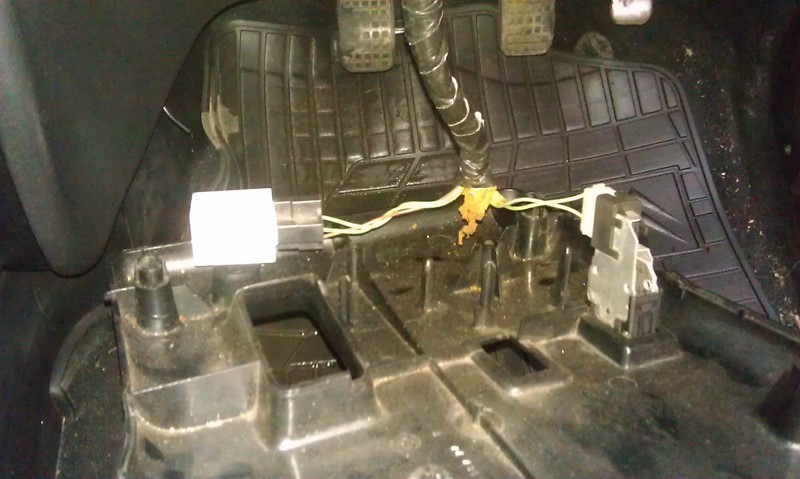
2.4 Removing the upper steering column
With the pinch bolt removed, remove the four nuts holding the column up. The universal joint can be separated by pulling the upper column off the lower column. The upper column can then be lowered into the footwell. There is no need to undo the wires to the stalks. However, I would recommend undoing the two bolts holding the bonnet release lever. This will give you much more freedom of movement in the upper steering column.
Man, look at this for access!
Still to come in parts 3 and 4
In the next article, I’ll cover the removal and disconnection of the heater matrix. This is harder on right-hand drive models, but hopefully, it won’t be too difficult after this preparation. Once off the car, we can take a look at what’s inside the tap. This should let us better understand what causes the blockages.
If you have any specific questions, ask them below, and I’ll cover them in future articles.
M
Next – Heater Tap Overhaul – Part 3
Back to Citroen Articles
Back to Automotive Articles
2 Comments