
In this series of articles, I’m revisiting a topic I originally posted on the BXClub Forum. In part one, we disconnected the pipes and actuators for the heater tap. Then, we gained access to the heater tap and heater matrix in part two by removing the steering column. Now in part three, we can disconnect the heater matrix from the heater tap so it can be disassembled and refurbished. Hopefully, by the time we’ve finished, we’ll have a working tap and not a pile of broken pieces!
The article is broken down into several parts;
- Disconnecting the heater tap
- Removing the steering column
- Removing the heater tap and heater matrix
- Disassembling the heater tap and refurbishing
Parts of this article were originally published on the BXClub forum back in 2012
Part 3 – Removing the heater matrix
When Citroen originally installed the air handling box with the heater matrix and heater tap installed, they didn’t start by putting in the dash. So logically, the correct way to get the heater tap out of the car is, therefore, to take the dash out. And on a BX, it’s only held in by seven fixings. Well, seven fixings and an entire wiring harness with around 20 connectors and 1 billion zip ties.
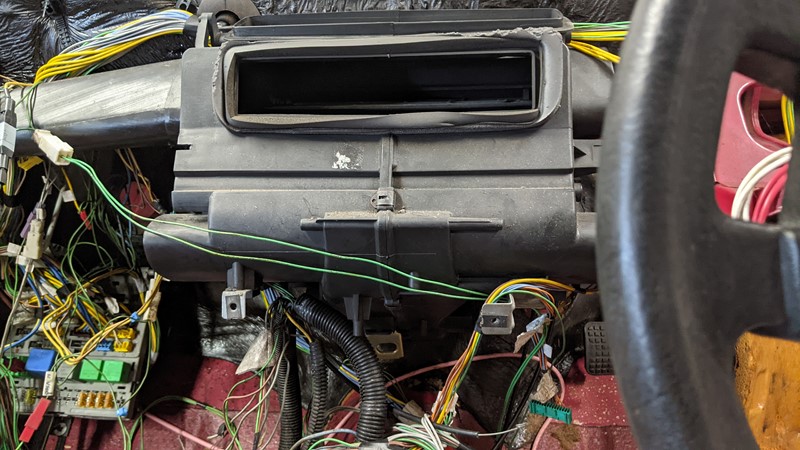
Removal with the dash in place means that getting to the heater tap takes a little lateral thinking. What we are going to do is disconnect the heater matrix from the heater tap. Then the matrix can be slide out of the way enough to remove the tap. I believe on a left-hand drive car, you can take the glove box out and slide the heater matrix out completely. Not so easy on a UK car, the bracing for the steering column is completely in the way.
3.1 – Disconnecting the heater matrix
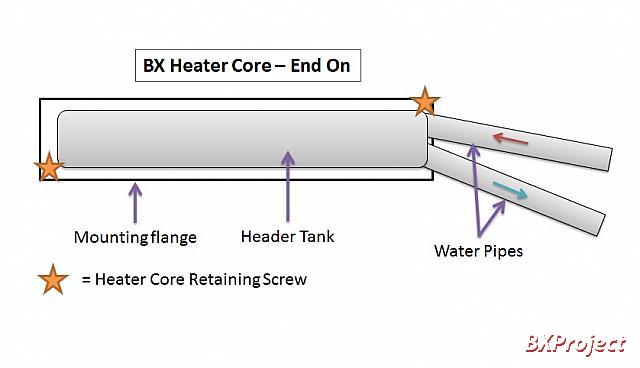
We will start by removing the screws that hold the heater core into the air handling box. Unfortunately, it isn’t easy to get a picture when the dash is in place. So instead, I’m going to try to show you where the two screws are through the power of dance. No, that’s not working, ok try this diagram. The stars show where the retaining screws are. They are 7mm head, and the one closest to the heater tap is often missing because it is rather difficult to get at.
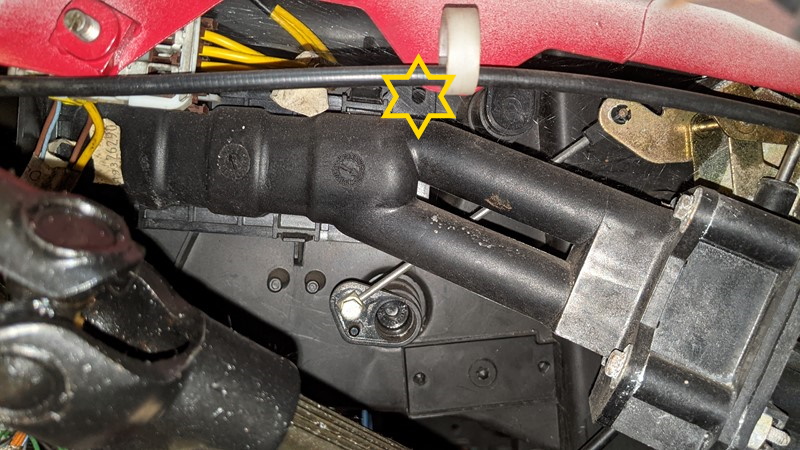
Alright, I’ll take the dash off to show you the screw locations. Or so I thought! Below is a picture of the non air conditioning heater box from XPO. Highlighted by the star is the places the screw should be! So it would appear that some models are only clipped in and have no screw. However, if you look closely, the screw isn’t simply missing. The casing has never been drilled!
3.2 – Making room to slide the heater matrix out
Next, we need to remove the common instrument earth point. Removal will give us the clearance we need when we slide the heater matrix out. I don’t think this is fitted to all models, but it holds the ground connections for many of the ‘toys’ on the car. When you get to the end of the job and indicators, washers, tacho and doors open, warning lights don’t work; you’ve forgotten to plug in these connectors! It’s the white blob at the top of this picture;

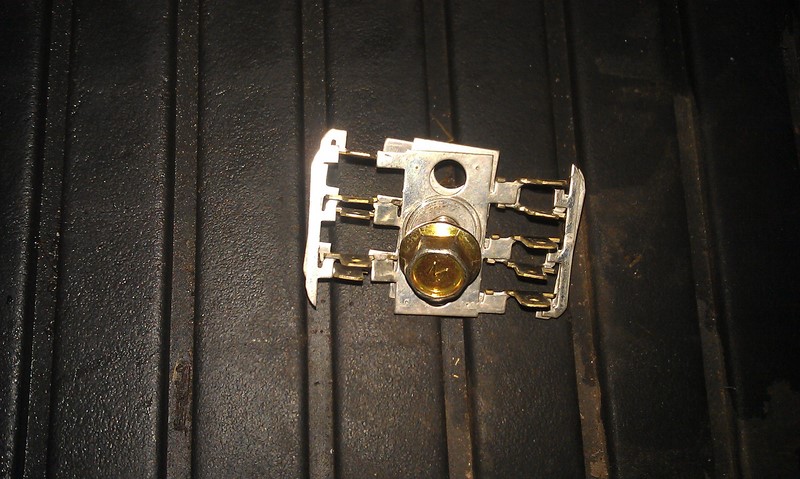
Removal requires a couple of simple steps, which aren’t immediately obvious. First, remove the white plastic cage type retainer. Squeeze the sides, then pull away from the steering column support. With the frame removed, the yellow and brown connectors can be removed. These don’t seem to be keyed, so they could go back on either set of pins. Fortunately, the cable length will determine the reconnection order for you.

The grounding “hedgehog” pins should now be revealed. In the middle is a 10mm headed bolt to remove. The metal that the connectors plug into is actually in two pieces, but when they separate, don’t panic as they only go back together one way. There is a potential for the temptation to skip a step to set in here. It is possible to pull the heater core out just enough with the connectors and white plastic cage removed. However, damage to the metal pins is inevitable and not worth risking for the extra 10 seconds to remove the bolt.
3.3 Disconnecting the air handling box connections
Now you need to remove the main fixing bolt for the heater tap. It is at the bottom left-hand rear of the lower tap section and bolts the heater tap to the HVAC casing (HVAC is the big box of plastic that the air blows through!). It’s hard to see and easy to miss. You don’t want to miss it!!
I’ve struggled to get a decent picture. I’ll try again at some point.
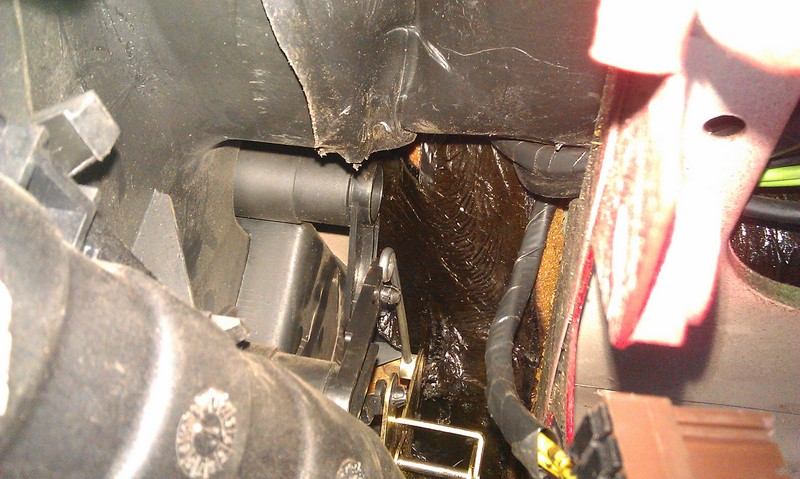
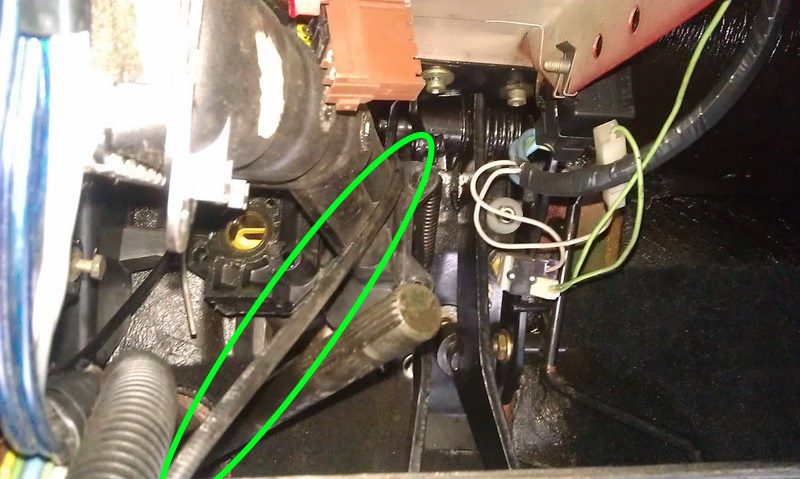
Next, disconnect the linkages. The hardest to reach is (for once) the easiest to remove. Simply put a flat-bladed screwdriver between the linkage arm (black) and the metal bar and slowly prise or twist off the linkage. It should pop off the mushroom-headed stud without too much force.
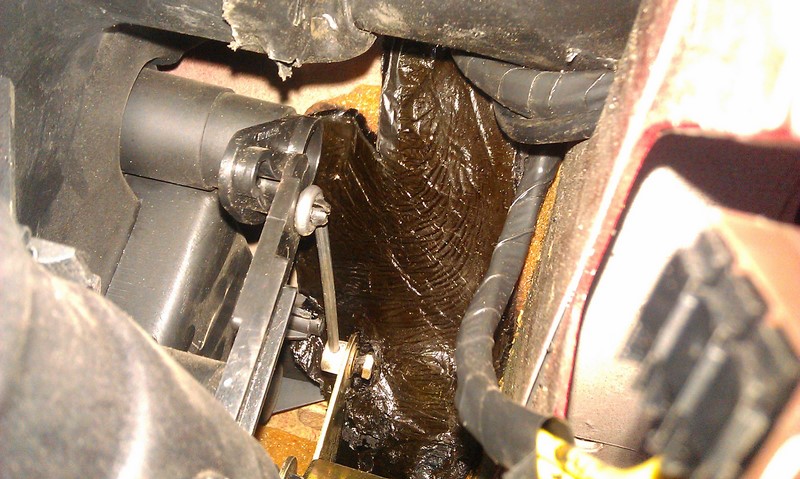
You can see the air distribution guide disconnected from the heater tap in the picture below;
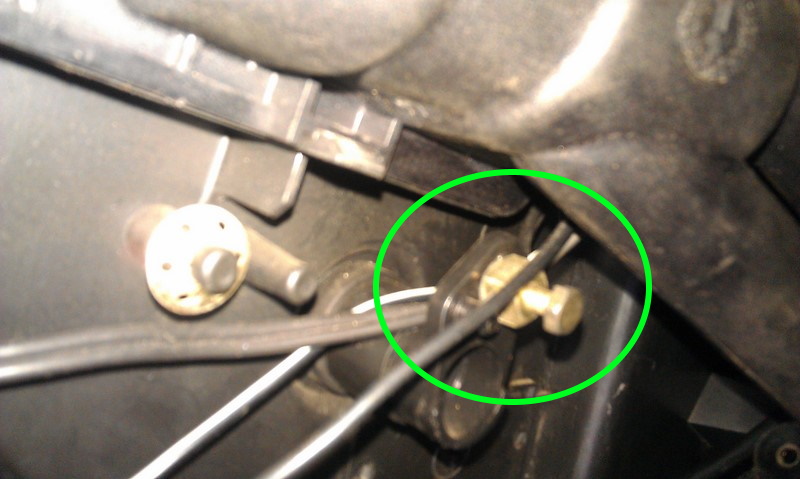
You’ll also need to undo the lower linkage by undoing the screw holding the bar into the lever just below the heater matrix. Two turns should do it, there is no need to undo the screw completely, or you’ll be cursing later when you can’t find it!
3.3 Seperating the heater matrix from the heater tap
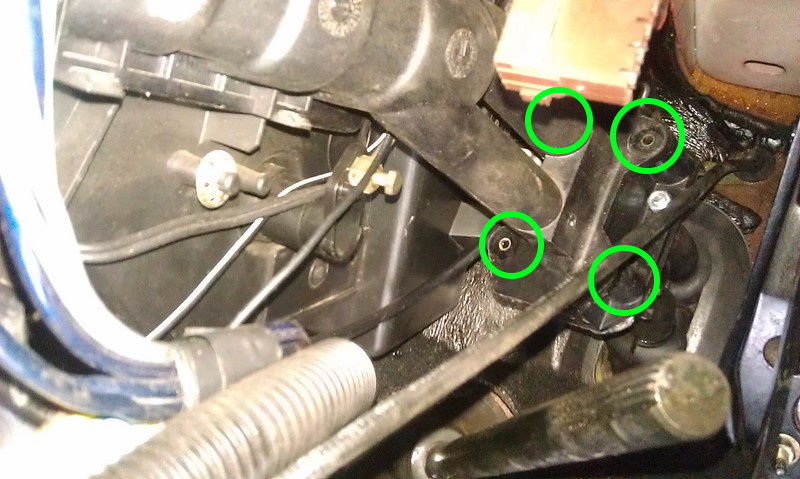
Okay, so with the heater tap free, we can disconnect it from the heater core by removing the 4 long bolts (with 7mm heads). I recommend undoing the lower left and completely removing the bolt BEFORE tackling the upper left, as this gives you a little more spanner wielding room. You can see in the picture below that the lower-left bolt has been completely removed.
next, slide the heater core out. It is still held in place with four plastic clips, which take a little bit of force to pop open. Don’t be tempted to use a screwdriver. It will only end in tears! You’ll see here my mistake. At this point, I hadn’t taken off the bonnet release handle, and the cable is right in the way of the pipes from the heater core!
3.4 Removing the heater tap from the car
Well, now the tricky part, getting the tap out! First, un-wind the control cable (that we disconnected earlier) from the bowels of the dash and point it into the foot-well. It is rather springy and likes to sleep in your eyeball, so be careful with it!
The tap is still held into the car’s body by a big rubber bung at the bottom of the pipes. You’ll eventually need this bung out, and if you try to pull the pipes out without the bung, you’re going to load one of the pipes and probably break it, so try to remove the pipes with the bung.
It is a case of gently tugging on the heater tap until it comes out. I take it right over towards the HVAC, under the heater core, then completely under the dash down the side of the clutch pedal. No number of pictures can explain this, so I’m not going to try! It can help if you move the big metal actuator about to clear the heater matrix pipes as a pointer. You will get some resistance when trying to pull the tap out, usually from the rubber. Don’t panic!
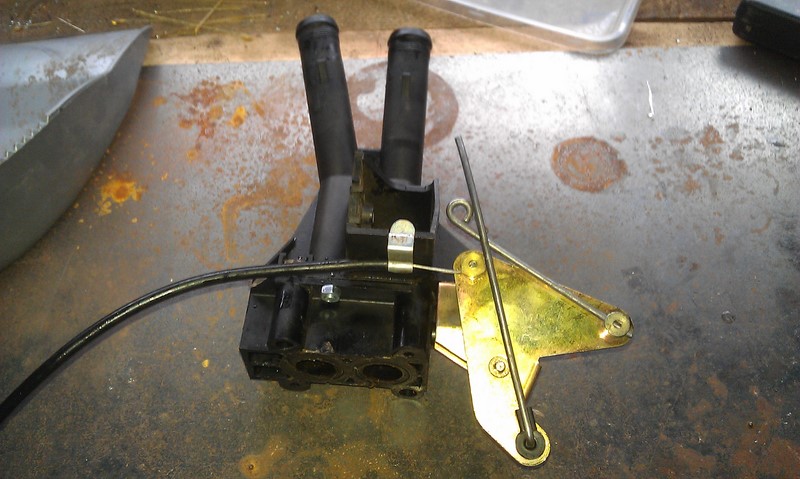
And here’s one I pulled out earlier!
Still to come in Part 4
In the final article, I’ll cover how to dismantle and clean the heater tap now it’s off the car. I’ll show you what’s inside the tap and the common reason for failure. And I’ll share some does and don ts for reassembly. Hopefully, by the end of the series, you’ll have the confidence to tackle your own heater tap repair.
If you have any specific questions, ask them below, and I’ll cover them in future articles.
M
NEXT – Heater tap Overhaul – Part 4
PREV – Heater tap overhaul – Part 1&2
This is great stuff and an excellent reference guide for those who will need it. Took me about ten minutes to change the valve on my Minor ; )
Cheers John, I’ll finish off the final part once I’ve the bag full of spare tap parts I have. There are a few steps I dont have images of! Oh, and I need to stop going to car shows! M
No no keep going so you can post lots of photos : )
How would you know your heater tap needs fixing? Really insightful series btw
Hi James, at the risk of creating a spoiler, the tap normally gets wedged in the closed position. Then you try to turn the dial on the dash and snap the knob off. I need to get out to the garage to get some additional pictures, but hopefully, the reason it gets stuck will be clear in Part4.
Cheers
M
Hi,
I struggling to get the greater matrix out – it is fouling on the frame that the steering column mounts to. Any ideas please?
Hi John, we’ve chatted about this on the BX Club UK FB page here;
https://www.facebook.com/groups/bxclubUK/permalink/10162929612832571/
It should be possible to slide the heater core out past the steering column mount (once the earth post is removed) without doing any damage. If you need a little more room, there are two bolts in the scuttle area (either side of the HVAC inlet) that secure the top of the box. There are then two legs at the bottom of the box that secure the HVAC box in place. Undo all four of these bolts and the HVAC box will drop a little.
Hope that get you sorted
M