
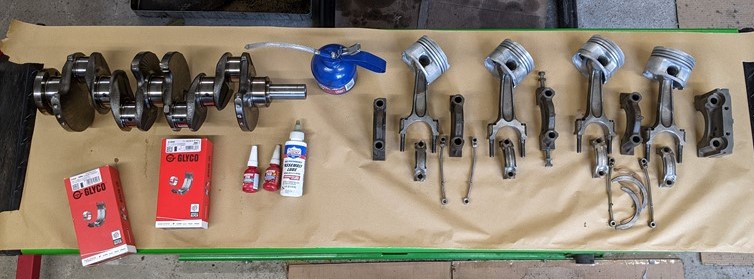
It’s nearly a month since I finished building the cylinder head, and there has been no end of distractions since. With a replacement crankshaft in hand, it was finally time to get stuck into the bottom end. Just a few bits to finish cleaning then the building can commence in earnest. It should be plain sailing unless I do something really, really stupid.
Cleaning the pistons
Before I can set to building up the bottom end, there are a few pieces I need to finish cleaning. Namely the pistons. They all look like they are in excellent condition, just a bit of baked-on gunk to remove. I’ve been in two minds on how to tackle these. Break them apart, clean and reassemble, or clean as they are. I’ve opted to keep them together, with some logic behind my madness.
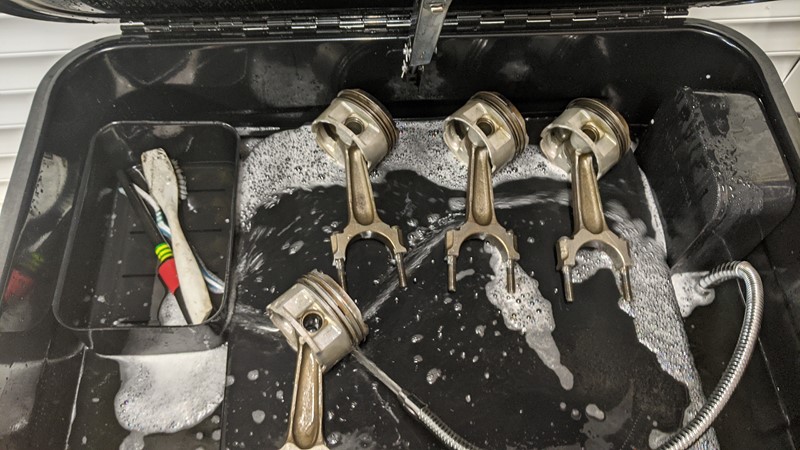
The first stage is to give them a quick once over in the new SGS parts washer. This is largely to clean up the piston crowns which have the worst build-up, as expected. Before I assemble the bottom end, I want to know the dirt isn’t hiding anything. Given the pistons have hit the valves at some point in the past, I expect to see some markings.
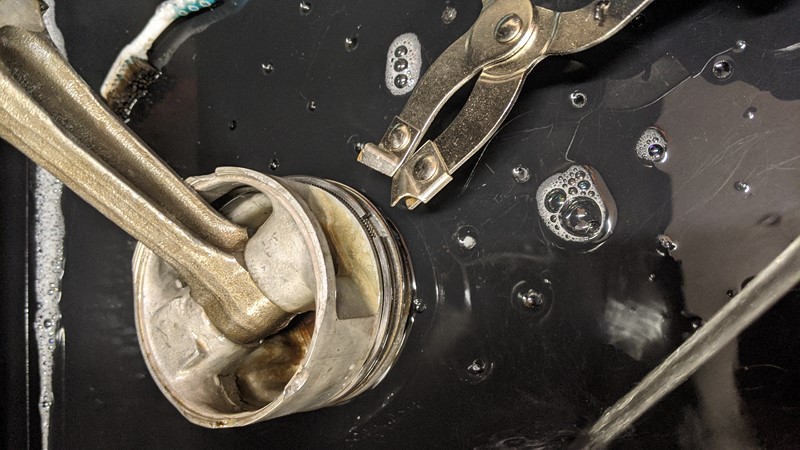
Once the worst of the dirt is removed, I can take off the piston rings and clean the grooves properly. There was a surprising amount of filth behind the rings, especially the oil control ring. I’m pretty glad I have a new set of rings to fit. And the end result, well just one piston was showing any unusual markings in the valve cutouts. Not really consistent with impact, more like a little pitting. Stupidly I didn’t get a picture before building up the engine.
When the pistons and con rods would clean no more, they were rinsed in warm clean water. The assembly was then heated up to about 40 degrees and left for about 10 minutes to dry off. There’s no science behind this, just, erm, winging it. Once sufficiently dry the moving parts were doused in oil and left to sit. Hopefully, this will see the conrod/gudgeon pin suitably lubricated.
Oil skirt tubes
In the Mi16 engine, there is a pipe that sprays oil onto the piston skirts. These are a pretty small tube and notorious for getting blocked up. The two left-handed and two right-handed pipes each took a long trip in the ultrasonic cleaner before being dried out. I tried to blow through the pipes in the direction of oil flow, but nothing came out. No air, no cleaning fluid, nothing. Not a good sign
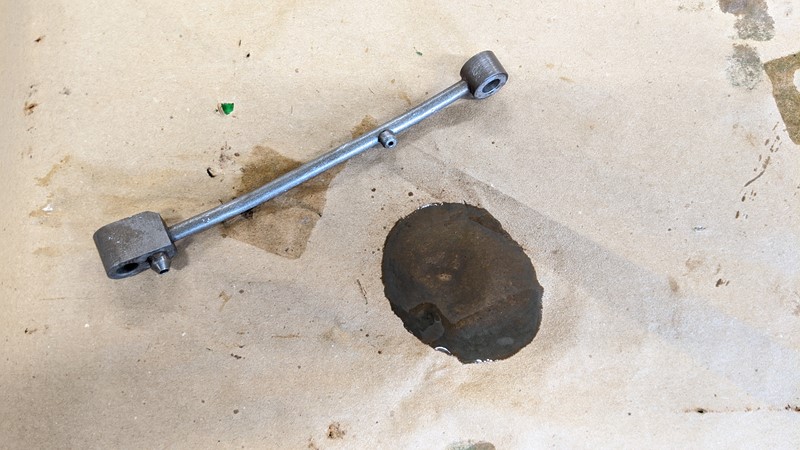
The pressure from an airline did a better job on two of the pipes. A plug of something horrible shot out of the first one and send oil all over the place. I was a bit smarter on the second one and shot the horrid oil onto paper, as shown. I can’t imagine these galleries were doing much to lubricate the bottom end of the engine! The final two pipes wouldn’t clear with the airline alone.

The Citroen workshop manual advised that there is a ball valve and spring on the inlet side, so initially, I tried to free this off. If there is a ball valve and spring in there, I couldn’t feel it. Both of the final pipes would happily accept a pokey thing. And this didn’t free up the pipe. I tried to pass a few different wires down the pipe, but most were too inflexible. In the end, I stripped the plastic off a tie wrap and wiggled that down the pipe. And it worked! With a load more crud out, I can be sure they will actually do something when put back into the bottom end.
Snapped bolt or something worse?
While cleaning up one of the crankshaft bearing housings, I noticed something odd about the holes. One was most certainly not like the other. I’m sure these are the holes for the sump bolts, so they should all be the same depth.
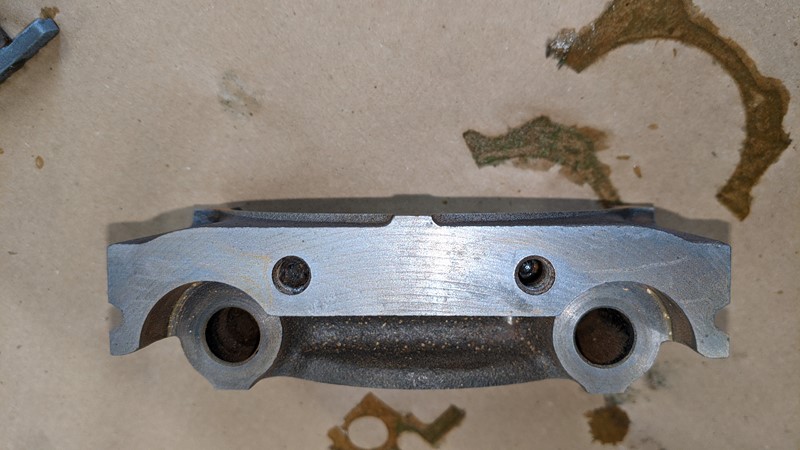
I expected the worst, another snapped bolt. But on poking with a pokey thing, whatever was at the bottom of the hole was soft and squidgy. Some levering and plier action later and I found the squidgy stuff was actually YET MORE SEALANT!! This particular sealant was white and a good 5mm of it. The housing seems to be okay, so hopefully, no damage done.
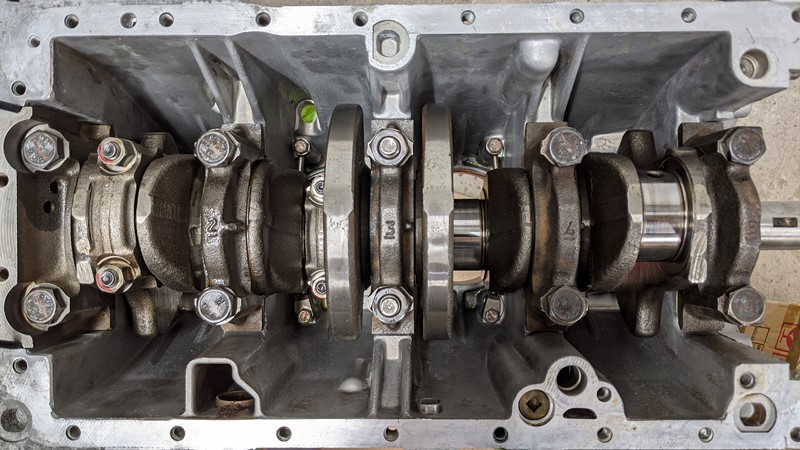
Finally ready to build the bottom end
And just like that, I have everything I needed to start putting the bottom end together. I have to admit to having a little bit of trepidation here. This will be the first time I have built the entire bottom of an engine before. Sure I’ve swapped bearing shells in place, but somehow this feels, well, more. I suspect I’ve been dragging out starting this phase as much through fear as anything!
Ultimately engines are just a giant Lego set and laid out like the picture, it seems straightforward. For better or worse I’m following the Haynes manual on the individual steps to build up the engine, but I’m about to find that’s not a great solution.
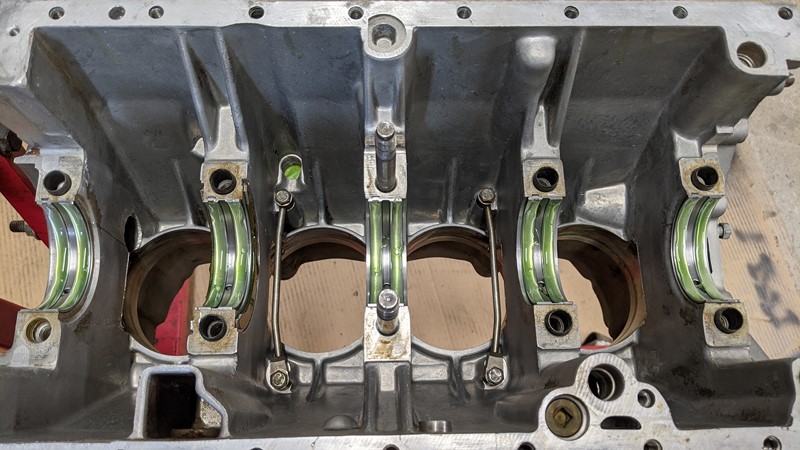
First in goes the oil skirt pipes, and this is the first issue I have with the Haynes, there are no torque settings for these bolts. But I figure I can work out the correct torque later and reach them with the crank in, 10Nm should be good enough for now. So I push on and put the grooved bearing shells in. They are liberally coated in Lucas assembly lube, or green snot as the kids call it. This heavy, sticky oil makes getting some bits assembled much easier.
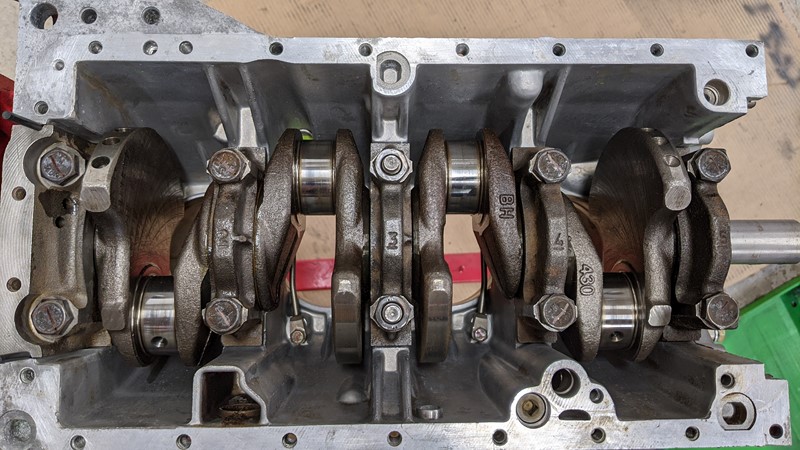
Then I can throw the crank in and put the caps in places (with the matching bearing half. For whatever reason, I’ve now picked up the Citroen Workshop Manual and noticed two things. Firstly, the torque is shown as 1m.daN, 1 deci-newton meter or, 10Nm in ‘normal’ so at least I got that right. It also shows that the bolts should have gone in with a dollop of Loctite. Bugger. Back out they come before being loctited and done back up. Curse you Haynes manual.
Preparing the pistons for reassembly
What follows next is a peaceful half-hour assembling rings onto Piston 1, with no faff at all. However, what occurs with Piston 2 is largely just a lot of swearing and internal contemplation for my own stupidity.
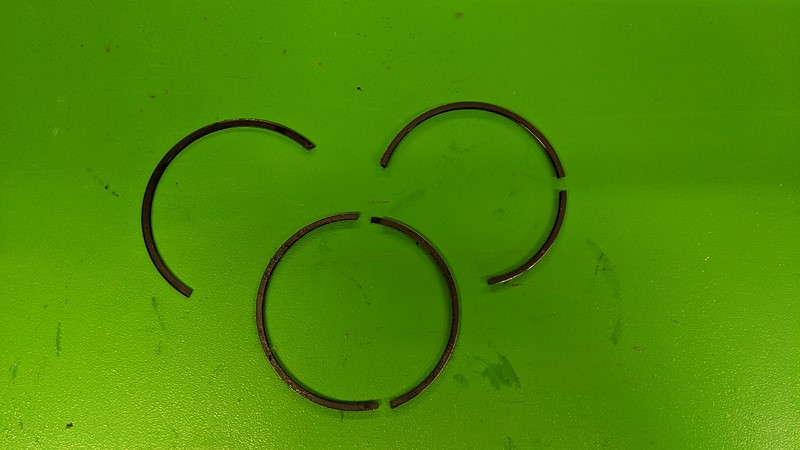
Not one, but two piston rings snapped. I can only blame my own stupidity, but now I know two ways not to slide a set of rings into a cylinder liner. It’s the first time I’ve done rings. The process is simple enough, but I think ultimately I got cocky with how easy the first set went on and stopped paying attention. Good mickey mouse though!
Bottom end build cut off in its prime
And, well that’s it for building the bottom end for the time being. I couldn’t find any more of the Mahle piston ring sets in the UK, so they are on order from AutoDoc. Hopefully, they won’t take too long to arrive and I can finish off. For time being though, I’ve got two pistons back in. The crank even goes around and the pistons go up and down. How hard can it be!
I did manage to record some of the build, but the camera turned itself off at the point my stupidity turned over. I guess you’ll just have to enjoy a laugh at my expense, without it being captured for all time.
M
NEXT – XPO – Building The Bottom End, Continued
PREV – XPO – A Crank For The D6C Engine
Back to Citroen articles
Back to Automotive articles