
Slowly but surely, the scuttle is becoming whole again. The worst rot from under the washer bottle has now been repaired, along with the rusty suspension turret panel. This repair will, of course, need some paint and finishing. However, I can now move on to the rot hidden above the washer bottle. Hopefully, this should be the last scuttle repair.
The hole problem with the back of the scuttle
An all too often overlooked rust area on the BX is above the right-hand washer bottle. Over time moisture finds its way between the panel that makes up the bottom of the windscreen and the inner wing section. There isn’t a way for the moisture to get out, so it just sits. Over time the vibration in the car and the uncoated spot welds allow corrosion to start. Pretty soon, the lower panel, which is hidden from view, starts to rot out.
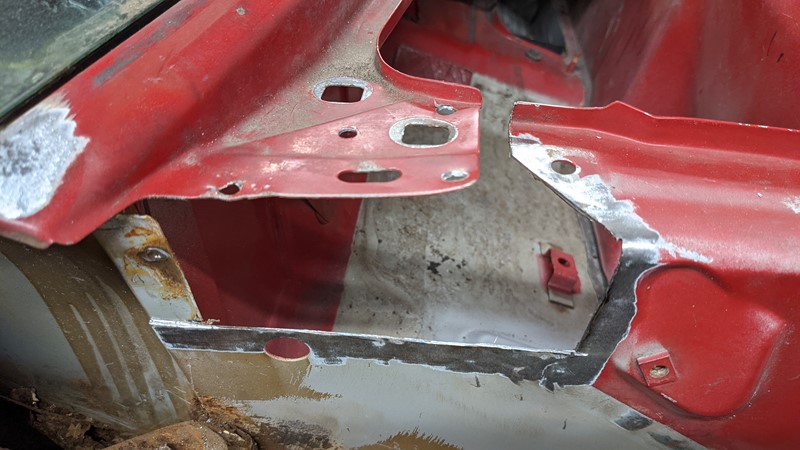
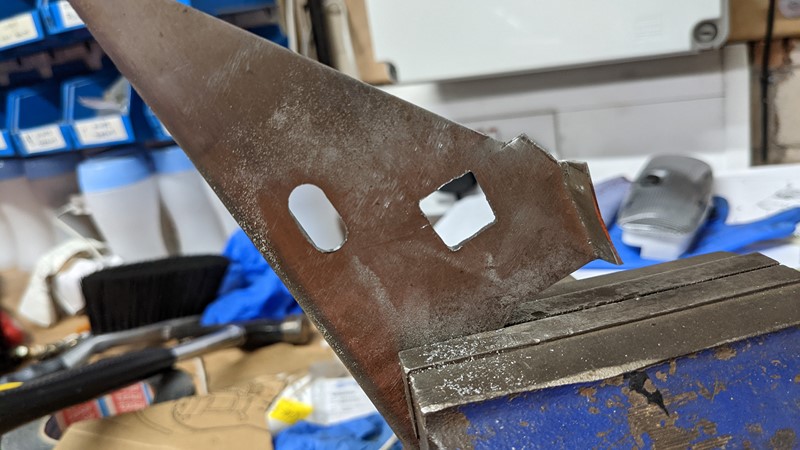
On XPO, the rot was pretty advanced into the panel and not something that could be stripped back and cleaned. To fix this particular area of rotten metal, quite a bit must be cut out. I’ve tried to keep the cuts simple, perpendicular or horizontal to the rearmost edge. I’ve also tried to preserve some of the features of the panel, like the big hole and complex pressed form to which the water bottle is secured.

Looking from the underside, it is clear where the rust has formed in the upper panel. This rot isn’t particularly advanced, so it can be cleaned up and treated. Fortunately, the rust hasn’t crept into the bulkhead panel. If it had, this would mean opening up more panels and a lot of extra repair time. I’m hoping a little sealer on the back edge will stop water pooling here again.
CAD modelling the scuttle repair panel
Like the previous scuttle repair panel, I’m using the high-tech wizardry of CAD. Although this panel is a little more straightforward in form, having only a couple of bends, I need to get this one right. This repair will partly control the alignment of the A-pillar around the windscreen, so the finished repair needs to be flat and flush.
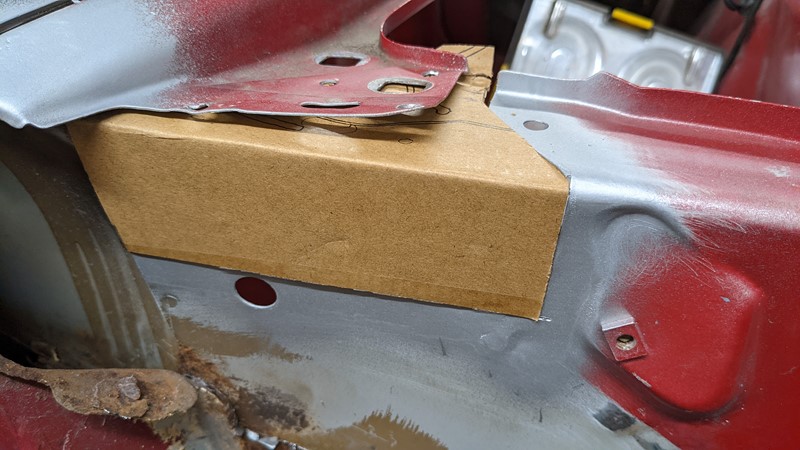
The initial CAD template starts to take shape. Unfortunately, I forgot to consider the orientation of the cardboard, which made forming the radius in the main bend a little tricky. The solution was to transfer the pattern to the metal with extra material on the lowest edge. This additional steel will ‘shrink’ when the increased radius is formed into the new steel.
Forming the scuttle repair panel
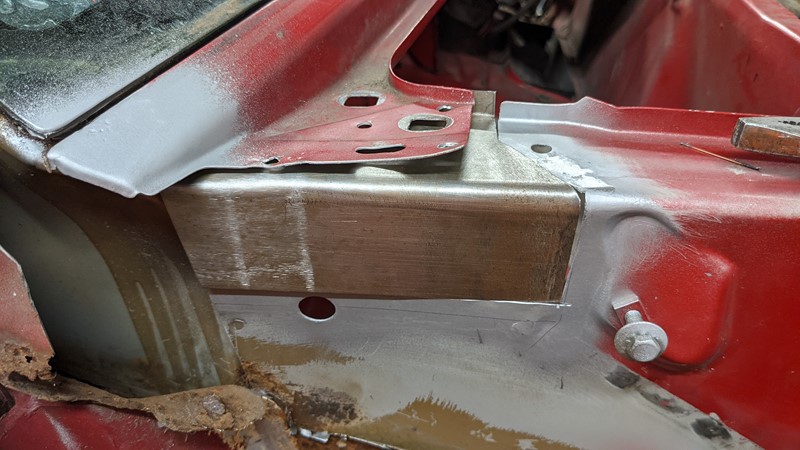
With a decent CAD template made up and fitting checked, I can start to beat out the repair panel in some new steel.
I’ve not tried this ‘creep’ method before, where the material will creep into the curved surface, causing the template to ‘shrink’. This technique is something I’ve found while watching the fantastic ‘Make It Kustom‘ videos on Youtube. If you have any metal forming to do or want to watch the artistry of creating complex metal parts from nothing, you’ll love this channel. I’ve used a round bar out of an old gearbox to form the curve. It’s a damn fine fit in the end.
Finally, the holes that match up to the top panel and A-pillar panel are added to the new steel. It also gets a run-over with a wire wheel to clear some of the surface rust. It’s much easier to get this scuttle repair piece cleaned up now rather than battling with the panel once it’s welded in place.
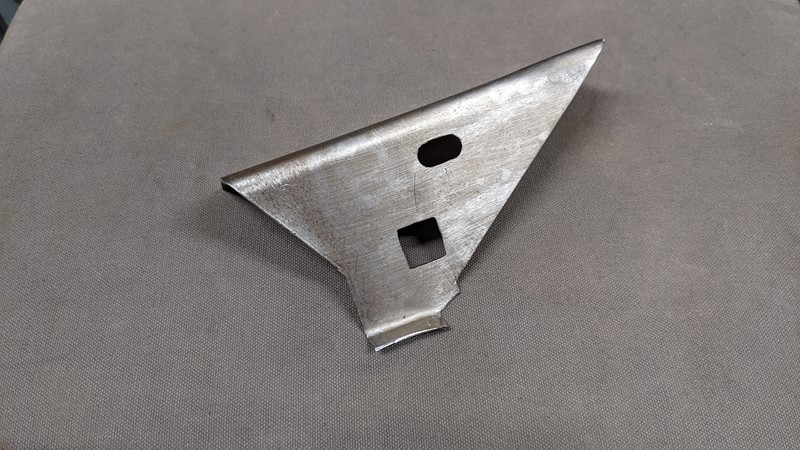
The final scuttle repair panel is looking pretty good, and for now, it fits pretty well. I’m a little concerned that some of the smaller, thinner features will warp once welded. The thinner the metal, the more effect the heat has, giving the potential for warping as it cools. I’ll need to go slow, and patience in welding is not something I’m any good at!
Welding in the repair panel
Practically this scuttle repair panel is easy enough to weld in. With all the welding on the outside edge, it should make for good torch access. However, I’m concerned about warping the panel with too much heat and getting it misaligned. So I’ll have to go slow and concentrate on this one. It’s nothing like welding up 3mm steel on a bus.
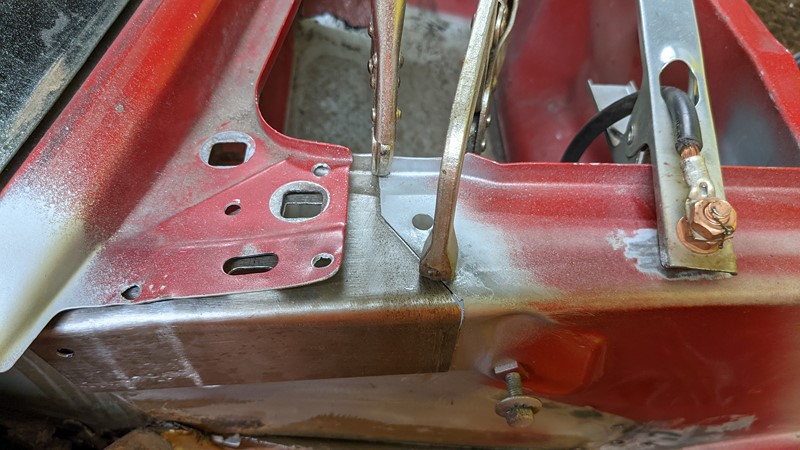
One challenge I don’t have an immediate solution for is my clamping situation. Unfortunately, I don’t have enough open-throated welding clamps, only a basic set from ALDI. I can align the top edge pretty well, though, so I can start with a couple of tack welds here.

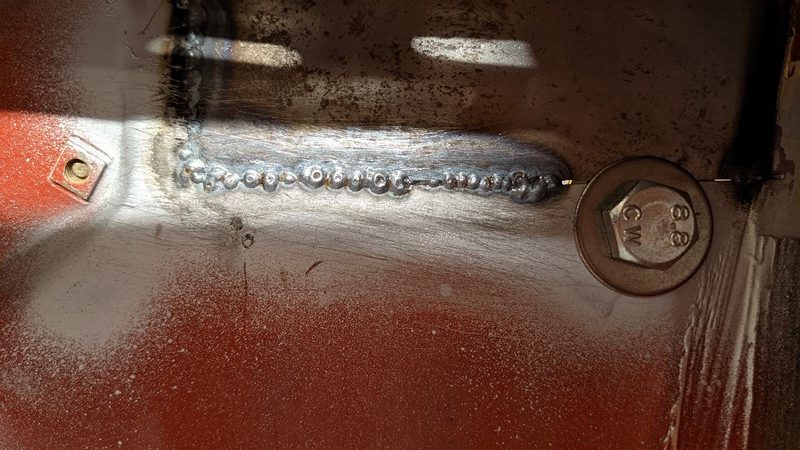
With the top edge tacked, I can start on the side. A couple of tacks while holding the panels by hand soon turns into a short seam. The settings are all dialled in on the welder, and the penetration is perfect. But all this heat is creating warping in the lower panel. The bend is clear in the picture above, where the left-hand side no longer aligns.
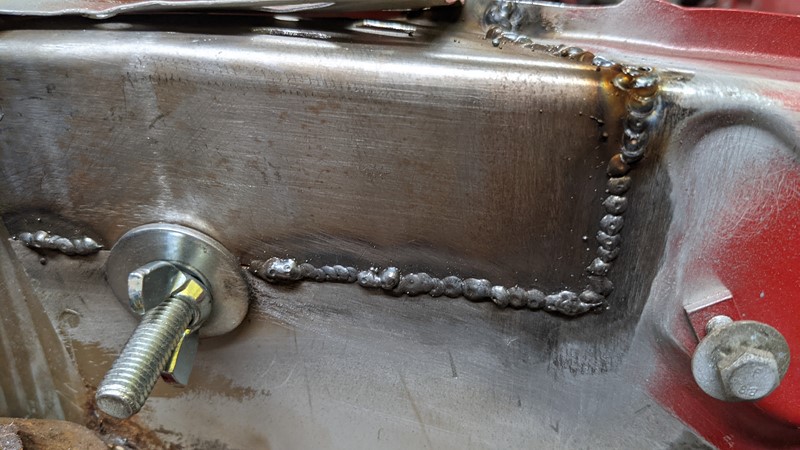
In a fit of genius, I realised a solution to the clamping situation. The Frost website has a whole area dedicated to clamping, but sometimes the simple options are the best. A big bolt and a bigger washer are enough to keep the panels aligned. Then a slightly slower approach to the welding is doing no more than 10mm at a time before moving to another area.
This slow build-up of the seams does lead to a wonkier welded seam, but this will clean up nicely. And looking from behind, it’s just about perfect. No grinding back will be needed here, which is fortunate as access will be rather challenging.
Grinding back and finishing
I won’t bore you with too much detail about finishing the scuttle repair. As with previous repairs on the scuttle and suspension turret, the welds are ground back and coated. I’m a little more careful dressing these welds compared to previous repairs, as the outer A-pillar panel will touch just about every welded seam.
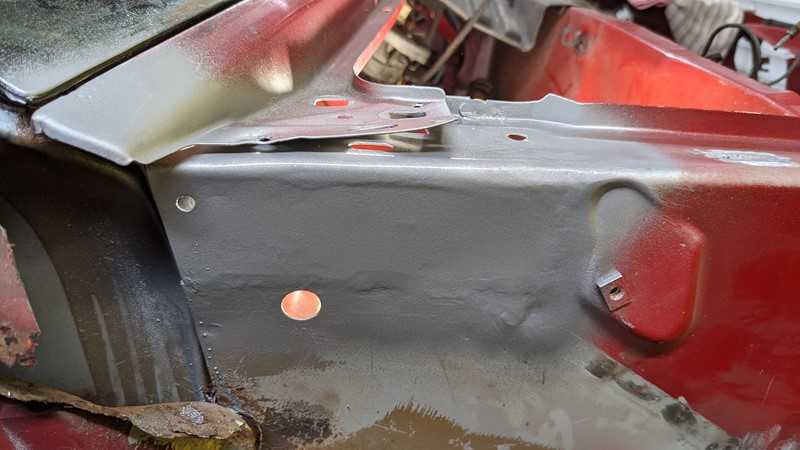
The finished repair looks pretty wonky in these pictures, but it’s much flatter and smoother to the eye. There is a slight warping to the right of the hole used for clamping. This defect is because I got carried away and added too much heat. A spot weld is also missing in the top left, which needs to be finished when the next panel is in place.
The next panel to tackle is . . .
This work is the last scuttle repair, so it’s time to start moving to the main event, the A-pillar. Next, there are two significant repairs needed. The first is the panel to which the lower a-pillar and door are joined, then the upper outer A-pillar panel. Both require the donor panels to be separated from the body cut and the localised rot repaired in them. After that, I’ll need to get my big boy pants on and start taking significant pieces of the body apart. This is going to get serious fast!
M
NEXT – Eps20 – A-pillar repair
PREV – Welding the scuttle part 1