
Groundworks complete, I can press on with turning the design into a reality. This stage of the build is by far the most exciting so far, turning that original design into a real thing. I should have a platform to build the Mega Shed from pretty soon. Let have a look at how I’ve gone about building the base.
Transforming the frame into a solid base
In the last article, I’d built a basic frame to set the locations for the concrete piers and galvanised legs. I got lucky with the weather. The air temperature stayed above freezing, and mostly the rain stayed off. So a week later, after partial curing of the concrete, I’m left with a frame sat on solid concrete piers.
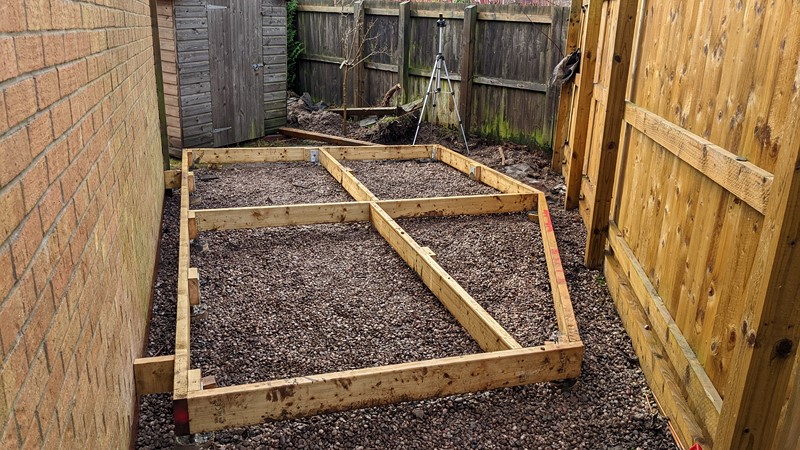
The frame may not look like much, but it makes me smile. I’m finally out of the ground and turning a vague dream into a reality. But, of course, the concrete won’t be fully cured yet, so I’ll need to be gentle with the frame so as not to disturb the steels in the piers. Right now, that’s not too hard as there is plenty of space, but that won’t last.
Adding the floor joists to the base
The first step to turning the frame into a base is to add the floor joists. These will hold up the floor and create a space to install the underfloor insulation. Keeping the “Mega Shed” warm will be critical if I want to use the shed year-round, although given the way the weather is at the moment, maybe I don’t need to bother.
Power tools for building the base
Attempting to build the whole shed by hand would take an almost infinite amount of time. Fortunately, I have a few somewhat helpful power tools at my disposal, which should speed things up and save my poor weary back.

First up is this “Evolution Rage sliding mitre saw“, which rips up the timber reasonably accurately with a minimum of effort from my part. I’m on to the second of these saws after the electronics failed on the first one, and Evolution wanted an eye-watering amount for repair! This saw is the smallest one they do, a mere 1500W with a 210mm disc. It’s cheap, and the universal disc makes it excellent for all materials, but it is a little underpowered on the wet timbers.
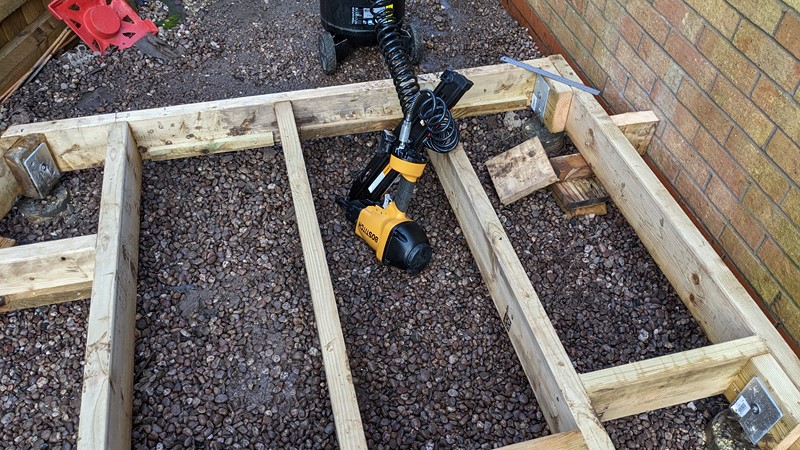
Rather than break my spine, hammering in thousands of nails, or even just hours spinning in screws, I’ve gone all-in on this project and borrowed a propper tool. This Bostitch framing nail gun is a true beast of a power tool and cleanly shoots 90mm nails through all of the timbers. They’re pretty dangerous tools. However, this is not my first framing project nor my first using the Bostitch nailer.
Cutting and installing the joists into the base
Building up the base by introducing joists is reasonably straightforward. First, cut to length, then nail them in place. I’m using a Swanson speed square to get them in straight and some pencil marks on the timbers to align the joists up to before nailing in.
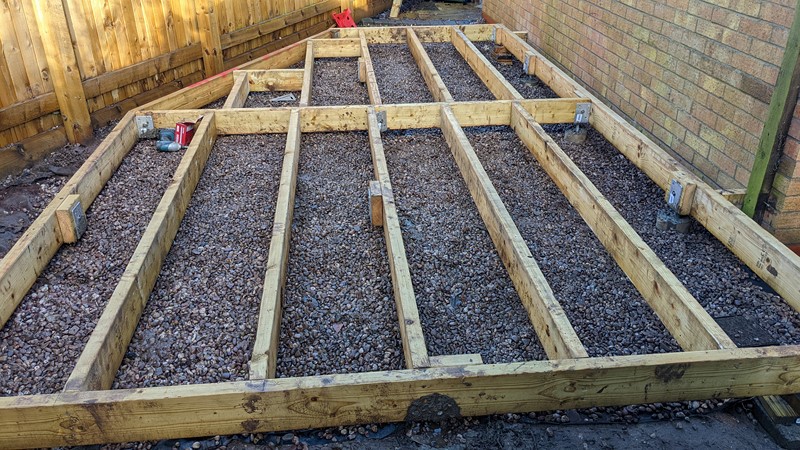
I’m generally aiming for 400mm centres (a gap of about 350mm between the joists). This size is pretty typical, although it’s not too critical as the floorboards will run across the joists, not along them. And as the spacing isn’t critical, I can align them off centre to avoid joist hangers. The essential bit here is getting the timber lengths perfectly parallel. Even gapping will make fitting insulation much easier.
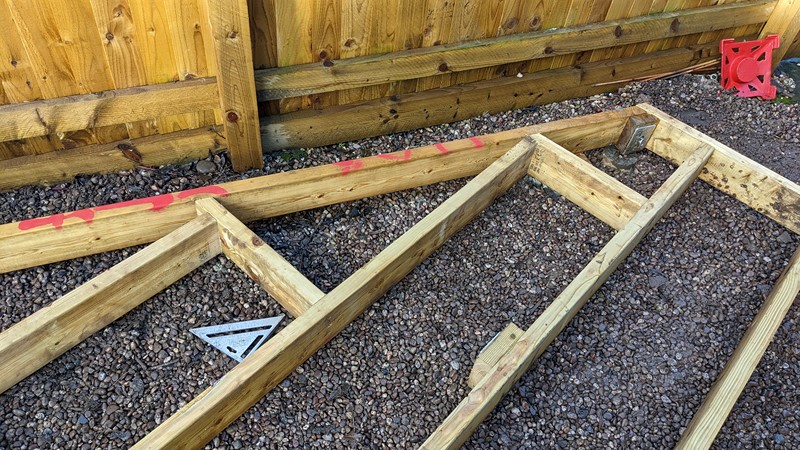
The shape does become a little complicated where the base has a triangular portion cut out to miss the fence. My simple solution is to remove the complexity by boxing out the frame. The short transverse sections turn the complicated angles into something more straightforward, making it much easier to attach the floor joists.
Finishing off the base with noggins
One last thing to do on the base is to add noggins between the rafters. These are placed approximately every 1200mm, working around the padding blocks which sit on the steel legs. These add a bit of rigidity and stop the floor joists from twisting. The timbers are wet and will likely change shape.
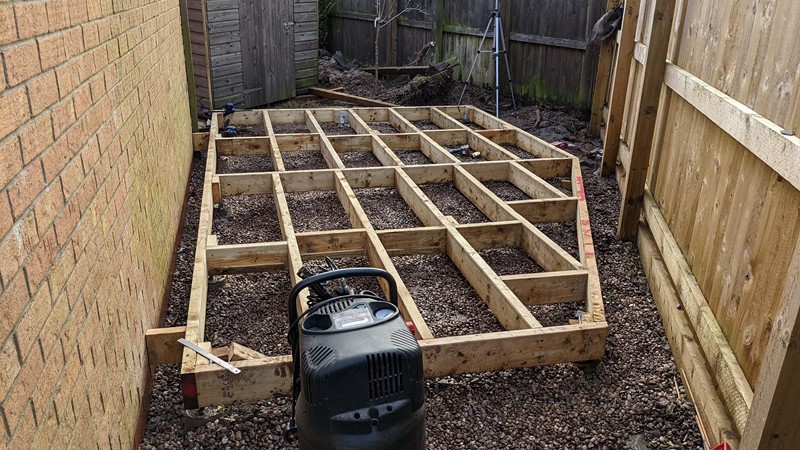
The frame is transformed into a solid and hefty base in a half day. The battens installed at the end of each ‘bay’ are not obvious in the pictures and will support the insulation material. The base is still only held to the steel feet with a handful of small screws.
The final steps to building the base.
At this point, the frame looks pretty solid and can certainly take some weight, but I’ve hit a bit of a problem. Part of the weatherproofing of the panels calls for a breathable membrane on the underside of the base. This barrier will keep moisture from rising and allow anything inside the structure to escape.
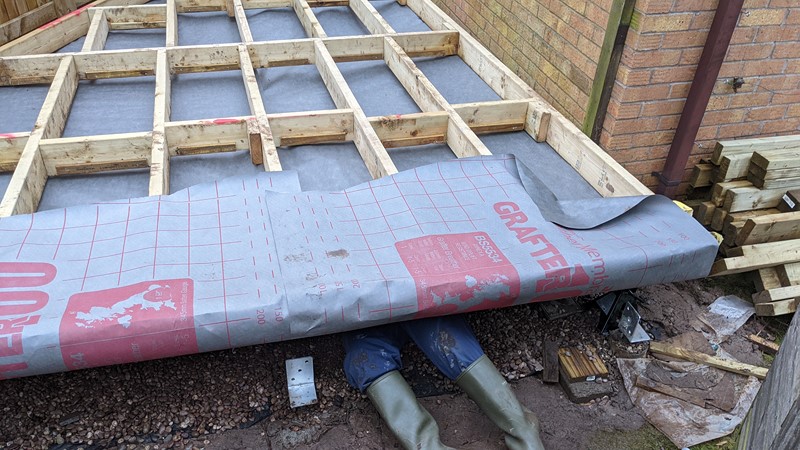
The problem is, the base is now far too heavy to lift. My dream of simply picking it up, moving it away from the legs and rolling up onto an edge is soon shattered. Just getting it a few inches high is back braking. Eventually, the trolley jack and axle stands come out to help get the structure off the ground. My better half then foolishly volunteers to go underneath with the staple gun, and who an I to argue.
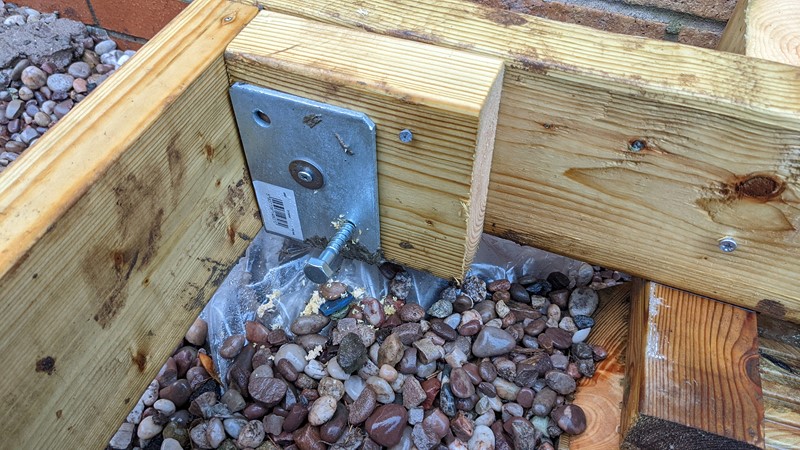
Once the base is fully assembled with the joists, noggins and breathable membrane in place, it gets finally and firmly bolted down. Unfortunately, it does get quite windy in this little back package, so a solid fixing is vital. I’m using two of these 10mm x 100mm coach bolts for the final fix. The cordless impact gun makes quick work of driving them home despite the fixings.
Wrapping up the base build

And that’s it for this article, the night has fallen, and the complete base has been covered up. However, it’s forecast for heavy wind and rain overnight, so I take no chances of the tarpaulin escaping!
The next chance I get, I can install the insulation and fit the subfloor. Then, finally, I can get to work on the walls!
M
NEXT – Part 5: Insulation and Subfloor
PREV – Part 3: Groundwork, Frame and Piers
Back to Mega Shed Articles
Back to Workshop Articles
Amazon Affiliate Links – Things used in this article
BXProject is using Amazon Affiliate Links. It’s a quick way to show you what I have used in this article.
“As an Amazon Associate, I [may] earn from qualifying purchases.”
Since January 2024, Amazon has blocked embedding images, but I think the links are still valuable.
One Comment