
In Part 4, we were finally out of the ground and building the Mega Shed. The frame that makes up the structure of the base is now complete and bolted to the anchors that were installed during the groundworks. If I want the final shed to be nice and warm, it’s going to need some way to keep the heat in. And to aid the assembly of the walls, I want to have a solid (ish) platform to work from. Time to install the insulation and subfloor!
Getting ready to install the insulation
Before I can start to install the insulation, there are a few things that need some attention. The frame needs all the bolts installing to fix it to the anchors, and the last few batons need putting in. Then the insulation can be cut to size and dropped into the bays.
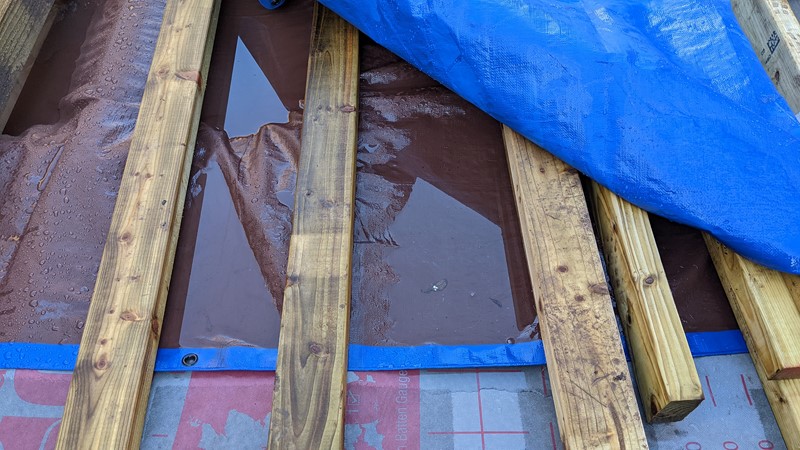
At the end of the previous article, I covered over the base with a giant tarp, and it turns out that was a good decision. Overnight it rained heavily for hours, and in the morning I had quite the puddle on top of the sheet.
Peeling the tarp back revealed quite that the frame had mostly been kept dry. There are a few puddles on the damp proof membrane, but they are quickly mopped up. With the unwrapping complete, the building can continue.
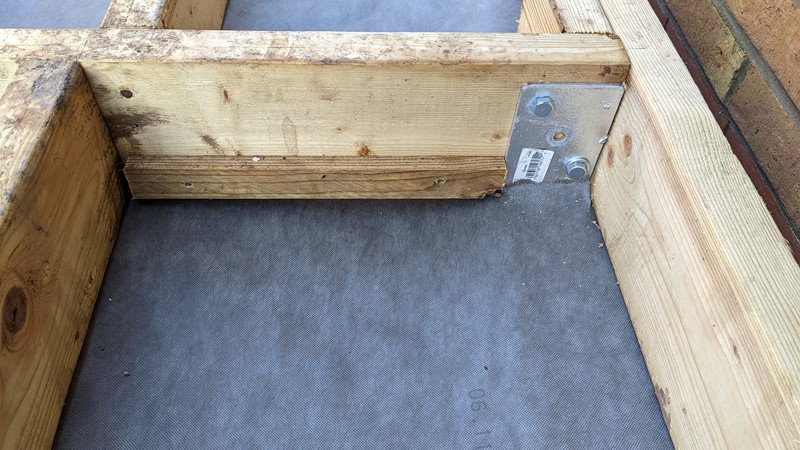
Every anchor gets two 100mm coach bolts installed to hold the frame to the ground. I pre-drilled the first few holes, but it wasn’t really needed. Most of the bolts were just screwed straight into the wood. The picture above also shows the batons installed at the end of each bay which will support the insulation and keep it off the membrane.
Cutting the insulation down to size
For the insulation in the base, I’m using 100mm Recticel PIR Insulation. Polyurethane insulation panels aren’t the most ecologically sound, just cutting them create a huge amount of microplastic. But it has a few unique properties that I can benefit from. The most important for me is its resistance to pests and vermin, which could be quite useful!
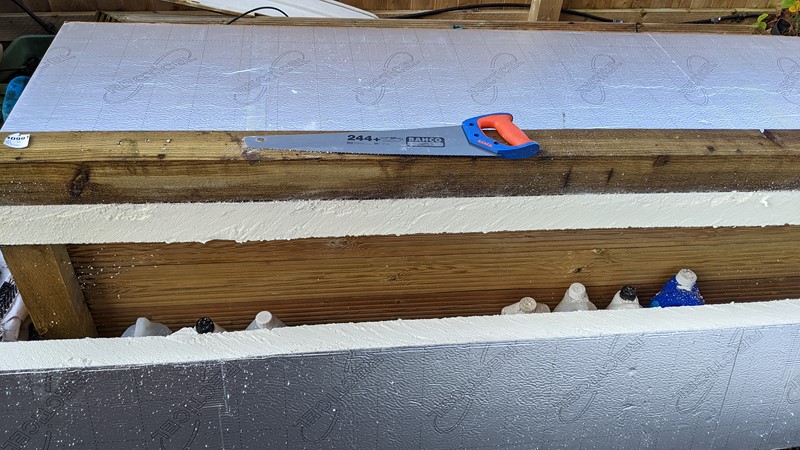
To cut the Recticel, I’m using a few tips I picked up watching Skill Builder on YouTube. They have a video which deals with cutting foam insulation. The basic principle is to use a big chunk of wood to use as a guide for the panel saw to keep the blade straight. I’m using a high tooth count Bahco saw and a length of 4″ fence post.
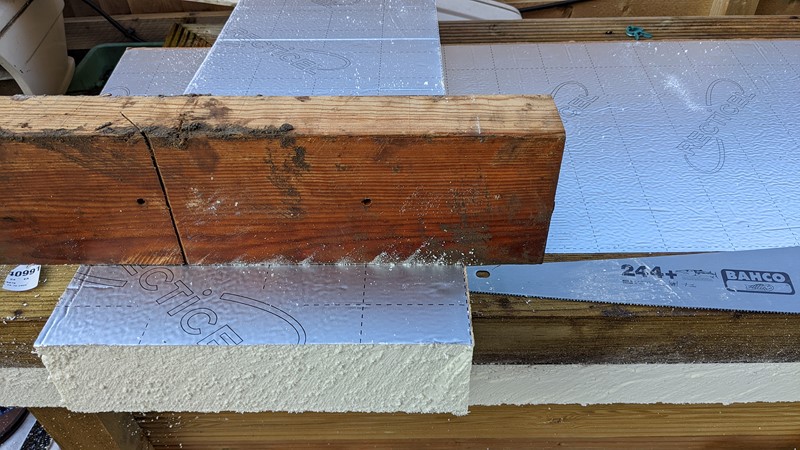
This method makes quick work of splitting the PIR sheets down to size. It did however create quite a problem. Small bits of polyurethane everywhere. I knew this would happen, so why I didn’t put a sheet down I don’t know. It would have saved me a few hours with a vacuum cleaner that followed cutting up the boards. And it really does take hours to vacuum a yard covered in slate. Ooops.
Installing the insulation into the base
The design of the frame allows for each panel to be split lengthways into three pieces, with a minimum of waste. The bays aren’t all the same width though so I have to cut them one at a time. I want them to be as tight as possible to minimise any air leakage, and this heat loss, through the floor.
The first panel is installed pretty quickly, with a notch removed to clear the anchor supporting block. Amazingly the insulation sits on the batons and is perfectly flush with the frame. Given that I installed the batons to a template, roughly measured, I was surprised just how perfectly they all sit.
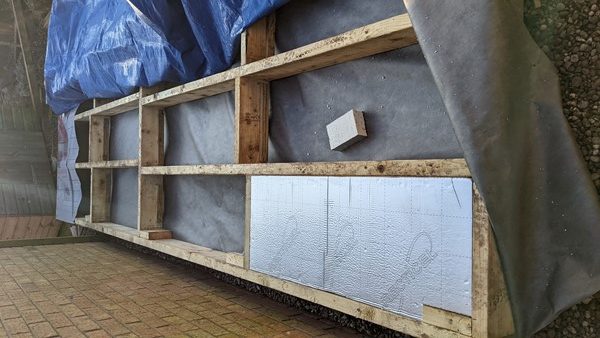
Pretty quickly I get all the insulation installed into one half of the base. There are a few panels that aren’t a perfect fit, which will need addressing later. The Skill Builder tip is certainly useful, for the most part, the cuts are at a perfect 90 degrees. This makes installing the panels really easy.
Making the insulation airtight
The tighter I can get the panels, the warmer the final base will be, so I’ll be taking extra measures to get the insulation as airtight as possible. I only really have one opportunity to get this right. Once the subfloor is installed, I won’t be able to correct the insulation.
To fill in some of the gaps between the metal frame and the less well-fitting panels, I’m using a can of expanding foam. The nozzle on the foam gun allows me to get the insulation right down to the bottom of the gap. Then I just have to let it expand and fill in the gap.
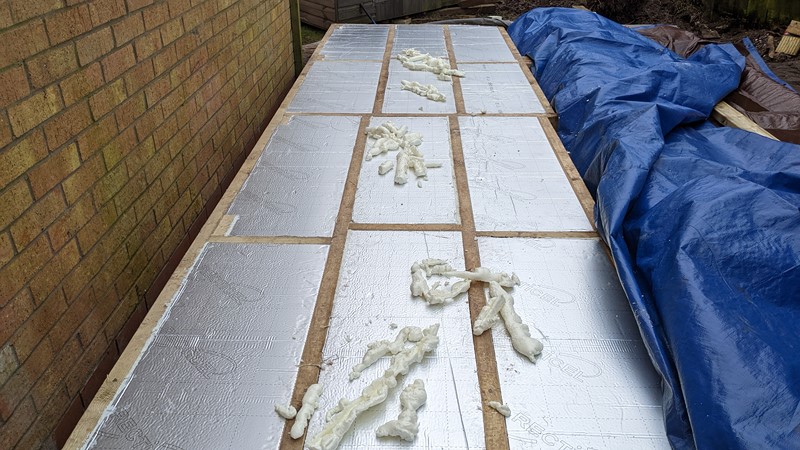
A few hours later and the expanding foam is cured. I use a long kitchen knife for trimming back the expanded foam. It has a very thin blade so it’s quite flexible which allows it to follow the wood to get a smooth flush finish. This flush finish should let the subfloor fit perfectly on top, reducing the air gap from the insulation to the flooring.
Installing a subfloor
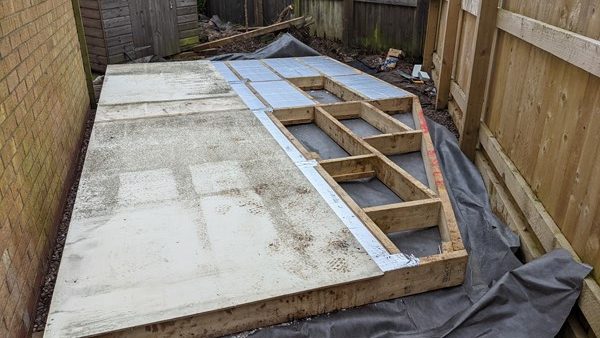
I’m not sure if the subfloor is the right term, but basically, I’m putting a thing ply sheet over the top of the base. This allows me to walk on the insulation while I’m building the walls. While this subfloor is not strong enough for a long term floor, but it will be more than enough during construction.
These 10mm ply sheets are pre-owned, painted and have been out in the wet, so they are a little mouldy. But they are almost the perfect size and require little cutting to get them to fit. I’m pretty confident that a bit of scrubbing should clean them up, perhaps with a bit of bleach thrown in.
Installing the other half of the insulation and subfloor
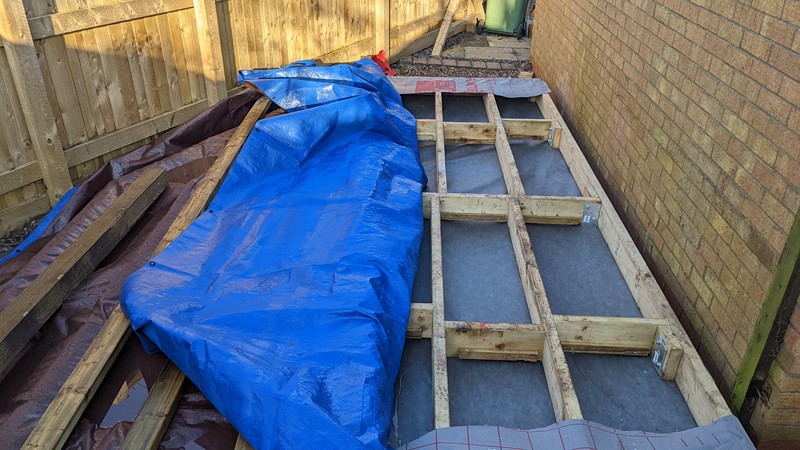
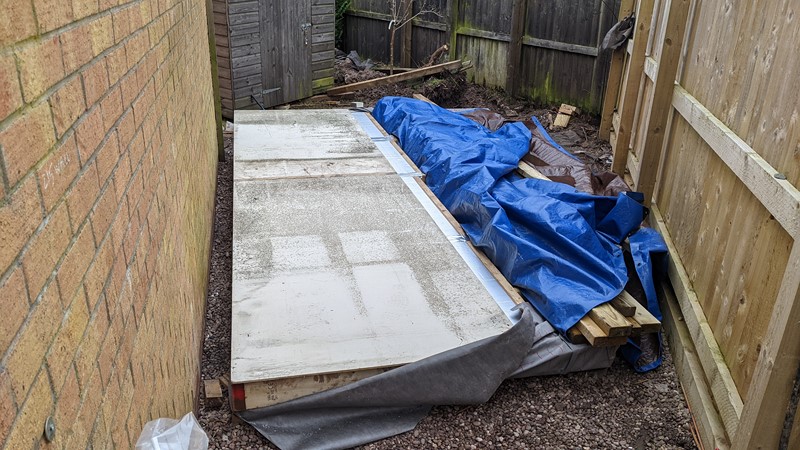
After installing the insulation and subfloor in one half of the base, I had to stop work on the Mega Shed. A few days later and I can resume construction. The base stays covered by the tarp, saving the second half of the base from the worst of the weather.
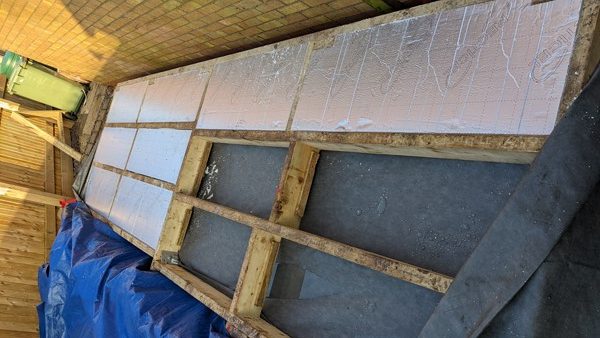
The subfloor is already coming in to use now, saving me from trying to balance on the beams when getting from one end of the base to the other. The process for the insulation is repeated and goes quite smoothly.
Oh, okay, it doesn’t go perfectly well and for some reason, I trimmed one of the panels 20mm too narrow. But with an extra slither of insulation board and some expanding foam, I soon get the gap filled. I don’t really have a choice as there is very little wastage, and I don’t want to buy an extra board just for this small area.
Sealing up the insulation
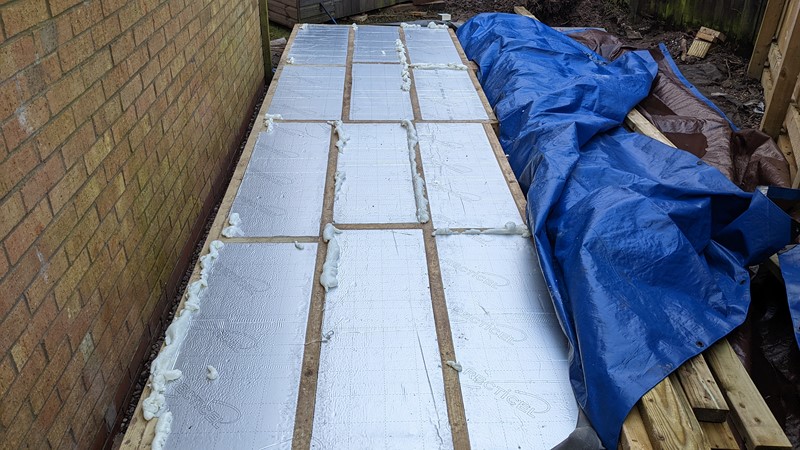
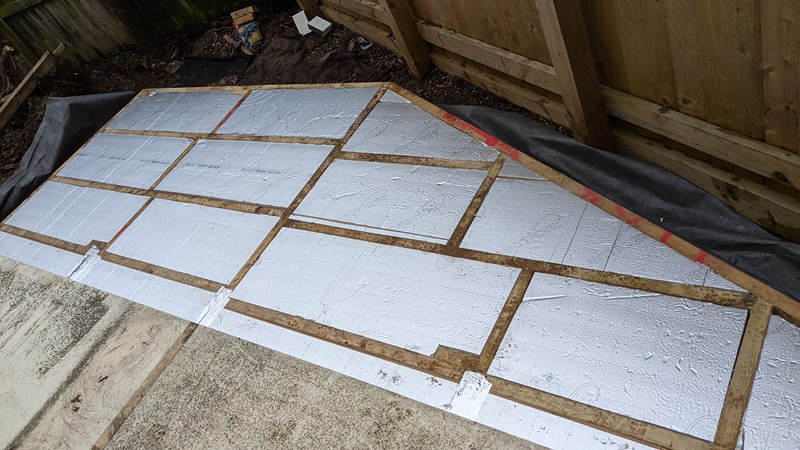
Before fitting the subfloor, I’m using foil tape to join all the insulation panels together. I’ve done a pretty good job with the expanding foam, so there is a question to be raised if I really need to add this joiner. With the base standing off the floor, there should be good airflow underneath. I guess this airflow will find its way through any small holes, so the tape is just one more element to a perfect seal.
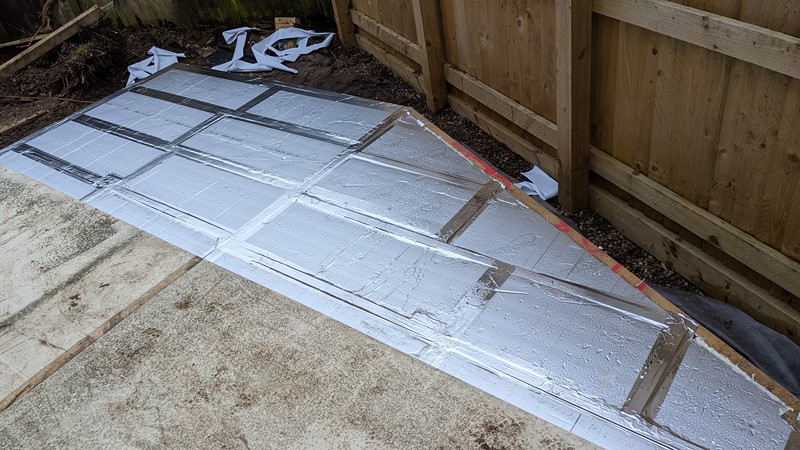
If nothing else, the final sealed up insulated base looks great with the foil tape on it. Annoyingly I run out before the final three-meter joint is taped up. Rather than buy a whole new roll of tape, I end up using some wide duct tape. Hopefully, this will do a decent enough job of making the join airtight.
The subfloor with air tight insulation
Although this stage of the build is spread over two days, it’s only taken about six hours in total. It seems like a lot of time to spend on insulating the base, but unlike a lot of other areas of the build, I can’t go back to this later. I’m hopeful that this level of attention to the insulation should see me with a nice warm shed.
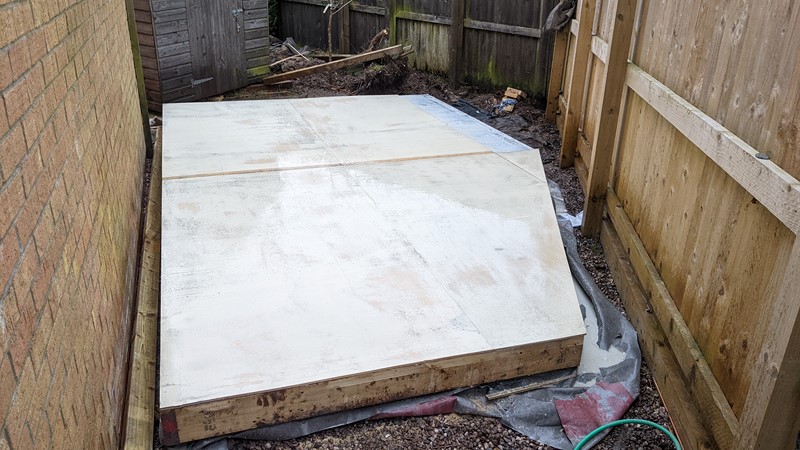
The subfloor panels aren’t quite the dimensions I thought they were, so I’ve got a little bit missing in the picture above. I have another board I can use to finish off this bit, I just need to go and collect it. The subfloor also gets a good scrub with warm water and bleach. This cleans off the mould and dirt and should stop any regrowth. I could probably clean the paint off completely but at the moment the thin covering is adding to the waterproofness of the ply.
And that’s it, the base is finally finished. It feels pretty solid too. Okay, the thin ply subfloor is a bit bendy, but it’s stiff enough to work off. Now I can start building the walls, I just have to remember to show as much care in the insulation for them.
M
NEXT – Part 6: The Long Wall
PREV – Part 4: Building the Base
Back to Mega Shed Articles
Back to Workshop Articles
Amazon Affiliate Links – Things used in this article
BXProject is using Amazon Affiliate Links. It’s a quick way to show you what I have used in this article.
“As an Amazon Associate, I [may] earn from qualifying purchases.”
Since January 2024, Amazon has blocked embedding images, but I think the links are still valuable.
One Comment