
A long time ago, while I was still in “high school”, there was a Denford Mirco Router. I suspect that’s how this CNC journey starts for many people, only in my case, the students weren’t allowed to use it. I guess this was because the machine was brand new and even the staff didn’t know how to use it.
I’ve been enjoying 3D printing for several years, and while I’ve had some great results, it’s always felt like a stopgap to making ‘proper’ parts. At the start of the year, I was on eBay, generally looking for anything with ‘CNC’ in the title and came across what would become my first CNC micro router.
Choosing the right CNC Router
Unlike many of my tool purchases, deciding on the right CNC router was based more on whatever turned up than careful research. I’ve had a search set up on eBay for a few years, simply the term ‘CNC’, filtered for ‘Used’ equipment and sorted by local first. Not rocket science, nor particularly wise. It brings up a lot of ‘stuff’.
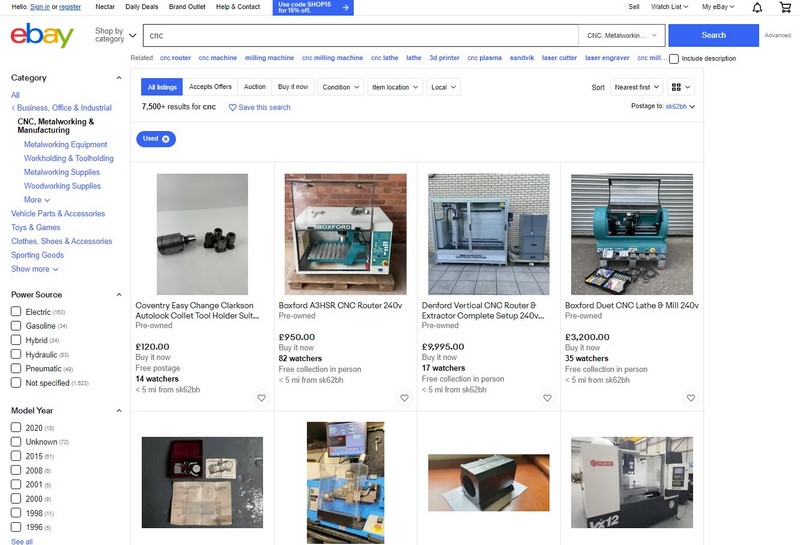
It’s interesting to see what comes up in such a basic search. There are a lot of tools way outside my price bracket, very much in the commercial price range. However, there is also a lot of ex-school hardware. Watching the eBay search term over a few months (probably years) helped hone in on a few decisions. Firstly, I wanted a CNC router. There are many CNC machines out there, lathes, mills, and routers for all kinds of materials. I intend to be machining materials like MDF or acetal, so something small would be ideal.
Secondly, I wanted either a Boxford or a Denford. These were both common in schools when I was in secondary. Our tech building had equipment from both manufacturers, although I’m sure the CNC router was a Denford. Something else I had learned was that I needed a CNC machine with the right software. This is something a lot of second-hand kit doesn’t come with and can be a costly thing to buy separately.
Collecting My First CNC Router
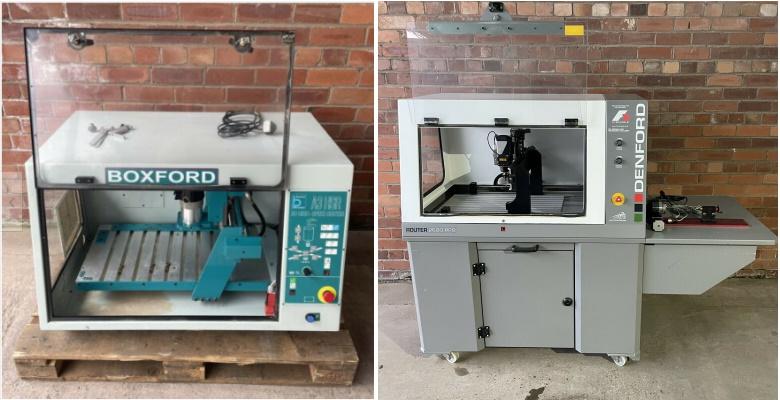
During the Christmas break, in between building the Mega Shed, a few suitable Denford Microrouters had been listed in the eBay search. Three were at Ostia Tools in Stockport, just a short drive away. After a few emails back and forth, it became clear that I would be buying something from the team at Ostia. They were quick to respond to my emails and had all the answers I needed. Yes, it came with the software. Yes, it would fit in my trailer.
Within a few days, a deal was done. I opted for one of the Denford Microrouters that Ostia offered with a homemade stand and set off to collect it. What a wonderful place they have. Everything you could imagine for a home workshop. All cleaned and ready to go. It is also clearly an owner with a passion for rescuing unloved equipment and giving it a second lease of life.
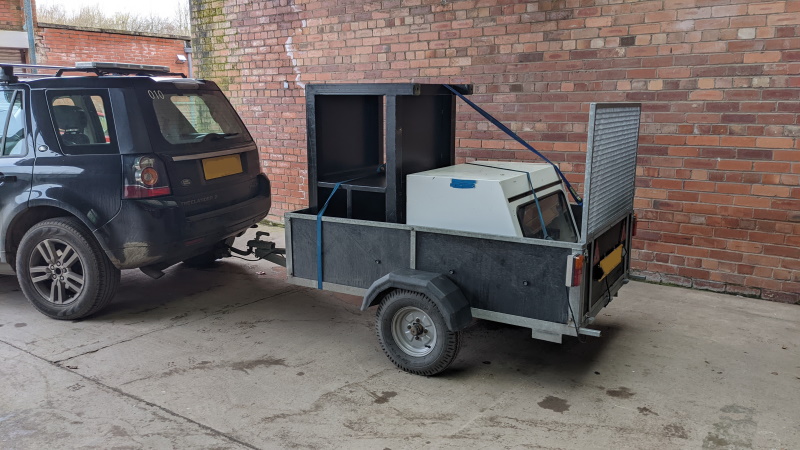
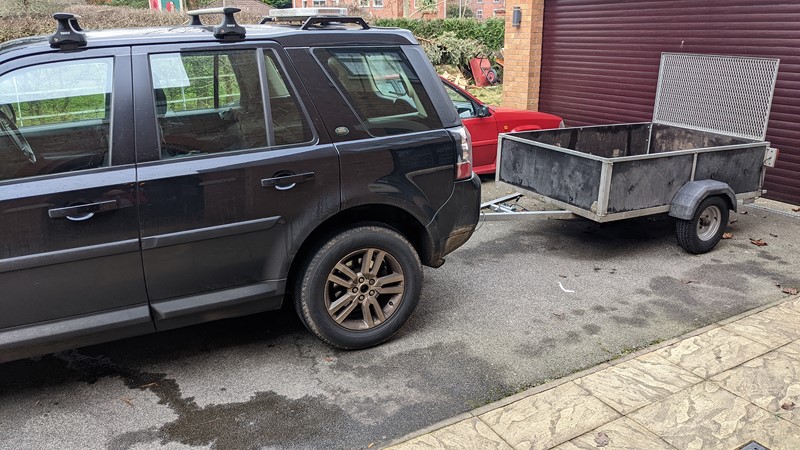
The router and base only just went in the trailer, and that stand was not a light construction. I couldn’t lift the table itself and needed a small army to move it into the shed. You’ll see it in some of the Mega Shed articles. It made for great scaffolding!
Checking over the Micro Router
Given the overall potential for things to go wrong with something with a tool rotating at several thousand RPM, I wasn’t keen to just turn it on and see what happened. Also, with the shed not fully completed, I wasn’t too keen on having the control unit outside potentially getting damp. So I started simple, getting the software running on an old laptop. Then check over the micro router controller internals and turn the power on.
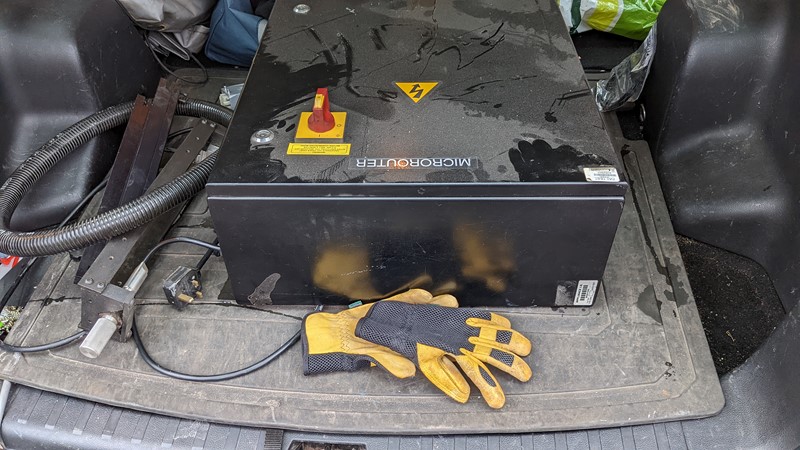
The picture above hopefully gives some scope on the size of the external control box. It is huge. On its own, the control box is weighty. The 6mm wall thickness Rittal enclosure is more than needed, but at least students won’t damage it! A wipe down of the dust from storage, and it looked surprisingly unmarked.
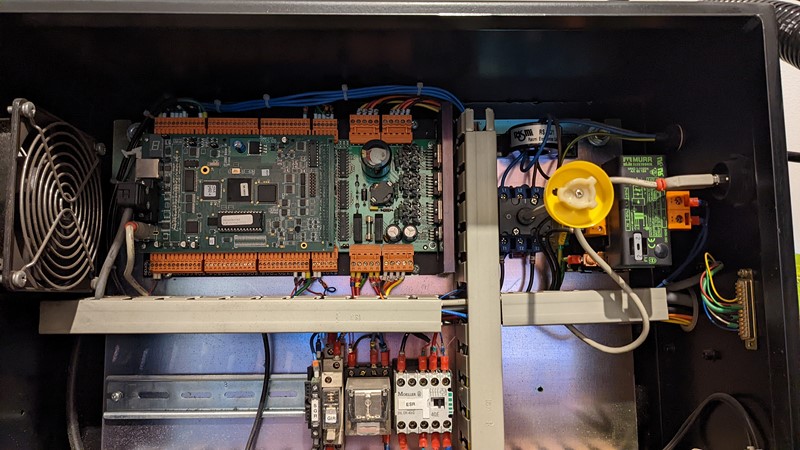
There is surprisingly little inside the case. However, I immediately noticed that the case had a USB port. This connection type is unusual for this age of Denford Microrouter, so I wondered if it was even connected. But sure enough, on opening the door, the USB port was connected to the internal comms board.
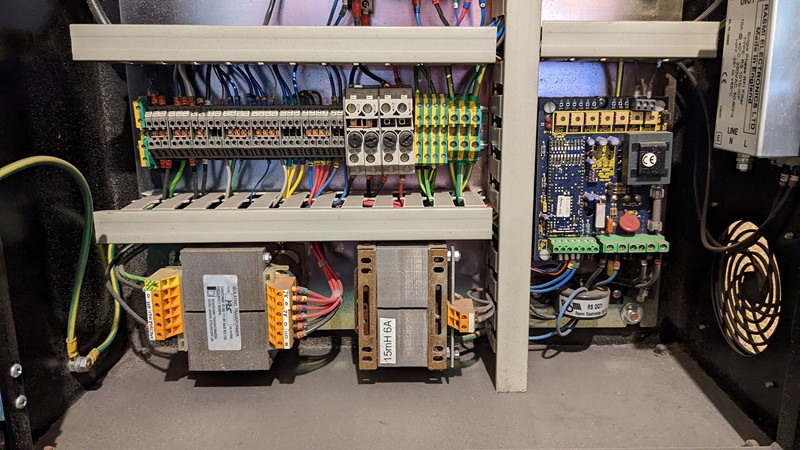
I can only assume the system was upgraded at some point. The rest of the circuitry in the case looked good. No damage or apparent burning. No tripped fuses. Very little dust and grime, too, which was a bit of a surprise given the case fans have no filter. The small amount of surface rust on the transformers is expected on a 20-year-old piece of kit. Pretty soon, I had the power on and comms to the laptop!
Setting up the micro router
It was nearly two months after buying the micro router before I could get into the shed and set it all up. It was surprisingly complete, even having dust extraction adapters. At some point, the machine was evidently well-loved and had a decent amount of use. Witness marks on the table runners show how many times the material clamps have been bolted down.
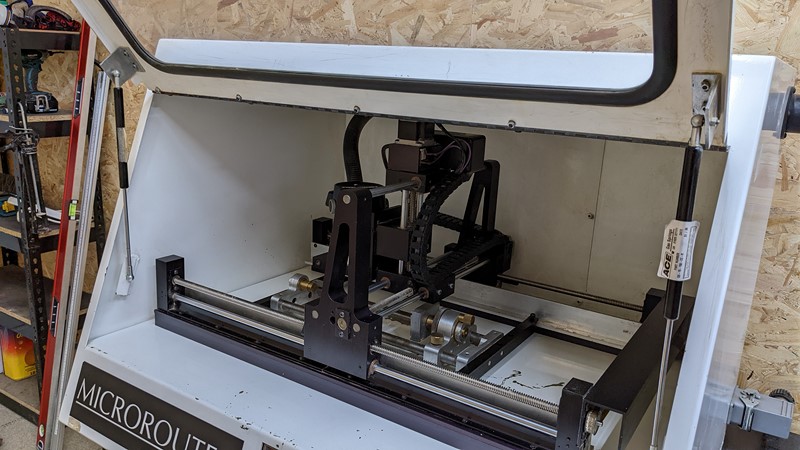
After dusting and wiping down, the CNC router is in excellent condition for its age. It seems a little bit sad that a box with some motors in it can make me feel happy, proud and nostalgic all at the same time. I’ve also been tasked with making some motorbike parts, so there is a little more drive to get on with recommissioning and getting some machining done.
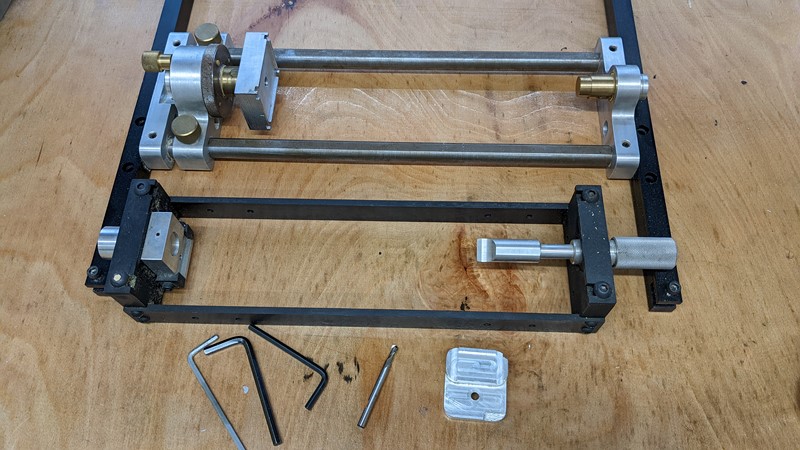
One of the attractions of this particular router is that it seemed complete. Along with the software and all the cables, it included some tooling and a variety of clamps. Even dust extraction adapters and some hand tools (Allen keys and the like). This micro router was definitely a good buy, and no doubt I’ll be back to Ostia Tools for more machinery once Mega Shed 2 is built 😀
Fixing the gas struts
One of the very few things that I have found wrong with the micro router is the access door, or more importantly, its erectile dysfunction. The door wouldn’t stay up, and after the third time, it hit me on the head. I figured it needed some investigation.
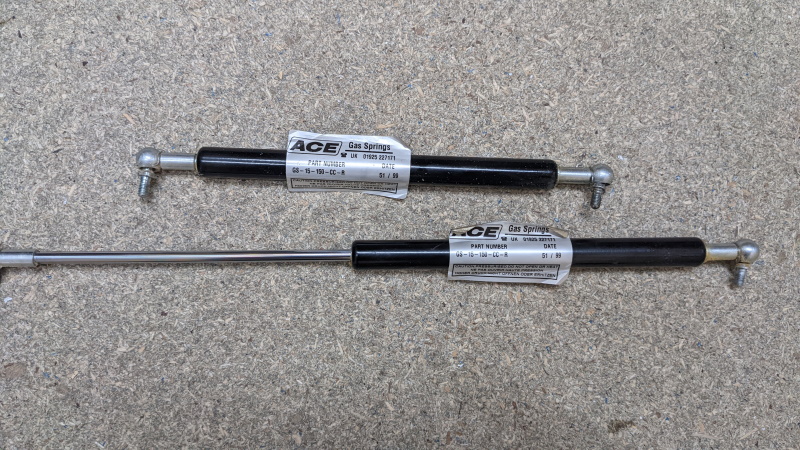
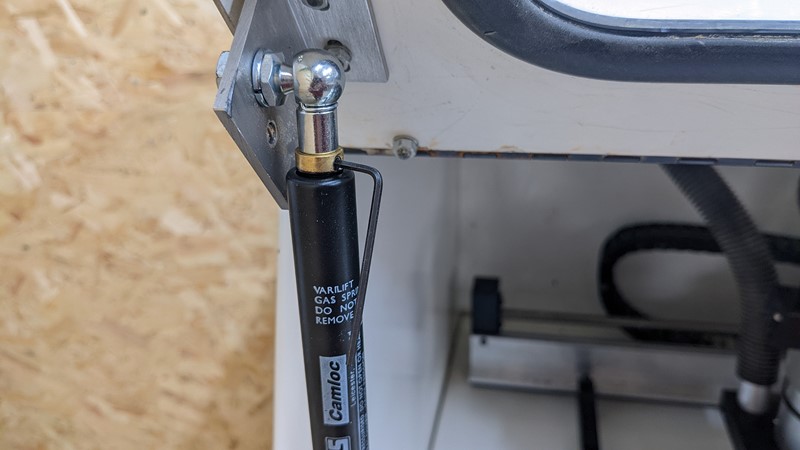
I found that the gas struts had failed, well, one of them at least. The giveaway was the puddle of oil in the bottom of the housing. I spoke to the UK agent of the original manufacturer (ACE Gas Springs). They were very supportive, and against the part number, they could supply like for like replacements. Unfortunately, the price was hideous, and the lead times were measurable in phases of the moon.
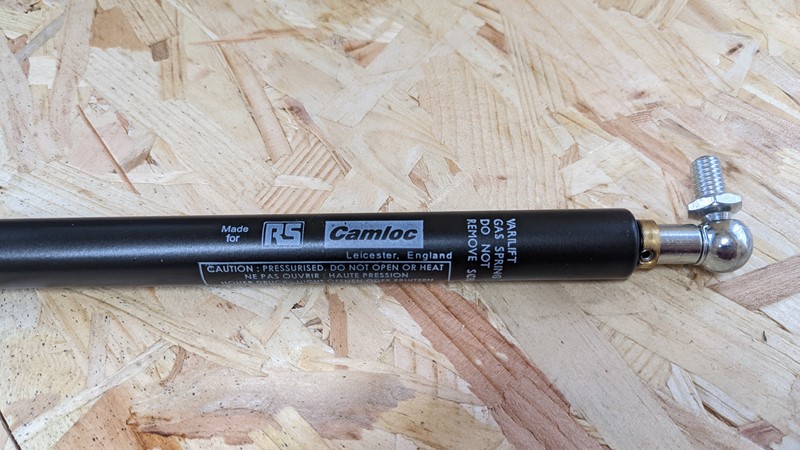
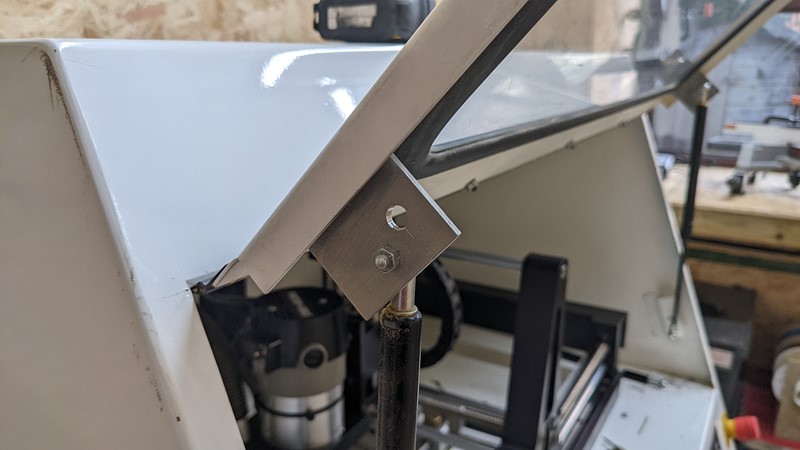
Instead, I opted for an off the shelf strut set from Camloc through the RS website. The strut pair was less than a single strut from ACE. They’re also adjustable pressure. The only snag is that they have a different fixing thread size. M8 Vs M6.
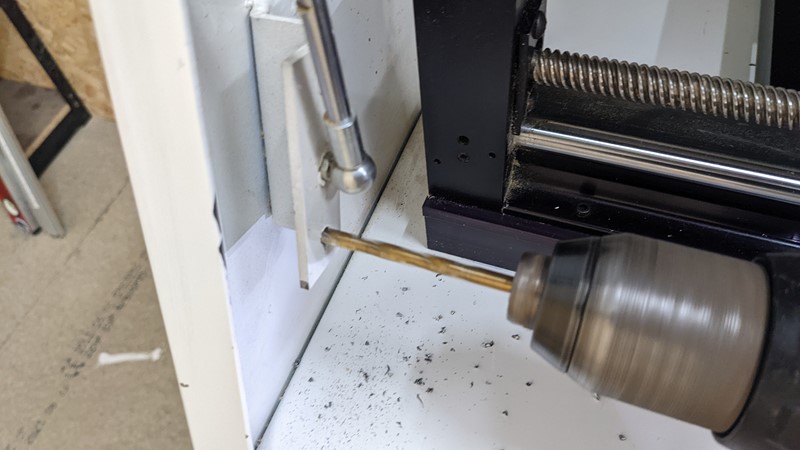
Not a problem, though. I simply drilled a few extra holes of the correct size. Unfortunately, the struts are also marginally different in length. So new holes are drilled, 25mm away from the existing hole. This hole spacing will maintain the original opening height and the overall kinematic swing.
Some precision measuring gets the holes in the same position on each side of the door. This should help prevent twisting. Fortunately, the door has a perspex window so that a little twist won’t result in a glass explosion.
The Camloc struts have adjustable opening pressure. They can be made ‘softer’ by simply letting the gas out, although watch out for the oil that comes with the gas! I’ve tuned the opening pressure, it’s probably a little high, but they work very well, at half the price of OEM replacements.
Putting the micro router to work
While I’ve struggled to find the time to do much with the router, I’m yet to see any issues, and it all works as it should. The first time the router head moved was hugely exciting. The software was tricky to work out, but Denford has made all the data available through the Data for Denford forum. The first time the whole carriage auto homed was such a buzz!
I’ve done some basic 2D modelling with the Denford included software. While an elementary software package, it made something that it could convert to G-Code to run the machine. The VR5 Milling software uses this G-Code to move the CNC router’s X, Y and Z axis around.
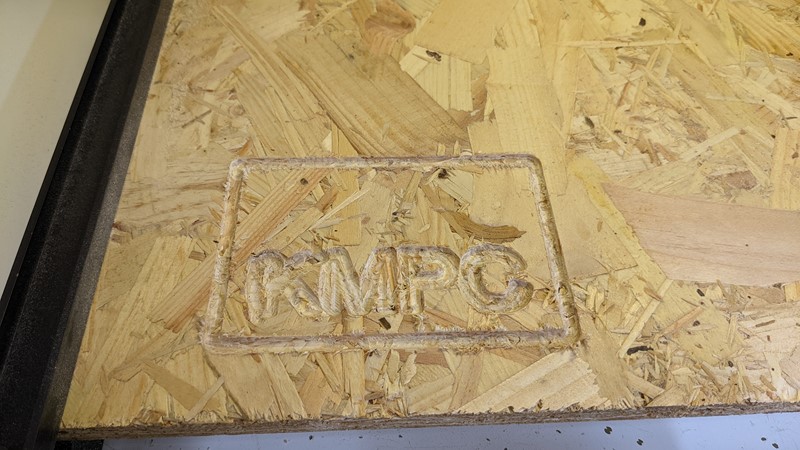
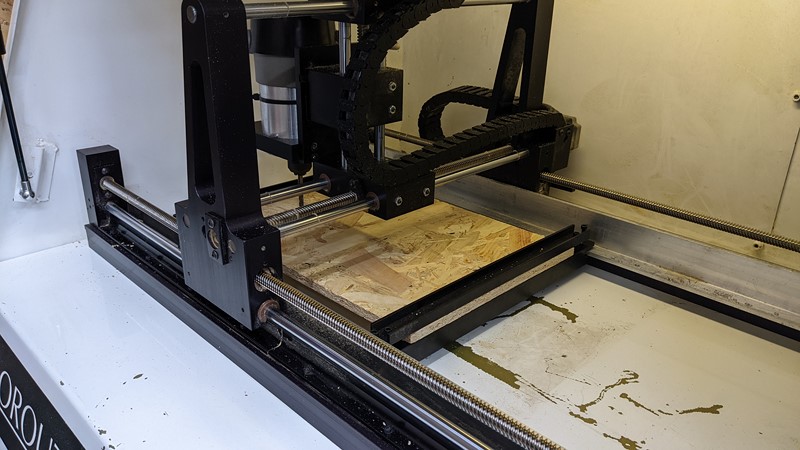
So far, I’ve managed some basic 2D engraving which went ok. I routed the basic shape in OSB as it was all I had to hand. This OSB isn’t a great material for machining as the structure continually changes, often resulting in pieces bursting out. While the result was a bit messy, it did at least prove the router worked!
What’s Next for the micro router?
Next for the micro router is for me to work out the toolchain to make 3D parts. Geeting up to speed might take a while. I don’t have Denfords 3D drawing package, although it looks like a lot of effort to learn. I plan to figure out how to use something more modern, like Fusion 360. I’ll need to model the part, create the tool paths and export the FNC file.
I need to be making practise cuts in MDF and not OSB, but that brings an issue of dust. I suspect the 20-year-old vacuum I’m currently using for dust extraction hasn’t got a filtration rating. So I’ll need to upgrade the extraction to something that will work with the router and catch dust out of the air.
As a start point for my CNC journey, this Denford Micro Router is fantastic!
M

Hi I’m a teacher of d&t and I’ve just moved to a new school with a similar machine to yours. In my previous school I used a boxford for projects but also we cut f1 in schools cars on the 4th axis. I am unable to do that as the new s hools cnc has no 4th axis attachment, but you have. In the photo of accessories the lower rectangle frame is purpose built to fit the f1 car polyurethane block. I was wondering if you needed it as they don’t make them anymore? Kind Regards Simon
Hi Simon,
Yes, that is the F1 in School’s adapter, and no I’m unlikely to ever use it.
I’ve sent you an email directly, and if you let me know the address, I’ll post it to you.
M