It’s hard to believe that more than six months have passed since the last XPO update article. This lack of update is partly due to the distraction of the Mega Shed, the construction project that keeps on giving. But fear not, quite a bit of progress has been made, even if I haven’t had enough time to update you. In the previous article (Back in October), I’d finished the repairs to the scuttle. In this article, I’m going to tackle the A-pillar repair of the donor body panel.
The hole XPO’s A-pillar
Back in 2008, when XPO’s original engine took a walk-off in the direction of a Peugeot 205, I suspect the bodywork was in quite a fine fettle. In fact, given the car’s overall condition, I’d be willing to bet it was immaculate. However, roll forward a few years, and the tin worm started doing its worst.
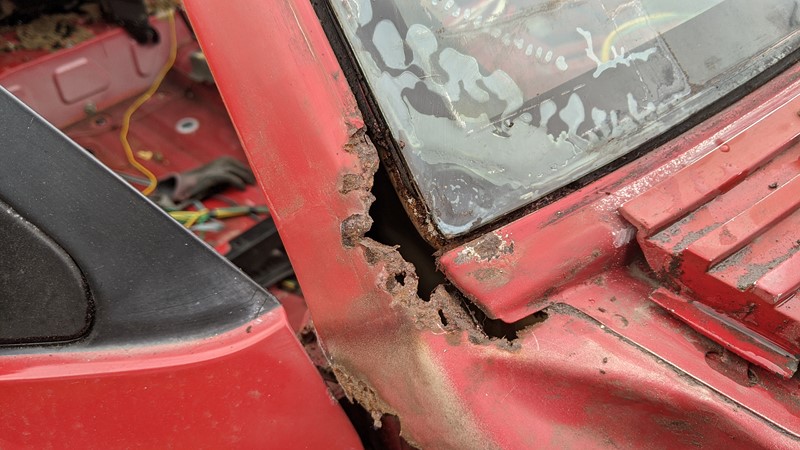
The picture above shows the extent of the visible rot in the driver’s A-pillar when XPO arrived at BXProject Towers. While not common, I have seen BXs with holes in this area before. Usually, the degradation starts after a windscreen replacement. Overly keen glass removal causes scratches in the paint, which exposes the steel to the elements and slowly, the metal oxidises away. However, this car still seems to have the original windscreen.
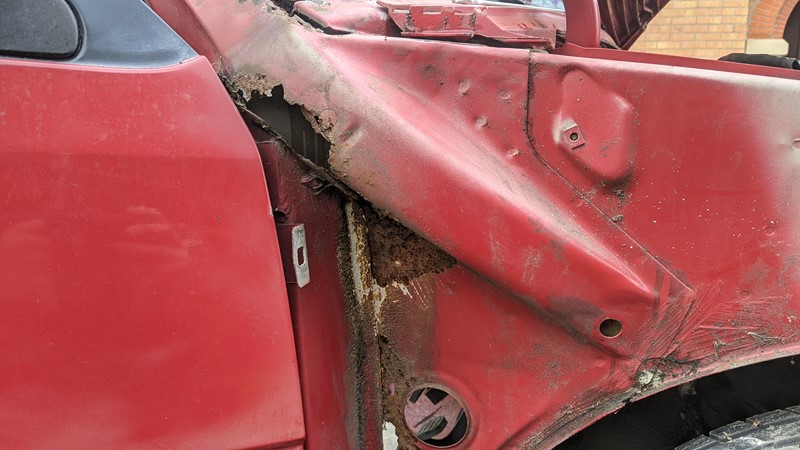
Once the hole appears at the edge of the windscreen, rainwater starts to run down the inner A-pillar. Blocked drainage and a few years later, combined with the almighty power of H2O, shows just how quickly metal sheets turn to iron oxide. Fortunately, all the rust seems to be in a single panel, but by this stage, there isn’t enough left upon which to do repairs. Also, the shape of the A-pillar is pretty tricky to reform. So the plan is to pull out the damaged panel and put a salvaged part back in. Simple. Ish.
Recovering a replacement A-pillar
On the Citroen BX, the A-pillar is a relatively complicated shape. I think it may be the most complex panel on the car. My panel beating skills have improved over the years, and watching MakeItKustom on YouTube has helped. However, trying to create this panel from scratch is beyond me.
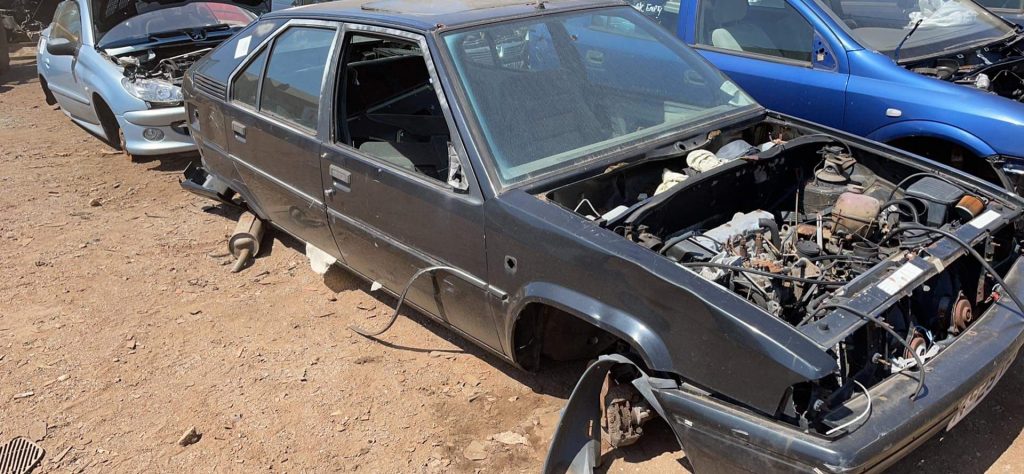
Perhaps not surprisingly, off-the-shelf body panels for the BX are now very uncommon. Only sills and outer wings are available these days, and there is debate as to whether the inner A-pillar was ever available to buy. Fortunately, Albert Looms’ scrap yard near Derby has had a BX in stock since 2018, which appeared to be the perfect donor.
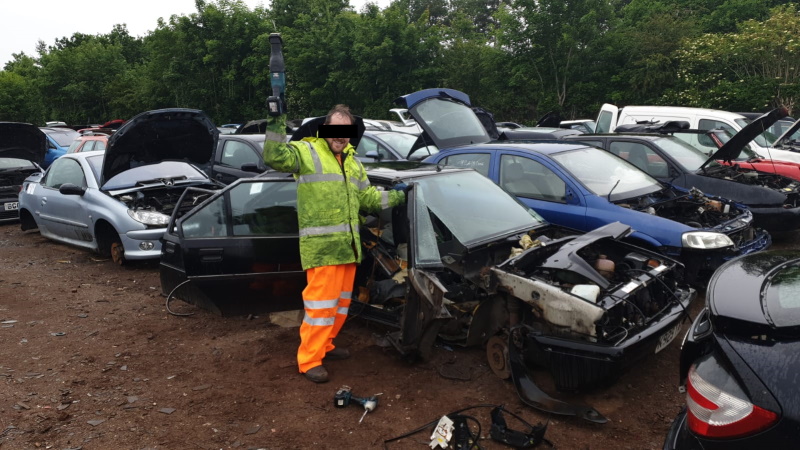
Armed with a bag full of batteries, a reciprocating saw, and a set of helping hands, we set off for my favourite automotive breakers. The trip was successful, with the donor car giving up the required parts with little resistance. And after a few hours, £25 lighter, and only light rain, we walked away with the body panels needed.
Separating the inner and outer A-pillar
Predictably, the donor panel was not as perfect as the original pictures might have suggested. However, compared to the holey mess currently attached to XPO, this donor panel was a considerable improvement. Indeed, all the parts that would be visible were in fine fettle.
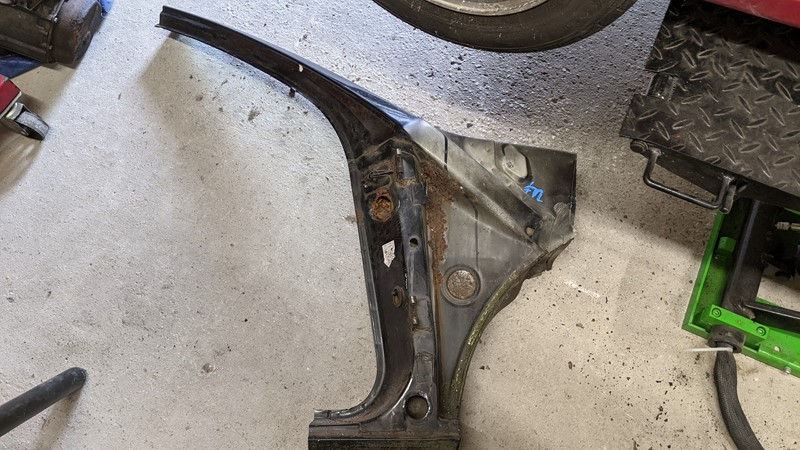
Before I can understand the extent of the damage in the donor panel, I need to remove the outer A-pillar. The outer A-pillar is the section that holds the door onto the car. This panel is by far one of the thickest pieces of metal used in the production of the Citroen BX. I think only the strut top metal is a thicker gauge.
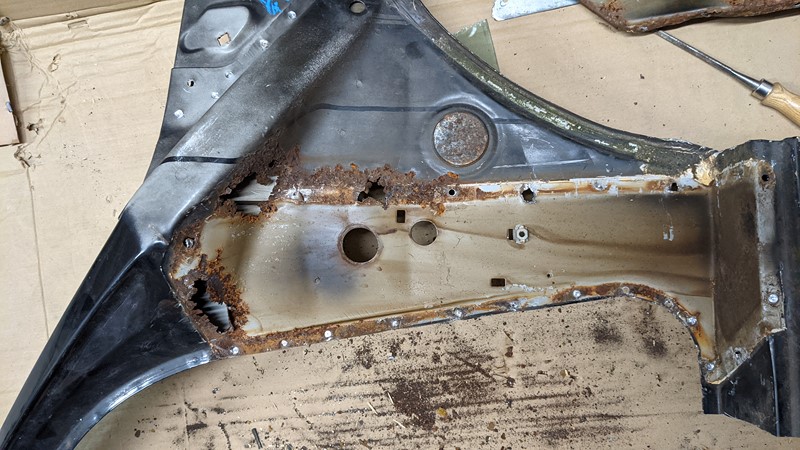
With the A-pillar fully detached, the scape of the repairs needed becomes clear. Fortunately, it isn’t too bad. However, I’ve left the section of the scuttle and lower sill attached for now. Without these pieces, the salvaged panel will likely become floppy and easily distorted once the welding starts.
Repairing the inner A-pillar
With the outer A-pillar detached, the damage in the salvage panel is more pronounced. Overall the rust isn’t too bad. The damage is also in the more ‘normal’ places for a BX driver A-pillar. A few decades of the door over-opening and exerting excessive force on the hinge welds causes cracking. This paint and metal fracturing allow water to enter and the inevitable oxidisation.
Identifying the areas of damage on the salvage part
The donor panel is in good condition compared to the inner A-pillar on XPO. However, before the replacement A-pillar gets slid into place (and yes, I’m being optimistic), now is the time for some repairs. There are three main areas of damage, and I draw them out with a sharpie onto the panel.
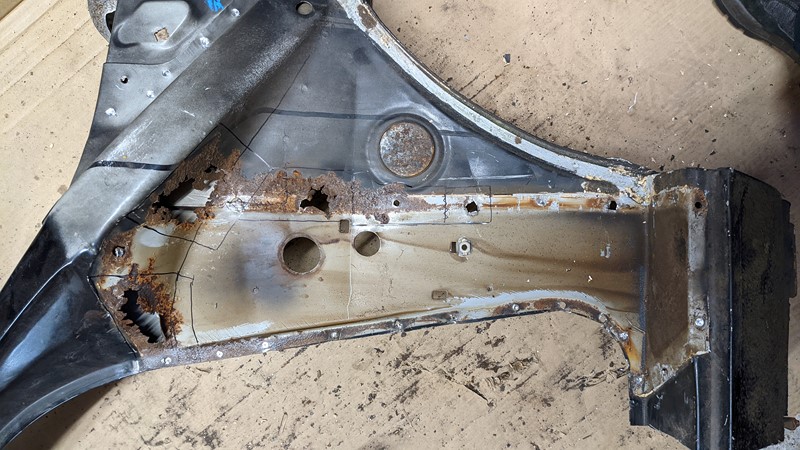
Two pieces are in the radius above the top of the outer A-pillar, which is tricky but won’t be visible once the wing is reinstalled. The hidden nature of the repair gives me a little flexibility to reshape after installing if needed. However, it mostly gives me the confidence that if the repair is only 99% accurate, I can probably live with any imperfections. When drawing out the long section down the old outer A-pillar spot welds, I realise this panel has a noticeable crease. It will be easier to tackle this repair in two parts, so that’s four patches that will be required.
Starting with the flat sections
The inner A-pillar panel has a lip or bends around the whole edge. These are relatively minor features but more than stiff enough to support the panel while I make holes to remove the failed material. However, I’m loathed to try to tackle the flat repairs in one go in case they warp or buckle the plate. So I’ll tackle the repairs in smaller sections, using the crease as the natural join line.
Clamping the repair
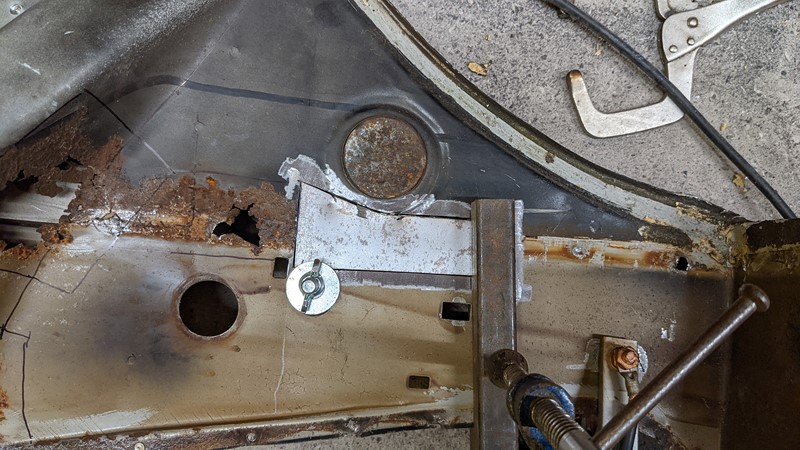
As the inner A-pillar panel is relatively flat, holding the repair patch while I tack it into place is straightforward. I enjoy using the big flat washers, bolts and wingnuts through existing holes to keep repairs in place. The combination does a great job clamping the repair pieces tight and fully aligned.
Welding the repair in place
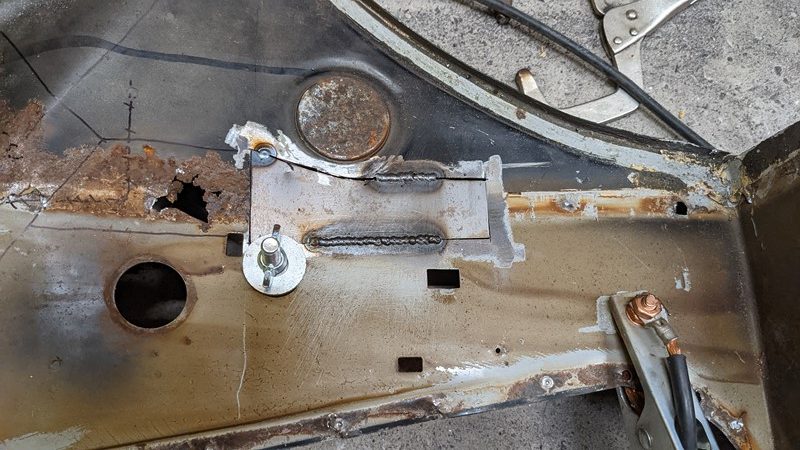
A couple of tacks go in on the long edges to start the weld. More tack welds are added slowly, eventually joining the old and new metal. I’ve learned through bitter experience that the slower you go, the less warping is likely. I’m far from patient, but slowly and surely, the old and new start to become one.
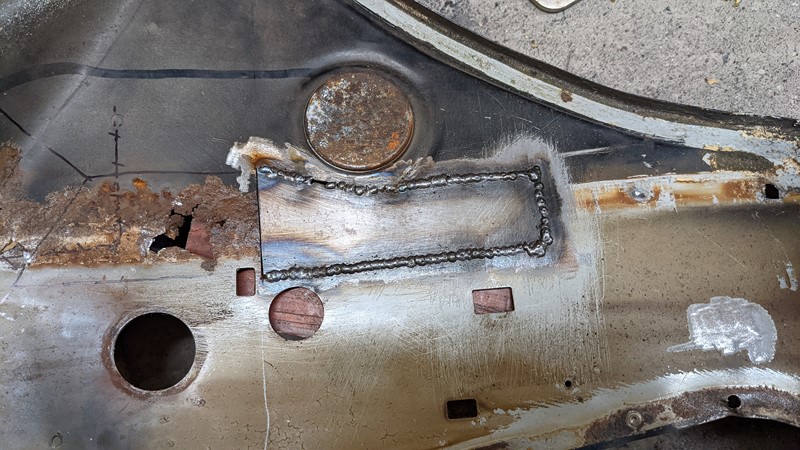
A good hour later, the repair piece is joined on three sides. I will complete the welding on the final side once the next repair patch is fabricated. There are a few gaps in the weld line at this stage, but generally, it looks pretty good. The proof is in the pudding, as they say. I guess it’s time to turn over.
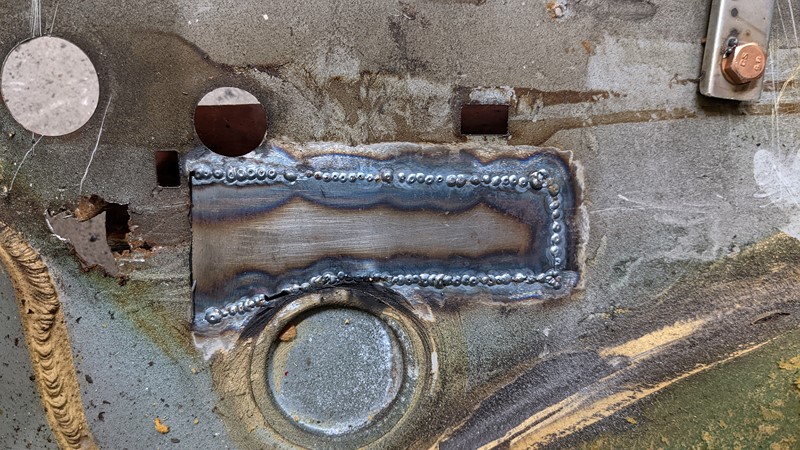
As penetration goes, that looks pretty good to me. There are a few spots that will get a going over, but critically I haven’t blown through any holes. This lack of blown metal suggests I’ve got all of the rust out. You may also notice that the large hole in the panel for the wiring harness is blocked with a cap. Most BX’s have a blanking cap here, and for now, I’ve left it in to help retain the structure during welding.
A-pillar repair flat patch number two
The second a-pillar repair is another uncomplicated patch in a flat area. Although not apparent in the pictures, there is a slight change in angle between the first and second repair as it’s not a perfectly flat panel.
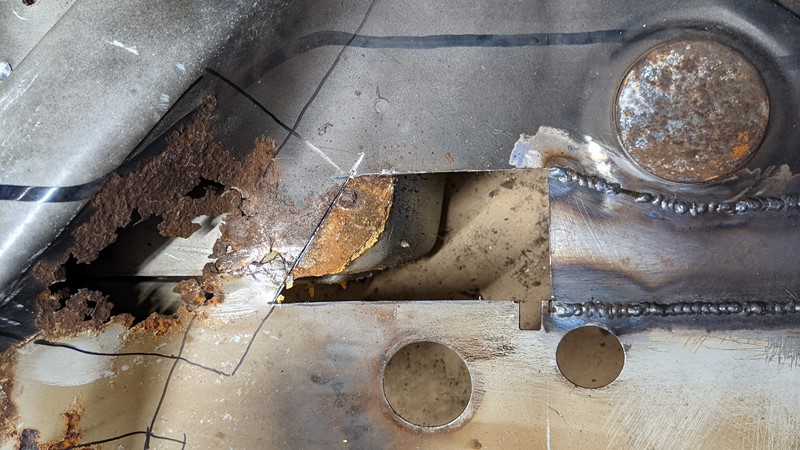
Another complication is the scuttle section hidden behind the repair, which is visible once I remove the old rotten metal. The complication comes from the amount of sealer between the panels. To avoid inclusions in the weld, I must remove this filler as best as possible. A cavity in the bead of the weld may least to moisture ingress and premature failure.
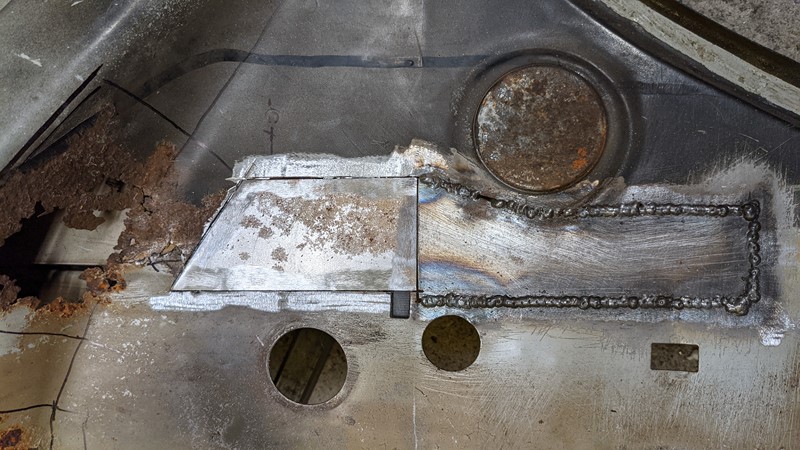
Using a steel ruler and then CAD (Cardboard Aided Design), a repair piece is quickly marked and cut out using the bench shear. The first attempt is a very good fit, possibly too tight, so it gets a bit of filling back. The rectangular cut-out in the original panel will need to be extended into the repair later.
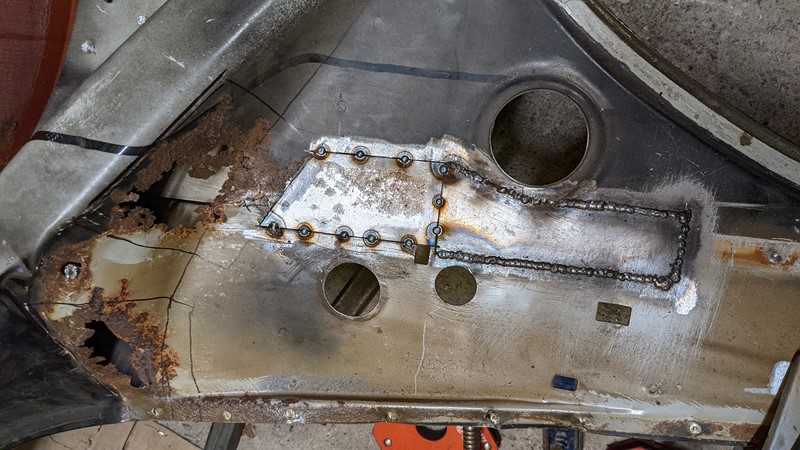
Slowly applied and well-spaced tacks start to hold the repair piece into the original panel. From experience, I’ve found these simple repair pieces are usually the ones I rush and put distortion into the panel. As the welds cool, they pull the sections together. More head leads to more pulling and eventually panel distortion.
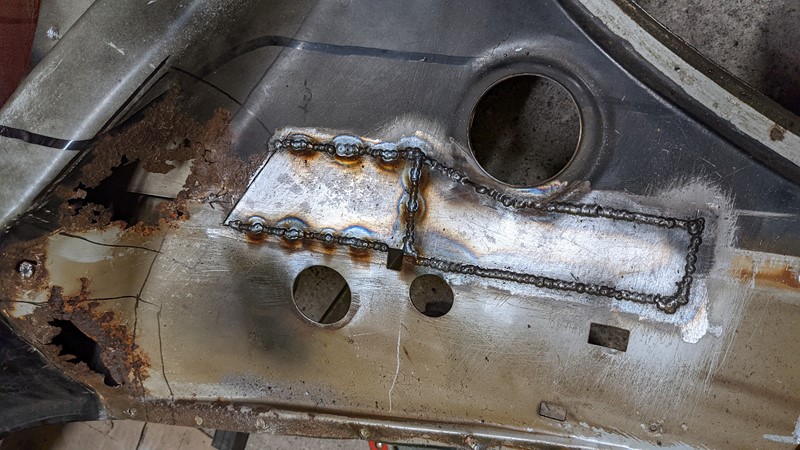
After what feels like an hour but probably isn’t, the repair panel is stitched in on three sides. So far, there doesn’t appear to be any distortion in the thin metal, but the proof of the pudding will get when the unused support sections of the donor panel are removed. Fingers crossed!
The first curved repair patch
Making curved repairs always puts a little dread into me. A patch that is too small or too big will soon make itself known. And this curve repair is not as simple as I first thought.
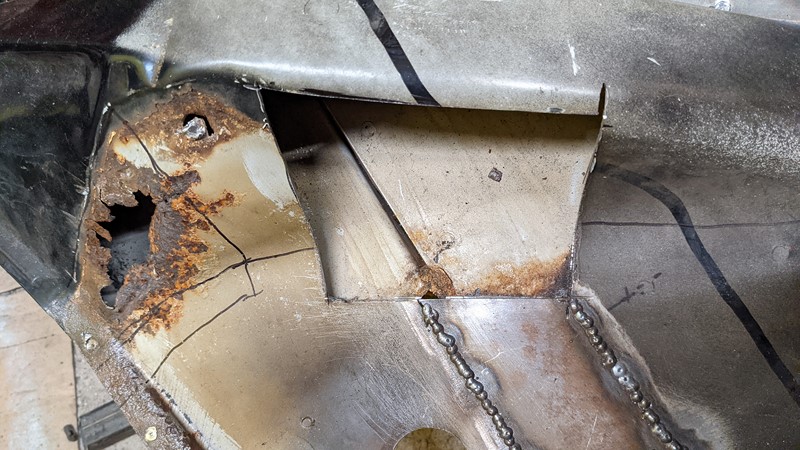
The picture above shows the hole after I’ve removed the rotten material. The right side of the hole has a simple continuous radius bend, with a small lip towards the end. Unfortunately, the left side is not as simple. The panel starts with a concave radius which turns into a subtle convex curve.
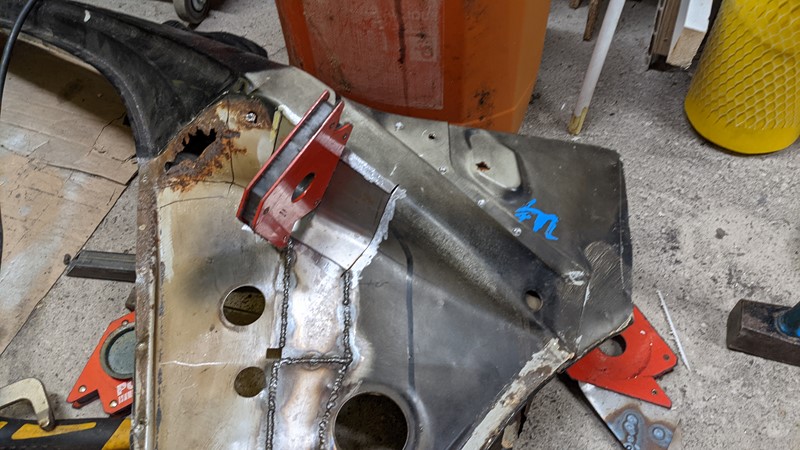
The removed, damaged section is hammered flat and used to make a CAD template for the repair piece. The CAD template outline is transferred to a piece of steel and cut out. Gentle bending using a mixture of hydraulic press and hammer gives the repair panel a passable fit in the hole.
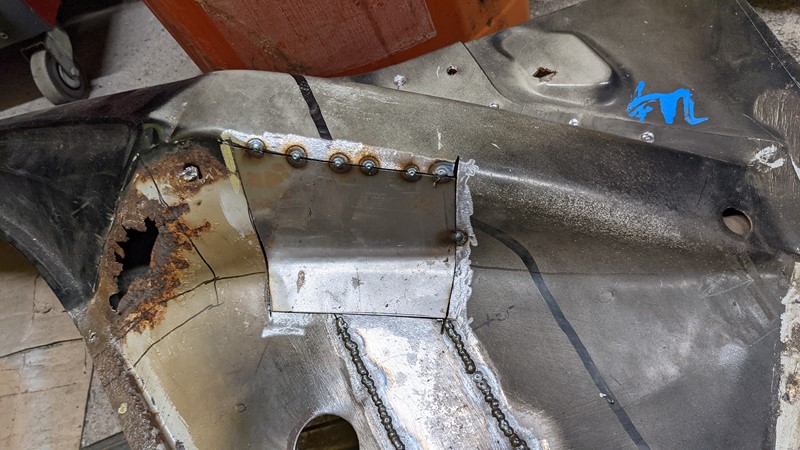
The repair piece is carefully tacked from the top edge to the bottom to get a perfect fit. Once the first edge is in place, I can make small bends with a hammer to the rest of the panel to achieve the perfect fit. It is a prolonged process, but the finished repair will benefit from the slow, methodical approach.
The Final A-Pillar repair section
The final section of repair is by far the most complicated. With bends in at least three-axis and a curve through the middle of the panel, it more than challenges my skill set. But, again, I’m spurred on mainly by the knowledge that it can be formed and the pile of spare sheet metal I have if I need to keep trying!
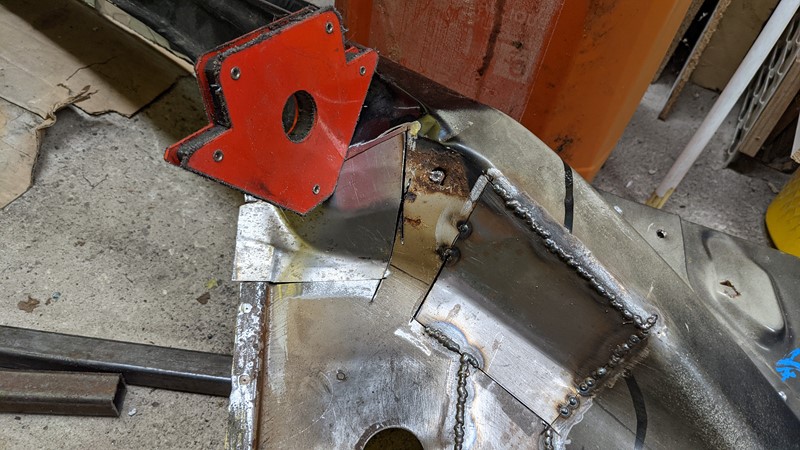
Just bashing out this repair panel takes a few hours. I’m sure this fabrication could be done faster with proper body shop equipment, but it is rather satisfying forming the required shapes by hand. The biggest concern now is whether the outer A-pillar will fit correctly. The original panel has already gone off to a new home!
The repaired A-pillar inner panel
Wow, that was a lot of work. However, I’m happy with how I tackled the donor panel restoration. Starting with the simple patches and building to the complex multi-axis repair was a good plan. Getting the welder settings dialled in at the start made adding the final A-pillar repair section easier.
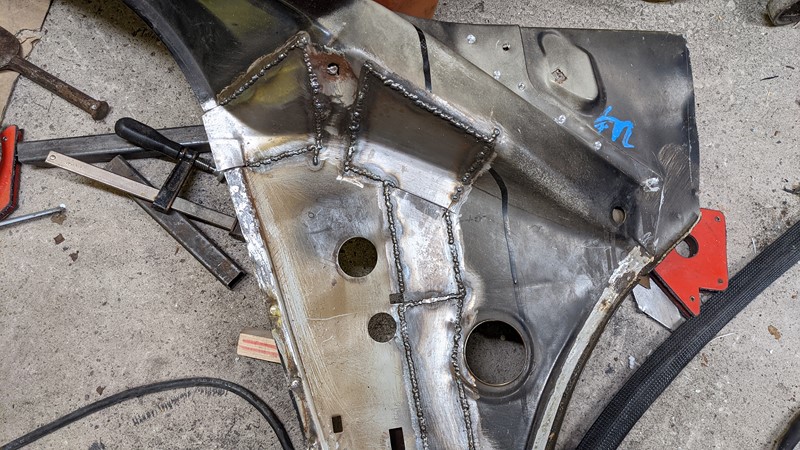
From the top side, the lines of the beaded weld aren’t the neatest, but they do look to have good coverage and few gaps. This welding is undoubtedly strong enough to hold the repairs in place for a long time. They will eventually get a slight rubbing back, painting and sealing.
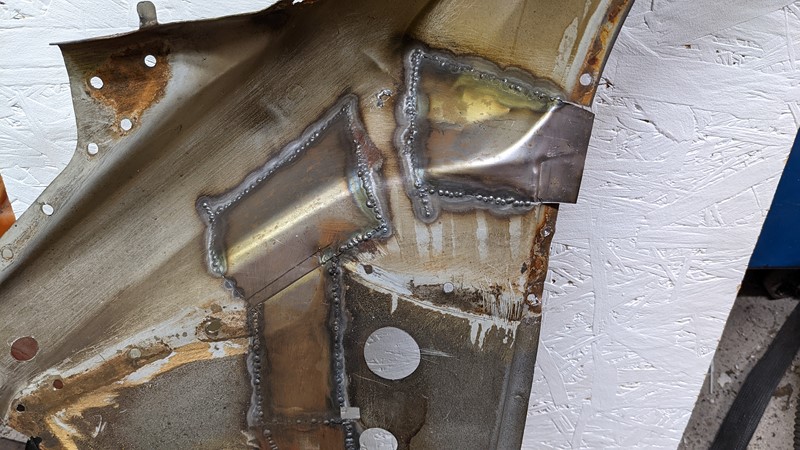
Once the scuttle section of the donor panel is removed, the back of all the welding is exposed. While there are a few penetration gaps, I’m delighted with the result. A little over tidying up of the welding, and this donor panel is ready to be installed into XPO!
The first cut is the deepest.
In the following article, I’ll tackle the one challenge I’ve dreaded throughout the A-pillar repair. To join the donor panel to XPO, I must start removing the structure holding the car’s windscreen and driver’s door. This removal could quickly go wrong and collapse the vehicle body like a deck of cards. Removing too much structure too fast will make the body floppy and the repair impossible to complete. I am scared!
M
NEXT – How To – Door Pillar Repair
PREV – Welding the scuttle part 2
Back to Citroen articles
Back to Automotive articles
Amazon Affiliate Links – Things used in this article
BXProject is using Amazon Affiliate Links. It’s a quick way to show you what I have used in this article.
“As an Amazon Associate, I [may] earn from qualifying purchases.”
Since January 2024, Amazon has blocked embedding images, but I think the links are still valuable.
