
There comes a time in many a BX owner’s life when the door falls off. Or at least that’s the myth. They rarely fall off completely, but the top door mount does have a horrible tendency to try to part ways from the body. Repair is a daunting job for many. However, having been taught by the fabulous Doc from Adventures in Rust, I’m ready to tackle a Citroen BX door pillar repair myself.
When door bracket’s escape the door pillar.
This year marks the 40th Anniversary of the BX, although they only came to the UK 39 years ago. So they’re getting old. Even the youngest of BX’s will just about be hitting their 30th birthday. Daily wear and tear will make itself known, and cars that are usually sat idle are likely to pool with water. Unfortunately, the upper driver door hinge on the BX will usually succumb to tin worm one way or another. I suspect this is often from opening the door too wide, leading to fatigue in the weld. After enough excessive openings, usually aided by the wind, cracks will start to let water in and make a right old mess.

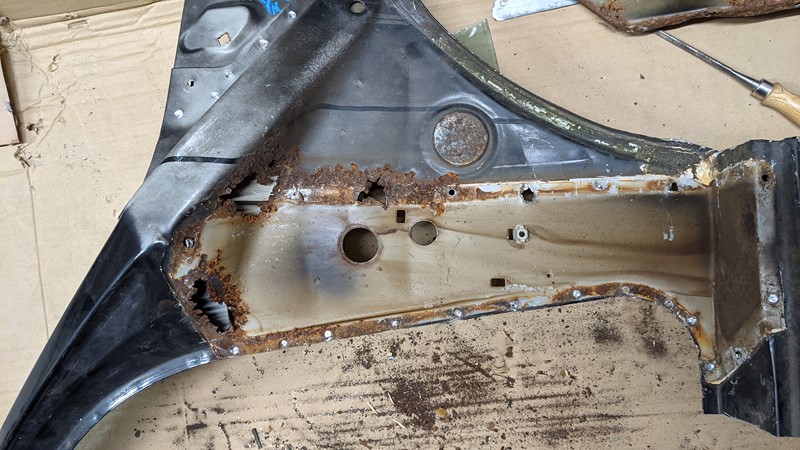
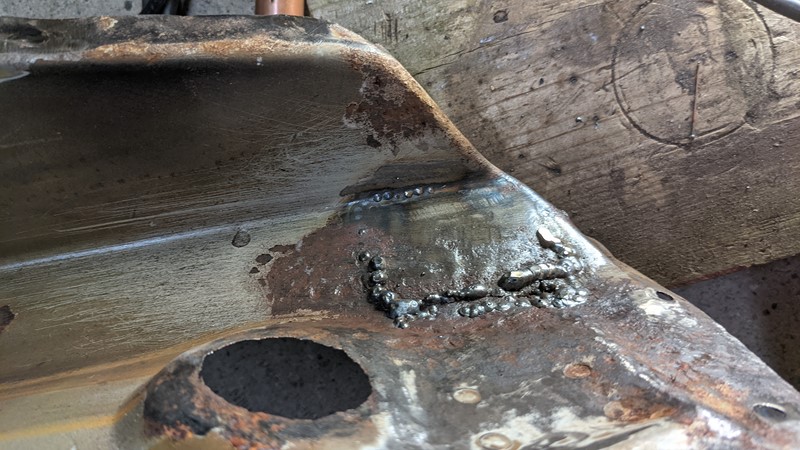
The picture above shows a particularly ripe example. The upper door bracket is completely disconnected, and the metal behind has long since washed away. I’ve had to repair this parting of ways on two of my BXs. If they’re not too far gone, simply over-welding the crack is a perfectly acceptable solution. Once they go this far, replacement from another car is the best bet.
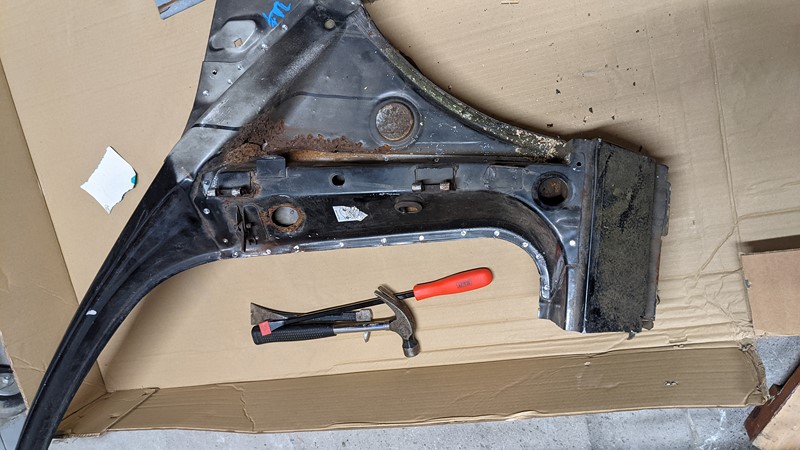
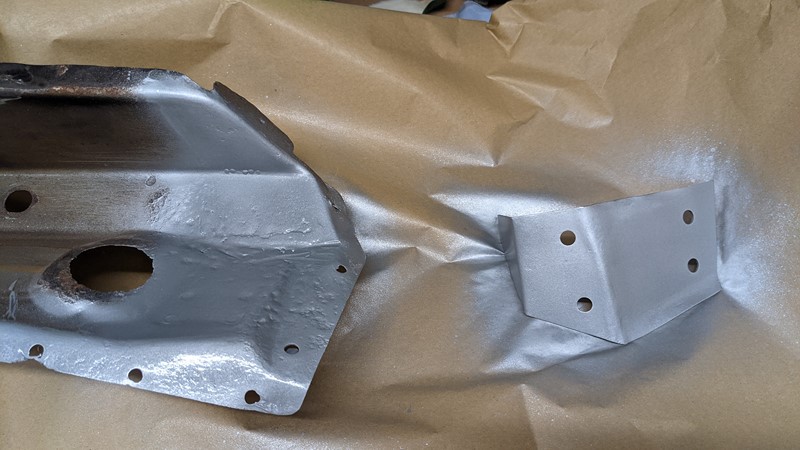
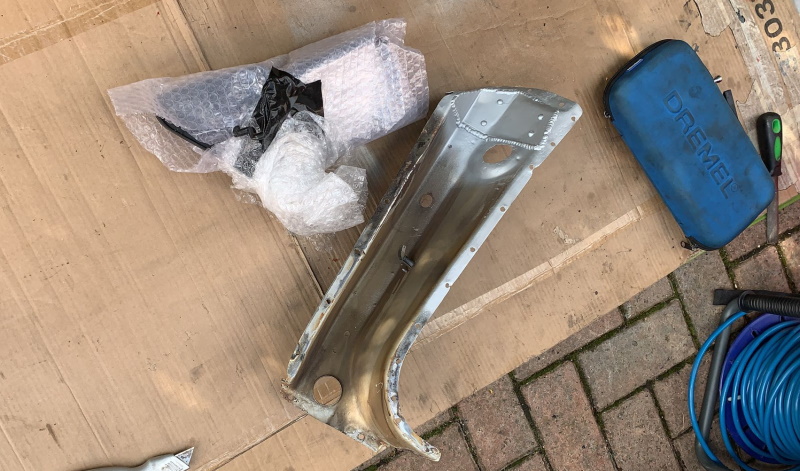
The donor Citroen BX door pillar
The quickest fix is a donor body panel when there is too little metal left to affect a repair. Donors are becoming few and far between, but they’re still out there if you know where to look. In this case, I have a spare section of the a-pillar from the body cut I took for XPO.
Drilling out the rivets
Separating the inner and outer a-pillar isn’t too difficult, although potentially easier on the car than off it. The metal of the outer pillar is almost twice the thickness of the inner pillar to which it is spot welded. This allows certain freedoms when parting the sheet metal. The outer a-pillar, being thicker, is reluctant to bend.
The first step in the separation is to drill out the spot welds. The welds were about 6mm in diameter originally. I use a 6mm spot weld bit to part the joined metal. However, if you’re a little bit off centre with the drill, a bit of weld is left behind. So care needs to be taken to split the remaining panel join. The idea is only to drill through one panel. I find it a little easier at the welding stage is only the door pillar is drilled through.
Separating the pillar from the sill
Drilling out the welds on the sides and top of the pillar is straightforward. First, sand back the paint until you find the indentation the weld sits in. Use an auto punch to mark the centre, then get drilling. When it coved to separating the sills at the bottom of the pillar, it gets a bit trickier.
There aren’t too many welds in front of the door pillar, but some are hidden. A little heat on the seam sealant and a sharp wood chisel help to strip back through to the paint. Then you can start to find the hidden spot weld heads.
Working towards the back of the car, the spot welds are visible but tricky. These joins are set in place on something of an angle. When using a drill to remove the weld, care is needed to match the angle. Off by too much, and you’ll drill through both sheets before you know it.
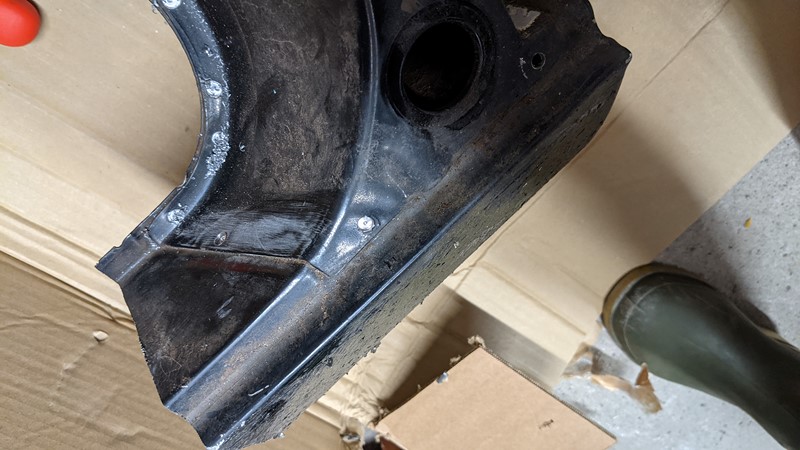
Inner and outer a-pillars parting ways.
Separating the inner and outer panels can be a bit of a patience test. I use a mixture of sharp word chisels, a parting wedge, a range of hammers and some choice swear words. Couple this with patience, and you can slowly part the panels. The accuracy of the spot weld drilling determines how easy it is to achieve separation.
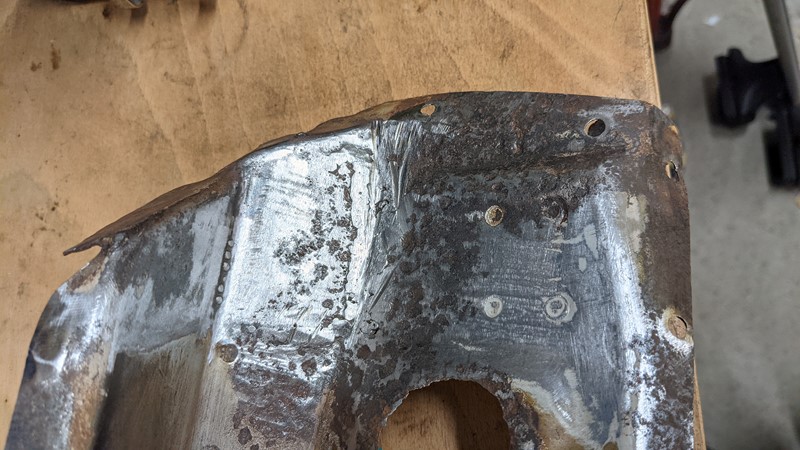
Despite care being taken, the remaining inner a-pillar panel looks a little worse for wear. This is the panel I need for the XPO project, and while I’ve torn some holes in it, “she’ll be reet”. This panel will need some repairs before it goes on a car, and I’ve covered this in a previous XPO article.
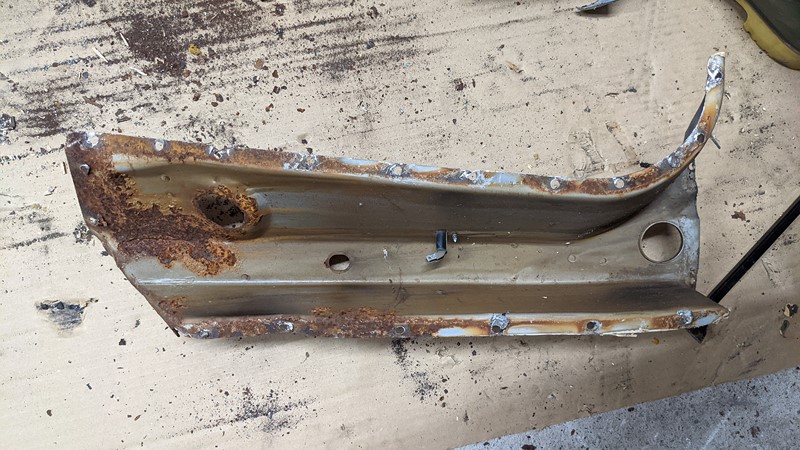
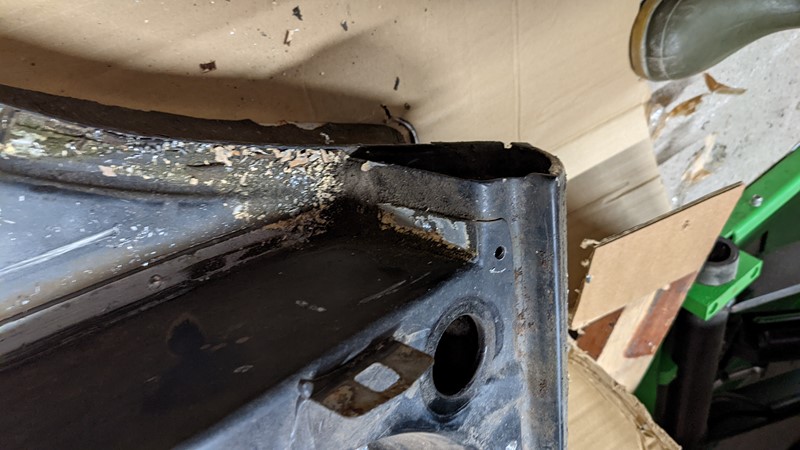
The piece we are interested in, the outer a-pillar, is a bit of a mixed blessing. A softly, gently approach means the panels have separated with minor damage to the outer panel. However, the corrosion at the top of the panel is quite notable. Fortunately, it’s not as bad as first feared, more flakey paint than rusted through.
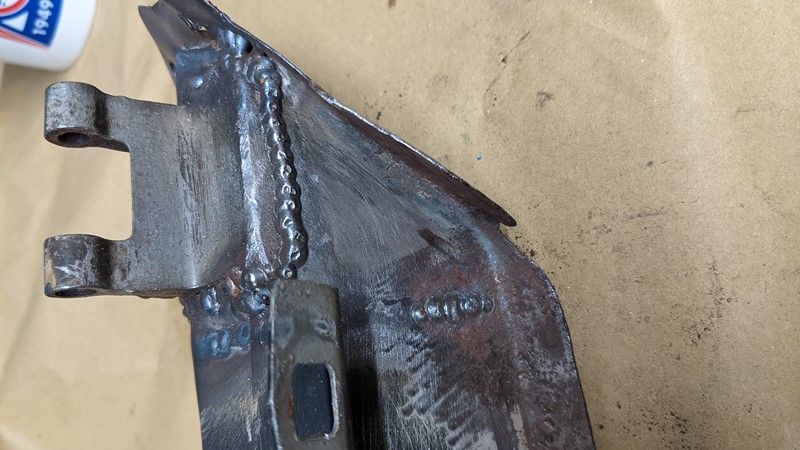
How it should be
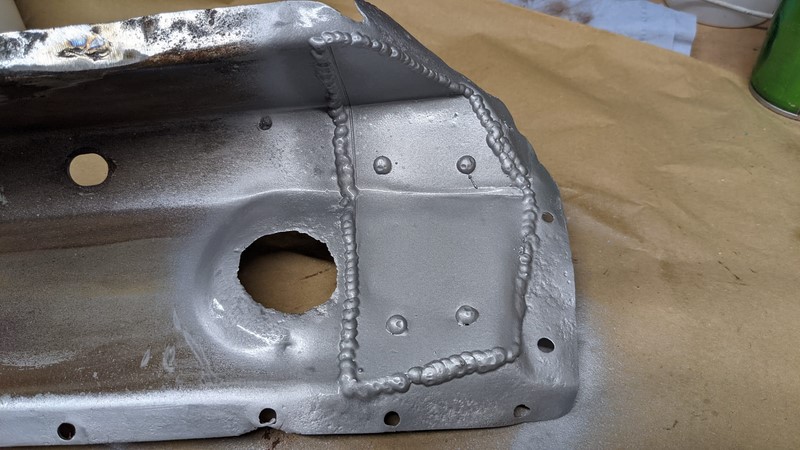
At this point, it would be prudent to show how the hinge and check strap plate should look. Unfortunately, trying to find an un-damaged and un-repaired a-pillar is somewhat tricky. So instead, I’ve found a picture of a very good condition passenger side hinge.
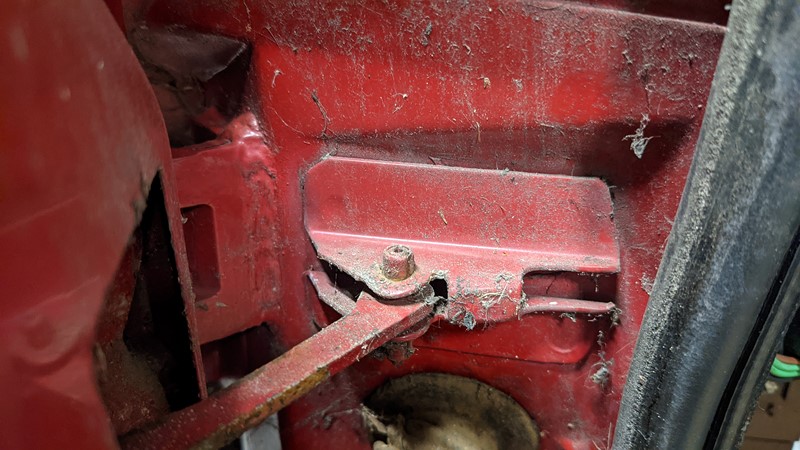
The weld around the upper door bracket shows no signs of cracking or rusting. This hinge goes about its day without too much trouble. The plate for the check strap also sits flush to the panel and is spot welded too. This bracket is relatively large, seemingly just to hold the small pin the check strap is attached to. However, it is critical to stop the door from over-opening. A sure way to tell if a BX door bracket is having trouble is to see if this bracket is still flush to the outer a-pillar, all the way around.
Solidifying the bracket
When I started separating the inner and outer a-pillar metal sections, it was for the inner part to go on XPO. The door pillar panel was originally destined to go into storage. However, one October afternoon, I got a message asking if I could help repair another BX door. Oh, how the planets align.

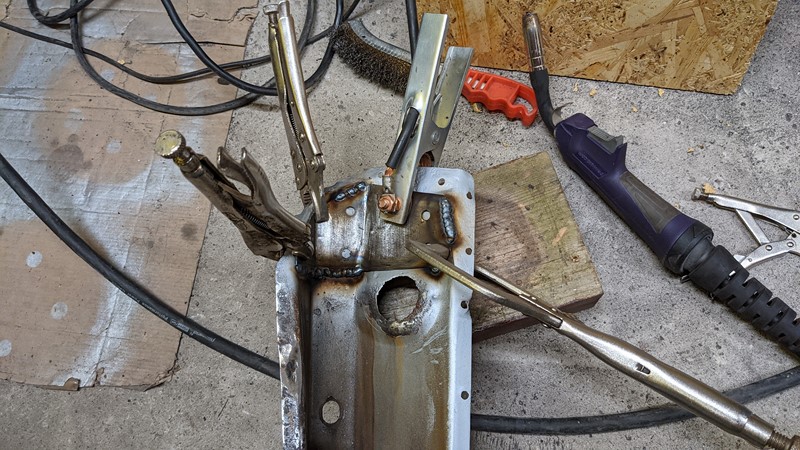
The only issue was that the other BX needed repairing yesterday, so I needed to throw the repairs together pretty darn quick. And my welding skill drops right off when I have to rush. There was also no time to grind back later. So this isn’t my greatest welding effort, although it’s plenty strong enough.
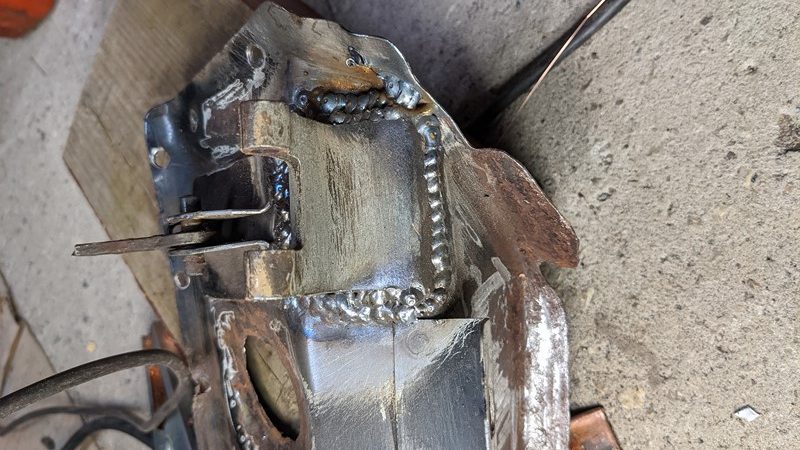
The first step is to fully weld around the whole upper door hinge bracket. I’m effectively over welding the original joint and getting good penetration into both the bracket and the a-pillar metal. This over-welding also replaces any cracks with new metal. The weld is made up of hundreds of spot welds. Continuous runs would put too much heat into the metal, and warp the panel and probably the bracket.
As this is quite thick metal, I can afford to turn the power up on the welder. More is less or something. The extra bit of oomph means I’m getting some good penetration. But, of course, good penetration means a much better bonding of the two parts.
Reinforcing a Citroen BX door pillar
In places, the iron oxide is a little thicker than I might like. This means the outer a-pillar metal is a little thin in places. If the remaining metal is too thin, the welds around the door bracket will fatigue and crack pretty quickly. The solution is to spread the load away from the metal the bracket is directly attached to. A simple brace or reinforcing panel is added.
Making the reinforcement bracket
Of course, I’m using my favourite old car repair tool, CAD, cardboard-aided design. I quickly have something drawn up on cardboard that fits the back of the a-pillar quite nicely.
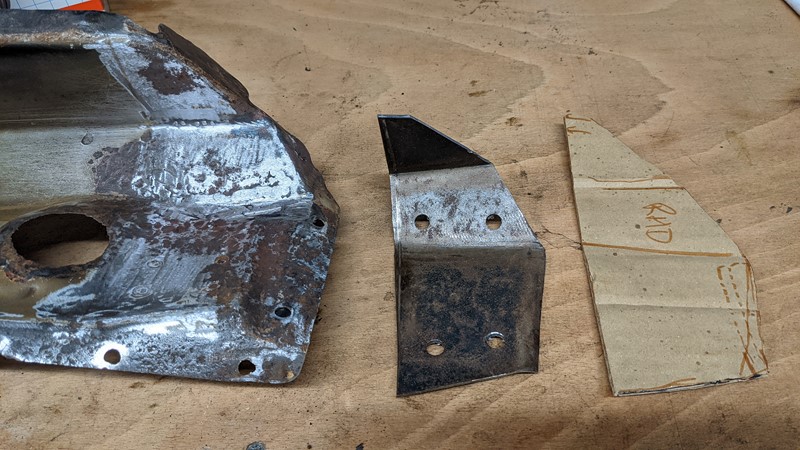
This CAD model is then transferred to a piece of steel and whipped out with a grinder. Some tender loving with a 2lb lump hammer and the same of the a-pillar is copied into the reinforcement panel. The steel is a little thick for the job, but bigger is better right?

The final reinforcement panel sits quite nicely on the back of the a-pillar section. Clamping the panel in place, the assembly is offered back up to the original inner a-pillar to make sure everything still aligns. Finally, the reinforcement panel gets a few holes to allow plug welding to the back of the door hinge and the check brace bracket.
Preparation makes good.
Just how clean I can get the donor metal is entirely limited by the time available. Using a finger sander, I can get all the penetrated weld back flush, but I’ll have to live with some of the metal pickling (dark patches).
The door pillar metal is plenty clean enough to weld to. However, I’m concerned that trying to get back to all clean metal is likely to result in thinning. And this is not the place for thin metal. So I’d rather leave the discolouration than strip back too much metal.
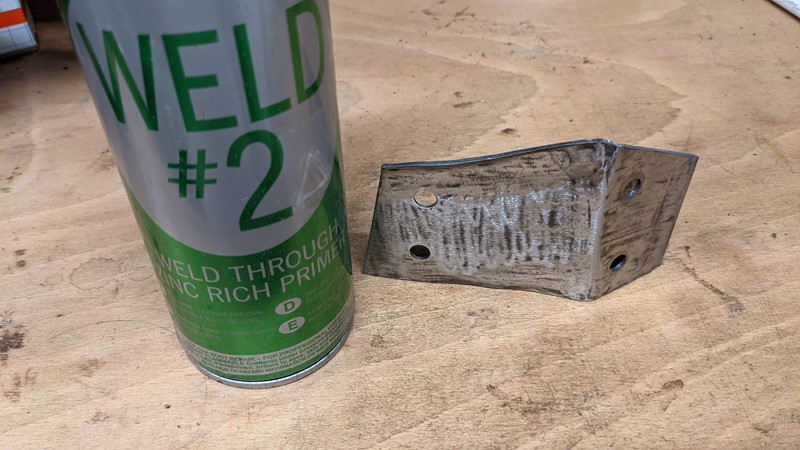
To try and hold off any future rust in this area, I can give it a good coating of a weld through primer. The high zinc content allows rust resistance, with zinc becoming a sacrificial layer, slowing the oxidization of the steel below. It also allows electricity to pass through, which is good for welding.
A few layers are built up and allowed to dry. I’m a little on the fence about how beneficial zinc weld through primer is. Surely it all gets burnt off during the welding process? I’ve never cut a panel back to see, but maybe that’s something I can do in the future.
Grown-ups hot glue
For me, it seems evident that welding is the best way of joining the two pieces of metal. Duct tape, hot glue or even bolts will not be much good. Well, maybe the bolts, but that would be horrendous. The Portamig 215 I have available is more than capable of fusing the edges of the metal panels and creating a solid bond.
With the welder turned up by yet another notch, I can ensure the two pieces are stuck for life. Once again, this is a slow process. Starting with a few tacks and then building up to a continuously welded seam. Plenty of cooling air after each spot of welding helps to avoid warping.
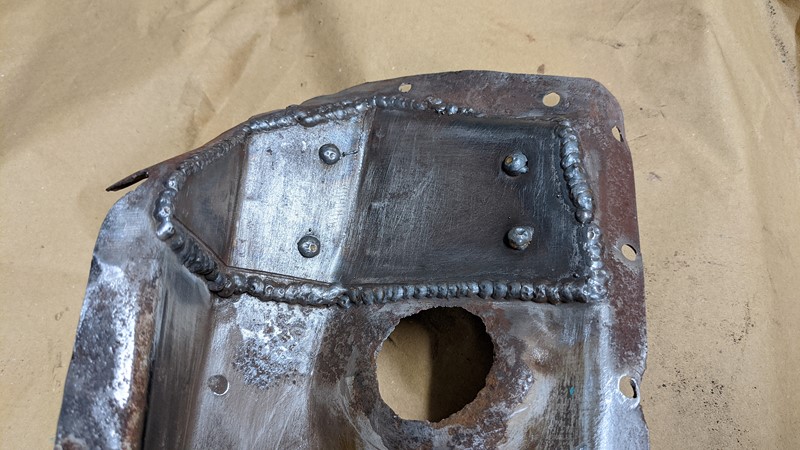
After what feels like forever, the entire edge of the reinforcement section is seam welded to the a-pillar. Unfortunately, the final weld is not as neat as I might like, but that’s what I get for rushing. At least it can’t be seen once the repair panel is in place.
From the outside, some good penetration can be seen, which is very reassuring. The reinforcement should keep the door hinge from ever coming off. Transfering the loads from the small area the bracket is attached to the whole top of the panel should stop any future failure.
Welding the repaired door pillar back to the car
For me, the story of this repair ends here. While I’m happy that the re-welded door hinge bracket won’t fall off, it’s not the finished job. However, the car the part is going to has an upcoming date with the MOT station, and I suspect a door that falls off won’t get a test pass.
I suspect some of the reinforcement panel welds will need to be ground back. They stick out a little, which won’t help with reattachment. Also, when I offer the repaired and reinforced panel to the original inner a-pillar, they align well but don’t sit entirely flush anymore. These are the problems with rushing to meet someone else’s time scale.
However, just 48 hours after I started welding the panel together, it dropped on the door mat of YouTubes Number27. Yeah, the guy with the Ferrari, bought the Flipping Bangers BX, and I supplied some of the parts to get it back on the road.
You can see how Number 27 used the panel in the video below;
It’s a shame that little of the outer A-pillar panel was used, but I agree with the reasoning to only use a small section for the required repair. And that’s one more BX back on the road.
So, if your door hinge is falling off, there is no need to worry. It isn’t a major or complex job to repair and reinforce. But the best bet is to check your hinges now and take preventative measures before the door drops off!
M
NEXT – Removing the A-Pillar
PREV – XPO Donor Panel A-Pillar Repair
Back to Citroen articles
Back to Automotive articles
Amazon Affiliate Links – Things used in this article
BXProject is using Amazon Affiliate Links. It’s a quick way to show you what I have used in this article.
“As an Amazon Associate, I [may] earn from qualifying purchases.”
Since January 2024, Amazon has blocked embedding images, but I think the links are still valuable.

The BX models with a sunroof are the worst for rotting in this area. The four drain tubes are prone to falling off, allowing water to drain behind the pillar.
Btw, the Citroen special tool for door adjustment is a long steel bar with a jaw that locates on the hinge. A bit like a pipe wrench. At all of the dealerships I have worked at, they adjusted door sag using two mechanics to lift the door, bending the area where the hinge attaches to the bodyshell. Same effect as the special tool…
The last BX I had with this problem I replaced the hinges with ones from a BMW E36. These hinges are adjustable, rebuildable and last forever. I have a 200k miles E36 with zero play on the original hinges.
Finally, the BX rear suspension arm bearings are identical to ones on the Fiat Punto. Less than a tenner for an identical kit. Took me about 20 hours of research to confirm.