
At the end of the last article, I’d hit both a milestone and a complete disaster. Finally, all the welding was finished, and XPO was structurally sound after a long time of awaiting its fate. The new metal was primed and ready for paint. All very positive progress. That was until the activator didn’t release in the paint, and it failed to harden. Now it was time for unpainting the A-pillar.
Perfect first time
Back in July 2022, the paint was first laid on the repairs. Although this wasn’t my first time with a rattle can, the finish was spectacular. While there were a couple of marks that could be easily polished out, the surface was immaculate. Not a single run or thin patch of paint.
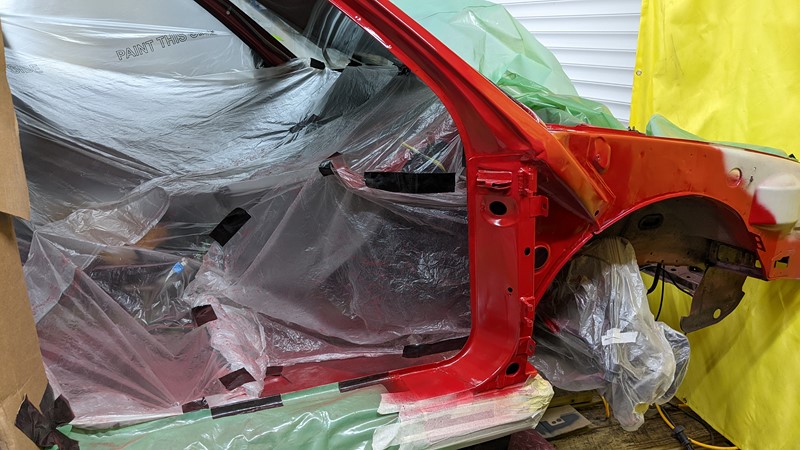
To say I was chuffed with myself at the quality of the finish would be an understatement. That was until I realised the instructions on the can and the manufacturer’s website was utterly wrong. Although it was my first time with a 2K activated spray can, I followed the instructions, which seemed simple enough. Equipped with the correct instructions, I tried them on the now-used aerosol can. As soon as the internal blade turned through 360 degrees, I could feel the activator canister release. Balls.
A few days later, trying not to think about it, I rubbed a cloth soaked with panel wipe over the recently sprayed surfaces. Sure enough, the paint lifted, proving a lack of activator. So that was the decision made for me. I’d have to go back to metal and start again. No point stressing. Just pile into unpainting the A-pillar.
Unpainting the A-pillar
Unpainting the A-pillar was something I’d never expected to do and something I’d never really done before. I hoped it would be relatively straightforward. However, the soft new paint had other ideas. It seemed sensible to start with sanding, but I soon learned this wouldn’t be easy.
Sanding
Taking sandpaper to paint that was not even three days old was painful on its own. Watching the layers and hours of preparation flowing to the floor wasn’t exactly satisfying. Equally annoying was the speed at which the sanding pads filled with the soft paint. Progress was slow, dusty and tiring.
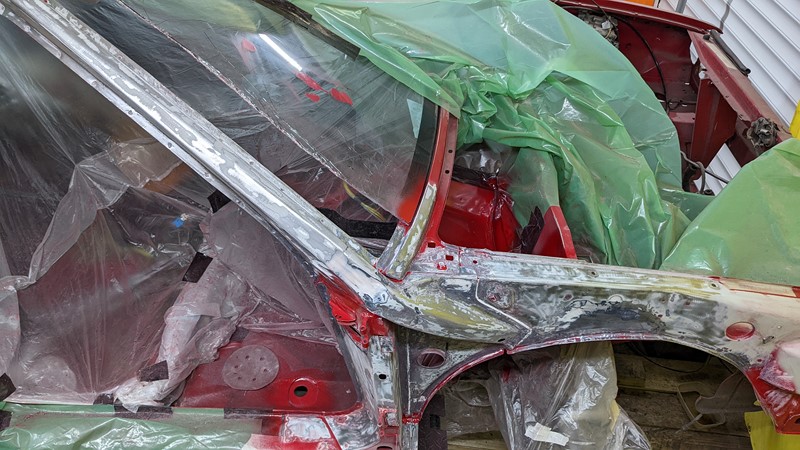
I’d hoped to use 120grit to do the minimum damage to the sub-layers, but I quickly became impatient and broke out the 80grit. While the progress was much quicker, marks appeared on the metal. Only light scratches, but these will be a challenge later. Ultimately, the sanding method simply couldn’t get into the more complicated areas.
Paint Stripper
To try and speed things up, I broke my own rule and picked up some paint stripper. I’ve always tried to avoid paint stripper chemicals, which can be hard to deactivate. The same chemicals that make it good at unpainting the A-pillar will make repainting very difficult if not entirely removed.
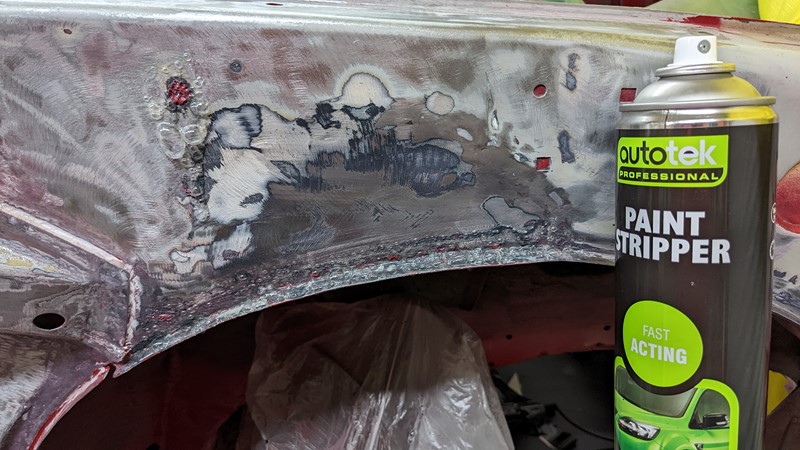
Before flying into the car’s more complicated voids and shapes, I tried the Autotek paint stripper on an easy-to-clean panel and a few small spots of left-behind red paint. I was surprised by how easy and effective the paint stripper was to use. A semi-gel formula allowed for accurate application, while the chemicals removed the paint in seconds. Once the paint was bubbled, it simply wiped off.
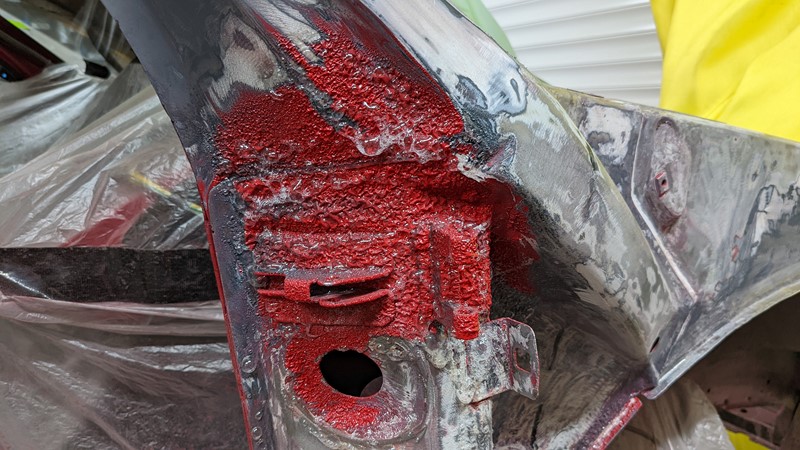
The check strap area was by far the most complicated body part to try and unpaint. The Autotek paint removal spray made light work of lifting the paint in the nooks and crannies. This would have taken hours to try and do by hand with sanding paper.
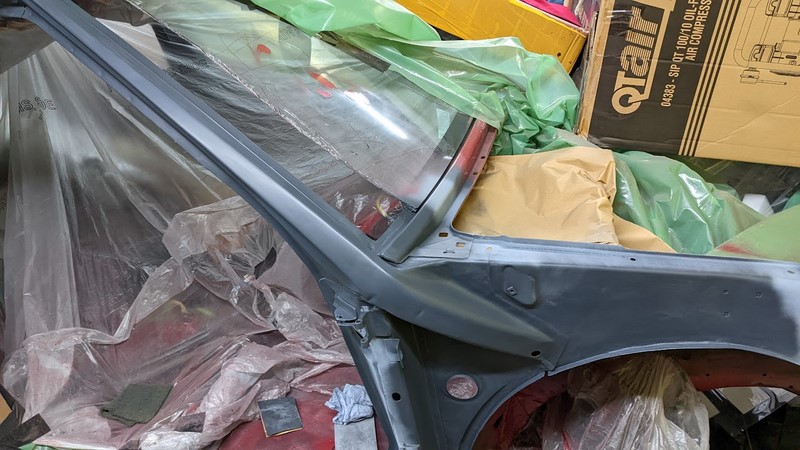
A-Pillar Completely Unpainted
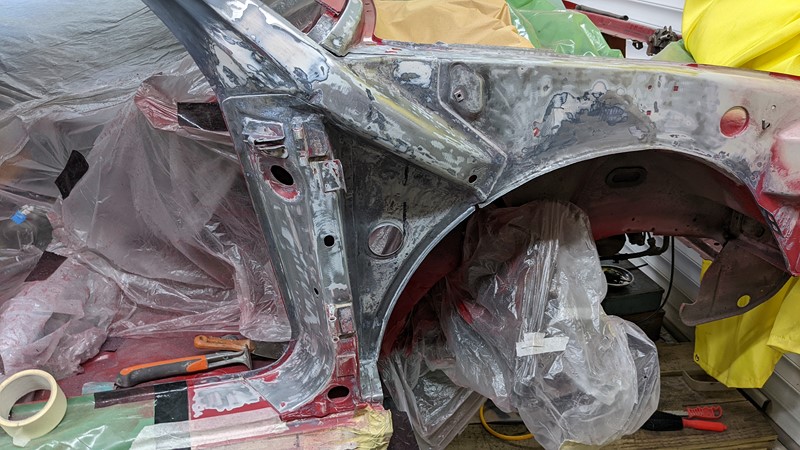
The old paint is slowly removed between the sanding and the Autotek paint removal spray methods. I suspect the tears didn’t help, but a mixture of accepting fate and sheer disappointment got me to the end of this thankless task. The result is a far from attractive sight.
Repainting the A-pillar, again
The lack of hardener in the paint is a miserable learning point that will stay with me to the grave. However, removing the original paint is the more disappointing factor in this ‘adventure’. Despite all the faults and issues, the painting process employed by Citroen in this era of cars was fantastic. So many carefully built-up layers of paint are a lot of why so many BXs are still on UK roads. I had been trying to preserve the original galvanised, primer and paint layers where possible.
Etch primer
Modern paints are useless. There we go. I’ve said it without any expertise. Looking back, I probably should have invested in some 2K primer. However, I’ll stick to the time-proven uPol paint system for the second respray after recent disasters.
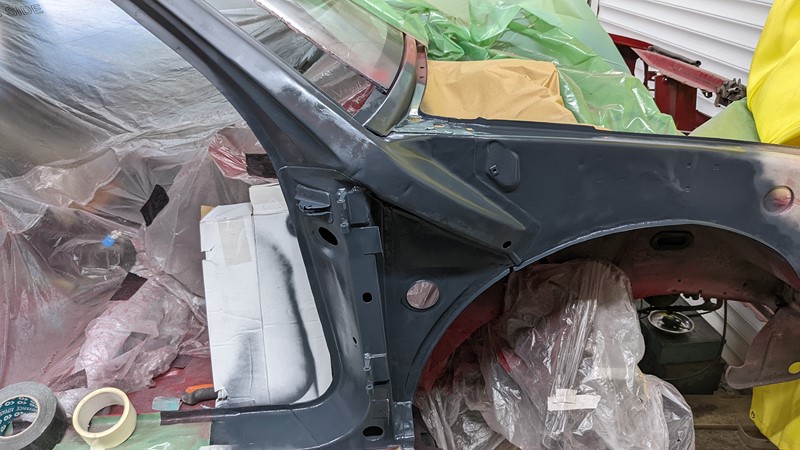
With so much exposed metal, the first step is the etch primer. I get a couple of layers on here to ensure all the nooks and crannies are filled.
High-build primer and filler
Another disappointing aspect of removing the failed paint was removing all the filler. The filler application and sanding were by far the longest stages in the previous attempt at painting.
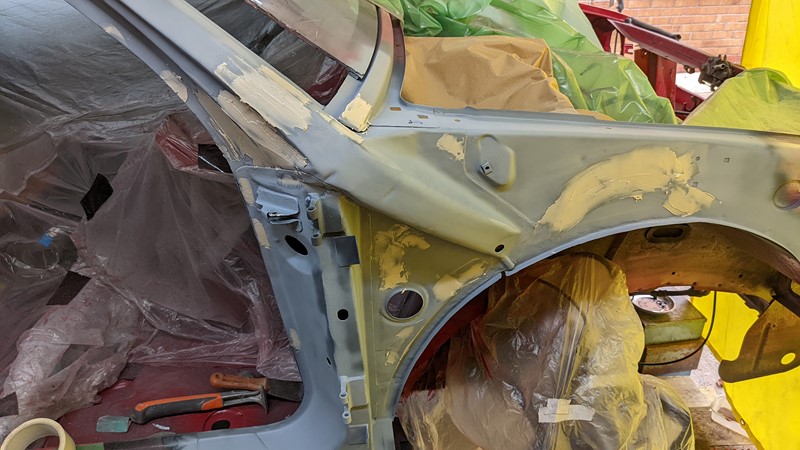
Some filler follows a couple of coats of high-build primer. Despite the advertised 20-minute drying time, I do like to give it a couple of days for the filler to fully cure before sanding. Unfortunately, while waiting for the filler to go off, I very much lost interest in flattening off the P38 once again. This is where projects often die. Such a simple mistake that has set progress back months. Not surprisingly, it takes quite a while to refind the motivation to press on.
To prove how long it takes me to build the emotional strength to continue painting, the filler stage started in August and wasn’t completed until November. Then, between family and a ramp-up in working hours, getting time on the car becomes ever more challenging until the winter months. But like so many things on the XPO project, slowly chipping away at the tasks, and I’m slowly getting to the end.
I won’t spoil the excitement by sharing the result of the second spraying attempt, as a few other jobs have been completed between the painting sessions. So, for now, I’ll sign off and let you imagine the final finish on the car!
M
NEXT – Eps27 – Wheel Arch Repairs
PREV – Eps25 – Painting the A-pillar
Back to Citroen articles
Back to Automotive articles
Amazon Affiliate Links – Things used in this article
BXProject is using Amazon Affiliate Links. It’s a quick way to show you what I have used in this article.
“As an Amazon Associate, I [may] earn from qualifying purchases.”
Since January 2024, Amazon has blocked embedding images, but I think the links are still valuable.

[…] NEXT – Eps28 – A-pillar Painting. Again.PREV – Eps26 – Unpainting the A-pillar […]
Fantastic build log, really enjoyable to read and so much better than watching crap on YouTube. I 100% recommend epoxy primer though!