
The last few XPO articles have focused on the A-pillar painting and then unpainting. However, there are a handful of other jobs around the car that have been completed but not discussed. The approaches I’ve used to tackle these typical jobs might be helpful to others in the future, so let’s cover them now. This article will look at wheel arch repairs to the fitch panel and wing bracket.
The Wheel Arch Flitch Panel
What is a flitch?
My first task in this article was to figure out what this panel is actually called. I would immediately call it a ‘flitch panel’ with little to no idea why. Opening up Google and I find that ‘flitch’ is Old English for the side of a pig. A ‘flitch panel’ is there for the panel on the side of the engine bay. Obviously. I’m a little disappointed it has nothing to do with Harry Potter.
Well, the area of rot we will tackle is to one side of the engine bay. I guess the panel makes up part of the inner wheel arch, but I’m going to stick with the flitch panel naming.
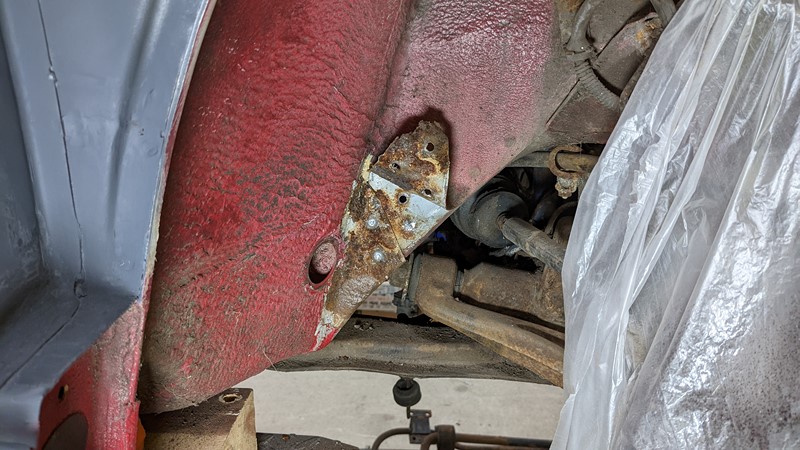
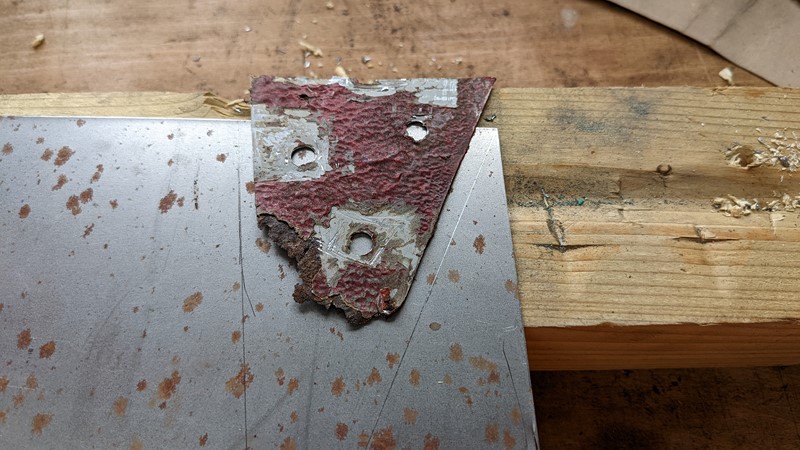
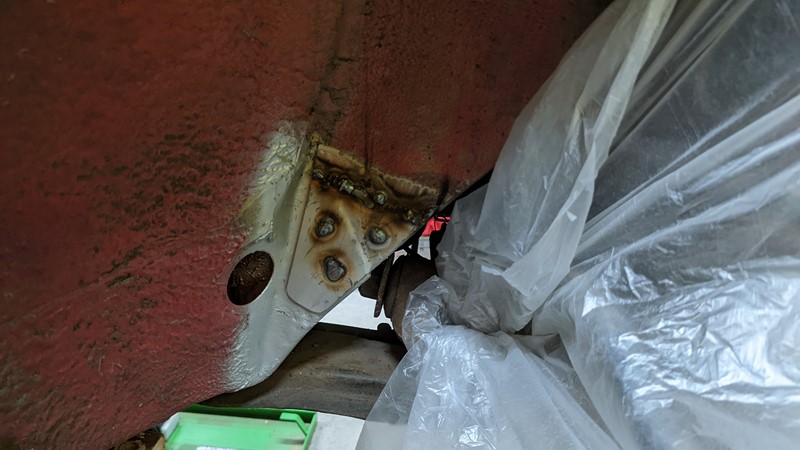
The picture above finally gets to the point of what on earth I’m talking about. This triangular piece of metal is spot-welded over multiple layers and creates an excellent water trap. I’ve seen rot here on quite a few BX’s. The rot initially presents as an oval bubble vaguely following that sloped inner panel.
Interestingly, XPO didn’t present too badly here. The bubble in the paint was maybe 10mm. However, given all the other going ons, I suspected this would only be worse underneath. And it was! Four spot welds were removed, and the flitch was peeled back to expose the real rust.
Tackling the rust under the flitch panel
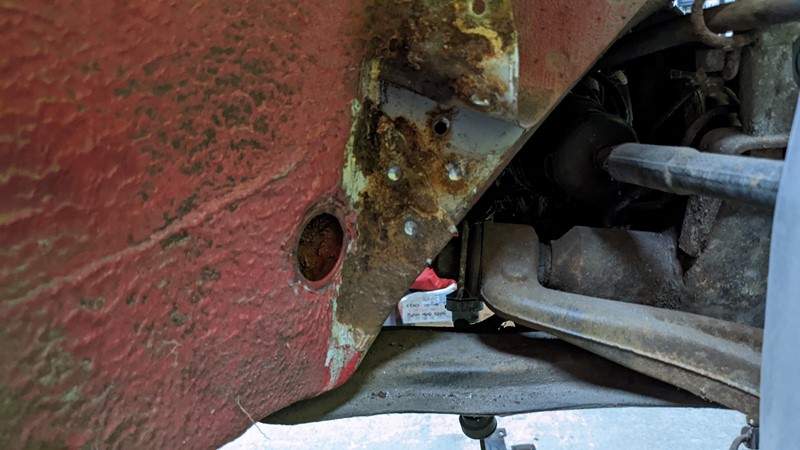
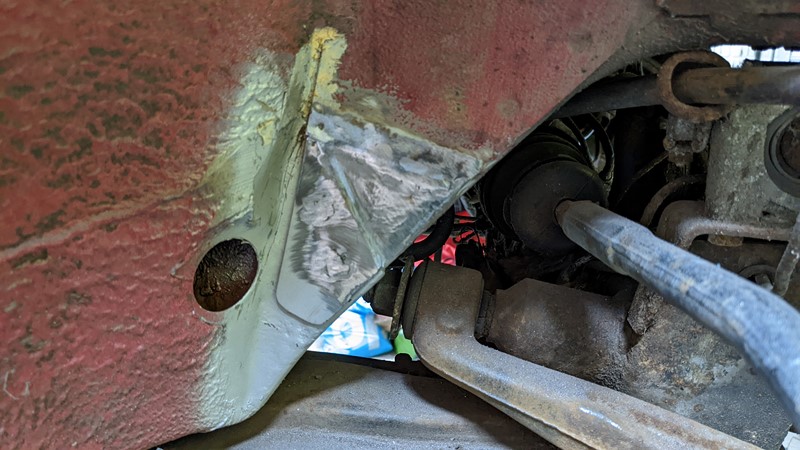
Out with a combination of the sanding finger and drill-mounted wire brush, the layers of metal under the fitch panel are quickly cleaned back. I think I’ve caught this just in time. Once cleaned, the underlying metal is solid and remarkably unpitted.
This is another one of those jobs that could be quickly hidden with a smattering of stone chip spray and forgotten about with limited impact. I don’t really know why Citroen continued the panel all the way down the triangle other than to look neat. The bottom of the flitch panel has no structural merit. Nevertheless, it will be restored back to how it should be!
Replacing the rotten flitch panel end
Cutting out a blank flitch tip
In an almost out-of-body experience, I didn’t use CAD to make up a template for the damaged panel. I feel a little bit dirty just confessing that! And despite the simple appearance, there is a small change I want to make to the design.
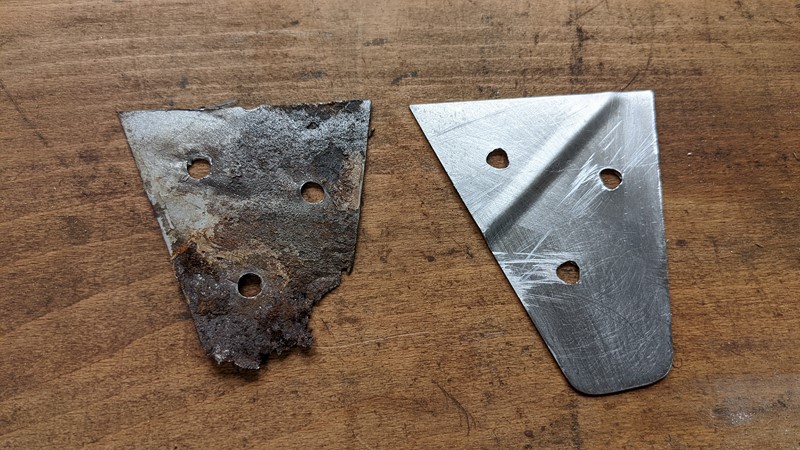
Instead of CAD, there was just enough of the old piece of panel left to use as a template. At this point, the repair panel is deliberately oversized for reasons that will become clear. I’ve followed the original sides of the triangular panel but run them to the tip of the triangle, rather than cut them short.
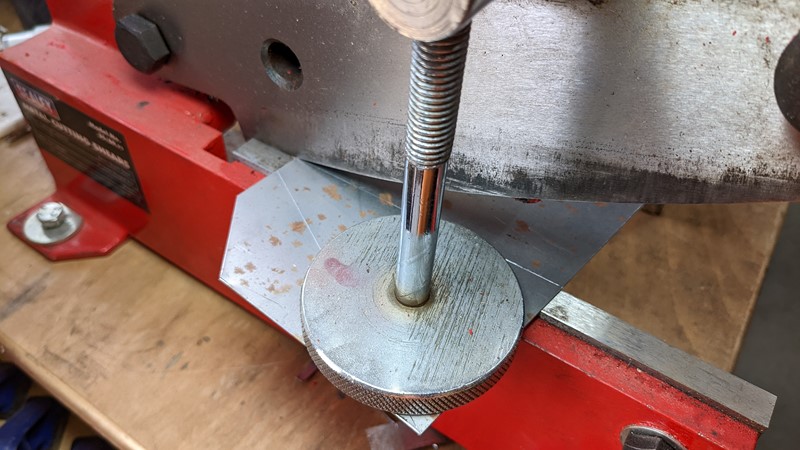
The bench shear is engaged to get some beautiful straight lines. And if I am really lucky, the straight lines should match the original panel dimensions!
Panel beating the groove out of the flitch.
After drilling out the spot welds and folding the flitch end out of the way, then cutting back to good metal the original material was a tad warped! Using a hammer and a piece of heavy plate, I beat the panel back flat again. So there may or may not have orignally been a crease in the panel to stagger over the different layers underneath the flitch panel.
Something that was clear to me, was that the step in the flitch panel tip was needed to get the best fit. And this is why the replacement piece was made slightly too long. Sure, this crease would only shorten the panel by one, maybe two millimetres, but by leaving it long and trimming it to fit, I can get a near-perfect job.
Welding in the flitch repair panel
The next step is, predictably, to prep the panels for welding.
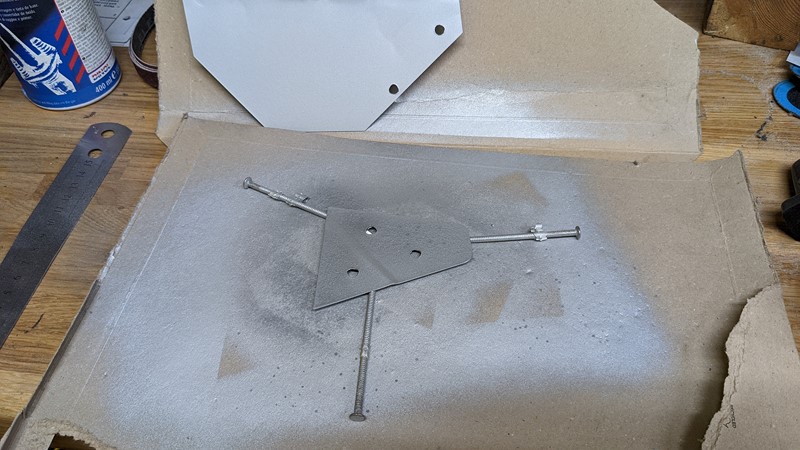
Both the repair and the original body get a heavy coating of etch primer. These ribbed nails, which were left over from the mega-shed build, have proven to be super useful for holding painted parts while they dry.
The panel is welded into place. First, a couple of tacks on the joint hold the old and new flitch sections together. Then the holes are plug welded to replace the original spot welds. Right most first, while the panel is held flush with a big pokey stick. Then the upper, followed by lower spot welds, are remade.
Finishing off the flitch panel repair.
The rest of the repair is a bit samey (especially if you’ve read the other 26 articles on the XPO project. I’ll try to stick more to pictures and fewer words. Hell, I bet most people just skim the pictures, save for those cherished few.
Grindy, sandy. Smoothy, pretty.
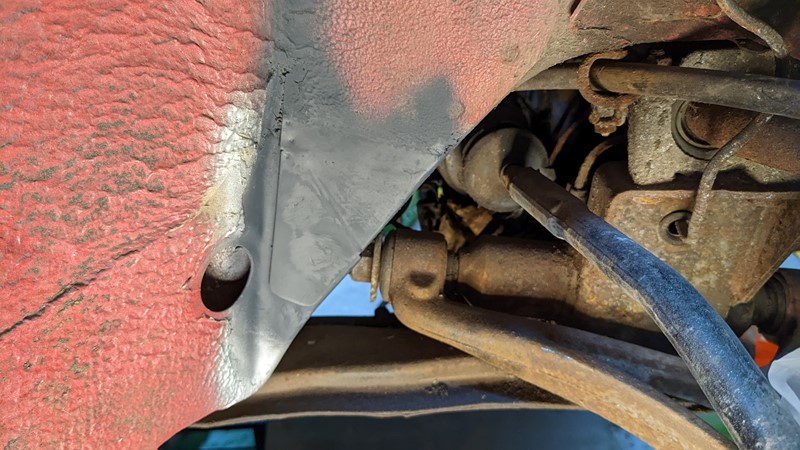
Paint follows paint, follows paint.
Later, the joins are covered with tiger seal on two-ish edges. Some more primer, basecost and topcoat finally finish with some stone chip should see the repair outlast the car. I’ll come back to the stone chip.
Wing Bracket Repair
If you’ve ever taken the wings of a Citroen BX, you’ll probably know they are a pig to do. There is a single bolt on the leading edge which attracts all the filth that misses the wheel arch liner. Of the many BXs I’ve taken apart, these are always a mess. Either the bolt and nut have fused into one, or equally often, the wing bracket has dissolved off the car. In fact, it is so common an issue I used to have a special tool for the job in my scrap yard toolbox, back in the days of scrap yards that could be visited.
Making a wing bracket pattern with CAD
On XPO, the driver-side bracket is completely missing from the vehicle, which provided an extra challenge. Fortunately, the body side bracket is mirrored from one side of the car to the other.
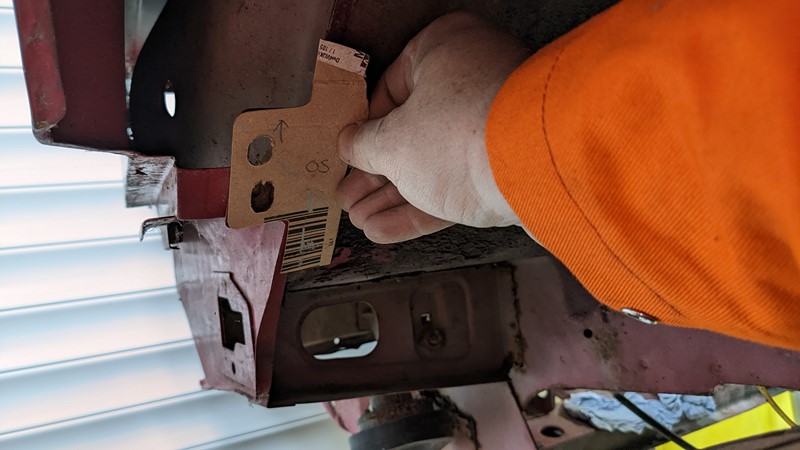
With some big felt tips and yet another Amazon box, I can quickly make up a CAD model of a near-side bracket and flip it over to become the off-side. Trace this onto some metal, cut it out, and I’ve got a new near side . . . fuck it. Try again. Trace the other side onto some metal, cut it out, and I’ve got a new off-side bracket.
Getting the bracket in the right place.
I didn’t get many pictures of the cutting out, drilling and profiling of the repair piece. Probably because I was so ecstatic about making it twice. And no, you can’t just flip the near-side over to make the offside because of the damn holes. Lesson learned.
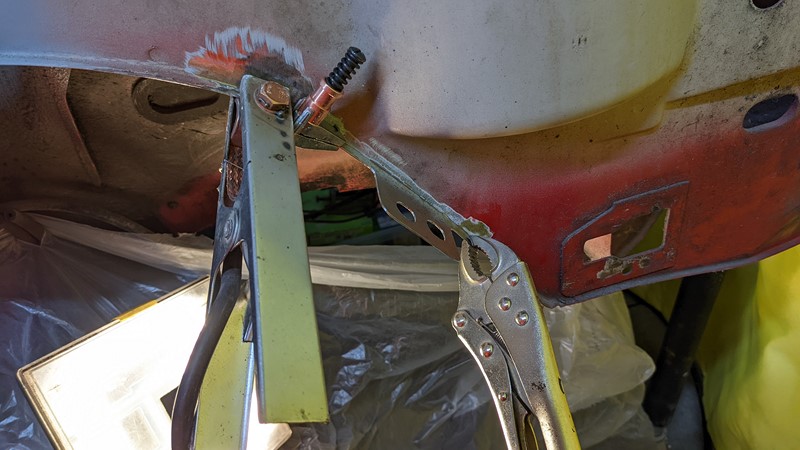
To get the repair piece roughly in the right place, I measured from the bottom of the near side panel to the bottom edge of the wing bracket to get them in just the right place. There’s quite a lot of play between the bracket on the body and the wing, so I only need to be within a few mm.
Sticking the new wing arch bracket on.
Lots of very thin metal and a curve to contend with make this a slow and tricky repair. Patience and plenty of cooling are the only way to get it right.
I’ve tried in the past to just replace the ‘ear’ that sticks out of the lip, didn’t end well. So my preference is to make a repair piece with some of the arch lip to make fixation a little easier. The edge Cleco’s are a godsend here.
Sometime later.
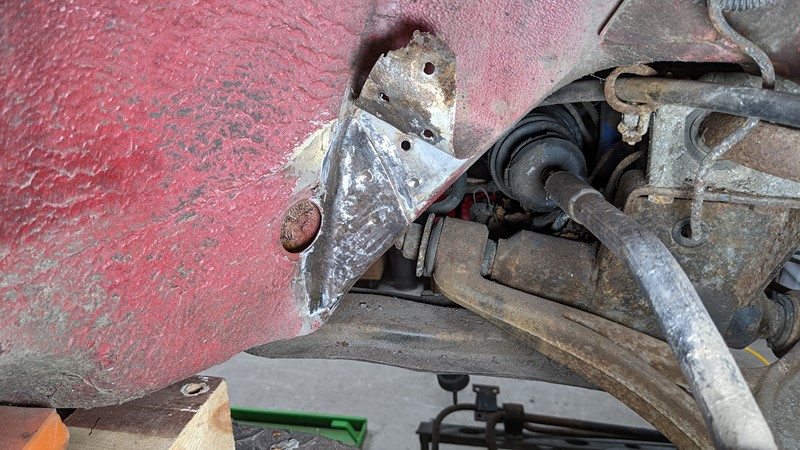
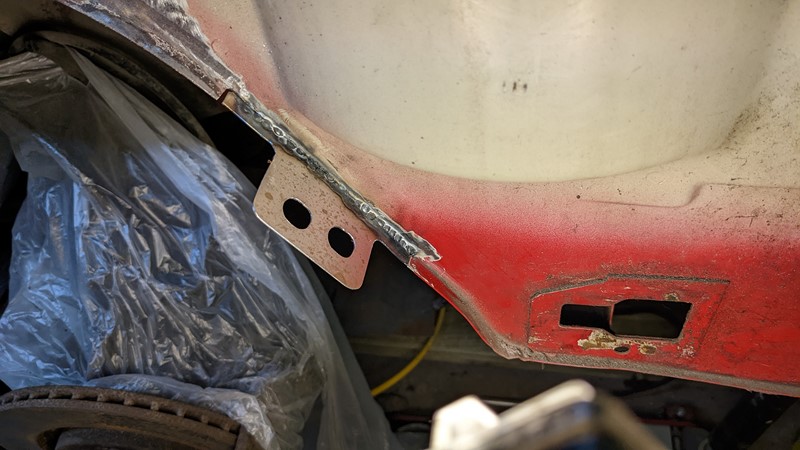
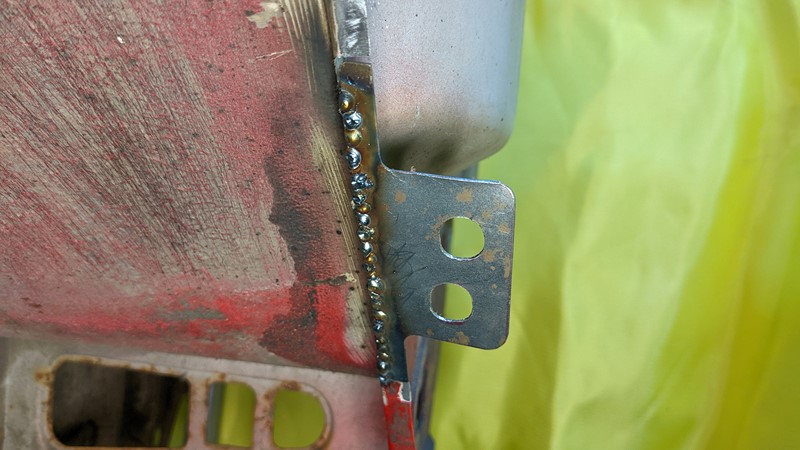
After what feels like a million hours and many tiny little overlapping welds, mostly from the underside, the wing bracket repair panel is finally attached.
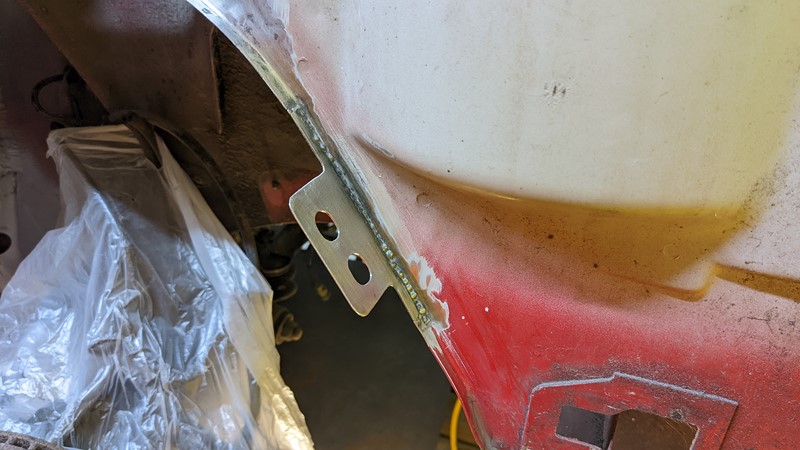
The top side is a lot neater, for the simple reason that it is so had to clean back the welds here. A lot of care goes into making sure the welds in the corner of the lip are neat from above. If it is not obvious from the picture, the scallop in the wing for the LHM reservoir makes access with any abrasive tool rather challenging.
Finishing off the wheel arch
There is only one way to celebrate the completion of all the work in the wheel arch, and that is to break out the stone chip. This really does need to be the very last step in wheel arch repairs. While great at protecting the paint underneath, removal is time consuming and not something you want to do twice.
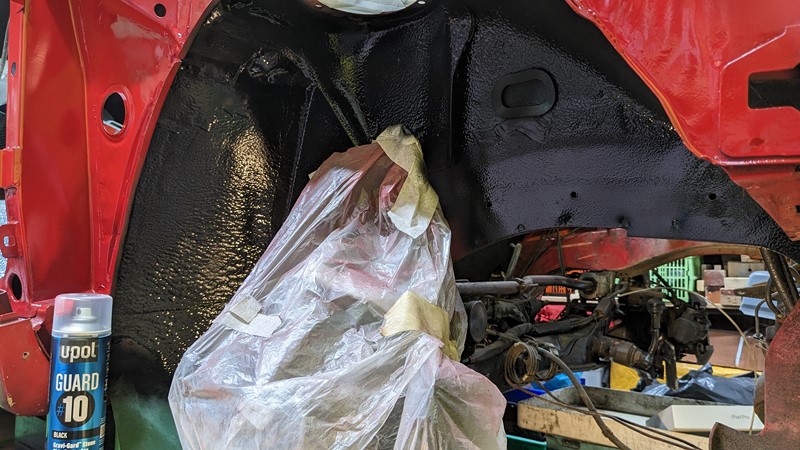
Sticking with the UPOL theme, I’m using ‘UPOL Gravi Guard 10 Black‘ stone chip. This thick, textured, slightly rubberised spray paint is meant to help resist damaged caused by stones hitting the wheel arch. As the name suggests, hitting the paint in the arch causes chips, which allow corrosion to start.
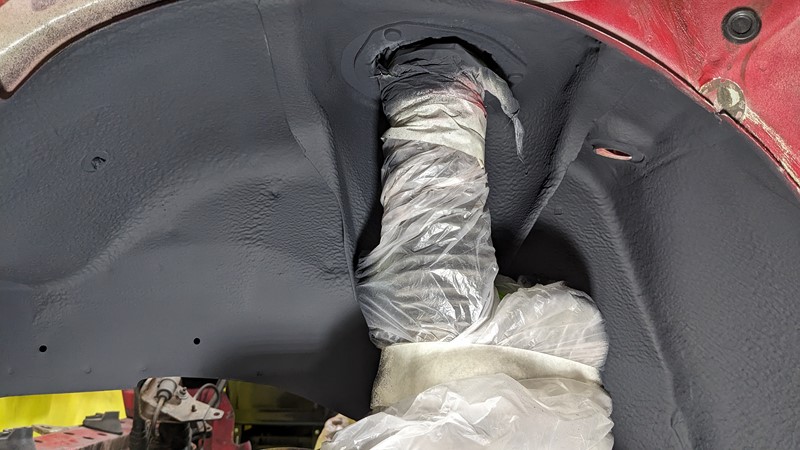
Despite both nearside and offside wheel arches being treated with the same can of UPOL stone chip, the results look incredibly different on camera. But in reality they do look the same. This whole area will also be protected with the plastic wheel arch liner, so there is an argument if this level of protection is even needed. Personally, I’d rather have too much protection than not enough.
Return to painting in the next episode
Well, that’s it for this article. Next time I’ll show you the finished A-pilar painting and try to catch up some more on where the car currently stands. There is a big push to get the car finished this summer, ideally for the national, so fewer articles, and more work are the current rule of thumb.
Until next time
M
NEXT – Eps28 – A-pillar Painting. Again.
PREV – Eps26 – Unpainting the A-pillar
Back to Citroen articles
Back to Automotive articles
Amazon Affiliate Links – Things used in this article
BXProject is using Amazon Affiliate Links. It’s a quick way to show you what I have used in this article.
“As an Amazon Associate, I [may] earn from qualifying purchases.”
Since January 2024, Amazon has blocked embedding images, but I think the links are still valuable.
[…] NEXT – Eps27 – Wheel Arch RepairsPREV – Eps25 – Painting the A-pillar […]
[…] NEXT – Eps29PREV – Eps27 Wheel Arch Repairs […]