
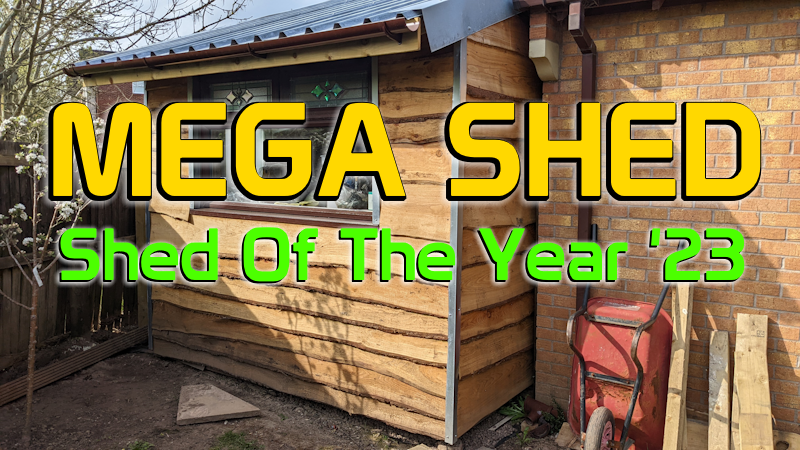
It’s more than a year since the Mega Shed construction was completed, and I still love it. I would estimate that the Mega Shed is 95% complete. There is still a little trim I haven’t got around to fitting, but the structure is complete, watertight and well-used. I’ve already completed a long list of projects in the shed, so I’d call it a job well done.
I missed the entry cut-off for the ubiquitous “Shed Of The Year” 2022. I’ve loved the nature of the competition since first discovering it through Colin Furze’s YouTube channel. This year, I managed to get the Mega Shed entered into SOTY ’23, I made a mess of the entry, but that’s not the point. The motive behind writing up the Mega Shed build is entirely about encouraging others to build.
The original article series runs to a total of thirteen episodes. Some of the articles get into a lot of detail and aren’t great for a quick overview. So, for the benefit of Sheddies, hopefully, this will be a quick, easy read to inspire you on your own Mega Shed adventure. Each section has a link to the original article, in case you need more detail.
Mega Shed – Part 1: Designing the Shed
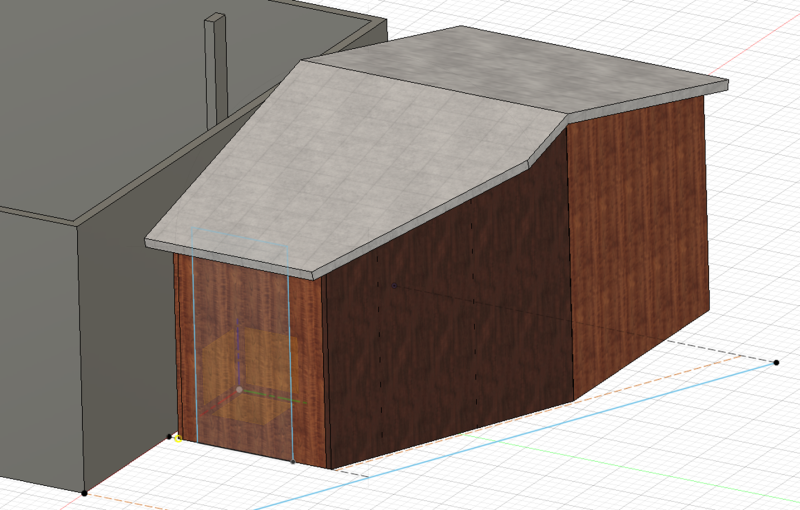
The site offers something of a challenge. It’s behind a standard double garage, but the plot itself is triangular. I went through a few different designs, including a strange L-shaped monster, but I ultimately came up with this. The structure is essentially a timber frame, as that’s what I have access to and have the most experience with. I figure this arrangement will be easier for me to make the shed airtight and, hopefully, warmer.
Mega Shed – Part 2: Clearing the Site
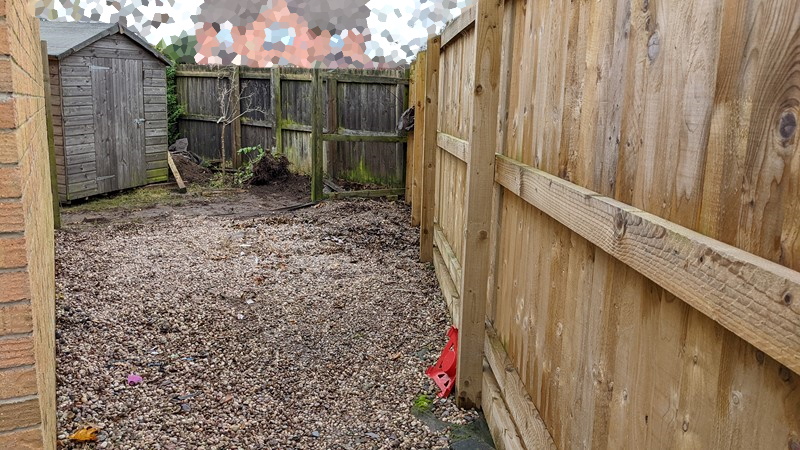
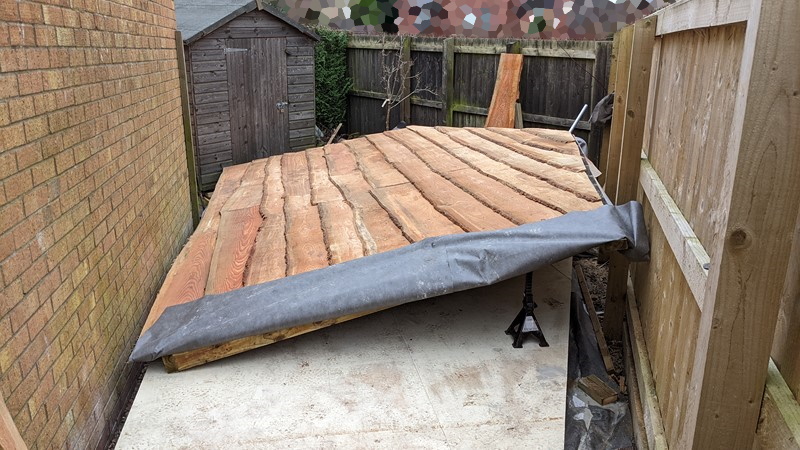
As with so many shed projects, one of the first steps is the clearing of the site. As is often the way, there was already a shed in the space where the mega shed would eventually be. And as you might expect, it was a shed full of ‘stuff. I spent a whole day clearing the shed out and moving it out of the way. With limited space elsewhere, I couldn’t dismantle the shed just yet as it needed to be repacked. And as I was on my own, there was only so far I could drag and push the old shed out of the way.
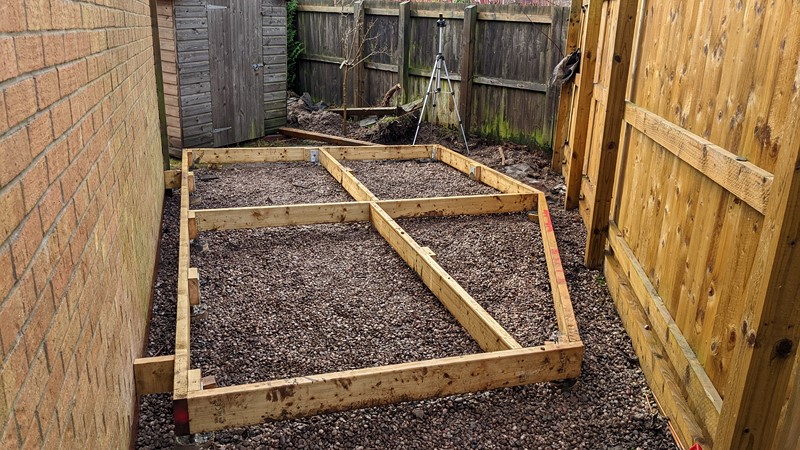
Mega Shed – Part 3: Groundwork, Frame and Piers
Starting the build in the middle of winter should have created more challenges, but other than a bit of rain and frost, I seemed to get away with it. For the base, I used concrete pillars to support a heavy-duty wooden frame. Without a doubt, this was the most enjoyable part of the build for me. Finally, getting on with it after years of procrastinating is brilliant. The foundations are critical for a successful build, and I’m quite satisfied with this start.
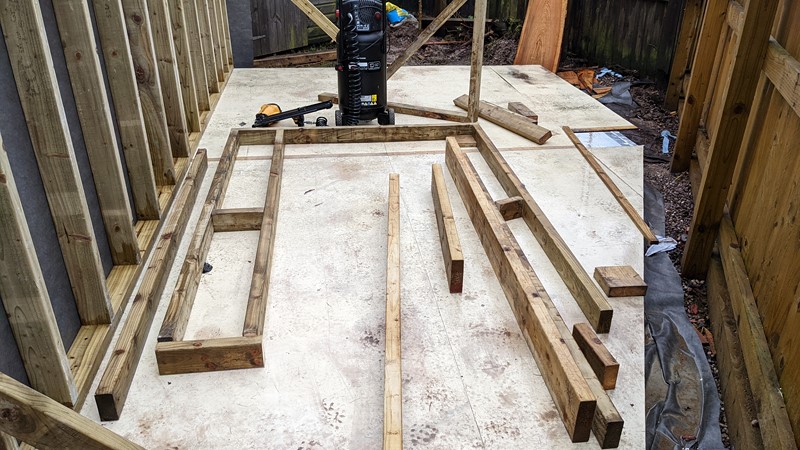
Mega Shed – Part 4: Building the Base
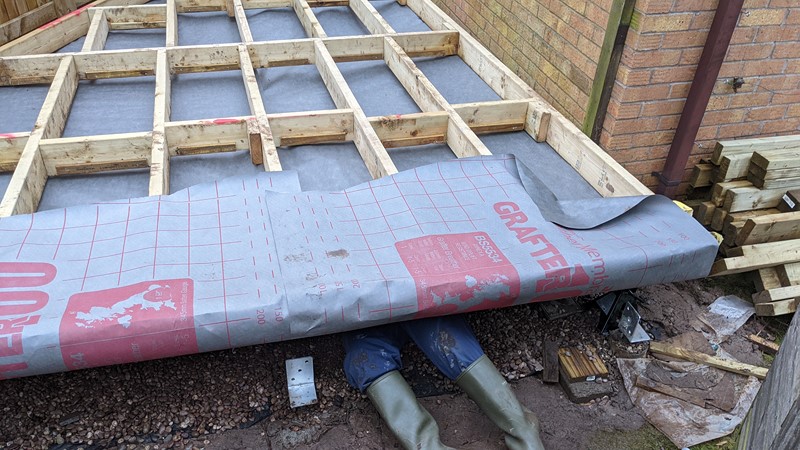
The next stage of the Mega Shed becomes a little more complicated and feels slow. Building off the frame used to set the foundations, the building of the base begins. First, all the mains go in with a combination of nails and screws. Then the noggins and ledges go on. The ledges will hold the Kingspan insulation panels closer to the floor. Finally, the breathable membrane goes onto the underside of the frame. I’m sure there was an easier way to do this, but the triangular shape of the site didn’t help.
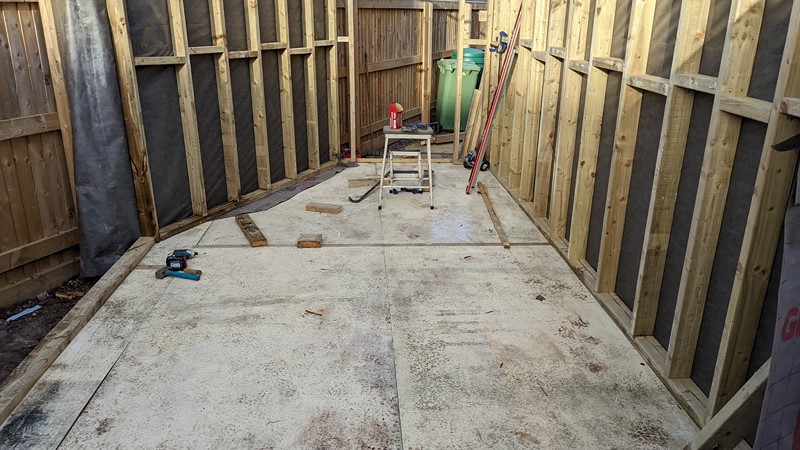
Mega Shed – Part 5: Insulation and Subfloor
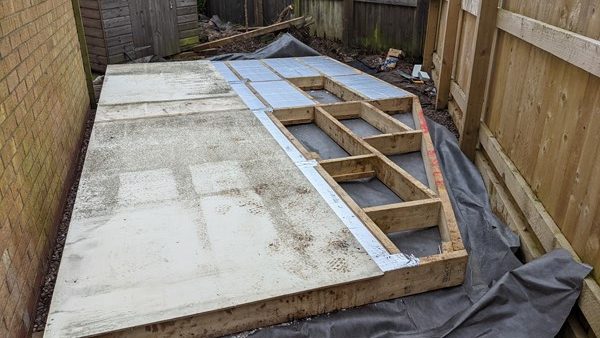
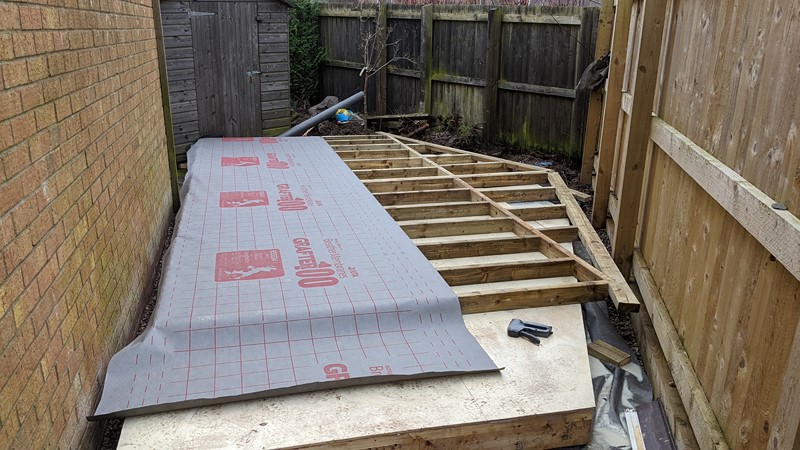
Once the frame for the base was complete and bolted onto the floor piles, work started to speed up. The insulation boards were fitted into the gaps and generally went in nice and tight. As the base of the shed is completely off the ground, I wanted to get this layer as airtight as possible. A little expanding foam and foil tape was used to get an airtight seal. Finally, the subfloor was laid. These recycled ply sheets give a platform to build from, but are a little thin to be the final flooring.
Mega Shed – Part 6: Framing the Long Wall
I love framing. This is probably why the Mega Shed design is made of framed panels. Borrowing a nail gun certainly helped, and keeping the panels as symmetrical as possible also helped. Because the long wall will be just 100mm from the existing garage brick wall, it has to be completed before raising. In retrospect, I could have built it in two panels. All that 2×4″ wet timber gets very heavy very quickly!
Mega Shed – Part 7: Cladding the Long Wall
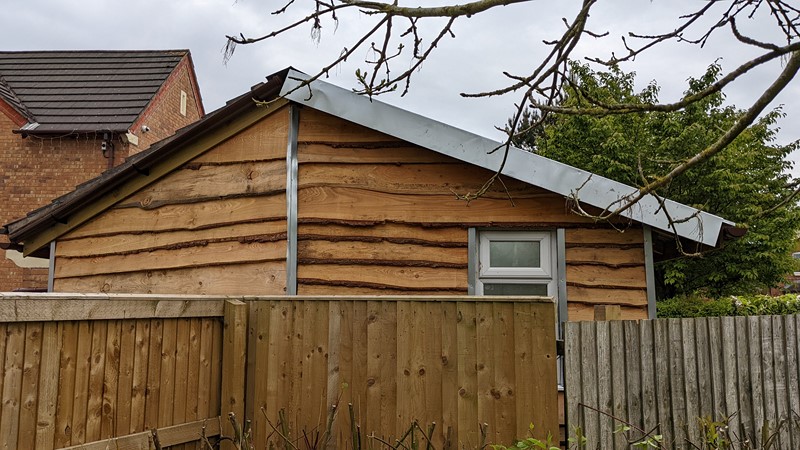
And if the frame alone is heavy, the weight only climbs as the cladding goes on. The outer surface of the shed is finished in nominally 18″ Larch. I’ve never used such big panels for cladding, and on my own, they are quite a challenge to handle. That said, I’m more than happy with the final finish. It’s just a shame that it will be hidden and never seen. Getting the panel vertical is quite a challenge, but fortunately, hosting the family for Christmas provided many helping hands.
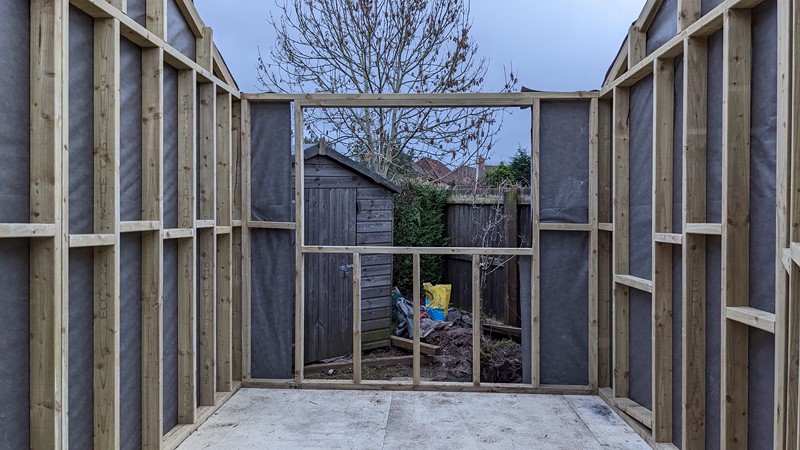
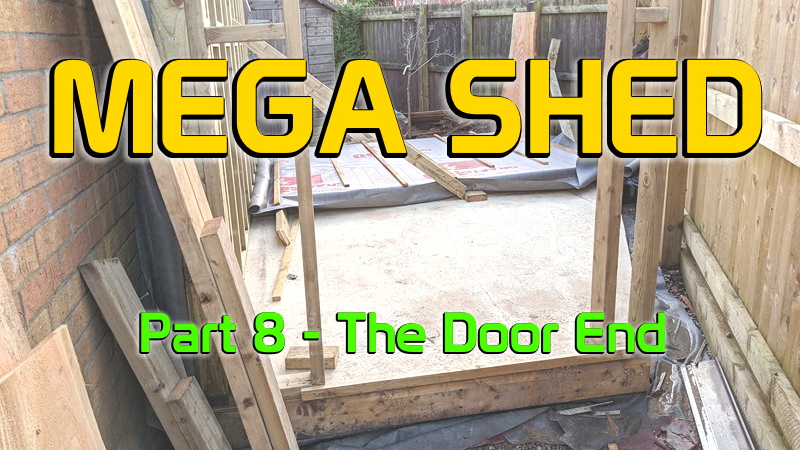
Mega Shed – Part 8: The Door End
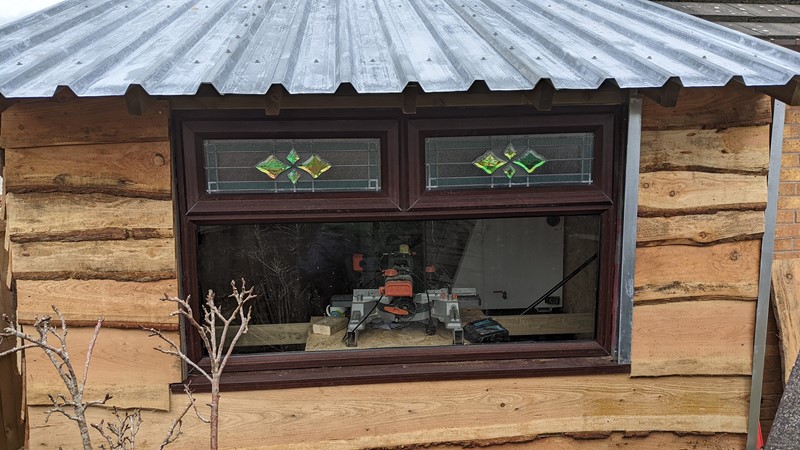
Spurred on by getting the first wall panel in place, I jump straight onto the remaining panels. As the door end is the narrowest point on the shed, it gets assembled next. I managed to source some second-hand double glazing for doors and windows, so the door frame is sized to fit the £20 double-glazed door. While it might have a little damage, I couldn’t pass the door up at that price.
Mega Shed – Part 9: The Fence Wall
The third section of the wall to go up is along the fence line, which isn’t residential on the other side. I won’t be able to clad this wall once erected, so again, the lower half has to be lined with larch before it is raised. I can at least raise this panel on my own, with a little help from a walking post. I’m surprised at how much getting this one panel on provided motivation. After much planning and a few weeks of part-time building, the pile of wood started to feel like a building.
Mega Shed – Part 10: The Final Wall Sections
Pretty quickly, the last few sections of the walls go up. The last two sections of the wall follow the same process but need a little thought to allow for windows and the change of angle as the shed goes from square to tapered. It was somewhere around now that engagement with the locals started to increase. There’s a public footpath at the far end of the shed, and through the positive comments, I picked up on a little shed envy!
Mega Shed – Part 11: The Roof Structure
The roof was by far the most mind-bending piece of the shed puzzle. While one-half of the roof is lovely and square, the door end of the shed is tapered to match the fence line. I’ve often referred to the Mega Shed as a triangular shed, but trying to do the roof makes me realise its a triangle on a triangle on a triangle. ARGH!
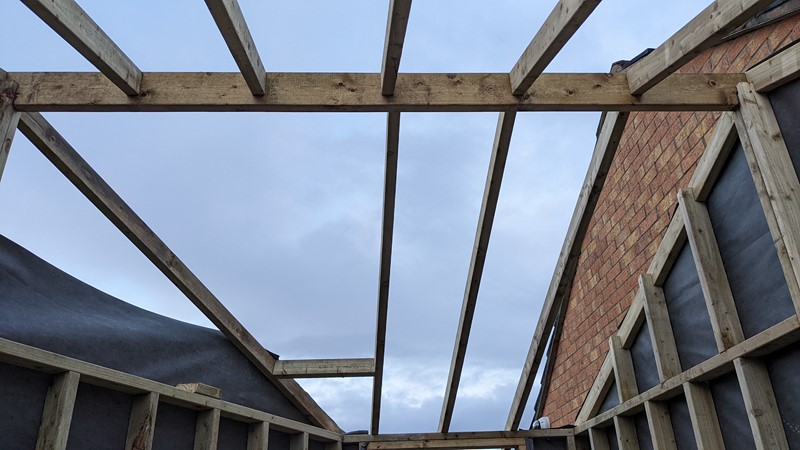
The solution to the challenge was simply to break the structure down into simple elements. Starting with the rectangle up to the door, then the twisted rafter. Building up the framing to the twisted rafter, then extending the fence wall up to the twisted rafter.
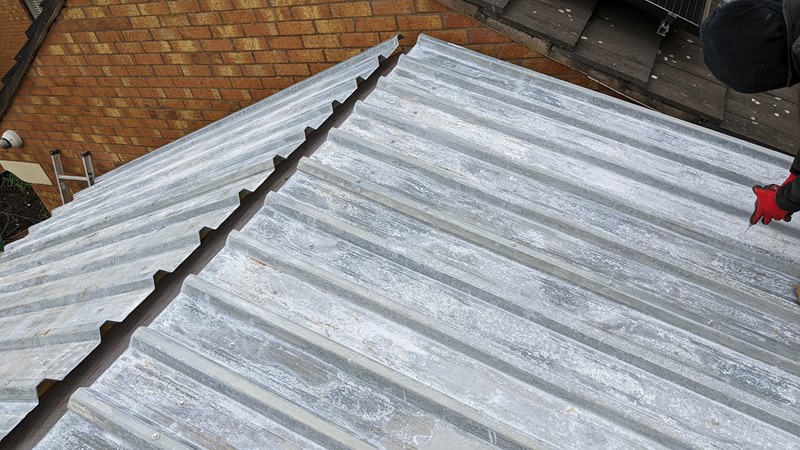
I must say, I was very happy with the end result. The galv sheets against the larch cladding give a very rustic/farm-spec finish. Although the galv sheets start a bit bright and shiny, they will soon weather down and stand out a lot less.
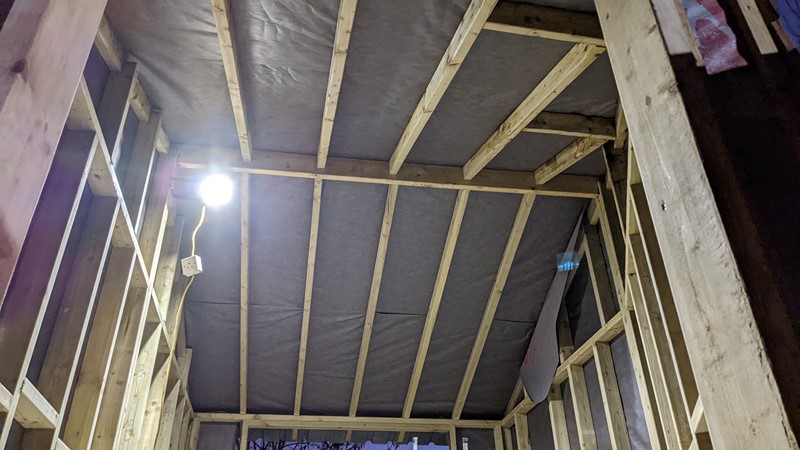
From the inside, there is obviously more work to finish off the roof frame from the underside, but I can now work in the dry as the rain starts to fall.
Mega Shed – Part 12: The Interior Installation
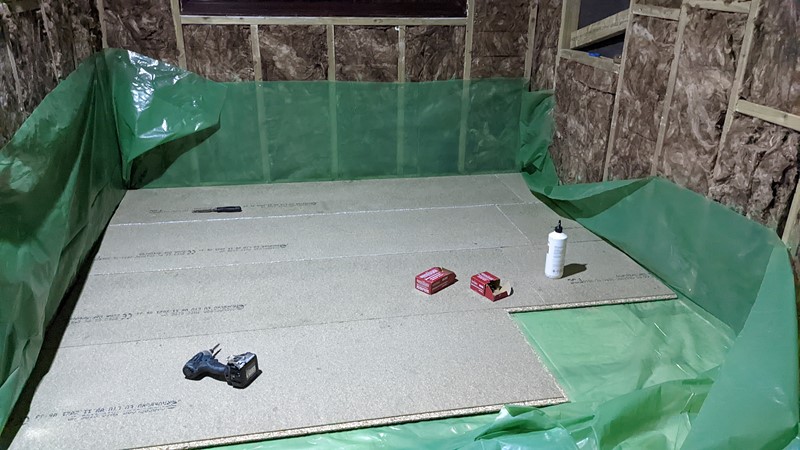
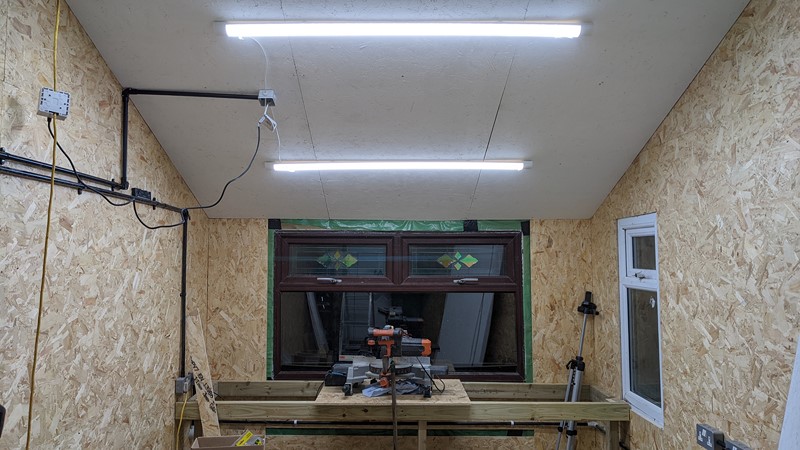
The recycled UPVC double glazing goes in, and the building quickly becomes weatherproof. The Knauf space blanket provides over 100mm of insulation over the whole shed. The vapour barrier finishes the air-tight seal on the inside (with some wide tape), and finally, the 22mm chipboard floor can go down.
The interior is finished with some 10mm OSB. I deliberated for some time over the finish. In a perfect world, plasterboard would be warmer and absorb more sound, but I didn’t fancy the environmental impact. I’m also much better with timber than plasterboard. The interior comes together within a week, and the space is already usable.
Mega Shed – Part 13: Exterior Finishing
Sometimes I look back and wonder if I was overly optimistic about the ability of the breathable membrane to hold out the weather before the cladding went on, but I got away with it. The exterior cladding didn’t get finished until the interior was completed. The corners are one place the design was a little unplanned. The galv cladding that went on as an afterthought is okay, but far from perfect.
The guttering was also a bit of a challenge. Because of the multiple angles, I needed to run the downpipes in a round pipe, but there was a UK-wide shortage of joints and clips. I got there in the end, though.
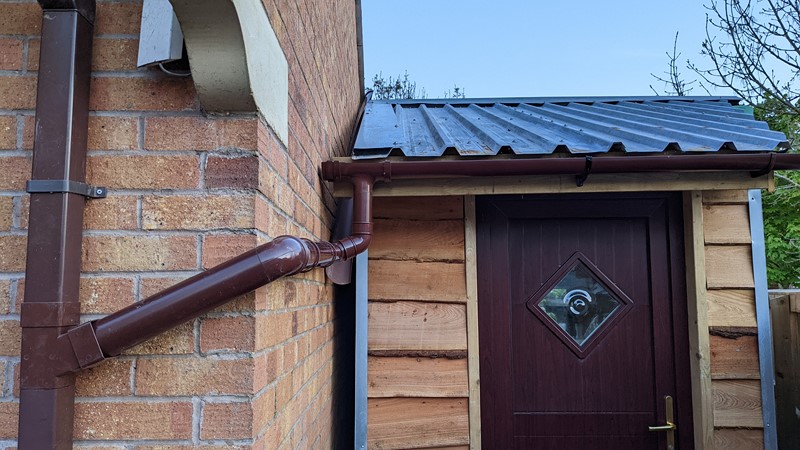
The triangular roof edge also needed some guttering. This was surprisingly challenging as the gutter is so steep, and water flow builds up a lot of speed. The first attempt at fitting this piece of drainage resulted in the rainwater completely missing the gutter over the door sending water everywhere. Some tuning and now most of the water goes into the drain.
One Year (and a bit) of the Mega Shed
And that’s pretty much where the shed building finished. A few bits of interior trim have been added, along with some heating. The roof edge gutter is still missing the capping. But after more than a year, some horrendous weather and a few seasons under its belt, the shed is still standing. There have been no internal leaks. No birds nest in the eaves, and no signs of animals living under the shed (yet).
Compared to the cost of buying something lightweight and uninsulated, or getting a professional building company in, this has been a bargain shed. More importantly, I take a lot of pride in having built it myself, with help from a few friends. I guess the best thing is that I have plenty of space for projects, both work and personal. As a place to work, the Mega Shed is warm and comfortable.
I hope you’ve enjoyed this summary of the Mega Shed project. Feel free to browse the longer write-up, starting with episode one.
Mega Shed: Part 1 – Designing the Shed
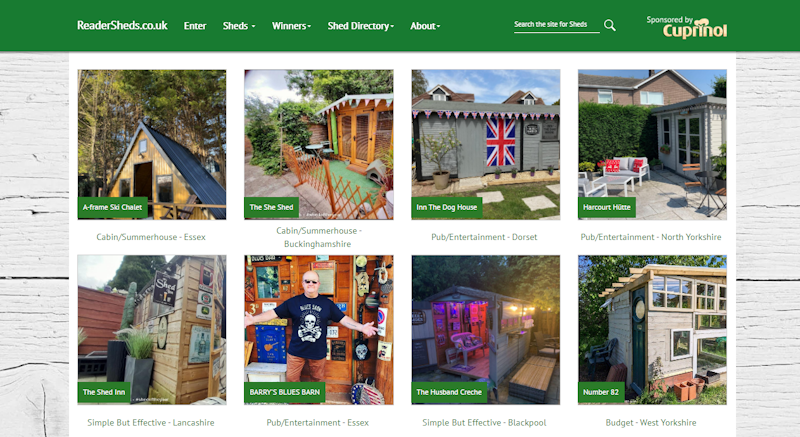
And don’t forget to check the Shed of the Year website for some amazingly inspiring shed builds! The orchestrator of the competition, ‘Head Sheddie’ and all-around passionate shed lover @UncleWilco has created an amazing place to explore the plentiful and varied world of the shed!
M
NEXT – Mega Shed – Part 1: Designing the shed
PREV – Mega Shed – Part 13: Exterior Finishing
Back to Workshop Articles
Return to Home
Amazon Affiliate Links – Things used in this article
BXProject is using Amazon Affiliate Links. It’s a quick way to show you what I have used in this article.
“As an Amazon Associate, I [may] earn from qualifying purchases.”
Since January 2024, Amazon has blocked embedding images, but I think the links are still valuable.
Makes my fence panel/plastic roofed garage extension/workshop look cheap – well it was very cheap actually : )
That was a great project and well thought out and executed – your shed not my shack.