
While it was mid-Christmas when the first wall went up, I’ve been rather excited about the Mega Shed between overeating and watching awful telly. I had to hold back until a week off from work to get cracking again. The next bit to tackle was one of the critical parts of the design, the door end.
Finding a door
The shed’s dimensions are set around three things, the shape of the plot, the length of timbers available and the height of the door. The basic wall and thus the eaves height (where roof and wall timbers meet) is set entirely by the door!
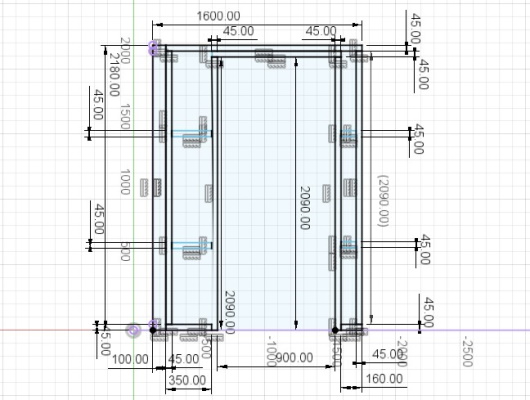
To get the maximum insulation and weatherproofing, I opted pretty early in the design to use a pre-owned UPVC door. In the UK, UPVC doors (in their frames) are pretty reliably 209cm tall. That’s like 82 and 3/16th of an inch, and I have no idea why. It’s not an especially friendly number in imperial or metric.
Well, okay, the 209cm isn’t a rule. UPVC doors are made to order and can turn up in any weird size. But it was a very common size on eBay when hunting for local bargains. So, allowing for a ‘normalised’ two-inch (4.5cm) top and bottom plate, I set the design height of the walls to 218cm.
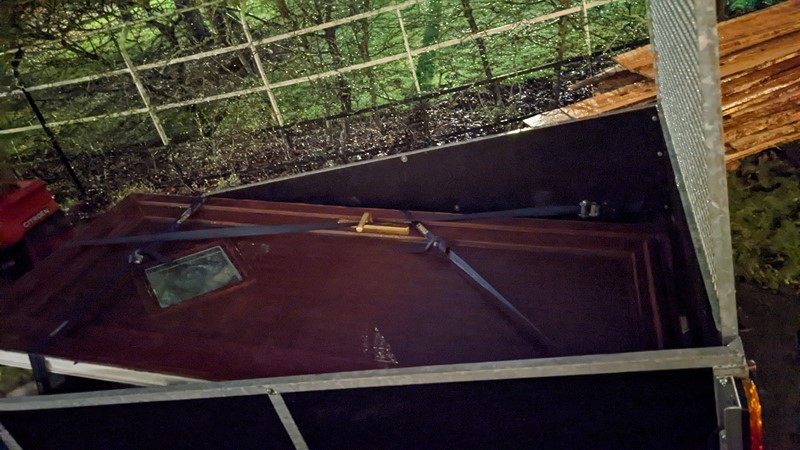
I’m not sure if that was brave or outright stupid, as I then had to find a door to fill the hole rather than make the hole fit the door. But after a bit of searching and a trip to a local guy who recycled old UPVC doors and windows, I found a near-perfect door. It matches the colour of the house doors, has a small window, opens in and hinges on the left. For £20 it was probably the best bargain I’ve ever had!
Changing the door end design
While I had given some thought to the design of the door at the wall end of the shed, I wasn’t entirely convinced about the measurements. The original design assumed the ground was level, and it wasn’t, as I found out while doing the groundwork. This means the shed base is a lot higher off the floor than planned. Also, adding a bottom plate made stepping into the shed somewhat tricky for my little legs.
So, a new plan was hatched. The bottom plate became a header. And instead of being a 4″ timber like the rest of the walls, it became a 6″. This extra 4.5cm should give the cladding something to butt up to and look rather pleasing. It also uses the over-ordered lengths of 2″x6″ wood.
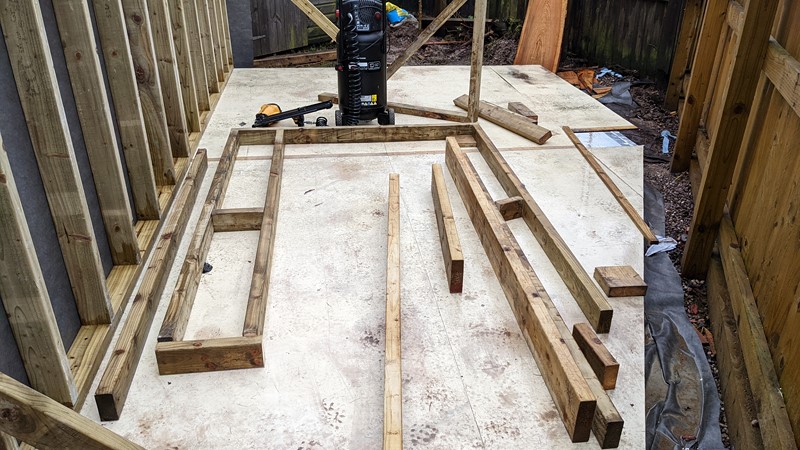
Laying it all out
Getting the hole to fit the door snuggly will be vital for the mega sheds airtightness. The more airtight it is, the less heat will escape, and the easier (and cheaper) the space will be to heat. But get it wrong, and I can’t exactly shave a bit of plastic off, and I suspect hitting it with a big hammer will end up finding the ‘give’ in the door and not the frame.
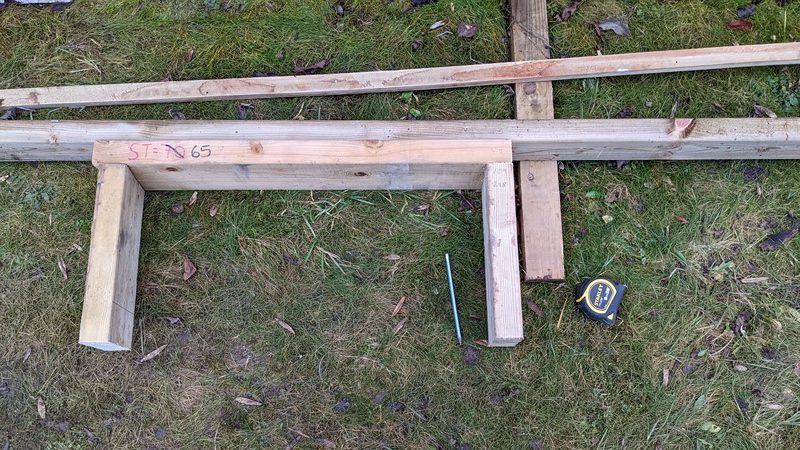
To avoid an acme style disaster where the door won’t fit in the hole, I spent half a day measuring and mocking up. I have a form for rushing the measurements and cutting a hole too big for the sink, and watching it drop into the cupboard when offered up. So some offcuts are used just to make sure that what I think is the timber width matches the reality. And it doesn’t. I’ve designed for a 45mm thickness, and the 6×4″ is 47mm thickness. But that’s okay, I also designed a 5mm clearance into the opening height. So 3mm left to play with!
The bigger 6×4″ timbers are acting like a casement and will be fixed to 2×4″ timbers that make up the frame for the door end of the shed. I don’t want to fit the casement or the door just yet. If I do fit the door, it will only get in the way. But if I start at the window end of the shed, I’ll have to drag all the materials around the garage, across the drive. I also don’t want to build the fence side panels with nothing to attach them to. I could pin them and leave them ‘lose’ like the garage sidewall, but that feels like a tower of cards waiting to collapse.
Time to commit
With the measurements seeming to make sense, the timbers are cut down, nailed, and screwed together. I’m not cladding this bit just yet as I want to use any offcuts for it. I also don’t need to fit the breather membrane as I will have excess from the two walls. This should mean fewer cuts and less tape. Almost like I had a plan.
Getting the door end upright
Runnily enough, five lengths of 2×4″ timber don’t weigh a lot, and I can raise this one myself. I’m fairly convinced that if I can get this simple frame square and true, then I should be able to fit the UPVC door that bit easier later on. But, of course, it will also set the garage and fence wall alignment, so I’d really like to get it right.
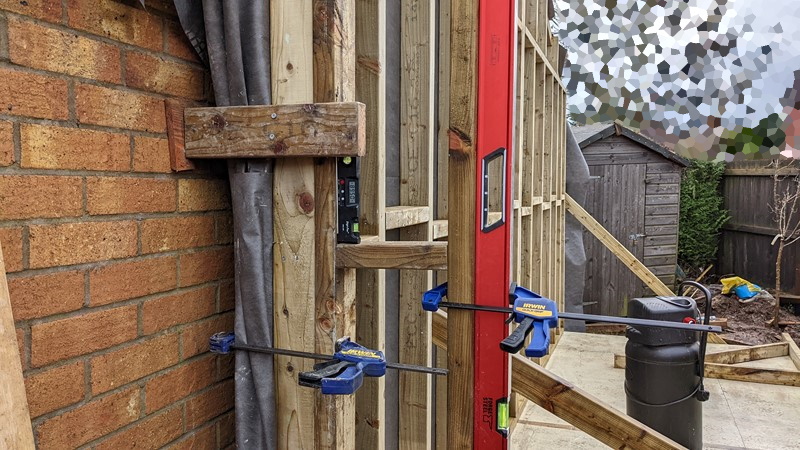
Taking little chance, I break out a small army of levels. First, the long red builder’s levels get the alignment right, and the first clamps go on. Then the digital level helps tweak the frame to be as close to vertical as possible. I find here that the ‘floppiness’ of the longwall means it is always trying to topple towards the garage. A quickly placed brace helps to keep the cladded frame parallel to the garage wall while everything gets screwed together.
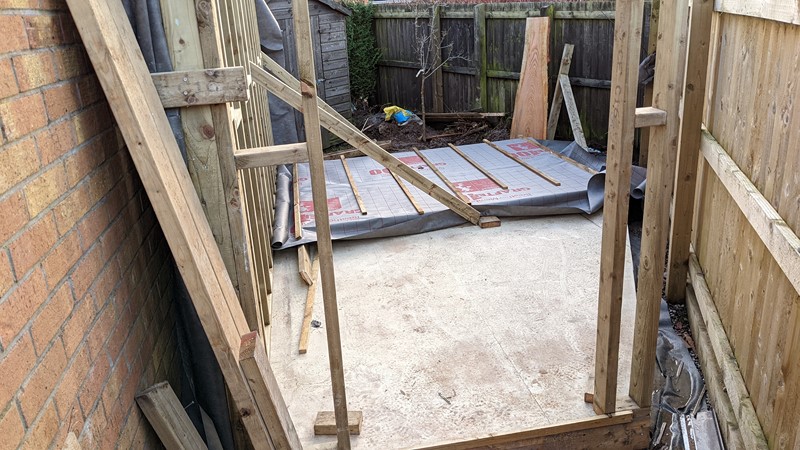
And there you have it. The door frame is in place. Only one side of the door end is screwed down, with a small tie holding the two ‘leg’s either side of the door apart. This brace was an afterthought following the 9th time I knocked the unsecured side out of place.
Next up?
This article will likely be the shortest of the mega shed building articles. It is, admittedly, a lot of words to ultimately talk about five bits of timber. But in terms of telling the story of the build the way it happened, this did take ages. It was however a little bit critical to both get the door installed easily, and get the fence wall built correctly. Unfortunately, as you’ll see in the next article, the ‘not-in-a-straight-line-wall’ proves to be quite a headache!
M
NEXT – Part 9: The Fence Wall
PREV – Part 7: Cladding the Long Wall
Back to Mega Shed Articles
Back to Workshop Articles
Amazon Affiliate Links – Things used in this article
BXProject is using Amazon Affiliate Links. It’s a quick way to show you what I have used in this article.
“As an Amazon Associate, I [may] earn from qualifying purchases.”
Since January 2024, Amazon has blocked embedding images, but I think the links are still valuable.


[…] Link to the original article […]