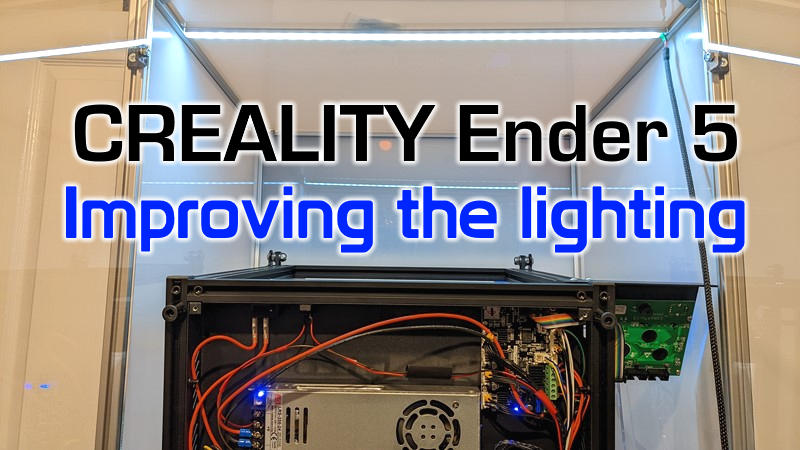
The more I use the Ender 5 3D printer in the newly built enclosure, the more I realise I’m struggling to see the progress of the print. I don’t think my inability to see the print is just failing eyesight due to my rapidly ageing body. The lack of visibility is all about the lighting. The home-built printing enclosure has not helped this. There’s an obvious solution, though, add lights! However, improving the Ender5 lighting is trickier than I thought!
Let there be light
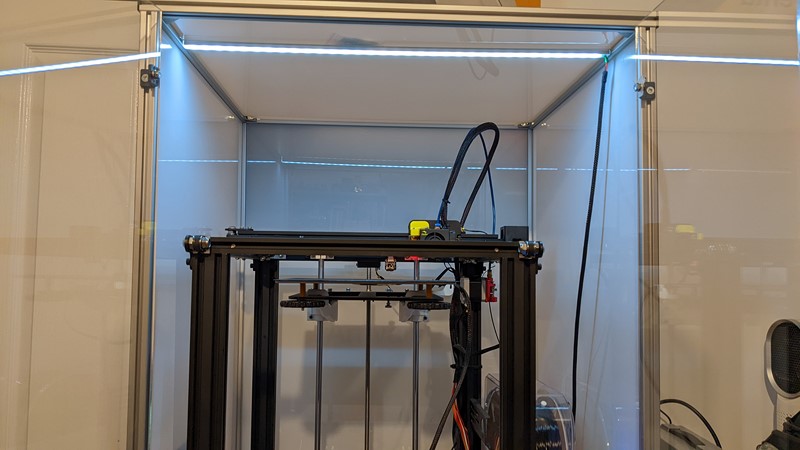
I keep the Ender 5 printer near a south-facing window, and it gets plenty of sunshine during the day, possibly too much. But as soon as the window blinds are closed or the sun passes its azimuth, my ability to see the print as it pours from the nozzle rapidly diminishes. The addition of the DIY enclosure has helped balance out very bright sunshine, but the frame casts shadows on the high-level build plate. And, of course, I can’t see much of anything in the dark evenings!
Casting some light on the range of LEDs
These days, if you want more illumination, it’s simple enough to add some LEDs. But the world of LEDs has become infinitely more complex since the 90’s when you could choose a red, green or even an amber LED. Gone are the days of firing photons through life-limiting compounds like gallium arsenide to create a little colour.
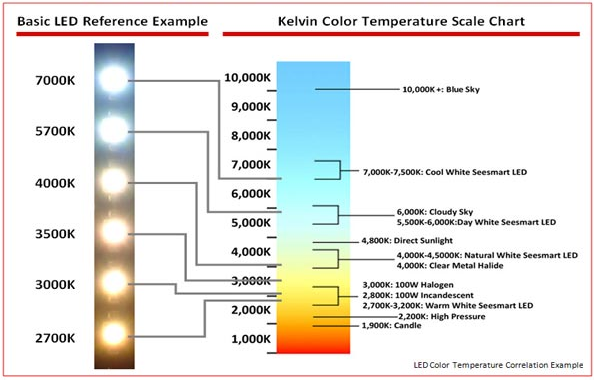
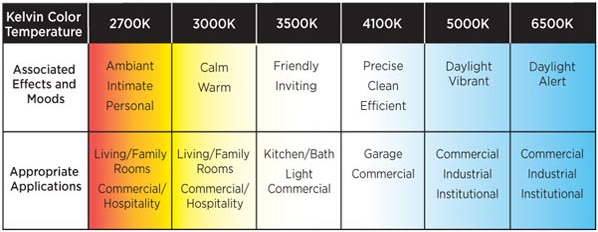
While I know I want a ‘white’ LED, there is a wide range of white. Most suppliers of LED lighting list the Kelvin colour of the light output, where the K value is (roughly) the number of candles the luminance is equivalent to. Typically referred to as colour ‘temperature’, white LEDs range from ‘warm’ white, at 2000k, to ‘daylight’ at around 6000K. The chart above from LED Spot gives a good idea of the range of white LED colours. Then there is the CRI, Colour Rendering Index, an indicator of how close a light source is to natural light.
Ultimately though, I want to use a low-profile LED light strip that I have experience with. The leper lights from Amazon have a colour temperature of around 6500K (daylight) and a lumen output of up to 1200ln, but no CRI is listed. Okay, these are some pretty cheap 12v LEDs, but having used them on a few projects now, I know they won’t cause flickering on my phone camera. LEDs have never been so complicated.
Regulating the power
The chosen LEDs require a 12v supply. However, the Ender5 doesn’t have a native 12v output. The main transformer inside the control box regulates the mains voltage down to 24v DC, so it’s close but not quite right. So, I need to regulate the 24v down to 12v. Fortunately, there is a clever little circuit for that.
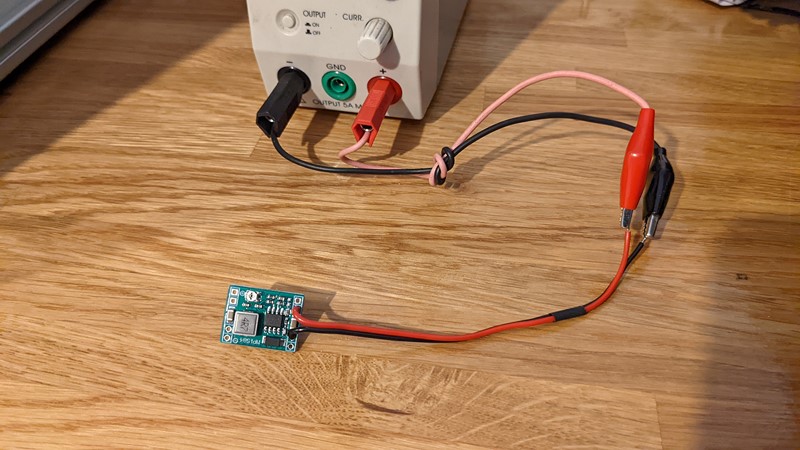
The MP1584 from Monolithic Power is a clever little circuit which uses a high-switching MOSFET to regulate the output power. Think of it like switching a light bulb on and off to get an average brightness. The chip can only handle 3 Amps, which is more than enough for this application. Rather than design my own circuit, I’m using an off-the-shelf solution from Amazon. It’s worth remembering that it needs some calibration before use.
Installing the lighting electronics
Unlike many other 3D printers, the Ender 5 has an all-in-one power and controller enclosure. The enclosure is a neat solution for housing the generic power supply and printer controller. There is also plenty of space in the case for adding a few modifications.
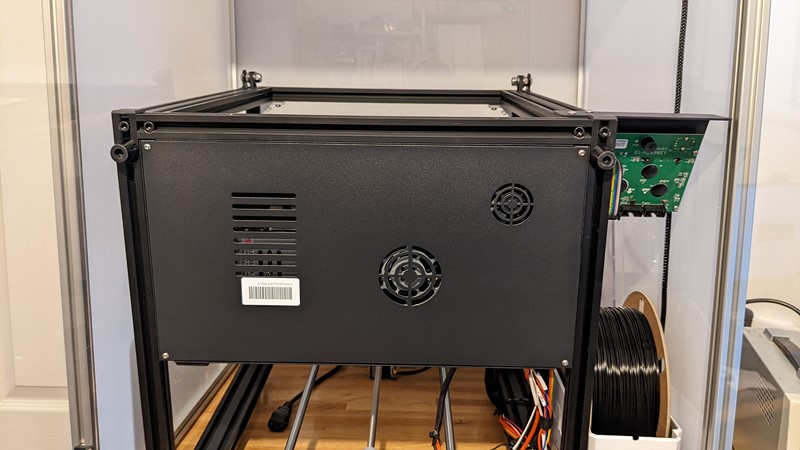
Flipping the 3D printer on its back, access to the controller enclosure is made by removing the four screws. Compared to the unsafe electrical installations on some 3D printers, I like how Creality designed this enclosure.
Installing a switch to control the lights
The general reliability of the Ender5 means I don’t generally have to watch the print once the first few layers are laid down. So, I want to be able to turn the lighting off when I’m not standing with the printer, so I need to install a switch.
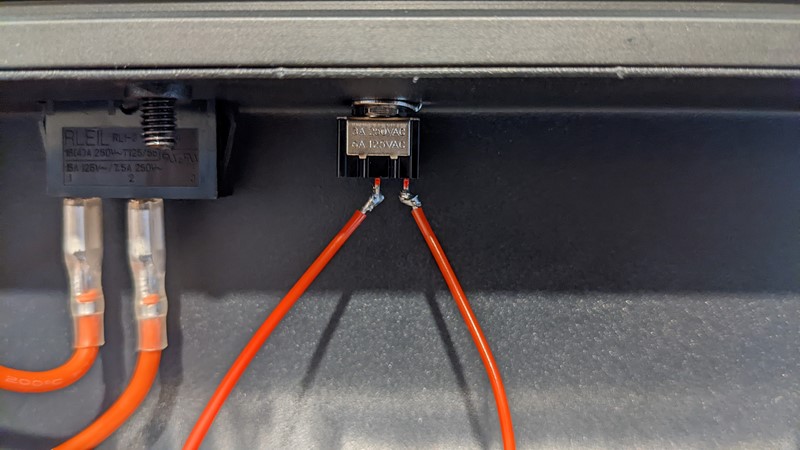
I’ve got some simple toggle switches to hand, so a suitable hole is drilled in the case, and the switch housing is installed. Don’t worry, those exposed contacts get some heat shrink before the enclosure cover is put back on.
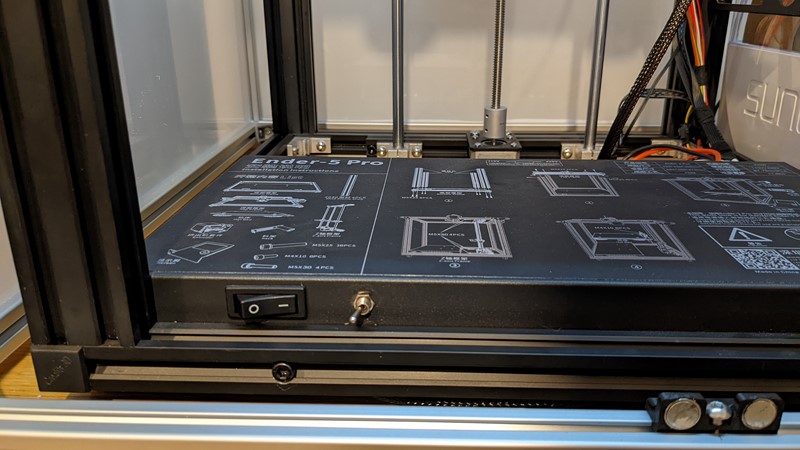
While relatively simple, this is a nice easy way to control the lighting, and I do love a toggle switch. Also, installing next to the power switch should make it easy enough to find in the dark.
Installing the buck converter
Once the buck converter has been calibrated to ensure it is outputting 12v, it can be connected to the power supply and switch.
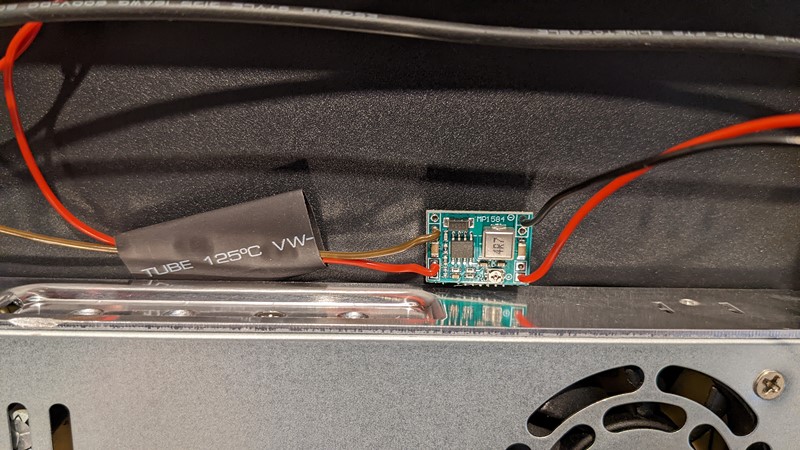
The buck converter board is wired in, and the whole bored insulated. I don’t need to over-complicate the installation, so the wrapped board is secured to the underside of the case with some double-sided tape.
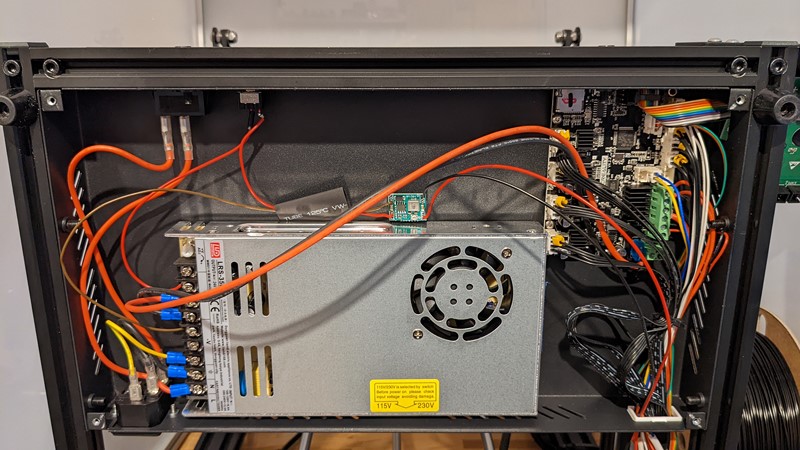
The 24v side of the buck converter board is connected to the power supply’s output terminals. Next, the 12v side wiring of the buck converter is run out through the cable guide, with enough length to reach the top of the housing. And that’s the tricky bit done.
Making an adjustable light bar
Depending on what I’m printing, I will likely need to move the light strip around. So I need a mounting solution that allows the light to be installed anywhere around the case. While researching what has been done in the past, I came across an article on All3DP about lighting for the Ender 3.
The article has some clever light mounting solutions, including magnetic mounting and lighting built into the print head. What I realised is that I already had the answer. The slots in the frame of the enclosure were perfect for use as runners.
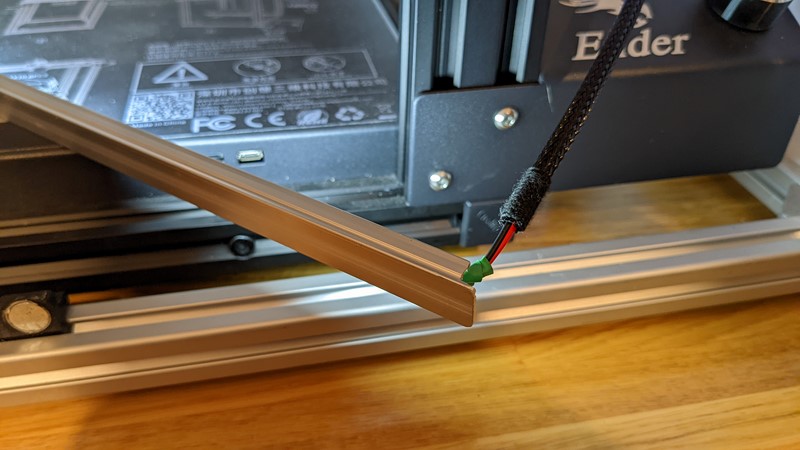
Carefully trimming down some aluminium profiles designed for LEDs allows the ends of the rail to sit in the slot of the frame. I can then slide it to where ever best illuminates the workpiece. And because the enclosure sides are the same width, I can use it above and to the sides of the workpiece.
Installing the light bar
Fitting the light bar to the enclosure is pretty straightforward. First, slide one end into the profile slot at an angle, then turn the lightbar until the other end slots into the profile.
And that’s all there is to it. Such a simple solution, and it works so well. Being able to slide the light forward and back when mounted above the workpiece means I can always position it in the right place.
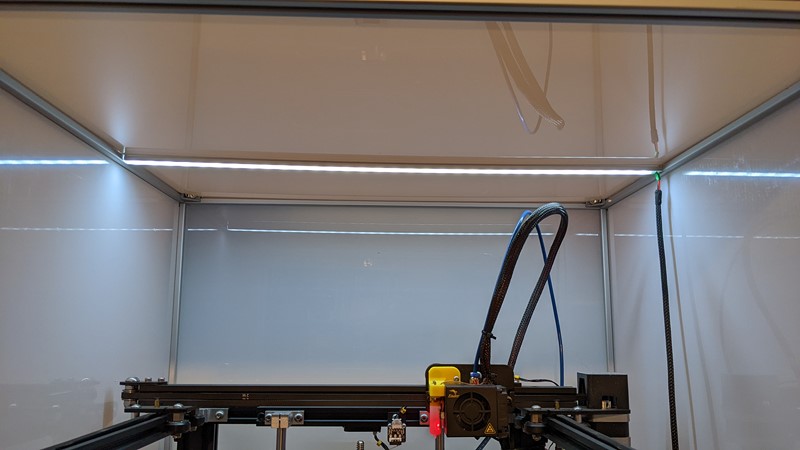
While not so helpful in seeing the print bed, I have found that sliding the light bar all the way to the back gives good illumination over the extruder. This has been particularly useful when changing filament.
Using the lighting with the Ender 5
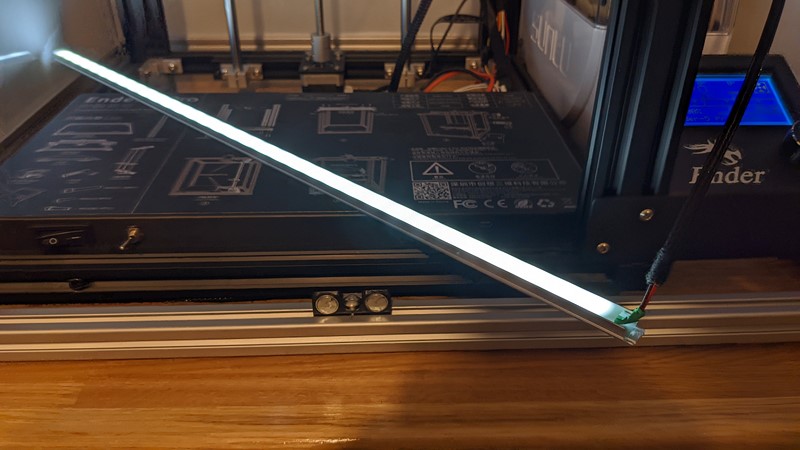
The difference with this simple lighting solution is, quite frankly, light and day. As a result, I get such good illumination of the build plate I no longer struggle to see how the print is progressing.
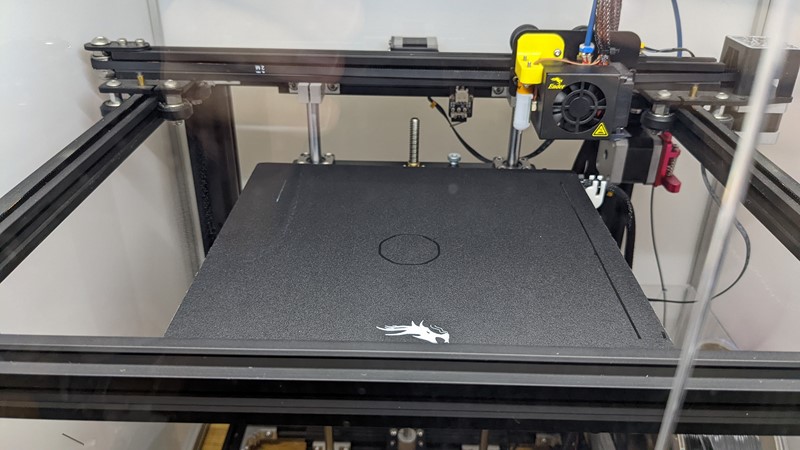
The colour temperature is just right and works well with both light and dark-coloured filament. The improved visibility has also made some printing issues easier to detect and calibrate out.
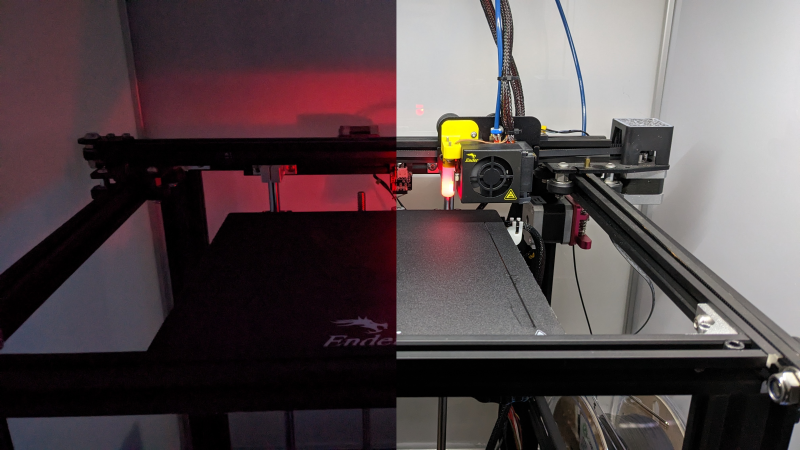
The comparison between with and without the LED lighting turned on in a dark room shows just how much difference a few LEDs can make. This is by far the best modification I’ve made to the Ender5 3D printer to date; if you don’t already have print bed lighting, I’d strongly recommend it!
M
NEXT
PREV – DIY Ender5 Enclosure
Back to 3d Printing Articles
Back to Workshop Articles
Amazon Affiliate Links – Things used in this article
BXProject is using Amazon Affiliate Links. It’s a quick way to show you what I have used in this article.
“As an Amazon Associate, I [may] earn from qualifying purchases.”
Since January 2024, Amazon has blocked embedding images, but I think the links are still valuable.