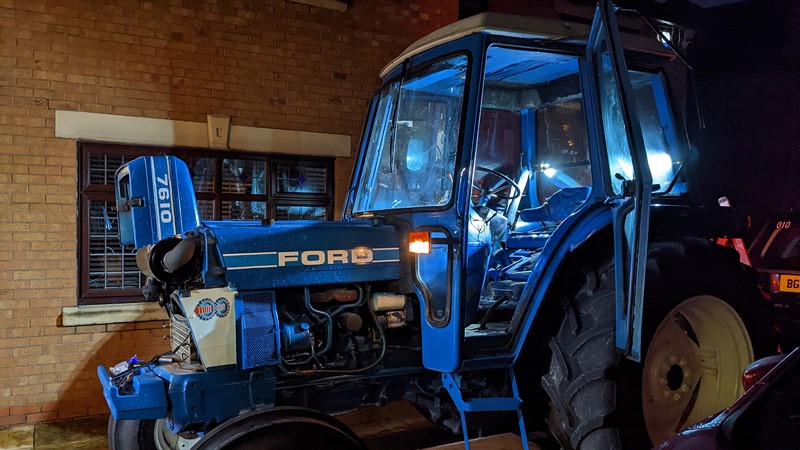
After the tractor of my childhood dreams was delivered, I wasted no time at all in going over the Ford 7610 with a fine electrical tooth comb. Sure enough, as the seller had made clear, none of the exterior lighting was functioning. But all of the lighting clusters were present, and all had electrical connections, so how hard could wiring up the lights really be?
Wiring up the exterior lights
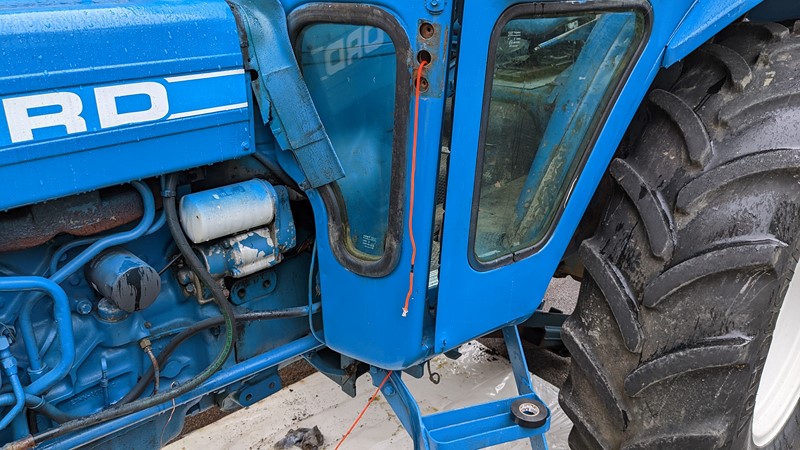
From a quick walk around the Ford 7610, there was evidence the wires to the light clusters on the wings, and the front stalks had been disconnected and removed for painting. Reassuringly, none of the original harnesses had been messed with, and all of the original Ford connectors were in place, unmolested.
There was, however, evidence that someone had been working towards getting the lighting working again. At some points in the probably recent past, both light clusters on the front indicator stalks have had new cables run to them. The 230v flex cable is definitely overkill, but perfectly usable. Could this simply be a case of plugging everything in?
Tail Light Wiring
With the front indicators probably needing re-wiring, I decided the tail lights would probably be the easiest place to start, then work forward from there. There is every chance I jumped into the wiring without really understanding how the factory was meant to be run, and what parts I actually had around me.

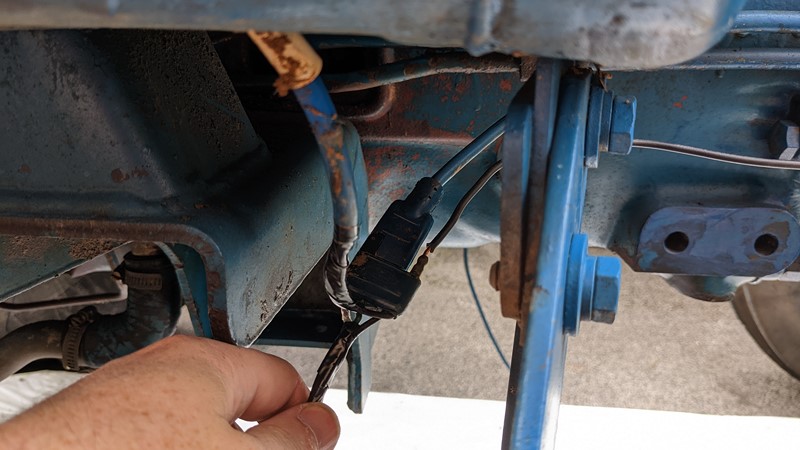
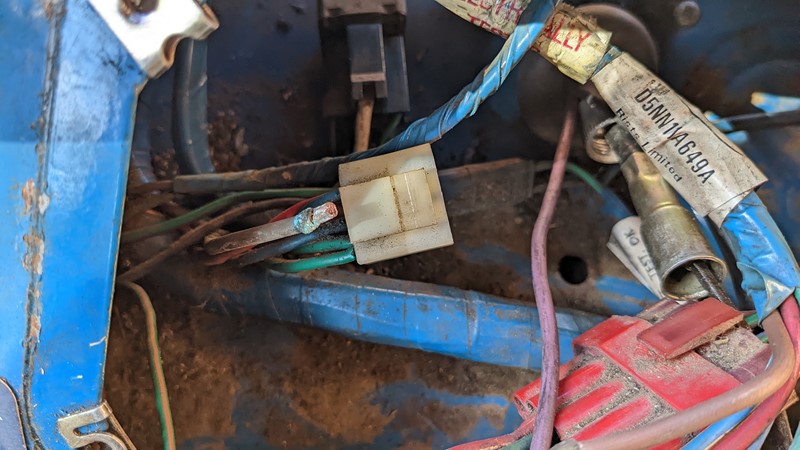
The tail light clusters were physically in place, but no wires had been run to them. At this point, I assumed I would be wiring from scratch all the way from the bulb contacts in the light cluster back to the lighting connector under the leading edge of the Q-cab. However, getting the wires into the light units seemed a little tricky.
While the tail lamp clusters had been bolted onto the car, neither side had a hole through the wing to allow the wiring to pass through. Fortunately, the rubber seal on the back of the lights has a witness mark for where the hole should be. With the location copied through to the wing, a hole could be drilled, and the reason for the missing wiring passage becomes clear. A touch of filler has blocked up the hole!
Running the wiring to the tail lights

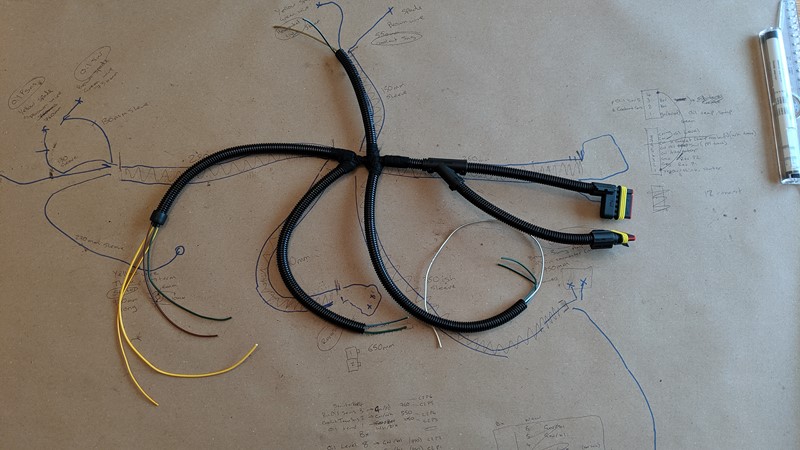
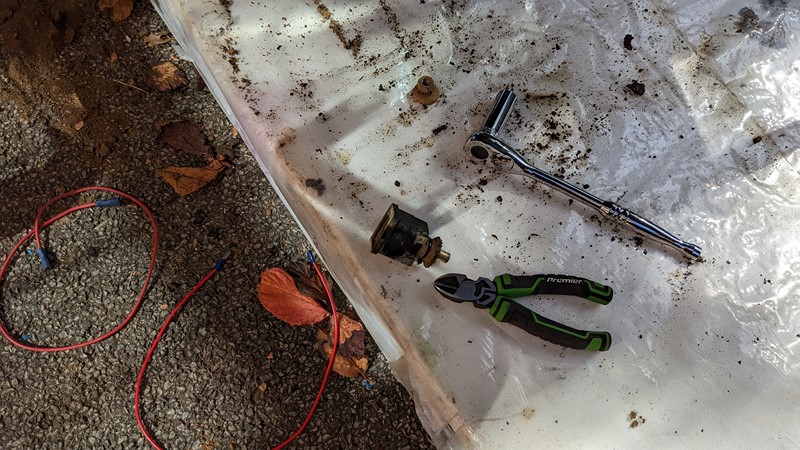
After a short tea break, I went routing around the bags of spares that came with the tractor. To my surprise, I found that the original genuine Ford tail light wiring harness was in the cab all along. This find significantly improved my mood and sped up the installation of the rear lights. All the original wiring retaining P-clips had been removed but included in the bag of spares, but for now, the wires are held in place with a zip tie.
Temporary bodgery
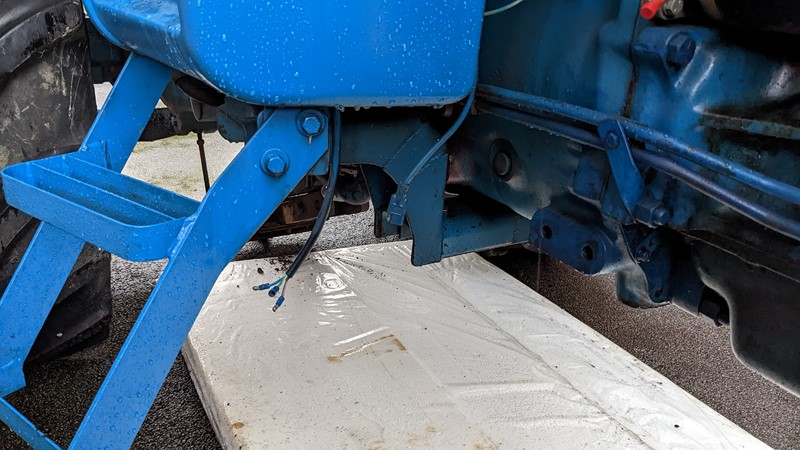
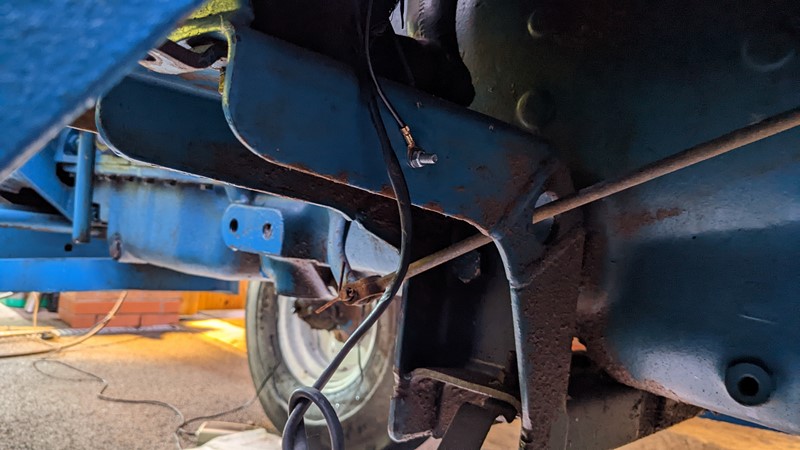
At the front edge of the cab, the harness to the tail lights splits to front indicators before connecting to the cabin harness. The installation just keeps getting easier. One connection I do struggle with is a ground connection for the lighting circuit. For testing purposes, I simply run a single core wire to the ground side of the tractor’s battery.
First light re-wiring complete
Once the tail light clusters are working, I reuse an existing hole in the Q-cab body support bracket to create a new ground point on both sides of the cab. A rub back to metal and a load of Vaseline should give the best possible electrical contact and stop any corrosion.
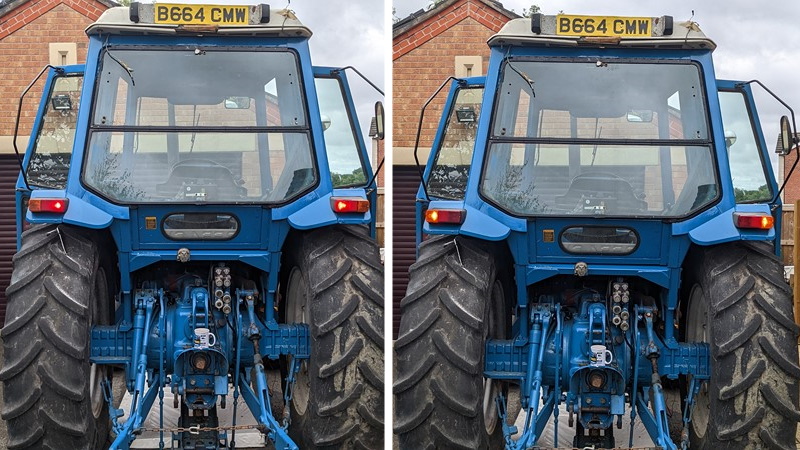
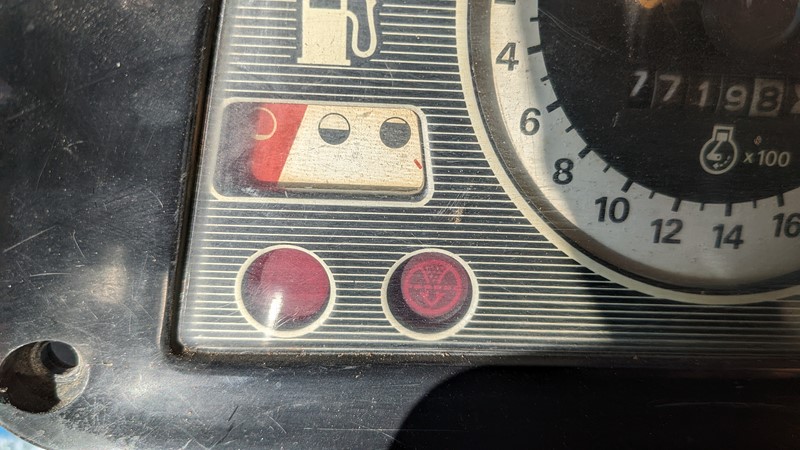
After a few hours of work, mostly faffing, the rear tail lights and indicators are working again. I did take a little time to work out the layout of the fuses in the fuse box. The brake lights are working, but they are a little vague until the switch is taken off and cleaned internally. A new switch will be needed in the long term.
Front Indicators
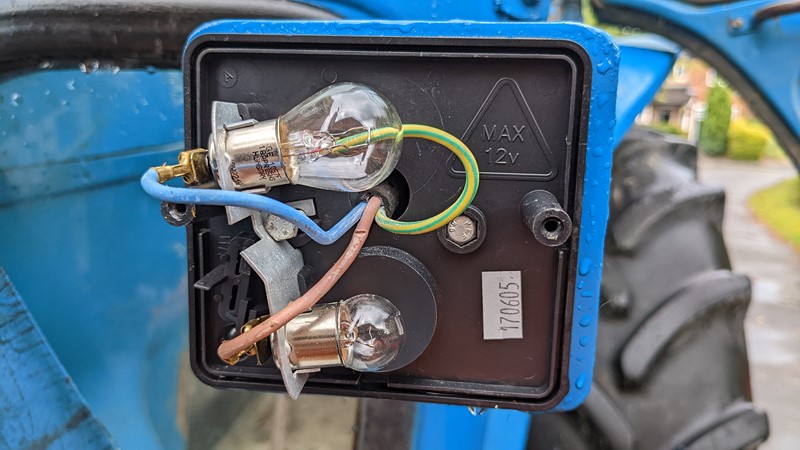
When looking at the original tractor advert, I did notice one oddity in the lighting. The front indicators sit on stalks that push the lights out away from the cab. The original Ford 7610 lights should have a rectangular shape. These should appear as a 50mm square light for the indicator above a 50mm square light for the side light. And not the completely square units currently fitted.
Lamp support brackets
Although the tractor should have a rectangular light cluster, the installed lights are square. Something very similar to the hamburger lights found on a trailer. They do appear to be brand new clusters, though, with new wires and wiring terminals. So, for the time being, these ‘hamburger’ lights can be wired up and stay on the tractor.

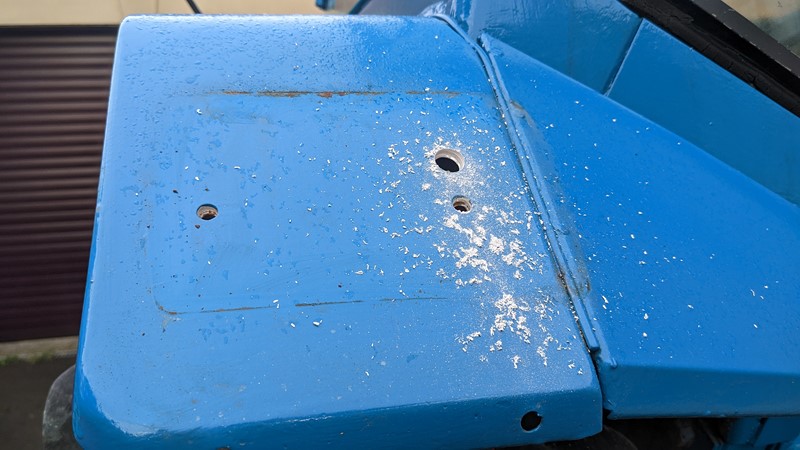
Before the tractor arrived, the lighting arms had new wires run through them. However, domestic mains-rated cable has been used, which is a bit tricky to connect up. It’s easier for me to replace this wire with automotive cable rather than battle to get a good connection. But first, the lighting arms need to come off. Unbolting the ‘arms show ‘lamp support brackets’ reveals some hidden surface rust and some very mediocre brushed painting.
While pulling the old wire out, I tie some string to the end to be used as a guide to drag some new cables through later. Digging about in the big bag of spares, I also find the original harness for the front indicators. This wasn’t initially obvious as the wires are much longer than they need to be. However, I assume the extra length is because the support arms are so much shorter than they should be.
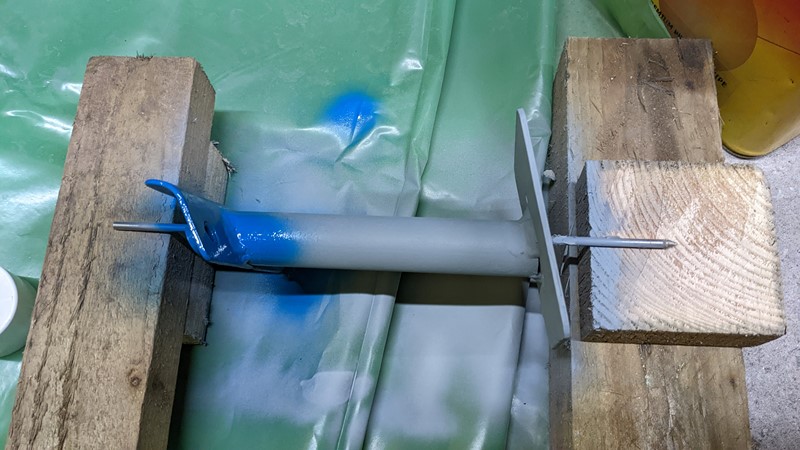
Assembling an impromptu spit, both lighting arms get a rub down. Then few coats of high-build primer and a good few layers of Ford blue spray paint. Predictably I’m too impatient to let the paint go off, so there are a few fingerprints on it if you look too close!
Reinstalling the front indicator lights
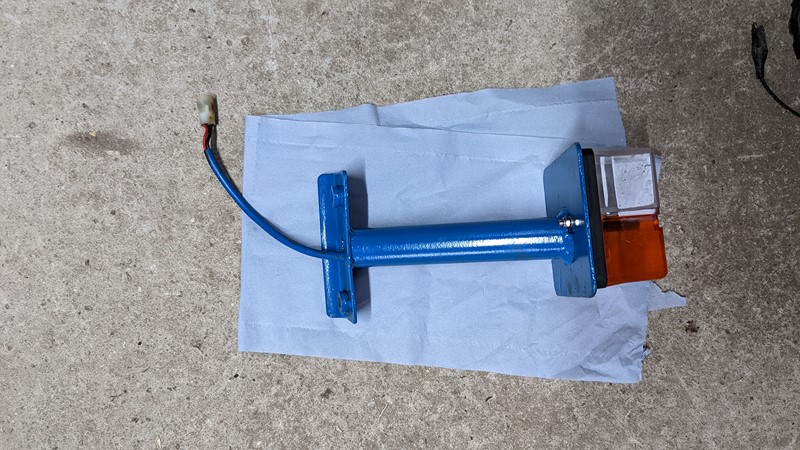
A few hours later and both support arms are painted, wired and reassembled with some stainless fittings. While impatiently waiting for the paint to dry, the surface rust on the Q-cab is also treated and painted. Another brew and the lighting clusters are connected to the wiring harness and reinstalled.
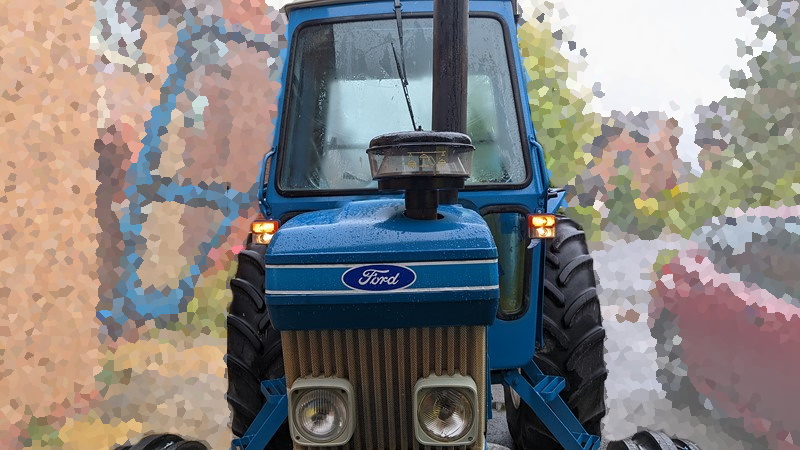
Despite the rain, I’m making pretty swift progress with the lighting. Before a late lunch, I have all the indicators and side lights working, even the brake lights work after a fashion. Not quite ready for the road, but finding the original harnesses has really sped up progress, I can practically smell success.
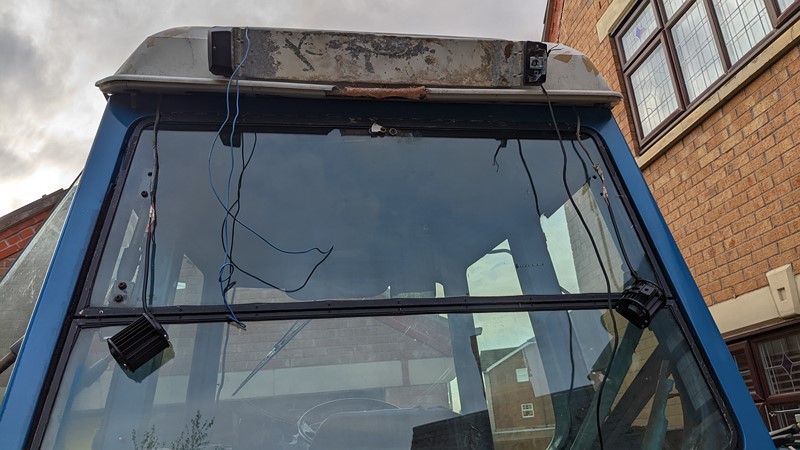
Under the Roof
Before I can wire in the registration and plough lamps, I need to get the Q-cab roof open. Anyone who has had the joyous experience of getting into the roof space on the Q-cab will know the task is less than simple. In theory, the bolts that hold the plough lamp brackets onto the roof need to be removed to allow the clamshell to be opened.

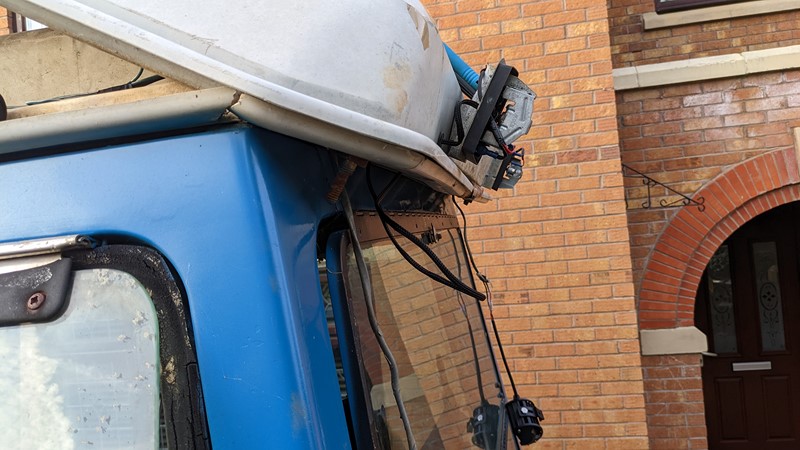
(Un)fortunately, at some point in the past, someone has sheared the bolts and opened the clamshell anyway. The result is a lot of damage to the lower half of the clamshell, with the fibreglass cracked and, in places, shattered. I say fortunately, as this means I can’t make the situation any worse, so I can open the roof and set to!
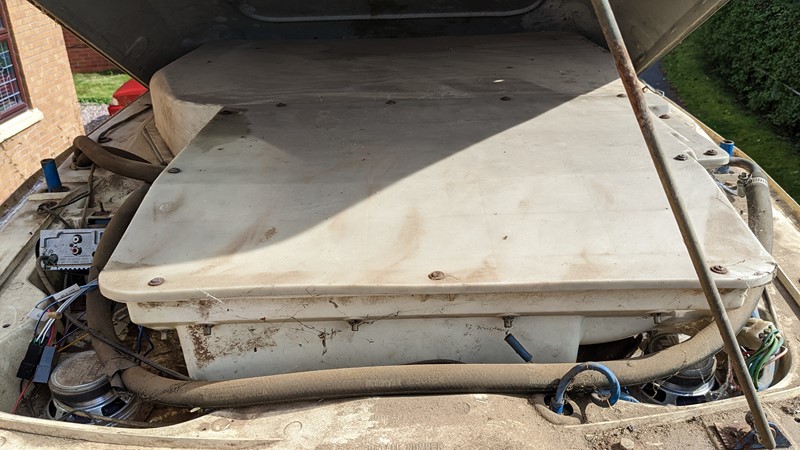
First up, sorting out the radio wiring (a quick win). Before I started, some very interesting wiring had been run to the cab space to power the Sony X-plod radio. This is a little odd, as the factory loom has the same wiring in it! One of the two speakers didn’t work as the connection had fallen off. Both issues were quickly resolved.
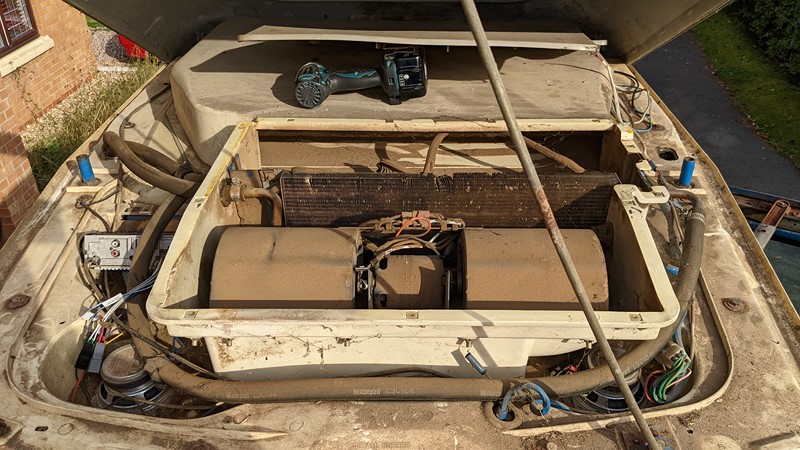
With the lid open, the ventilation system gets a huge cleanout, including blowing through the heater core to remove the ingrained dirt. It started pretty dirty and clearly hasn’t been cleaned out for many thousand miles, but it cleans up quickly.
Wiring Interior and Plough Lights
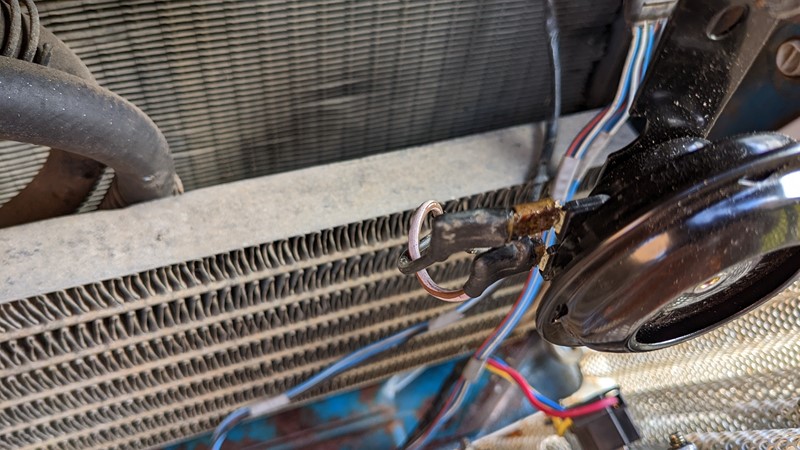
With the roof space open, I can access the wires for the registration plate lighting and the rear plough lamps. Again, the original roof harness includes all the connectors needed, so it doesn’t take too long to get the wires to the clusters.
The lamp holders on either side of the registration plate are likely the originals and, on first look, are horrendously corroded. Ideally, I would take the whole plate holder off and work on the light clusters in the workshop. However, the bracket is stuck fast. So, working from a ladder, the connectors in the light housings are cleaned up, and new wiring connections are made. Despite thinking the metal connections were too corroded for use, they actually come up really well, and the original lights are returned to working operation again.
All that cleaning and wiring takes far more time than I might have liked, and by the time I give in for the day, daylight has passed. Despite the long day, it comes to an end with nearly all the lights working. The dangling plough lights make for a very satisfying picture illuminating the cabin. Tomorrow the plough lamps will go on the brackets, and the wiring will be tidied up.
Fuel Guage
One thing that didn’t seem to work on arrival was the fuel gauge. After wiring in the lights, I was reasonably confident that all the fuses were in working order, so to understand what may be causing the fuel gauge not to work, the dash came off after the steering wheel was out of the way.

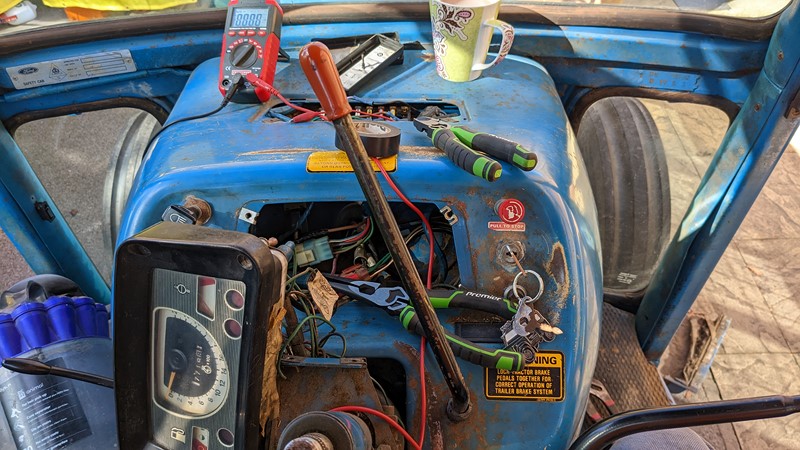
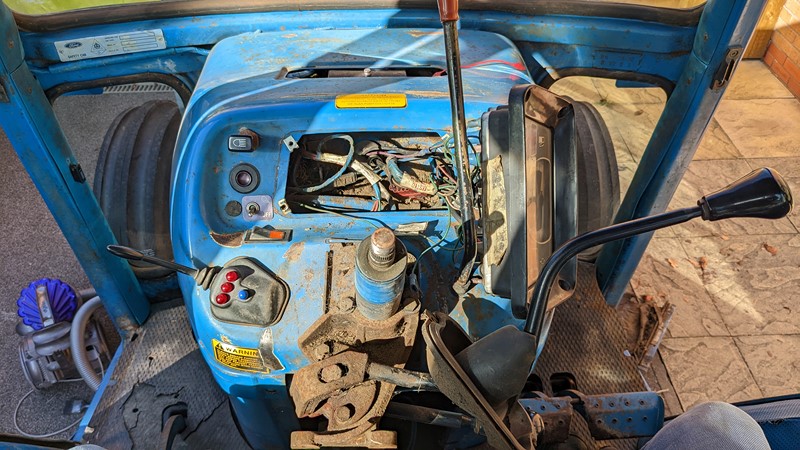
Removing the trim didn’t stop there, with the column shroud eventually coming out. Somewhere in the depths of the steering column void, I finally found the wire to the fuel gauge, briefly shorting out, bringing the needle on the dash to life. All that was needed was to reconnect this wire to the fuel tank level sender. ARGH! I did manage it in the end, but toys were definitely thrown out of the cab in the process. However, once all was connected, the fuel gauge seemed to work just fine!
While sorting the fuel gauge, I lost all the lights. After an awful lot of digging, tracing all the wiring connections from point to point, I eventually found a corroded wiring connection that had evidently been disturbed and finally failed. Fortunately, I had spare terminals for this connector, and full function was quickly restored.
Other Electrics
Generally, the cab electrics worked quite well. The cabin blower worked perfectly and is surprisingly powerful. Despite the lack of a control knob and an incorrectly installed wiper blade, the wiper also worked perfectly. Even the stereo worked well once both speakers were connected.
Washer bottle
There were, however, a few things that didn’t work. First up is the washer bottle. A quick test of the motor showed that it worked perfectly well. It did, however, take a little time to figure out where the plastic box should be installed.
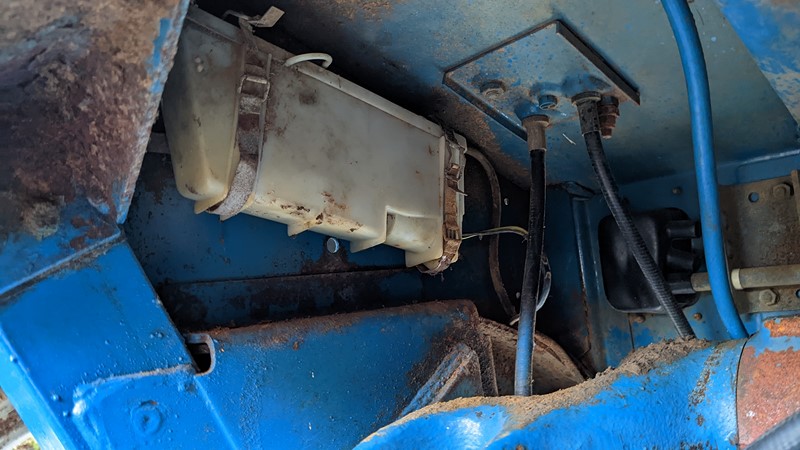
I’m still not entirely convinced about the installation position. It looks to match the parts diagram, but the filler cap is entirely inaccessible. What a faff! And while the pump works, there is currently no washer pipe to the bonnet. Yet another sign the cab has probably been off at some point.
Brake Switch
I mentioned earlier that the brake lights were a little vague. Sometimes a press on the brake pedal would trigger the lights, sometimes not. This is one of the electrical components on the tractor that is easily accessed.
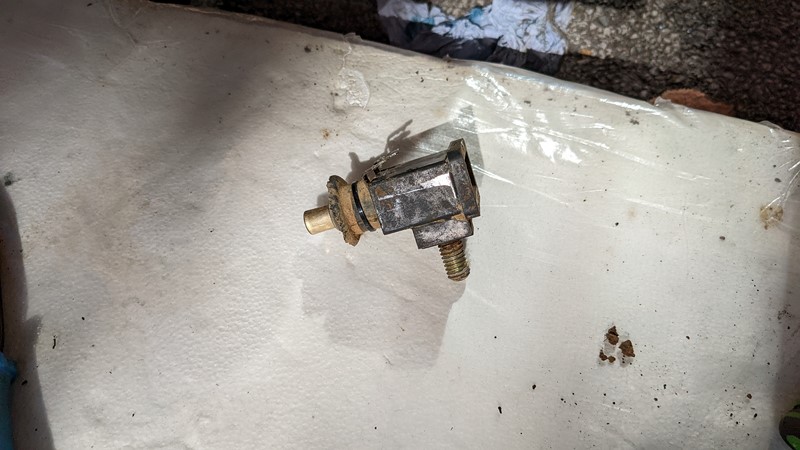
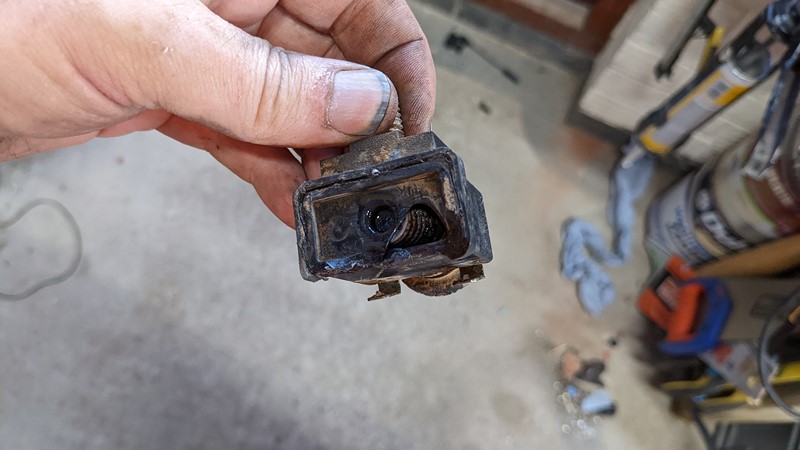
Once removed from its bracket, the cause of the fault becomes evident. The rubber boot on the bottom of the switch has failed, allowing moisture in, and corroding the internal contacts. While the switch is non-serviceable, carefully breaking off the lid (but not so much to release the spring) allows vigorous application of WD40 to clean the contacts. Reinstalled the switch is now working reliably but will need replacement.
Giving it the horn
The horn that came with this Ford 7610 was filled with water when taken off the tractor for a quick bench test. Not surprisingly, when power was applied, there wasn’t much more than a bit of a fart out of the sounder. It did look like the original, though, so gave me an idea of what to replace this failed horn with.
The replacement is a compact motorbike 105dB horn. Aesthetically it is similar to the original Ford part, albeit a bit smaller and a whole lot louder. I’m very tempted to fit a train horn at some point for the novelty value, but that’s definitely overkill for the amount it will get used!
Correcting the Paintwork
Predictably for an agricultural refurb, the respray has been carried out with a minimum of preparation. While the painting of the cab is generally reasonable quality, there is a tad bit of overspray. Who has time to take all the glass out to paint a tractor?
As I expected when buying the tractor, there is an amount of cleaning up to do. All of the glazing has some over-spray, which is quickly removed with some thinners. The Ford blue paint is quickly removed from the black window rubbers with the application of the back of a kitchen knife.
The overspray on the engine and hydraulic filters will vanish once a full service is carried out. Then, overspray on some of the other pipes and hoses is quickly removed with some gentle rubbing. And while I’m at it, the power steering pipes are carefully bent back into the right place, and the non-original flexible hoses are correctly secured.

The indicator lamp support arms weren’t the only body parts to get a bit missed in the paint job. Both left and right ‘filler plates’ that sit in the bottom of the door opening were painted only on one side. There is also quite a lot of mud on the underside of the tractor that has been spray-painted Ford blue, I’ll slowly chip away at that over time. Ultimately this is a tractor for working, not purely for show, so these little paint defects and a bit of overspray don’t bother me. It’s good enough that it already receives a lot of positive comments!
Ready for the Road
At this stage, the tractor is just about ready for the road. Insurance and tax are in place, so there is nothing to stop me except a massive bout of nerves. While I’ve driven tractors for almost as long as I’ve had a car license, I’ve never actually driven on the road. I’m generally happy driving anything, not I can’t think of a time I’ve driven something so slow.
My route options to get the tractor down to the farm are either down a dual carriageway or through back lanes. The dual carriageway is probably the simplest route and sees the most tractors on it day to day. The back lanes are a little tight in places, and while traffic should be slower, there’s a good chance of collecting a wing mirror or two. It makes the most sense to hit the dual carriageway, so long as car drivers realise just how slow I’m going.
There’s no reason to be so nervous about hitting the road, but at some point, I’m just going to have to get on with it!
But that’s a tale for another day!
M
NEXT – Ford 7610 – First Drive
PREV – Ford 7610 – A Childhood Dream Come True
Back to Ford 7610 Articles
Back to Tractor Articles
Amazon Affiliate Links – Things used in this article
BXProject is using Amazon Affiliate Links. It’s a quick way to show you what I have used in this article.
“As an Amazon Associate, I [may] earn from qualifying purchases.”
Since January 2024, Amazon has blocked embedding images, but I think the links are still valuable.