With the site finally cleared, I can get on with building to the plan. It’s well into December now, but it’s surprisingly mild at the moment. I need to crack on with forming the foundation and the frame that will make the shed’s base. As I’m planning to use concrete piers, I need to get them into the ground before it gets too cold for the concrete to cure. I’d best crack on with the groundwork, frame and piers.
Setting the dimensions with a frame.
Before I can go digging the holes for the concrete piles, I need to know where to put them. I could have done this with string and tape, but I’ve plenty of wood about, so I might as well use it. I can see a couple of problems by laying timbers out roughly where I want the base to sit.
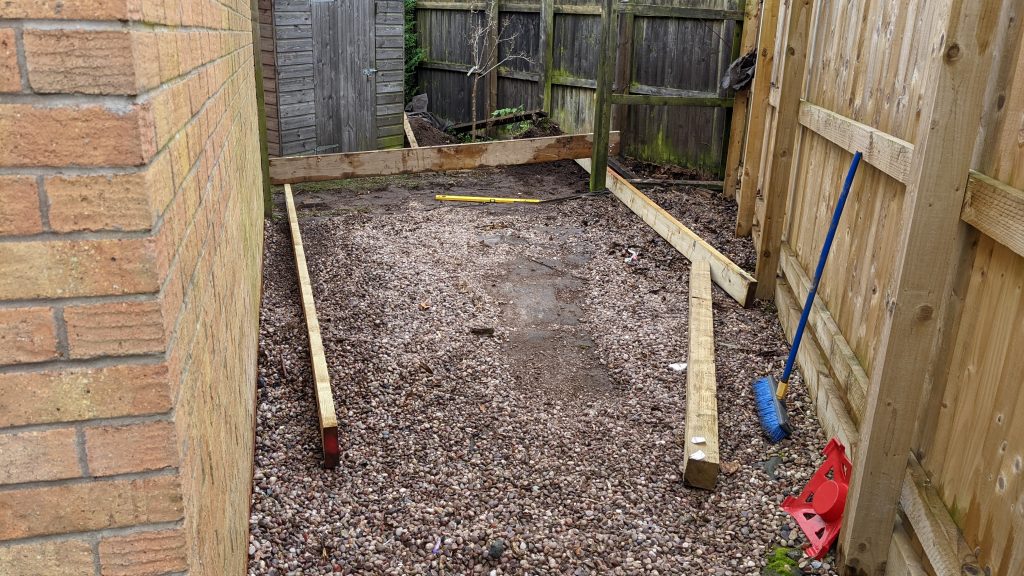
There is a pitch of over five degrees on the site, which is to the gravel’s height. What I hadn’t accounted for is that the gravel next to the garage is about 100mm deep. Oh, bugger. I wish I had checked this sooner, but the old shed seemed level ish, and who would landscape the ground towards a building? There’s not a lot of options here. I can’t raise the ground on the garage side too much, and I haven’t the time or money to flatten the whole site.
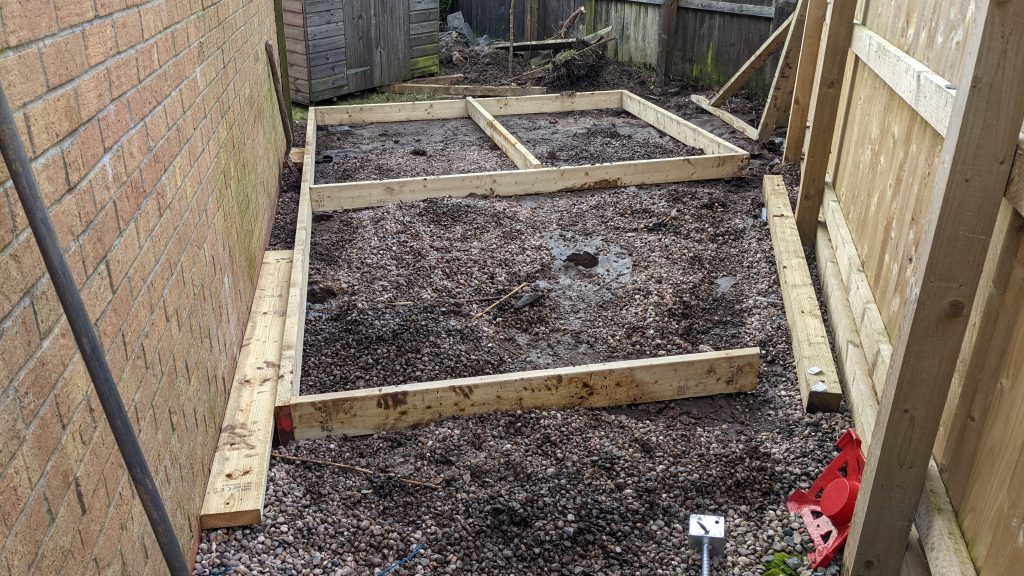
Much of the gravel gets scraped off the weed barrier, the sheet is dragged back, and the ground near the fence is levelled off a bit. Then I assemble enough of the frame to know where the piers and feet need to be. Foolishly a mate then turns up to see the progress and gets roped into digging all the holes, hopefully in the right place. The weather also got a bit rough, and I stopped taking so many pictures. Hopefully, this is all the groundwork required for the piers.
Pumping out the holes for the piers
Overnight it rains. And rains. And rains. So the first hour of the morning involves pumping out all the holes, which would have been straightforward if the magic pump still worked. Instead, annoyingly it’s got both bad solder joints and a seized valve, but without too much hassle, this cheap little pump is returned to service and quickly drains out the waterlogged holes.
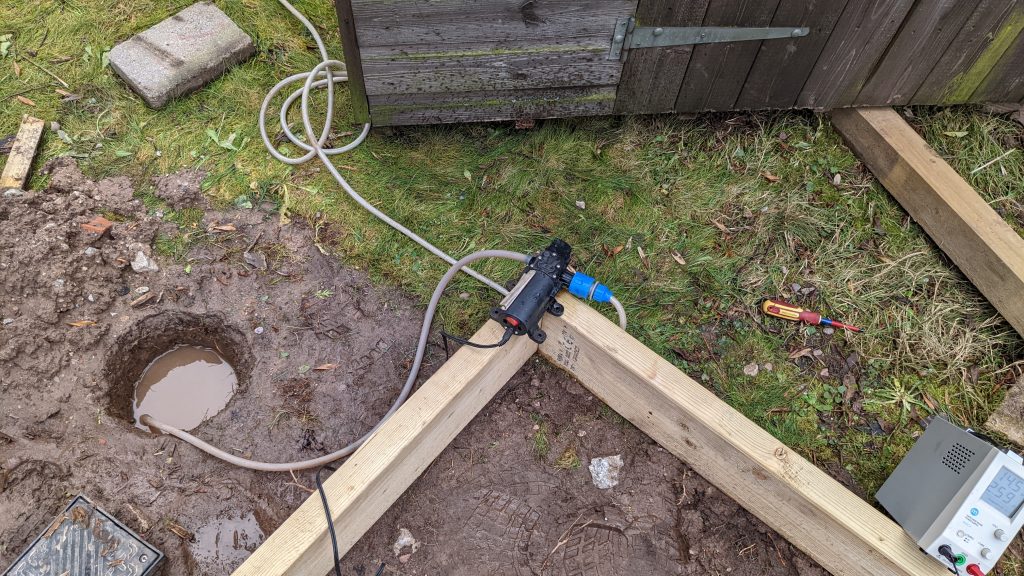
Despite the water in the holes, the ground is surprisingly dry, and they don’t refill. Each hole is dug to about 450mm deep or until I can’t get through the clay. In theory, this should set the piles into or below the frost layer. The idea is that this stops water from accumulating under the piers, then freezing and expanding and warping the frame over time.
Building and levelling the frame
The base of the shed is made of 6×2″ C24 treated timbers. These timbers are oversized for the strength needed but perfect for installing insulation later. This frame will sit on galvanised steel risers sunk into the concrete piers. Very much OTT for a shed, but this is a Mega Shed, so it’s okay!
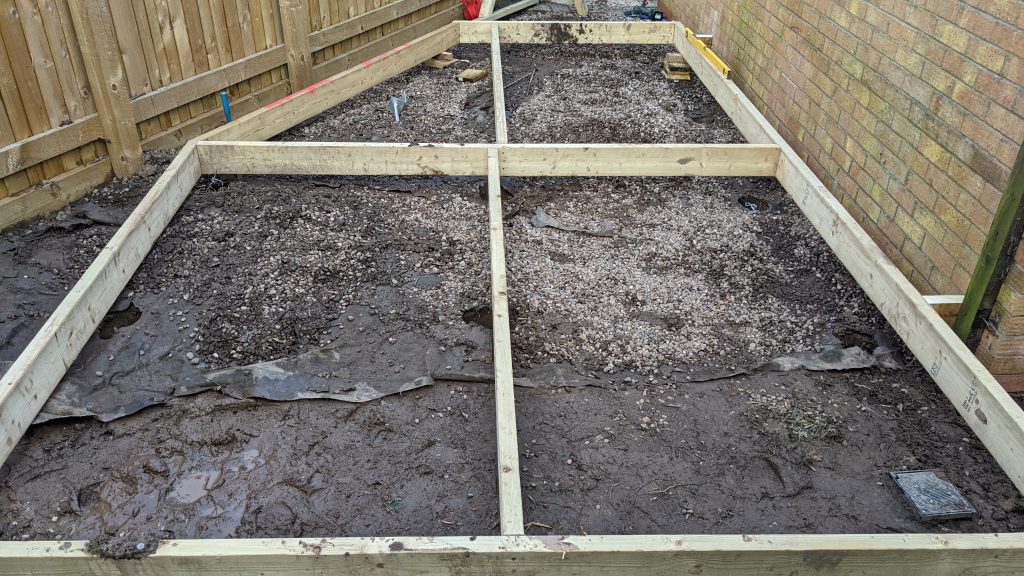
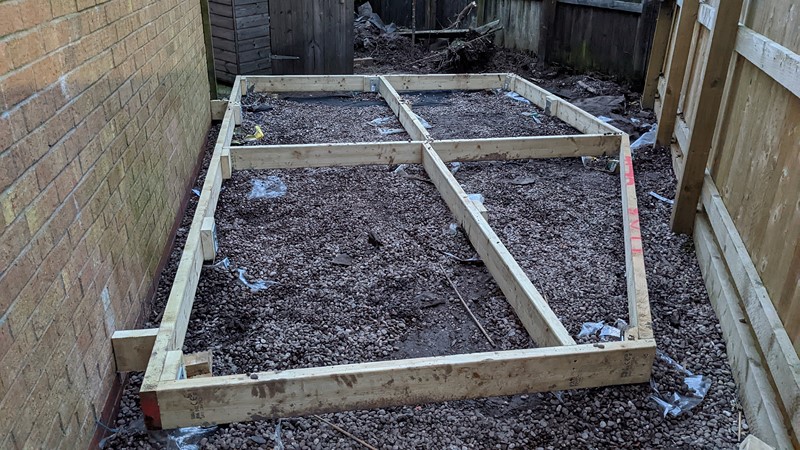
To set the level, I need the main structure of the frame assembled. I’m fixing all the timbers together with great big nails and even bigger screws. Once again, this is completely overkill on the fixings but ideal for the Mega Shed. With the frame complete, it becomes clear just how tight this shed is to the site boundary. I can’t say I haven’t used all of the space.
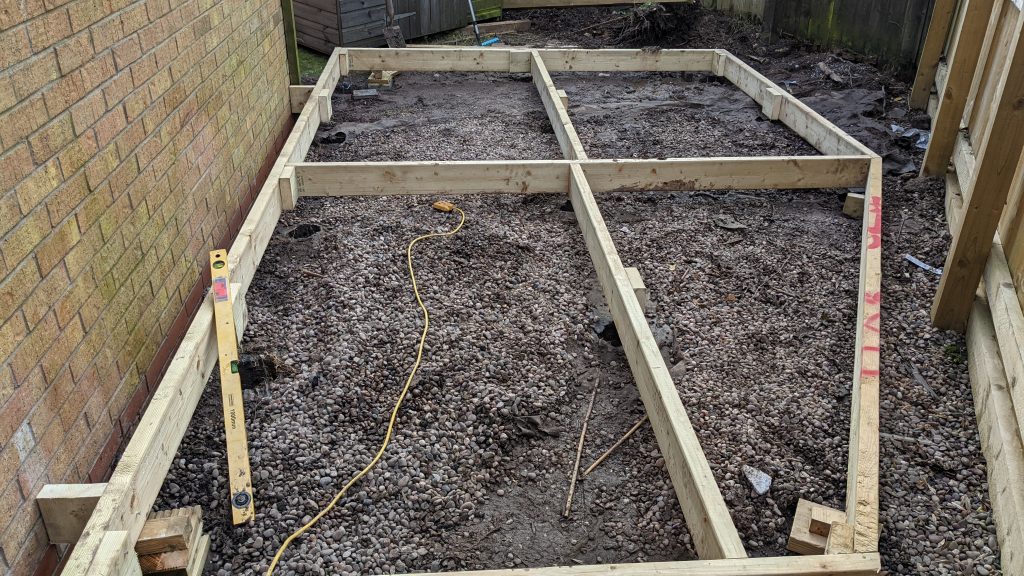
At this point, I realised I’d ordered the wrong sized steel risers from eBay. Doh. So everywhere a post goes, an extra noggin of timber is attached so that the frame can sit correctly on the pads. The complete structure also confirms that the holes are in the right place. Whoop! Using a long spirit level and woodblocks, I get the frame levelled and ready for the concrete to be poured.
Piers of concrete and steel
Part of the reason for using concrete piers is to get the shed entirely off the ground. If the shed base has enough clearance under it, then air should blow through, keeping the timbers dry. I figure I need at least 50mm clearance for leaves to blow through, although I might install some leaf/rodent mesh around the base.
Pier Reinforcement
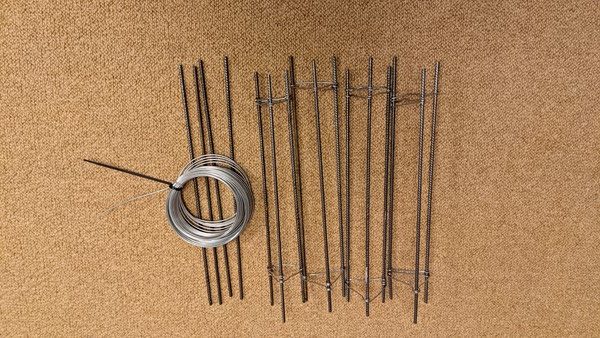
Concrete piers allow the height at each support point to be at just the right level. I want to use the minimum of concrete, but tall thin piers will not be solid, no matter the mixture ratio. The ground the piers will be set into is mostly clay and generally stiff, so it’s ideal for forming in. Adding some 6mm rebar should make the piers super strong. Each corner gets a fetching rebar pyramid, and the rest get two pars. I’ve used galvanised wire to hold them together while the concrete sets.
Extending each pier out of the groundwork
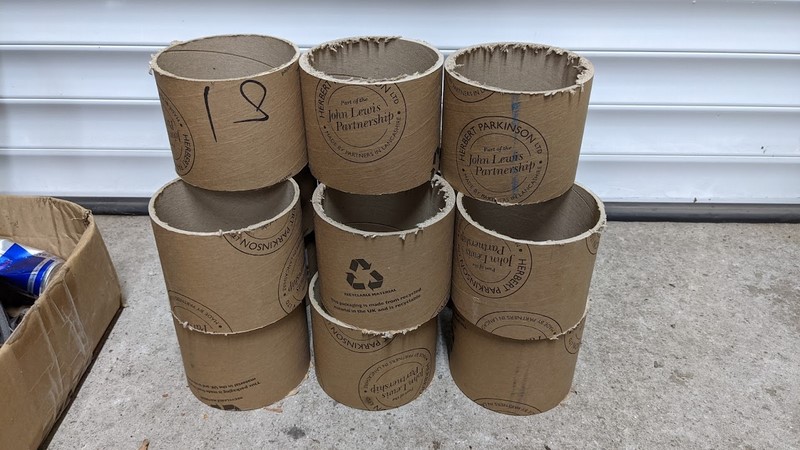
Finding the considerable variation in ground level over the site means some piers will have to rise out of the ground. This handy cardboard tube that I’ve been saving for a rainy day should make for an ideal form to cast into. First, the long tube is chopped down to 100mm sections then each section is split. The tube sections can then be overlapped to make a perfect sized form.
Galvanised anchors
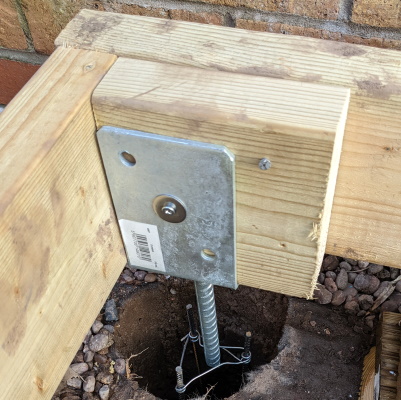
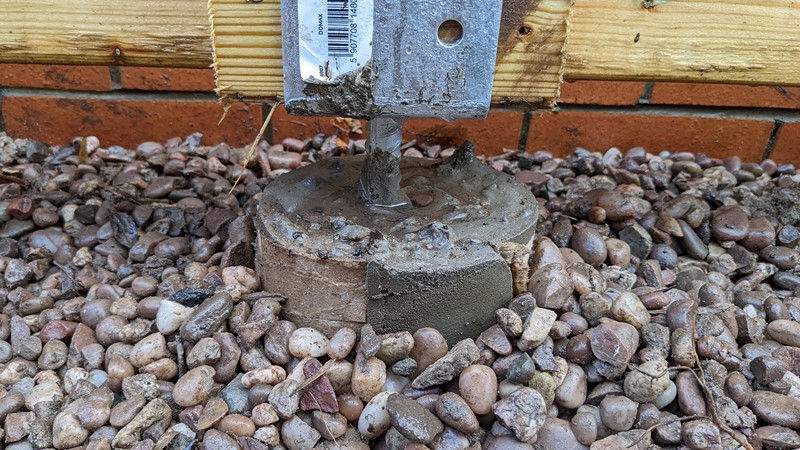
Each support point is prepared before the concrete is mixed. A screw holds the galvanised steel anchor in place while the concrete pier is poured. The picture above shows one of the corner support positions with a rebar triangle already in the hole.
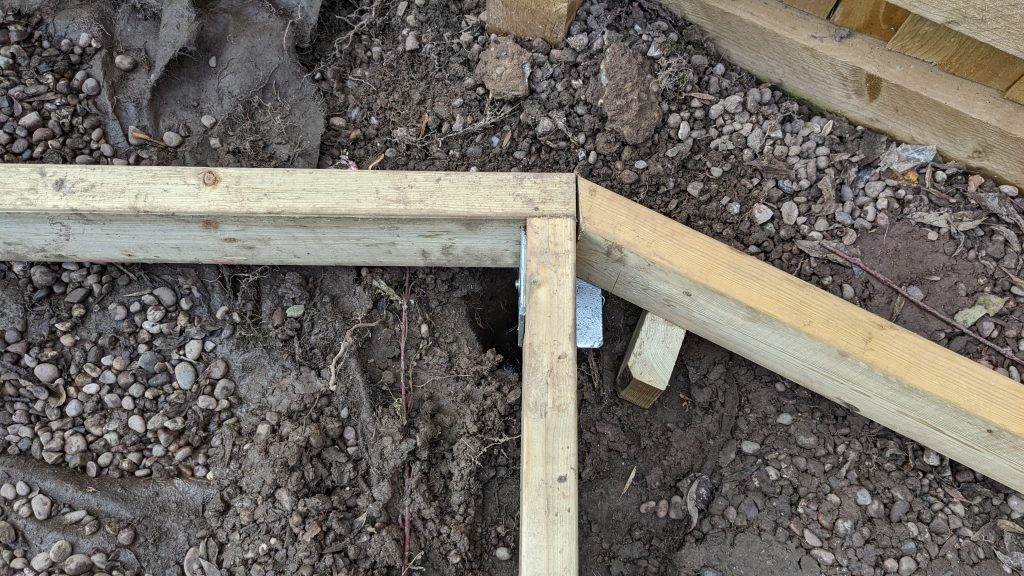
When I ordered the supports, I went off the height of the timber and not the width. As a result, each support is twice the size needed, but this is quite handy in the complex corners as they add additional support in multiple frame pieces.
Pouring the concrete piers
And after all the groundwork, framing pier preparation, it’s finally time to set this bad boy into the ground. Of course, the base of the building is the most crucial bit, so getting this right is vital to how mega the Mega Shed will be. I’ve done all my design and calculations on how much concrete I need, so there shouldn’t be any problems, right?
My hole digging mate arrives with a concrete mixer, and we set to mixing and pouring. I’m so grateful for this help as I’m already flagging after a long weekend. The first batch of concrete is mixed then gets thrown into the holes and tamped to get any trapped air out. It all goes surprisingly smoothly. Unfortunately, daylight is running out, and in a rush to get the concrete poured, I forgot to take any in-progress pictures. Then we start mixing the second batch, which absolutely isn’t going to be enough.
Curing time for the piers
Amazingly, there is precisely the right amount of concrete by some miracle and not calculation. Maybe a pint of the leftover mixture. The cardboard sleeves also hold up perfectly, creating fantastic forms with a bit of gravel banking to hold them together. Now they need to cure. The weather is expected to be reasonably dry for a week but getting dangerously close to freezing. If the water in the concrete freezes, it will expand and shatter before it cures.
To keep the weather off the curing concrete, each hole gets a plastic blanket to keep the heat in and the rain out. As the concrete curing process is exothermic, the piers should be fine. The structure is left for an entire week before I peel back the blanket to see what’s happened. The cardboard forms do get a bit stuck to the concrete, so don’t leave a perfect finish, but structurally the concrete piers are sound.
Whats next in the Mega Shed construstion?
The concrete piers will continue to harden over the next few weeks, but looking up curing times based on dimensions and mix ratios, I should be fine to continue building. I just have to remember to be gentle. The next step will be to complete the base structure, install breathable membranes, insulation and a subfloor. And I guess I should bolt the whole thing down to the metal posts at some point!
But now I’m firmly out of the ground; the only way is up!
M
NEXT – Part 4: Building the shed base
PREV – Part 2: Clearing the site
Back to Mega Shed Articles
Back to Workshop Articles
Amazon Affiliate Links – Things used in this article
BXProject is using Amazon Affiliate Links. It’s a quick way to show you what I have used in this article.
“As an Amazon Associate, I [may] earn from qualifying purchases.”
Since January 2024, Amazon has blocked embedding images, but I think the links are still valuable.

Great progress. If you’re putting a rodent screen in remember to do it before the walls go up – it’s a bit tight to get in against the fence one they’re already there. Or is this all history and I’m too late