
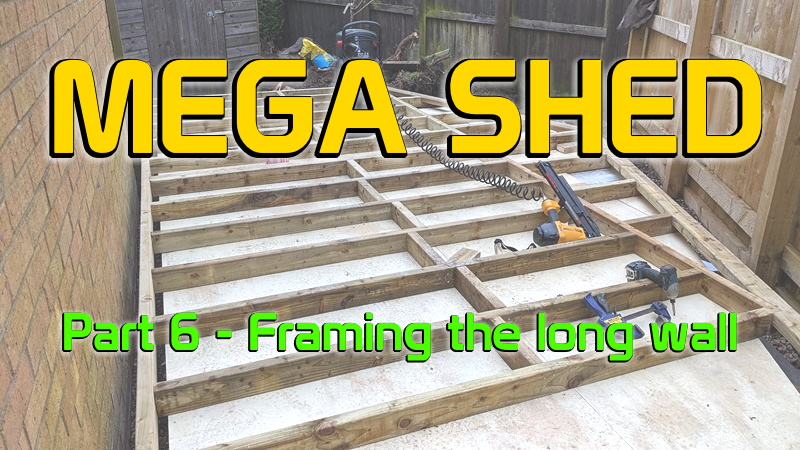
And where off! Out of the ground, base built and insulated. Subfloor installed to work off. It’s been a long time coming but finally, I can start to work on the main structure, the vertical bit of the building. This point in the Mega Shed build is where the design takes shape and becomes a reality. Getting the walls up will spur on the build, and I’m going to start by framing the long wall.
Where to start with a frame?
The long wall is, well, the longest of the shed walls. It is a 4.8m wall that runs alongside the existing garage wall. It will be the most significant single piece of the shed, massive, but where to start? Well, the critical part for this wall will be getting the roof central, so I’ll start with the main timbers that will hold up the ridge beam.
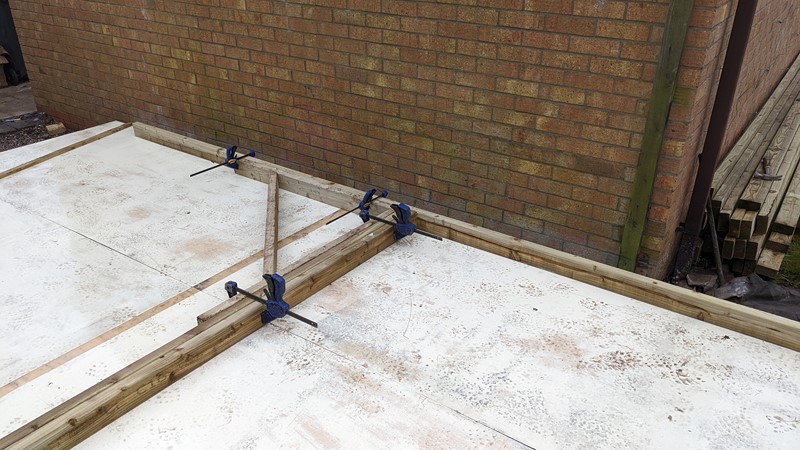
At the start of the build, I put together a framing square. It’s a simple set of four foot long 2×4″ timbers set precisely at 90 degrees. The long ‘legs’ of the frame allow the timbers alongside it to be held firmly in place with speed clamps while they are screwed or nailed together. Although it is a very simple method of aligning timbers, it is a much quicker method than trying to use a seven-inch speed square.
Creating the framework for the walls
I really enjoy putting together a basic framework. It’s pretty quick to do and in no time at all, you can start to see the size and shape of the building. It’s repetitive and straightforward too. The basic walls are about 220cm tall so I make these first, with noggins set at about 120cm from the base of the wall. These will later support the interior wall cladding.
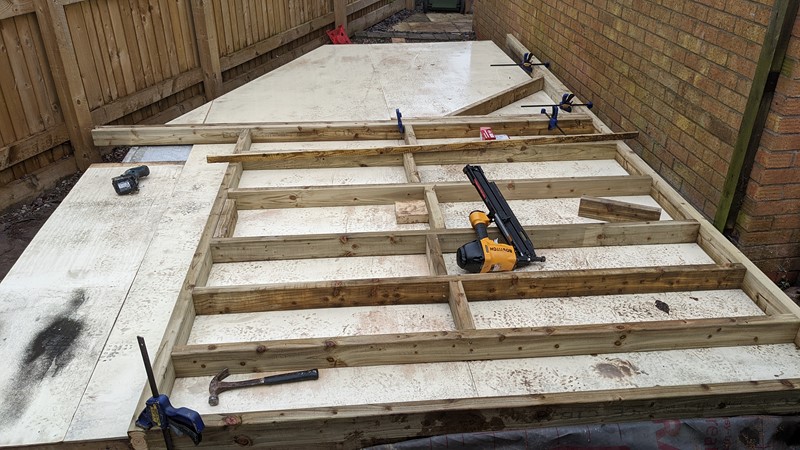
Keeping the structure simple and using the same lengths repeatedly makes the frame simpler to assemble. The wall studs are set with a spacing of 14″ centres, this will also help with fixing the interior cladding. There are a few areas where the spacing is slightly different to protect for later changes. For example, there is a wide enough gap to add a door to the garage later if I find the need.
Setting the first roof rafter to the frame
In the middle of the wall, a set of 2×4″ timbers, 3m long, are screwed together to support the ridge beam. The design of the Mega Shed means a thin ridge plate would be more than sufficient to support the weight of the roof. However, using a beam will allow me to use a simple hoist in the shed. I haven’t done the load calculations, but a few hundred kilos should be just fine.
By supporting the ridge beam with a set of 2×4″ timbers it does add a little complication to the rest of the roof structure. The rafters span from walls to the ridge beam and support the loads of the roof. It’s not just roofing material weight that needs holding up, but the force of any wind or snow needs to be supported. For me, this is one of the crucial elements of the build to get right, so I might as well go all-in with an oversized ridge beam.
Roof beam support
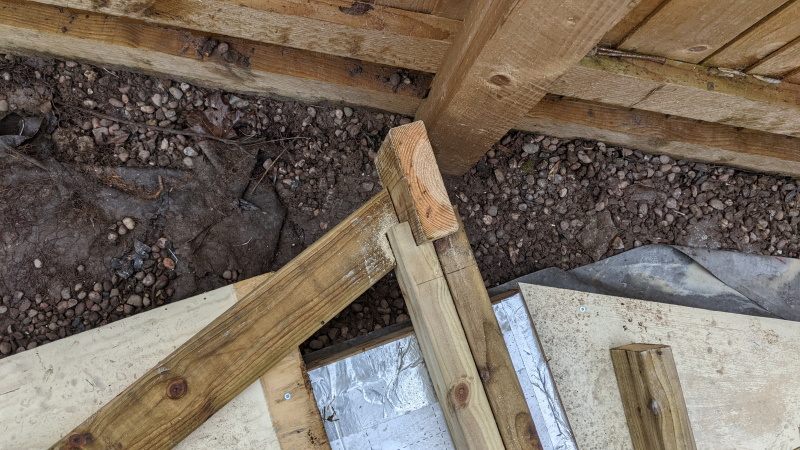
The first rafter is always the hardest. If I’ve got all my measurements right, and they match the original CAD design, then the angle between to top of the wall and the top of the ridge should be 20 degrees. And by some fluke, and maybe a bit of planning it is! The top end of the rafter also needs a little notch to work around the top of the beams supporting the ridge. And don’t worry about that piece of timber sitting high to the rafter. I have a plan for that.
Birdsmouthing the rafter
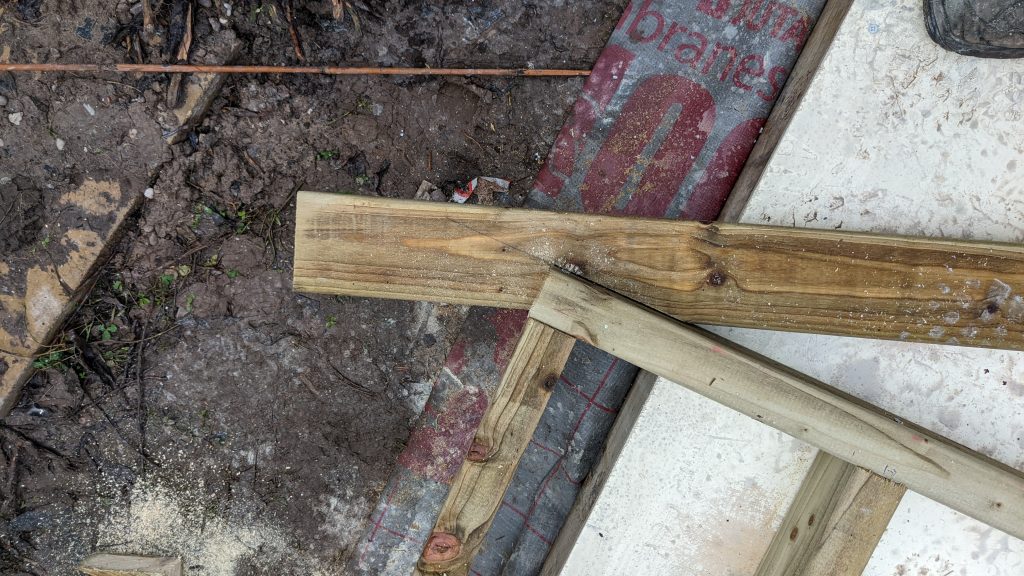
At the other end of the rafter, I need to create a birdsmouth. This funny notch makes sure the rafter puts any load downwards through the wall, or at least I think that is the idea. The birdsmouth should be about 1/3rd of the height of the rafter, and it’s a little over here, but close enough. The shallow roof pitch makes the birdsmouth look huge, but it sits perfectly when the rafter is offered up.
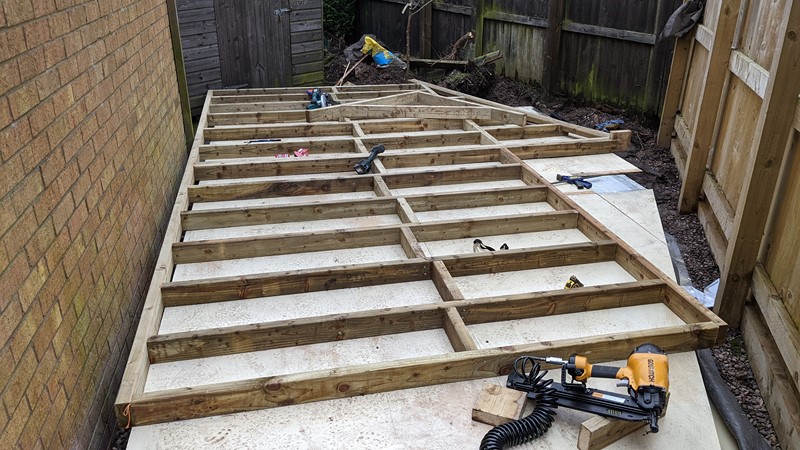
Repeat until the long wall is framed
Many hours of chopping wood and shooting nails later, and I have the framing of the long wall just about completed. I’m glad I have the nailgun at this point. While screws aren’t exactly slow, the nail gun definitely reduces the time spent assembling the frame.
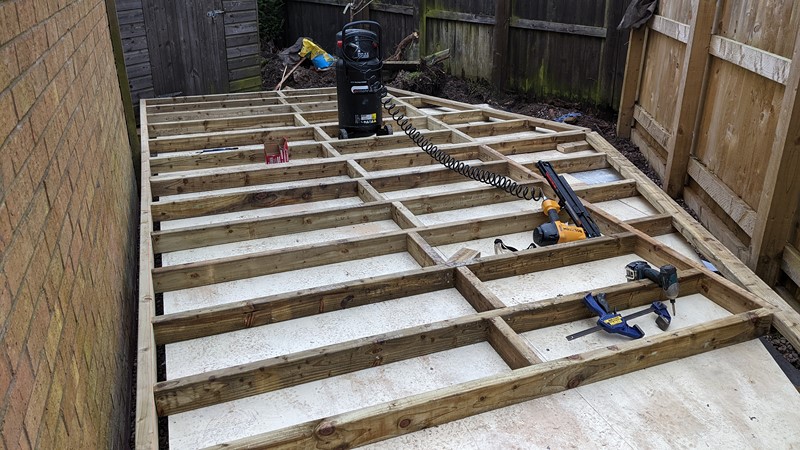
I’ll have to go back over the frame and check for missing fixings later. The rafter supports are cut behind the rafter, so I can’t get a screw or nail to them. I’m pretty sure I’ve missed a fixing into a noggin too, but right now, I can’t see the missing nail. I’m already dreading lifting this wall piece. The timbers are absolutely soaking, and it’s a struggle to lift as it is, and I have to add cladding too!
Adding the breathable membrane
Before I start packing away for the evening, I’ve got just enough time to get the Easy Trim Grafter breathable membrane down. The idea is that this barrier will let moisture out of the insulation but not let moisture in from outside.
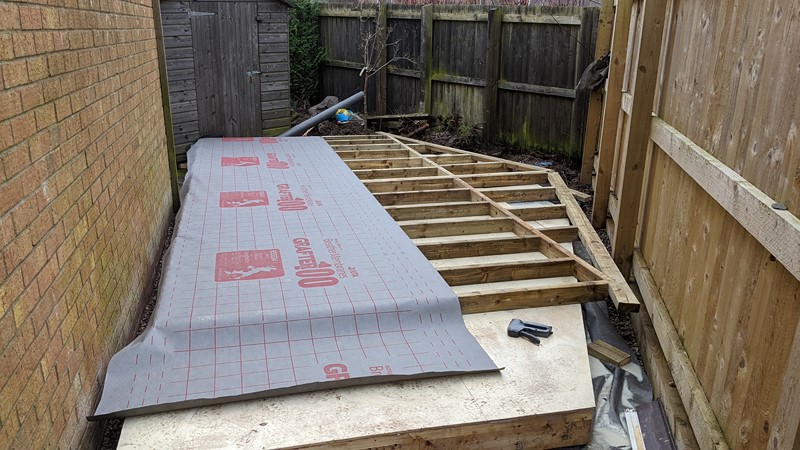
There is no particular reason for specifically using the Easy Trim product other than Travis Perkins stock it, and it is competitively priced. The membrane is another one of the building materials that’s big and bulky and goes on quickly, making it a satisfying job to do. Of course, the basic Stanley staple gun also makes quick work of tacking the sheet down.
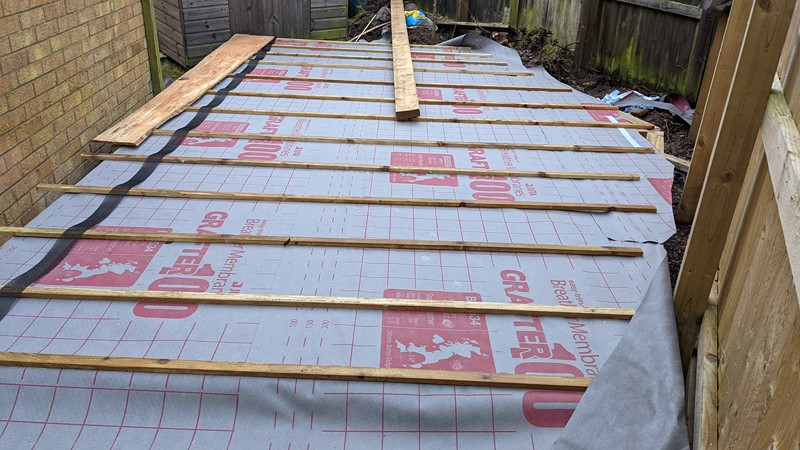
It takes three sheets to get full coverage of the frame. Each new sheet gets taped to the last one with 50mm wide double-sided tape with fibre reinforcement. There is a bit of debate if this sealing is needed for waterproofing. Personally, I’m keen to use it to help the structure become airtight. Over the top of the membrane goes some standard roofing battens. These will help create an air gap to help keep the cladding dry on the back edge.
Where to next on the Mega Shed adventure?
Next up, the cladding goes on. It’s a mixed process. It’s straightforward but needs attention to many small details to get the best long term performance. I’m undecided if I want to treat the panels or let them weather naturally, but right now, trying to seal them will be impossible because they are so wet.
As the build becomes a copy and paste exercise, the progress in the articles will start to speed up too. As I write, the roof and doors are on, so the write up significantly lags the progress. What can I say? The weather is generally being supportive, if not a bit cold.
M
NEXT – Part 7: Cladding the Long Wall
PREV – Part 5: Insulation and Sub Floor
Back to Mega Shed Articles
Back to Workshop Articles
Amazon Affiliate Links – Things used in this article
BXProject is using Amazon Affiliate Links. It’s a quick way to show you what I have used in this article.
“As an Amazon Associate, I [may] earn from qualifying purchases.”
Since January 2024, Amazon has blocked embedding images, but I think the links are still valuable.


[…] Link to the original article […]