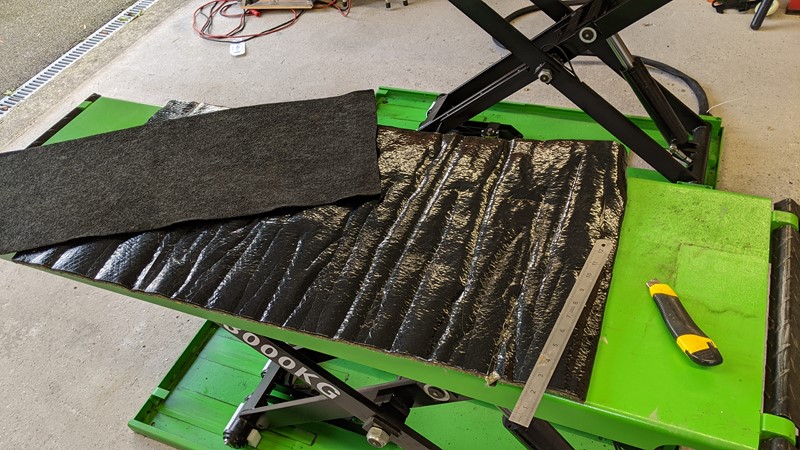
Somewhere in a beginners automotive DIY tool kit is usually a jack and a set of axle stands. The small elevation that the stands allow opens up a world of opportunity for automotive adventures. But after years or wriggling under a car elevated just inches from the ground, I finally plucked up the courage to buy a scissor lift.
The Fiat that broke the horses back
After twenty (ish) years of using axle stands and jacks, I can throw a car up into a raised state pretty quick. Despite all the automotive adventures I’ve had, only a few times have I had to get work on the underside of the car done by professionals. I was quite happy.
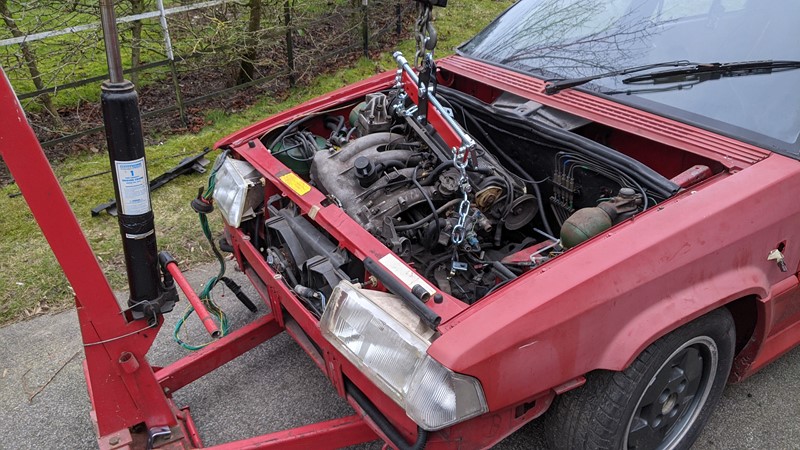
Then I shot myself in the foot and ended up with a Fiat X1/9 to prep for export. One of the photos required for the paperwork was a complete underside picture. Not something I could do from axle stands, despite trying. After many years debating if I really needed one, it was finally time to buy a car lift.
Deciding on the right type of lift
There are a lot of options for hoisting a car further than axle stands will allow. From scissor lift to a sunken two-post or even a forklift with loading arms, the options and combinations are endless. My garage height is limited, about 2.6m, which rules out most commercial lift options. I also didn’t want to be left with floor to ceiling pillars to work around when the lift wasn’t in use.
I was pretty much left with the option of a scissor lift or some sort of in-floor two-post lift. Until I visited Bell Engineering for work on the Freelander, I wasn’t convinced about a scissor lift. I perceived that the mechanism would restrict access, but having watching Bell Engineering service the cars haldex in a matter of minutes, the appeal grew.
Choosing the right scissor lift
Having spent a lot of time researching the right sort of scissor lift to buy, I’ve found there is a multitude of options. I knew I didn’t need a full-height lift as the 1.8m platform would leave little room for a car. And I also wanted to avoid needing a separate air supply used to release the safety latches. I was pretty much set on the StrongMan Clifton lift at a delivered cost of around £1900.
That was until I hit eBay looking for a bargain, and man did I find one. I stumbled across the Garage Equipment Group eBay shop where I found they offered a mid-rise lift for £600 less than the Strongman. They were also local enough that I could take a trailer the next day and collect.
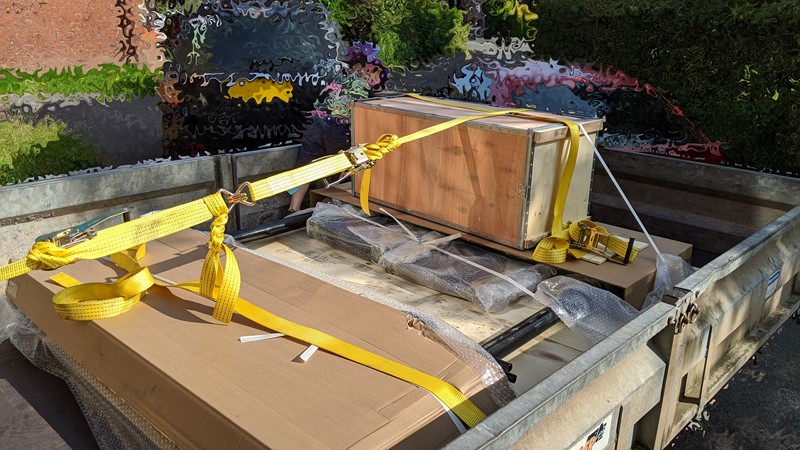
The grand unloading of the scissor lift
It was an adventure on its own collecting the scissor lift. Borrowing a trailer and engine crane, I went over to Garage Equipment Groups warehouse where they loaded on with a forklift. Nice chaps, open about their business model which is simply volume sales.
Offloading the 600kg of lift without a forklift was a little trickier, but I managed, on my own, in about an hour. The process was to lift one side of the lift up, drag it out of the trailer and lower it onto the legs of the crane. Then raise the side of the lift still on the trailer with the crane. The whole lot could then be pulled away from the trailer on the cranes wheels.
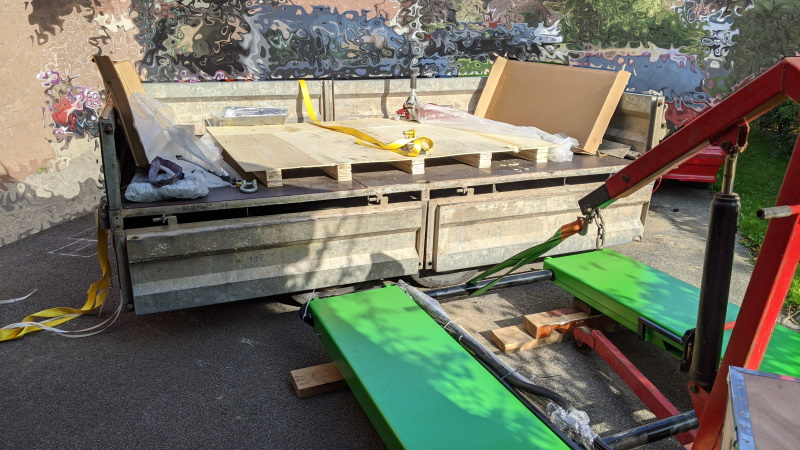
Once off the trailer, the scissor lift was lowered on to blocks, allowing the transport wheels to be installed. With the drawbar in place, the lift could be wheeled into the garage.
Simple Commissioning
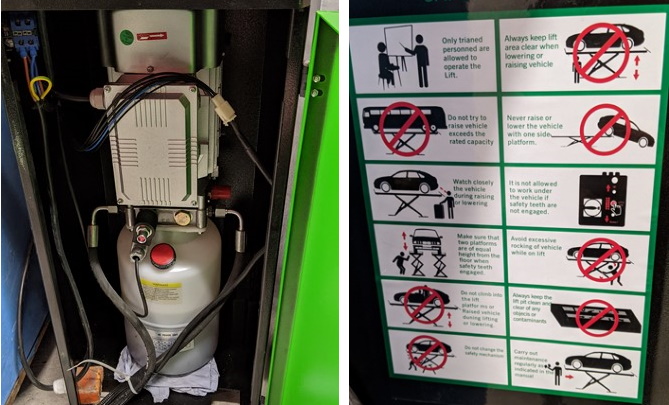
The guys at geg.co had talked me through the commissioning process, but honestly, there wasn’t much to it. Connect the pipes from the hydraulic rams to the connections in the control cabinet. Fill the hydraulic reservoir with the supplied fluid and plug in all the wires. Plug into a mains socket, and drive it to full height a few times. And that was it!
Safety Features
With the commissioning complete, it was time to memorise the safety instructions for the scissor lift. Sarcasm aside, this is one sturdy piece of kit. Well machined and finished 6 to 10mm plates make most of the structure. Nearly all of the components are standard common mechanical parts meaning replacements will be easy to source. I hope the simplicity of the scissor lift will mean it’s reliable for a long time.
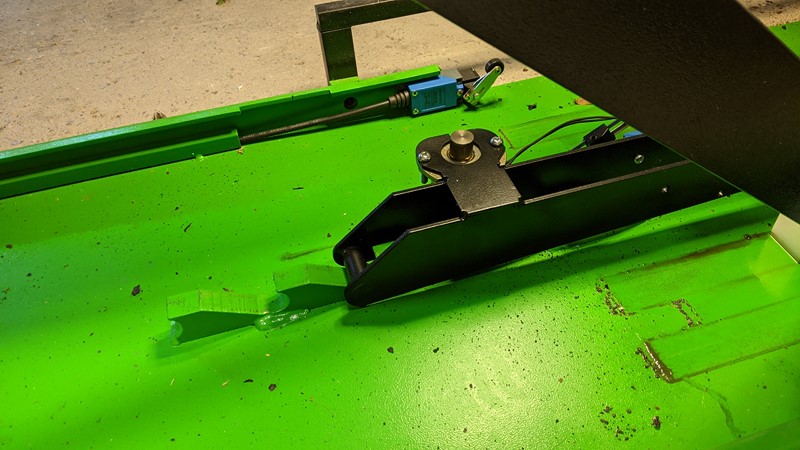
Should something fail, a hydraulic piston fracture or a pipe get cut, the anti-drop mechanism is more than capable of holding the rated 3tonne. In the picture above you can see the weighted drop arm (black) which falls into the sawtooth (green) and stops the scissor from collapsing. When the platform is being raised or lowered, the servo will lift the arm clear of the sawtooth
Using the Scissor Lift
Having usef the scissor lift for more than three months, there are quite a few things about it I hadn’t really considered before I made the plunge.
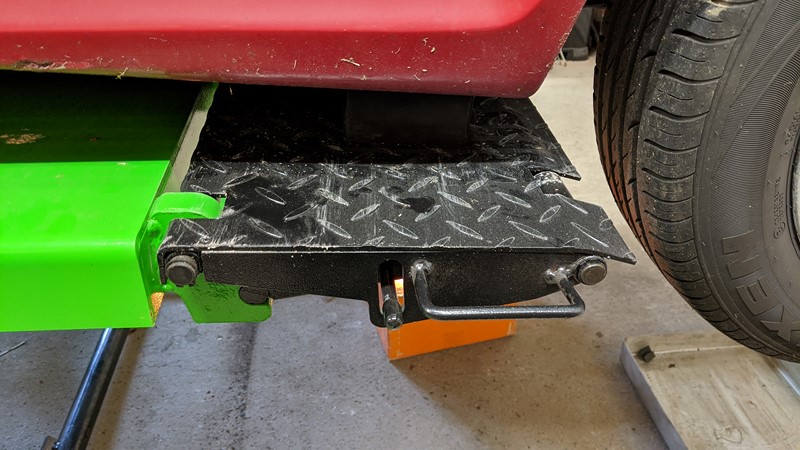
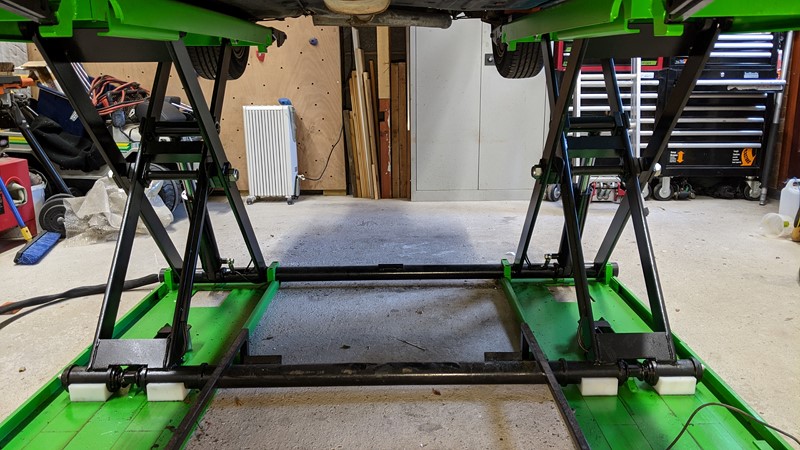
The two raising platforms are pretty big at 45cm wide and 140cm long, but sometimes big isn’t big enough. For those moments when the vehicles jacking points are outside the main platform length, the lead ramps can be locked in place and used as extensions.
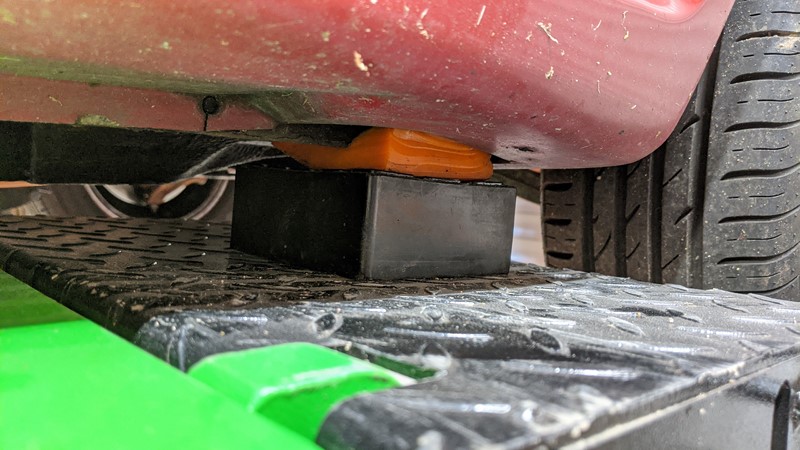
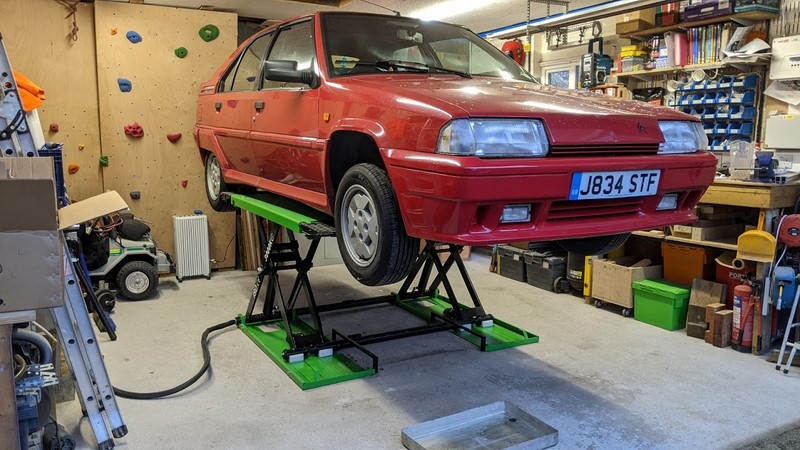
The lift comes with two sets of rubber lifting blocks, two different heights, to help with lifting through the cars jacking points. Because of the body kit on the BX, I use a couple of squares of poly bush type material the right size to fit the cut-outs.
I wouldn’t want to put the car through the ceiling, so its good to know that the BX is well clear even at full extension. There is about 40cm of clearance which means tall vehicles, like the Freelander, are going to get very close to the ceiling.
At full height, the lift has a huge amount of room to work under. The maximum platform height is 1m, some 5 times more than I would have with axle stands. The rubber blocks take this up a few more useful centimetres. One thing I perhaps didn’t think about pre-purchase, is that storing a car 1 metre off the garage floor actually makes it easier to get around the garage.
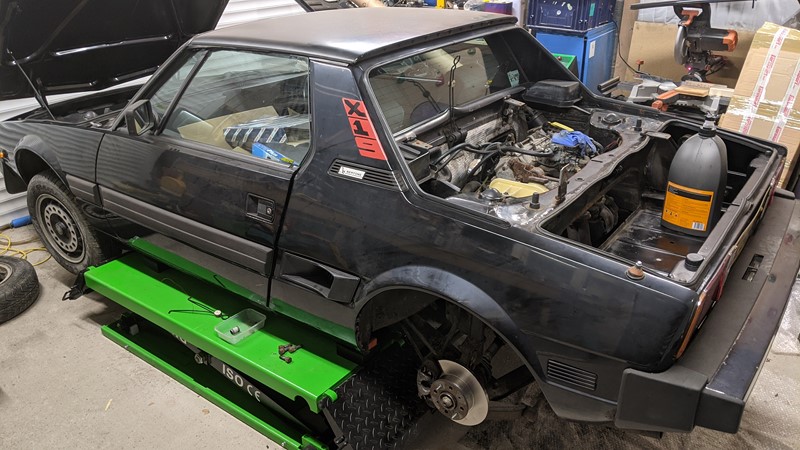
The scissor lift really comes into its own with just a small amount of elevation. I found when changing the Fiat X1/9s clutch, that a 30cm increase in height made working in the engine back much more comfortable. Like a patient on an operating table, the last thing you want is to be bent over for a 4-hour surgery.
And when the scissor lift is not in use?
I was really conscious of having the scissor lift sat on the garage floor, and not sunk in. Fully closed the platforms sit at abount 10cm high, with the pipes and cable sat in a bundle about 5cm high. My expectation was that I’d be forever tripping over it.
The reality is I am yet to trip over the giant green platforms. They sit at a balanced height of big enough to notice subconsciously, and not so big that much effort needs to be put in to step over. The cable umbilical is heavy enough that it stays where its put.
And most importantly, when there isn’t a car on the scissor lift, it doubles for the biggest workmate I’ve ever used. The full 1m table height actually makes for a handy place to work on sheet material. Despite my worst fears, the benefits of this giant tool sat in the middle of the shop floor far outweigh the negatives.
And the limitations of the scissor lift?
Of course, with any piece of equipment bought to a budget, there are limitations. And this scissor lift is no exception.
The hydraulic rams are single-acting, so downward velocity of the platform is a factor of the weight on it. The nylon sliders on the bottom of the scissor legs also add a lot of friction and need occasional lubrication.
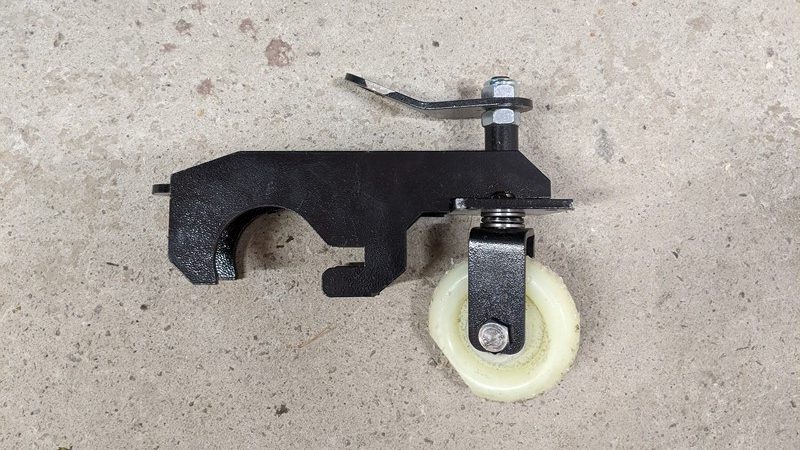
Another limitation is the basic transport wheels. At one end of the scissor lift, the two fixed castors work really well. But on the other end, the single pivoting castor is pretty much hopeless. After a few feet, the shaft buckled and ultimately I dragged the lift sideways into the garage. The nylon wheel isn’t looking too healthy as a result. But I think there is an easy fix to this.
By far my biggest concern is the lowering process. To clear the anti-drop system, when lowering the platform it first has to go up. I fear at some point I’ll have a car touching the ceiling and need to drive it UP, to get it to go down! If I do get into that situation it is possible to manually operate the lift. A slow and complicated process I’d like to avoid.
And the verdict of owning a scissor lift?
WHY DIDNT I BUY THIS SOONER!
For years I’ve had somewhere I could have put the lift while instead I struggled under low hung cars. I can’t believe I didn’t buy this sooner. My enthusiasm for working on cars has increased, just knowing I can work on them at a more convenient height. No more guessing where the leak is coming from, just jack her up and watch the fluid flow. This has been by far my best tool purchase for nearly a decade.
M