
From the outset of the XPO rebuild story, I have tried to put articles roughly in chronological order. However, the electrical side of the rebuild has been the most taxing and challenging aspect of the build. Practically every part of the wiring has needed some fettling, as you’re about to find out. So, in episode 33, let’s start tackling the electrics!
Electrics and bodgery
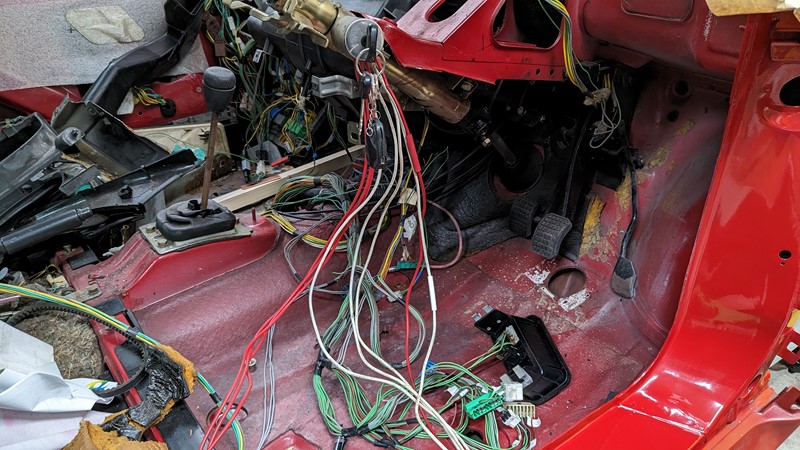
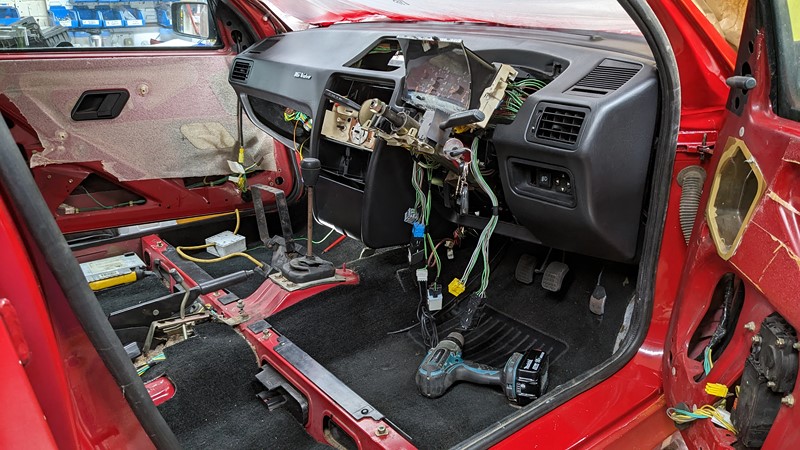
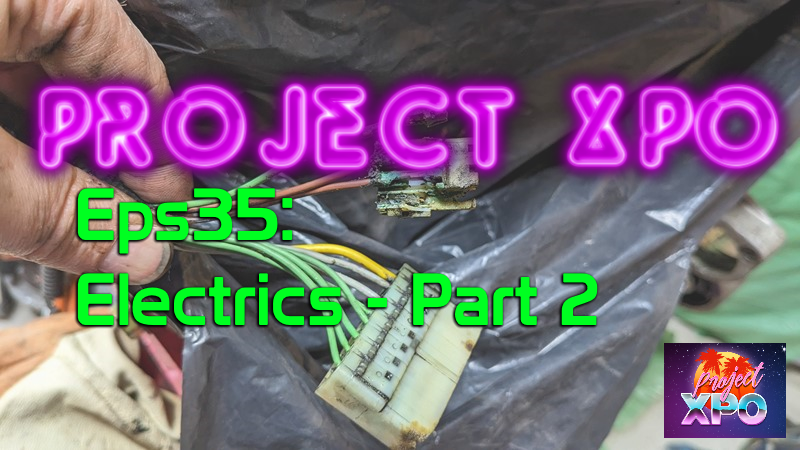
While I knew before purchasing XPO that all the interior was out of the car and the electrics had been meddled with, I wasn’t prepared for this. Every single cable run on the vehicle had been messed with. Not just unplugged and moved around, but connectors were missing and some rewired.
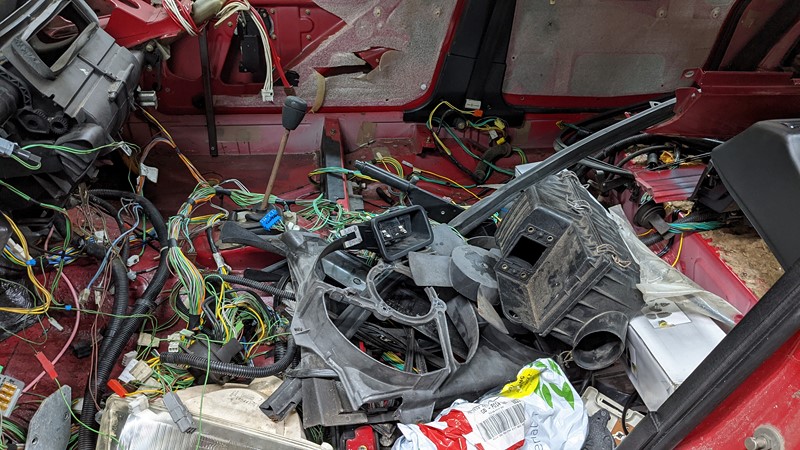
This is pretty close to how I found the electrics when XPO first arrived. Absolutely everything, everywhere and very little connected. Some of the elements I knew about. The lovely vendor at UpnDown videos (shameless plug, but only because he owns an SM) had prepared me. The original engine had been removed sometime in 2008, so the engine bay components had come from a range of donor cars.
Despite the warning, I have no comprehension of what happened to the interior loom. Nearly all plugs had been numbered with marker pen. And not marked in a clear order or matching the harness diagram. Every wire end had been labelled with the harness destination. This might seem like a convenient thing to have. However, in marking up the wires, the whole harness had been pulled apart. Pulled apart in a crispy duck fashion, not in a structured way.
Making the harness safe
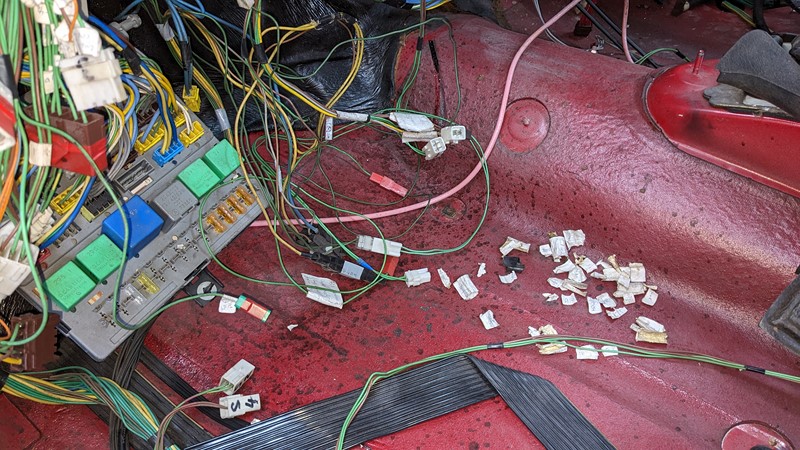
Early in the XPO rebuild, I decided that the electrics were in such a mess that there was no way I could power them up. Instead, a complete electrical review was needed, and the wiring structure would need checking and complete rebuilding. In retrospect, this was one of the better decisions I made int he XPO story.
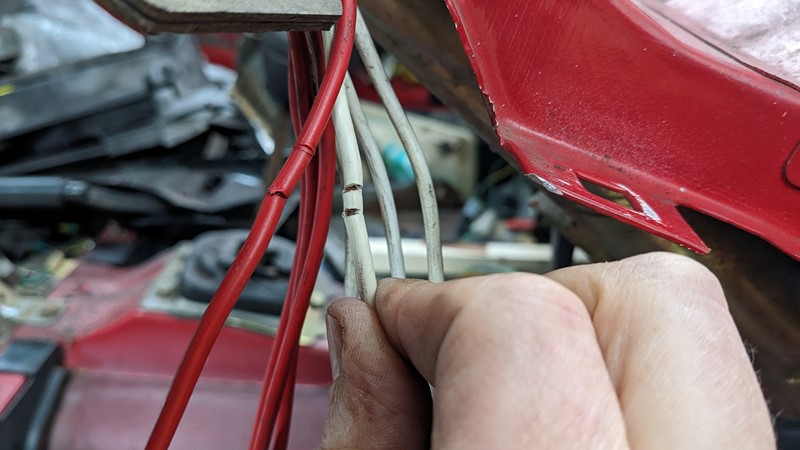
Suffice to say, it didn’t take long to find some horrid electrical bodgery. Beyond high current cables in the engine bay being unterminated, there is clear evidence a period car alarm was once installed. It didn’t take long to find this brutality on the ignition barrel wires. If you ever consider using Scotch locks on 12v wiring, please don’t. Even as a temporary bodge, they are destructive.
Fortunately, the minor damage could be swiftly rectified. Each damaged wire was removed from the connector at the bottom of the steering column. Then, a suitably sized heat shrink tube was slid up the wire to the damaged section. When heated, the tubes shrink and in this case glue inside the tube creates a water-tight seal.
If you’re considering installing an alarm on a Citroen BX, this is the WRONG place to pick up the battery and ignition live power feeds!
No ground to run to
Before putting power to the vehicle, I need to make the electrics safe. Every single wire was traced and checked for condition. Then, any damaged connectors were replaced where needed. A few wires simply had to be made safe. The process took days, and I did eventually realise the lack of ground stud behind the battery tray.
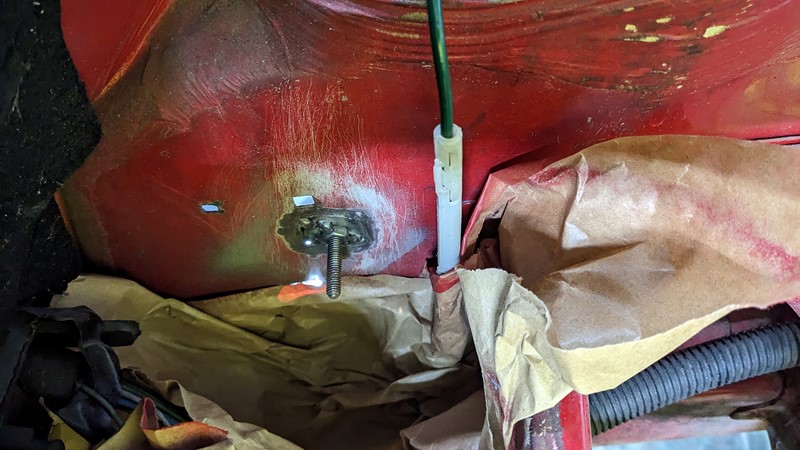
I suspect it was accidentally removed with the engine back in 2008. I’ll take accept fitting a new ground post if that’s the only damage during engine removal. The original ground terminal is spot welded onto the shell. Unfortunately, where it had been torn off the body, a 10mm hole had been left behind. Initially, I toyed with cutting a bigger hole, plating and welding in a new stud.
But in the end, given the access restrictions, I settled on bolting up an M6 bold with penny washers, then welding it all together. The usual layers of etch primer, high build, top coat and lacquer were applied on both sides to seal everything in. And don’t panic, I taped up the thread before painting. Afterwards, I lubed the threads and surfaces with Vaseline when fitting the cables.
ABS is a no
For reasons I don’t understand, I jumped in to tackling the ABS quite early on the the electrics restoration. Looking at the dates of the pictures, the ABS was tackled shortly after tackling non-functioning ABS issues on Jazz.

As I’d borrowed the ABS ECU from XPO for diagnostics on Jazz, I started with an almost blank slate. However, I could run through the whole ABS diagnostics sheet without the ECU in place. Amazingly, all the tests that require measuring across the connector pins were all within tolerance. For a car that has been moved from one resting place to another for fifteen years, I’m surprised none of the sensors have been damaged.

I started checking all the power supply basics with the ECU back in. Was the connection to the ABS relay okay? Was the ground wire at the bolt under the centre console still a good connection and free from corrosion? Fortunately, everything checked out. Was the power connector in the correct hole in the fuse box. Erm, hang on a minute …
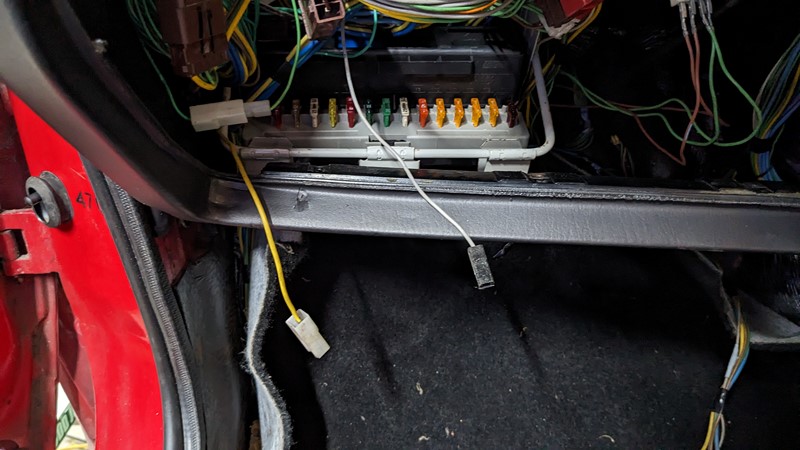
ABS Vs non-ABS fuse board
I hope the slider image below works, and you can play spot the difference between two fuse boards. On the left is the one originally in XPO when it arrived. It is a Mk2 fuse board but does NOT have the ABS pins populated.
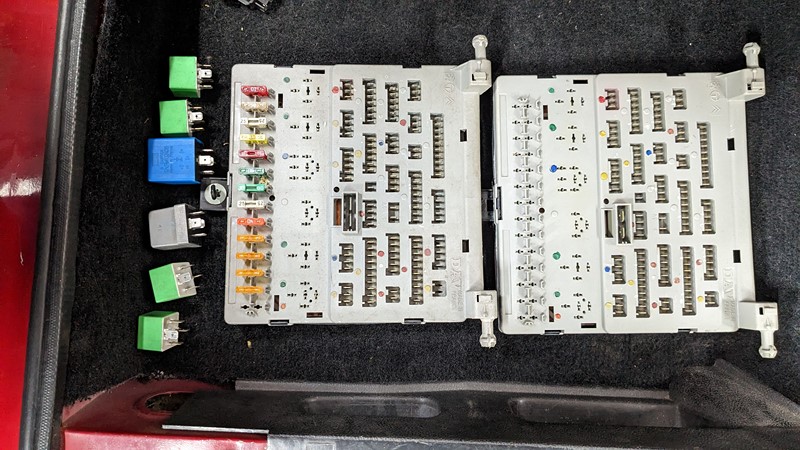
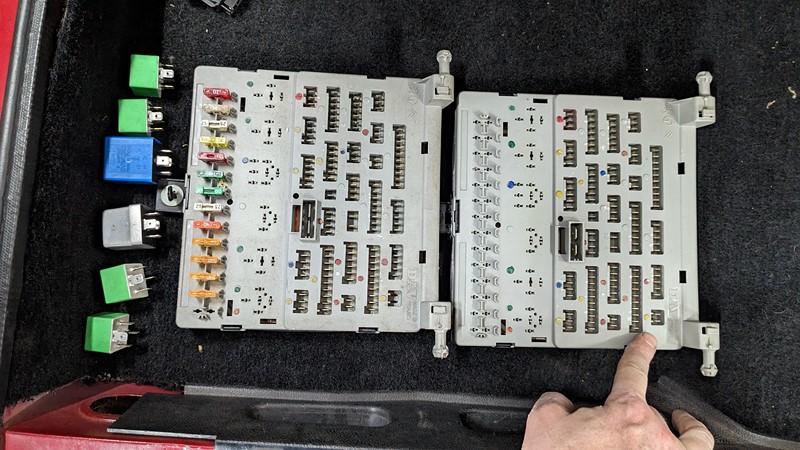
The ABS power connector was actually in the hole, but with no pins, there was no electric connection. Interestingly, the fuses were in completely the wrong places as well. I guess the fuseboard was also changed out at some point. Annoyingly, I couldn’t find a spare fuse board, and once again, the lovely bearded wonder at Adventures In Rust sorted me out.
The Magic Dash
To know if the wiring is working, and with so many of the wires being for sensors, I needed the instrument cluster back in. However, I’ve been caught out before putting a faulty cluster on a car and then spending hours trying to figure out a wiring fault, which was just a failed bulb.
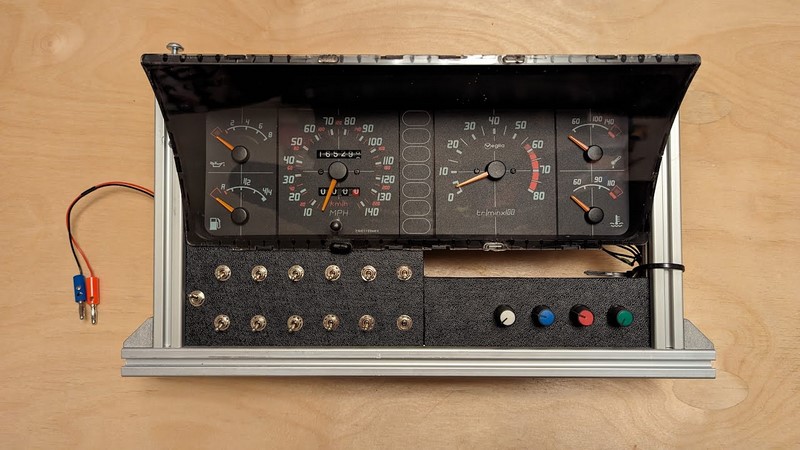
Rather unimaginatively, I call it the magic dash. Right now, it is simply a short harness and set of switches and dials, supplied with 12v. This lets me simultaneously test every bulb and gauge on the instrument cluster. In the long term, I want to make this more innovative and potentially driven by CANBus.
With this rather useful tool, I could check every bulb and confirm good operation. While this isn’t a totally foolproof solution, I hope this will signficantly reduce fault-finding time once the electrics are repowered.
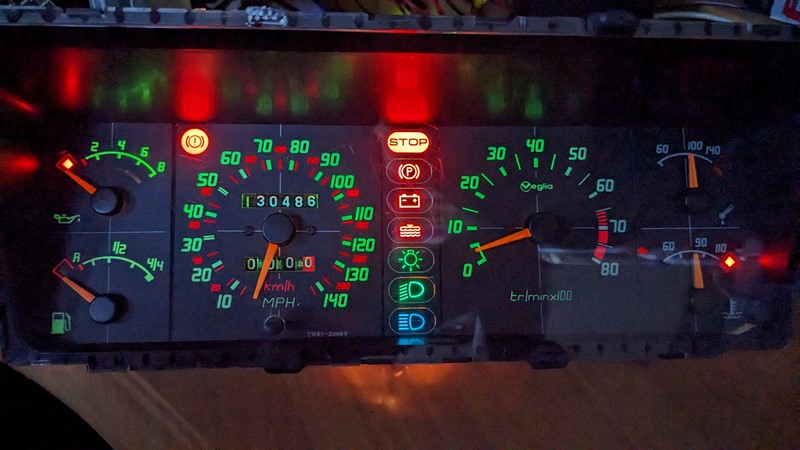
First power up of the electrics.
Now, this is something I’m not overly happy about, but I have to jump out of the build sequence. As if by magic, the interior carpet and dash are back in. I’ll cover that fun and games in an upcoming article.
I’m using a bench power supply rather than a vehicle battery for the first power up. This lets me keep things powered without flattening a battery and gives some over-current protection should something become shorted to ground. Okay, I can’t start the engine this way, but until I get the electrics tidied up, the bench power supply is a good solution!p
And amazingly, following some wiggling and bulb replacements, a lot of the electrics work. This was quite a surprise for a vehicle that has been sitting outside narrowly avoiding the crusher for so many years. I’m not suggesting the electrics were perfect, but this was a huge positive step.
Ignition electrics overhaul
One thing that did have me a little baffled was some strange operation when the ignition key was taken out. From turning on the power supply, the key would turn to the ignition or accessory position and the electrics where powered as expected. However, after taking the key entirely out of the barrel, some electrics continued to be powered. Spooky!
Ignition barrel disassembly
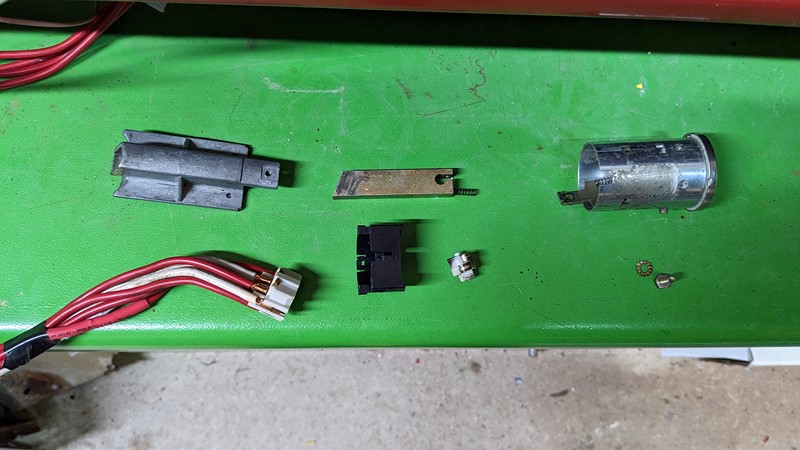
Fortunately, this was an issue I had encountered before, and all signs pointed to a burned contact inside the ignition barrel. The BX community often talks about the benefits of fitting relays in lighting and other circuits to overcome low voltages from the ignition barrel. Personally, I consider throwing in extra relays to be an electrical bodge, so I prefer to tackle the problem at the source.
Source of the electrical problem
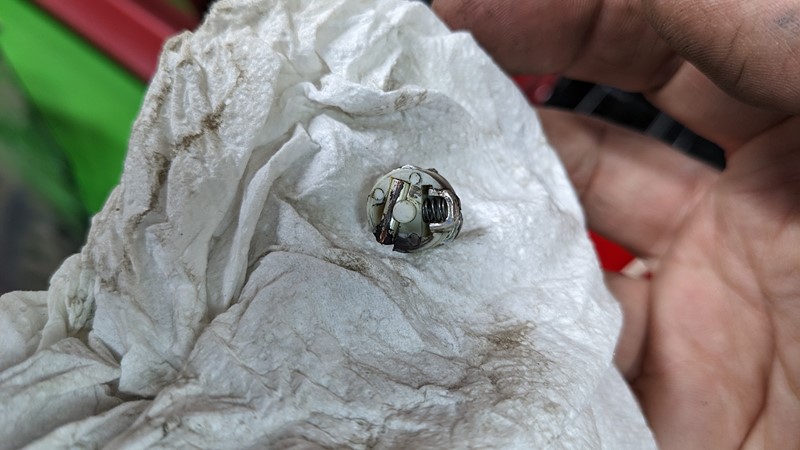
I swiftly had the barrel removed from the steering column and disassembled it. As expected, after 135,000 miles, the contacts in the ignition barrel and past time for a service. The discolouration from arcing is quite evident in the rotating part of the barrel.
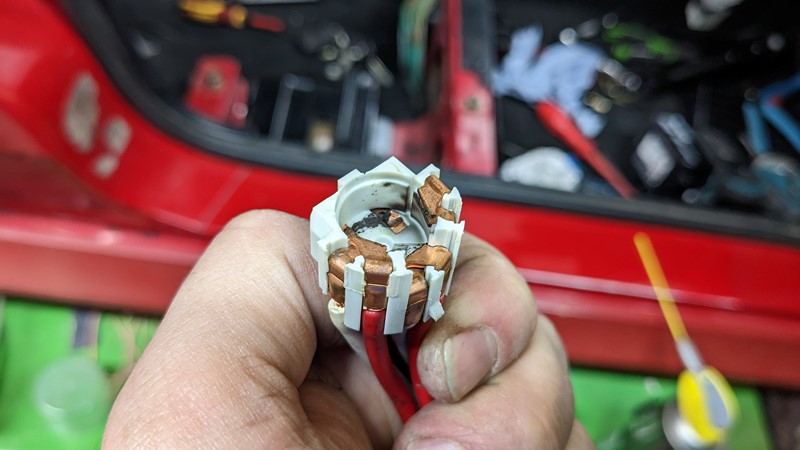
When looking at the moving half of the electrical part of the ignition barrel, the source of the electrical gremlins is quite clear! The arcing has bridged two of the copper contacts. This is probably the worst BX barrel I have seen, but it was still repairable. I don’t think it would have lasted long. First, I thoroughly cleaned the electrical components. Then, I reassembled them into the ignition barrel with suitable lubrication. Finally, I reinstalled the ignition barrel back into the steering column. Fortunately, the electrical bug was banished to history when I retested the operation of the barrel.
Tricky Rear Wiper
The next thing I tried to get working was the rear wash wipe. Despite the switch testing out, it simply didn’t want to know. No amount of bulb changing was going to solve the issue. This perplexed me for weeks, but fortunately, there were plenty of other things to get on with.
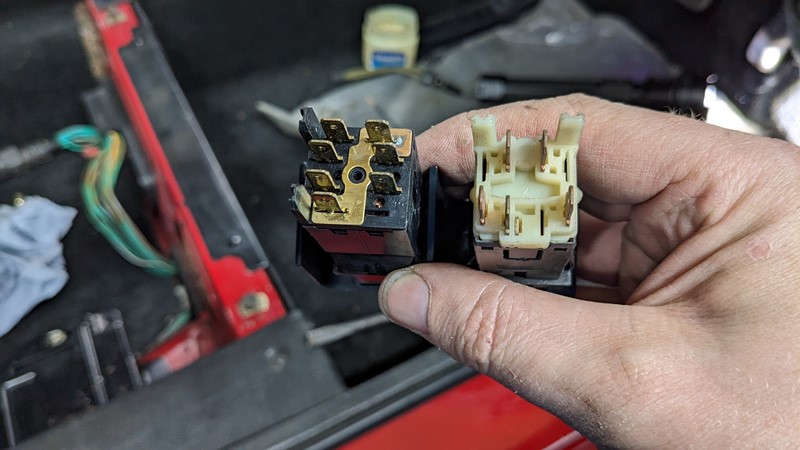
Eventually, a conversation with a fellow BX owner at a Citroen Car Club event led me to realise what I’d done. Many parts were missing on XPO, which became apparent when I started assembling the electrics. Actually, they were not missing; I misplaced a whole box of parts and didn’t realise. So I’d pulled the switches from my stock and somehow picked up an estate rear wiper switch instead of a saloon. As you can see above, they’re somewhat different!
Interior Electrics Back Together
After a few days, or perhaps they were long nights, the interior electrics are mostly back where they should be. And it was a challenging feat. I certainly feel at one with the wiring schematic. I also have a lot of notes for whoever at Citroen created the original.
Things are not entirely perfect though. At this point there are clutch of wires which are not connected, and frankly, I have no idea where they are meant to go. For the time being, I’ll refrain from installing the passenger seat and trim around the carpet. I can well imagine this will need to come out again in the near future!
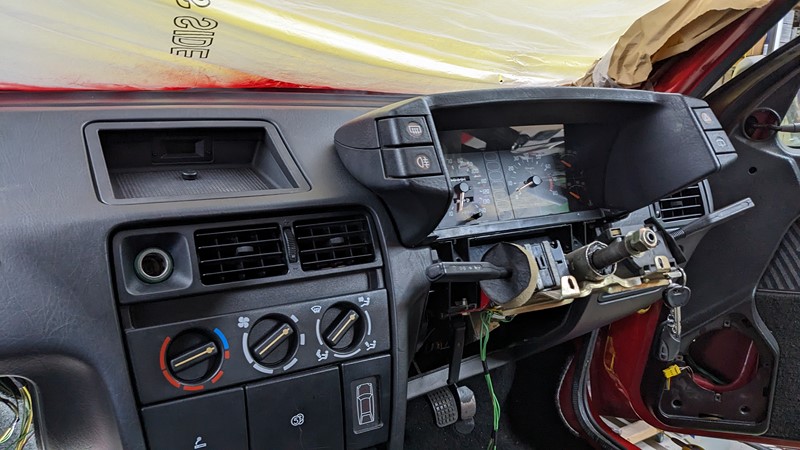
Despite the few remaining connections that I need to make in the cabin, we are finally bringing things together! Turning the ignition key and lighting up the instrument cluster creates a feeling of euphoria. Flicking on the indicator and sitting in the dark garage with the flashing amber bulbs drives home that progress isbeing made!
More electrics still to come
While I thought the interior electrics were a mess, oh, what a surprise lay in store with the engine bay wiring. And the car still had some tricks up its sleeves on the interior wiring. I’ll leave that until the next electrics journey, but suffice it to say, I need new swear words for the fun and games I had at the front and very rear of the car!
Until next time
M
NEXT – Eps34 Interior Installation
PREV – Eps32 Tackling the Scuttle
Back to Citroen articles
Back to Automotive articles
Amazon Affiliate Links – Things used in this article
BXProject is using Amazon Affiliate Links. It’s a quick way to show you what I have used in this article.
“As an Amazon Associate, I [may] earn from qualifying purchases.”
Since January 2024, Amazon has blocked embedding images, but I think the links are still valuable.
[…] NEXT – Eps34 Electrics Part OnePREV – Eps31 Cleaning and Plating […]
Great progress. My most complex wiring job was wiring a new fuse box on a Mini and that scared me
[…] no obvious reason, I take a detour to installing the door cards. In the last article we got a lot of the interior wiring working, including the door electrics. With the electric […]
[…] Episode 33, the article focused on getting most of the interior wiring repaired and connected so that the […]