With the fate of the Fiat X1/9 set on export, and remedial work started, it was time to think about the import permit. This seemed simple enough however the list of pictures required was extensive and I didn’t expect to have to drain the coolant for the import permit . . .
Australia Import Permit Requirements
To bring a car into Australia requires an import permit to be in place before it arrives at the port of entry. And like many countries, Australia has specific rules for ‘classic’ cars manufactured before 1989. Fortunately, this 1987 Fiat X1/9 falls into the ‘classics’ category simplifying the import.
To sum up the requirements in my own words the import has to be original and genuine. Oh, and being Australia, clean. Simple. And for the most part evidence for the permit application is simply photographic, and digital images are accepted.
The Many Pictures for the Permit
As the import was being managed by my ‘friend’ who roped me into this fine mess, I was, rightly, spoon fed the information required for the permit. A couple of pictures seemed simple enough. Until I saw the whole list!
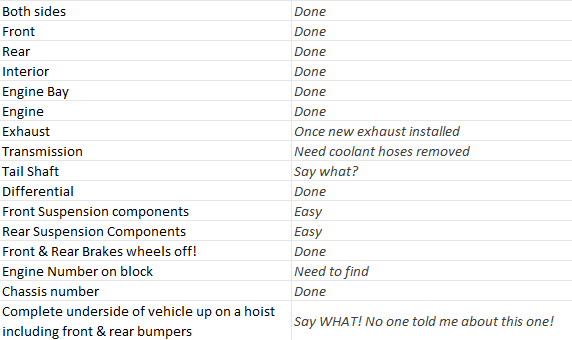
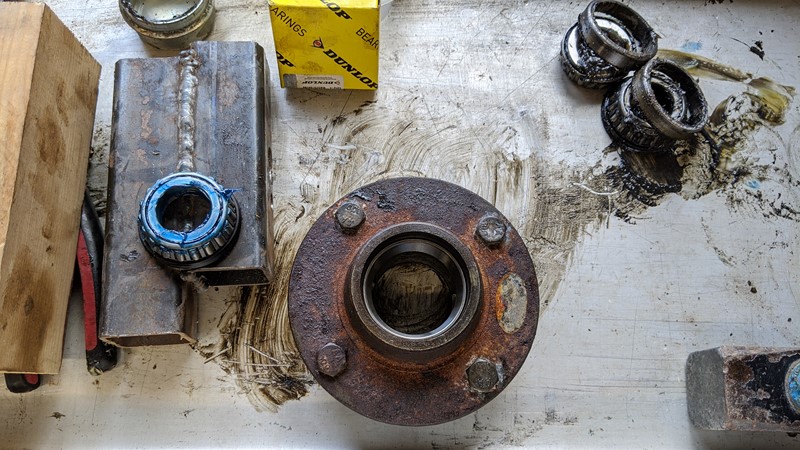
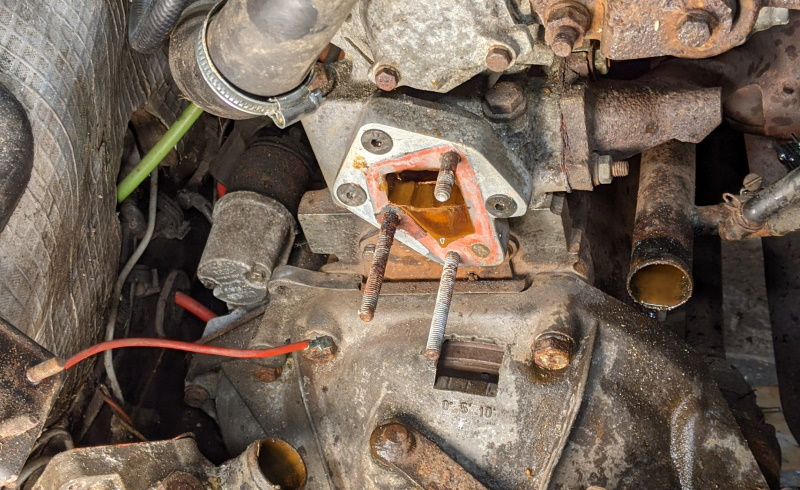
Actually, it was straight forward for the most part. The most difficult was to find the engine number under the rust. Being an M202 engine, there was little information as to where the number should be, just left or right of the thermostat.
The one image that really had me stumped was the full underside image. On axle stands alone this was simply impossible, despite my best efforts. Oh boy, did this create a headache! Until I stumbled upon a simple solution!
Raising the Fiat X1/9
The solution for getting that full underbody picture was to head to Garage Equipment Group and purchase a half-height scissor lift. I’ll cover the lift in a separate post. Suffice to say, unloading a 550kg chunk of metal from a trailer, without a forklift, was a health and safety nightmare.
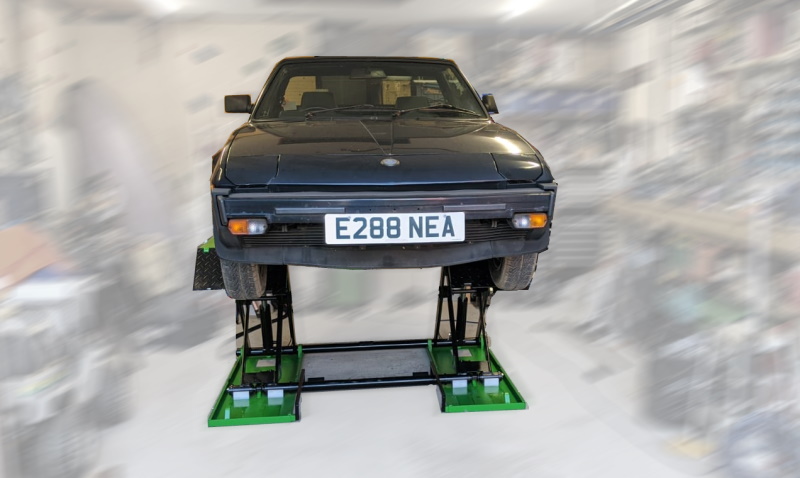
So with the Fiat now a massive 1 metre off the floor, getting that ‘near impossible’ underside shot was a little easier. Well, I say a little easier. My limited camera and lens options wouldn’t allow me to get all four suspension arms in one shot. A composition was required, but would this be accepted?
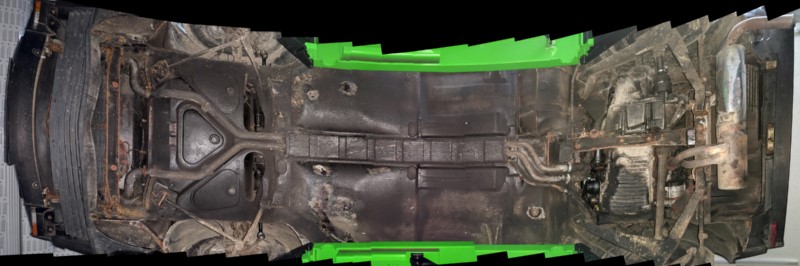
After a number of attempts at creating the composition, the picture above is (almost) what was submitted with the import permit application and accepted. I say almost as the final version was squared off and cropped a little compared to this, but you get the idea!
Coolant Surprise
In order to find the engine number, I needed to remove the thermostat housing to give some access. Never did I expect to have to drop the engine coolant on the Fiat X1/9 just to get the import permit. What was in the header tank seemed clear with no corrosion inhibitor, but no contamination. Ha!

Removing the drain plug on the radiator allowed pretty much no coolant to escape its confines. Poking about in the hole removed a plug of gunk and released a torrent of chocolate coloured engine coolant. Not what I expected!
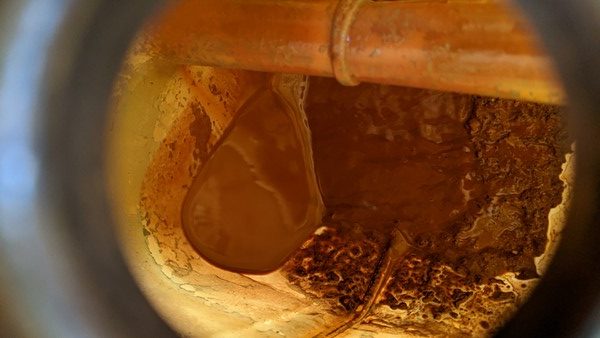
Once the coolant was drained I could see the bottom of the header tank. Not a very pretty sight. I suspect the lack of corrosion inhibitor/anti-freeze has not done the coolant system any good. Fortunately it was easily removed.
Thermostat Gasket
Once the engine number was found, it was time to put the thermostat housing and coolant hoses back together. The seller had mentioned the housing had been changed and an adapter fitted. I’m not exactly sure of the benefits, but the thermostat housing gasket was not the standard Fiat X1/9 type.
The solution was to make my own gasket. Something I’ve not done for more than 10 years, but I find rather enjoyable. It turned out that the thermostat housing was from a GM of some sorts.
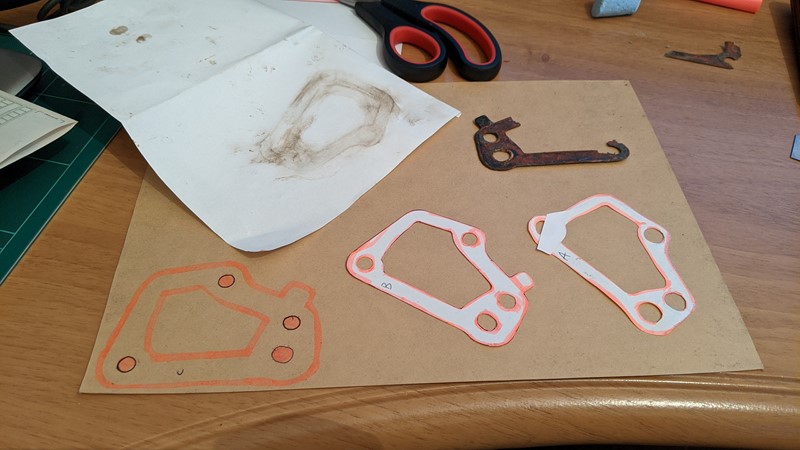
Taking the remains of the gasket and rubbing a dirty finger over paper pressed on the housing, I could get an initial gasket shape. This was then offered up to the studs, tweaked, a new paper template trialled and the final shape transferred to Flexoid gasket paper.
Ready for the Next Job
From years of experience and miss adventure, I’ve learned to refill fluid systems as the final step before recommissioning. There is nothing more annoying than having to drop the coolant again to access a single screw. So, for now, the coolant system will stay as it is with the thermostat housing and pipes on but the header tank off.
At this point I wasn’t too sure about the next task would be, but after joining a few Fiat X1/9 Facebook groups, I quickly learned about the trials of importing a car containing asbestos!
M