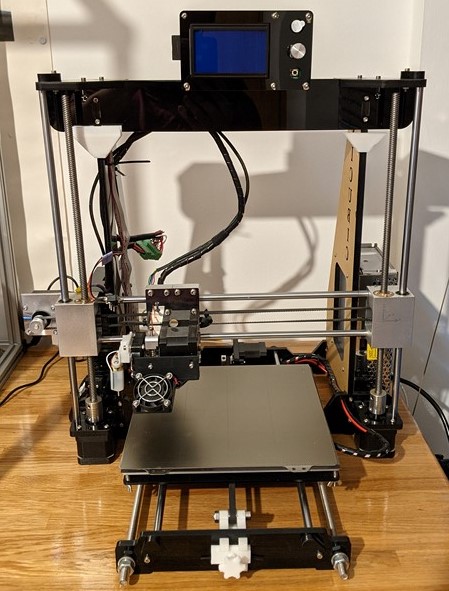
Back in 2017, I bought my first 3D printer. A Unicubic U1. Reduced from £240 to £160, it seemed like a bargain and something I could just about stretch to at the time. And I’m so glad I did! It’s certainly not a great printer, but I learned so much from its limitations. There are much better printers about now, but this bargain has been super useful.
Elements of this article where first published on the RepRap forum in November 2017
Jumping in at the deep end with a super cheap printer
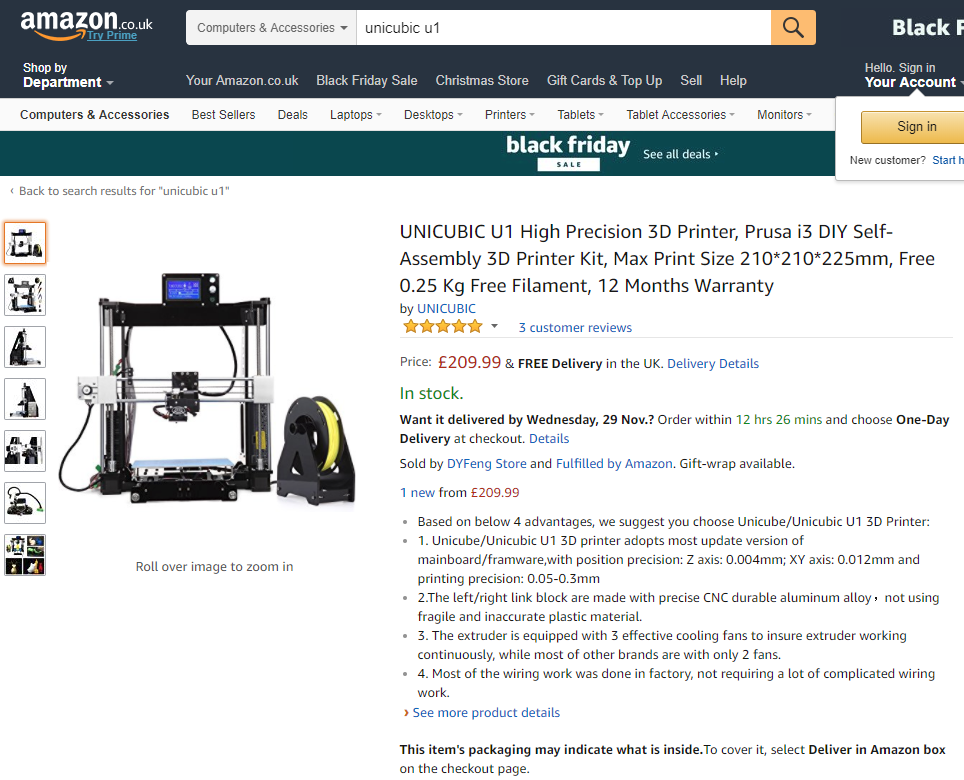
The Unicubic U1 is a Prusa i3 style printer that appears to be a cut-down clone of the Anet A8.
This printer can be found (back in 2017!) for sale primarily on Amazon and eBay in the UK for £210 to £240 and sold by DYFeng Store. When I purchased the printer it was on offer for £160 making it very attractive. Especially since I didn’t have plans for buying a printer. I perhaps should have done a little more research!
I’ve had a number of smallish problems with the printer and found that there is no technical support or a way to contact Unicubic despite the 1-year guarantee. At the time of writing the Unicubic.xyz website has been down for a few weeks. No response from the seller on Amazon and the ‘reviews’ are word for word from Unicubics sales media, read into that what you will.
Under the hood
The construction of the Unicubic printer is fairly basic. That in its self is something of a charm as the original RepRap project, from where home 3D printing comes, was very simple. It’s very clear that the Unicubic is based on the design of the Anet A8. The frame structure is 7mm plastic, with the endplates held together with threaded bars and nuts.
The headline specs are summarised as;
- Print Area – 210 x 210 x 225mm
- Main board – 3DYMY RAMPS ‘Plus2’
- Hot End – Max temp – 260degC
- Hot Bed – Max Temp – 100degC
- Print Speed – 10mm/s – 120mm/s
Well, I’ve summarised the whole thing in 5 bullet points. Not the most in-depth specification list, but that’s because the full list is the same as pretty much every other printer in that bracket. The sales plan is clearly to make to a budget and sell in volume. This means a very cheap controller, cheap steppers, cheap belts, and a rather floppy structure. You’ll never get a perfect print, no matter how much time you put into it. Functional prints however are readily available.
Assembling the Unicubic U1 3D Printer
The kit was easy to build, the instructions were okay-ish and the unit was mostly pre-wired which certainly sped up the build. Some of the pictures in the build guide are of poor quality and skip steps. Please don’t follow them when making the power connections to the power supply of the magic smoke is likely to escape!
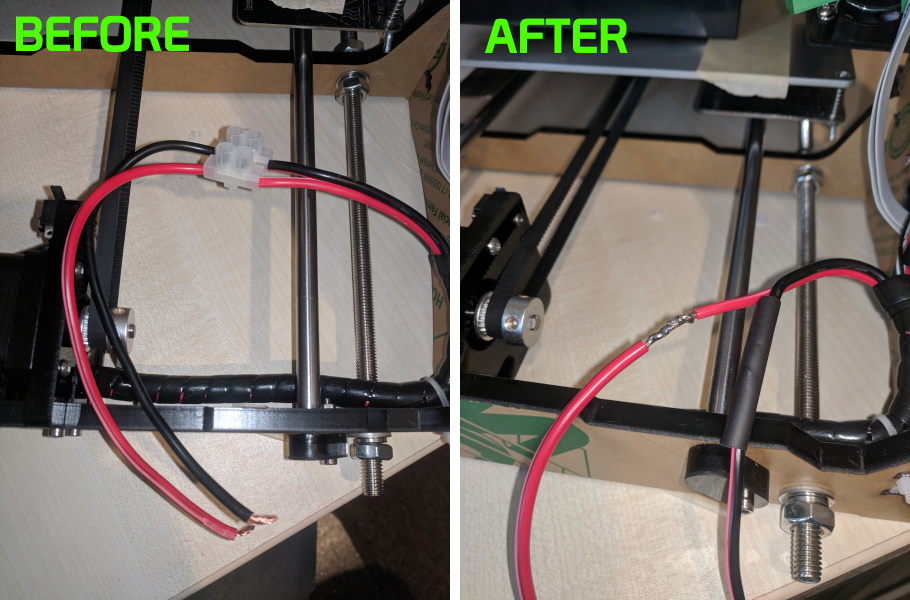
Actually, that wasn’t the only odd bit of wiring that I found. The power feed to the heated bed had a choc-block connector in it. I think this was to allow the heated bed to be removed and easily unwired if needed. I wasn’t a fan of this, not because I don’t like choc-block, but because of the position on the wire. This location would be continuously moving, something that this time of connector does not like. Instead, I joined these wires permanently.
There are no obvious instructions on how to tension the belts, run the cables to the print head, or what the plastic tube in the kit was for. Most of this was easy to sort out and pretty quickly I was up and running, printing the demo from the SD card, a simple tube. I spent far too long levelling the bed. My first print created a not very round tube, so a bit more tweaking of the belts and the ‘kneeling elephant’ printed out pretty well. I really wish I had known about the XYZ calibration cube at this point.
Rewriting the firmware
Obviously, I wanted to print THE test boat, #3DBenchy , to give me an idea of how good a print I could get. This is one of a hand full of ‘standard’ prints for a beginner. Unfortunately at this point, I didn’t realize there were other steps for calibrating a new printer. But trying to print 3DBenchy found my first major issue.
It was pretty simple to get CURA installed, the model downloaded from Thingiverse, sliced to GCODE, and copied to the SD Card. On trying to load the file from the SD card, the printer simply locked up. I tried changing my CURA settings and making other tweaks, but ultimately I found I had no idea what firmware was on the printer. It was clearly Marlin but an older version. So a reinstall was the only way to go.
What I should have done is fire up Arduino, read the settings in a serial window and make a note of them, but I didn’t. What followed was 30 minutes of over-enthusiastically installing the latest version of Marlin. Followed by a week of working out the right settings! In the process, I’ve discovered the original problem I had with loading the Boat was actually with the ‘Kingston’ SD card which is most certainly not genuine.
My First Boaty
With the latest Marlin installed, I dove straight in and printed the boaty. And it looked, well, alright. A lack of bonding between layers, oozing, stringing, all the beginner issues. Generally though, there was something just, well, off about it. I won’t spoil the actual problem before showing the print.
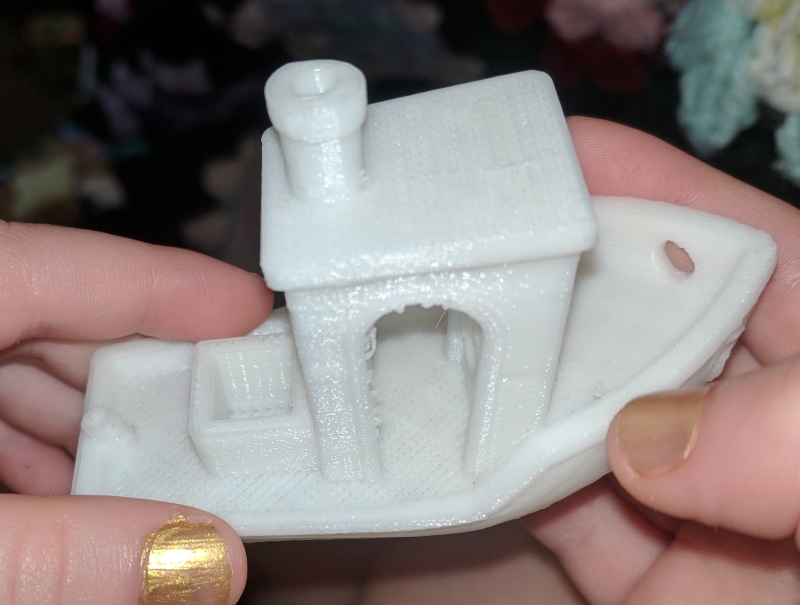
And the problem, it was completely the wrong size! The height, Z-Axis, was okay, but the X and Y dimensions were clearly too big. Something like a potbelly pig. The issue was with the settings I’d entered into the Marlin firmware. I’d put in settings for an Anet A8, but this printer was just different enough, these settings didn’t work.
Fine-tuning the firmware
One issue I was still having after the firmware update was lateral lamination. My layers in Z are well bonded but my parallel X/Y lines did not seem to fuse. Trying to print a simple tube really emphasised this. The cause, for every 10mm the printing nozzle was meant to move in X and Y axis, it was actually moving closer to 12mm. This meant that when two parallel lines were meant to be touching, there was actually a gap between them!
This was the point I learned a key step to setting up a 3D printer is the XYZ calibration. My approach was the most common I could find in guides online. A simple 20mm cube. Or in my case, a 24mm cube. Much reading and tuning of the Marlin configuration later and I could repeatedly print a cube that was a reliable 20mm x 20mm x 20mm! Finally, I was printing functional parts. Phew.
Unicubic printer upgrades
My Unicubic printer is now dangerously close to becoming ‘Triggers Broom‘. With many modifications and updates which generally just improve the ease of use, rather than the quality of the prints.
BLTouch auto bed levelling
This is an upgrade I would strongly recommend to anyone with a 3D printer. This little gadget can measure the relative height of any point of the print bed, to 1000th of an mm*. How does this help? Well getting the first layer of extruded filament to stick to the bed of the printer is the hardest part of printing. If the bed is not level, the filament will stick fine in one place but print in the air in another place.
*0.001mm resolution is what the software gives back, I doubt it’s really that accurate.
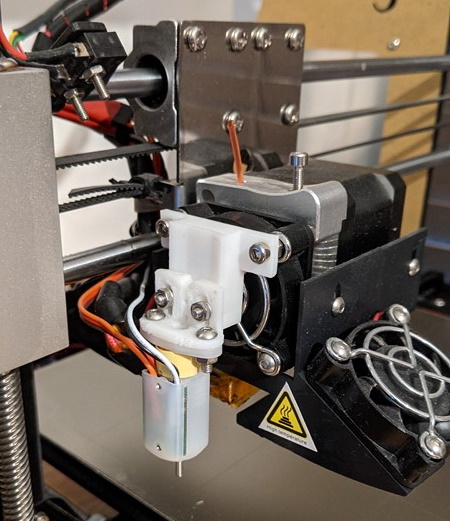
By measuring with high precision in multiple points over the bed surface, you can get feedback to help level the printing surface. Even better, with the latest firmware, it will adjust the bed height as the print head moves to keep the bed level. A top upgrade for any printer, but make sure you get a genuine one starting at around £30.
Magnetic removable bed
To help get the hot melted plastic filament to stick, I had been covering the hotbed in masking tape. This works really well with the right masking tape (cheaper is better here). But after a few prints, the masking tape lifts and needs replacing. And because it leaves behind a sticky residue, the change takes quite a while.
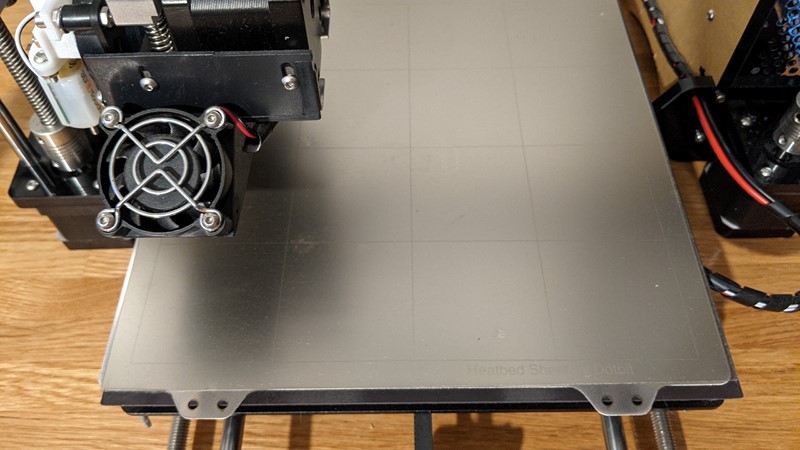
One upgrade I splashed out on was a magnetic base plate with a PEI layer. I’ve no idea what PEI actually is, but PLA filament loves to stick to it. The ‘magnet’ bit is a giant flexible magnetic sticker that gets stuck to the hotbed. The steel base plate then sticks to the magnet. This means you can rapidly lift the whole surface away from the printer, and most prints fall off with a gentle twist. A bargain for £23.
Print bed MOSFET control
One of the most commonly reported failures for a 3D printer, is the main circuit board becoming overloaded. And typically this results in a fire! The issue is that the hotbed, or extruder, draw a lot of power through the mainboard. With the extruder at 200c and hotbed at 60c, it’s easy to understand where that power goes. The 3DYMY board works reasonably well, there is a notable change in fan speed when the hotbed is turned on, a clear sign it is at risk.
The MOSFET upgrade board feeds power directly from the power supply to the heated components, bypassing the mainboard. The original mainboard output is then used to regulate the MOSFET. For £3, this is a no brainer upgrade!
End of the road for improving the Unicubic U1 3D Printer.
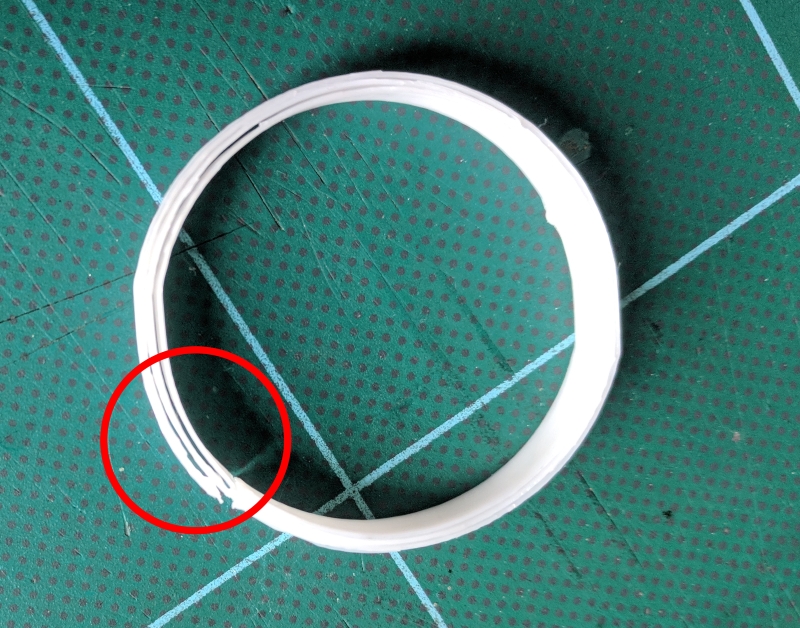
With PLA mastered (ish) I’ve tried printing in PETG, and quite frankly, it’s never going to happen. There simply isn’t enough precision in the control. The H-plate frame that the hotbed sits on is very flimsy, and there is no off the shelf part compatible with the Unicubic. The Y-axis track arms are marginally different dimensions so the sliders will bind. The flexible couplings are horrendous (I used to work with couplings of the same size that cost more than this printer) which results in one of the Z-screws flopping around all over the place.
But here is the real annoyance, and the thing that had me researching the printer again. The printer is, at its core, a horrid copy of an Anet A8. Except, and here is the kicker, a significant number of the dimensions are just different enough that you can’t use off-the-shelf upgrade parts. I ordered a thicker/stiffer alloy H-plate, for an Anet A8, which looks great and would be perfect, only the hole spacing for the sliders is wrong.
It turns out the Anet A8 has its sliders centred at 165mm, while this Unicubic poor man’s copy has sliders centred at 148mm. Digging further, I thought simple, I’ll just drill holes where they should be, but you can’t. There isn’t enough material. Okay, I’ll make the new front and rear panels, Anet A8 CAD is readily available. But the threaded bar supports are in a different position. In fact, the plastic plates at either end of the Y-axis are subtly different in almost every measurement.
Fine, I’ll re-build it with an extruded aluminium frame I thought. Only you can’t buy an off the shelf kit as the dimensions are all slightly wrong. Then you need all the plastic adaptor parts so you’re already spending more on ‘upgrades’ than the original purchase price to get it a little closer to the Prusa i3 Mk1 that has been repeatedly copied. I’ll be better off buying a better printer.
The final verdict?
After three years of using the printer, I’ve come to a pretty solid conclusion. You buy cheap, you get junk (just like any other tool) but that doesn’t make it totally useless!
The journey of discovery with this cheap Unicubic U1 printer has been fantastic. Wiping out the stock software has meant a huge amount of learning I might not have ‘enjoyed’ otherwise. And now I can see more of the Unicubic weaknesses that I might otherwise have not seen. And the kids have had loads of Barbie accessories and furniture from by adventure, so they are happy.
Perhaps more than anything, it has really cemented the cornerstone of 3D printing enthusiasm for me. I’ve already bought another, bigger, better printer. And already I’ve printed parts for work and replacement parts for workshop tools after the originals went missing.
I wouldn’t recommend buying one, but for me, this Unicubic U1 3D Printer, with all its limitations and imperfections, has been wonderful!
M
Back to 3D Printer Articles
Back to Workshop Articles