

By this stage in the Mega Shed build, I’m flying along and practically giddy with having this considerable space created. It is vast. Far more extensive than I had conceived when designing the shed. The height of the base means a big step up into the shed, which adds to the oversize feeling. But, it’s getting so close to complete that I’ll soon be able to use all of this room. I just need to press on with the doors, windows and interior installation.
Window and Door
While I have all the walls complete and the roof installed, the Mega Shed isn’t quite fully watertight yet. The Grafter breather membrane is doing an excellent job of keeping the structure airtight, but there are a couple of noticeable gaps in the walls. These form the openings for the door and window.
Installing the Window
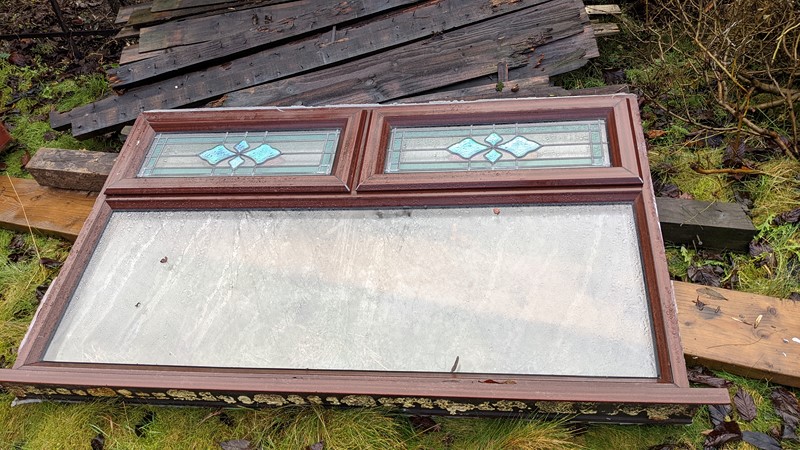
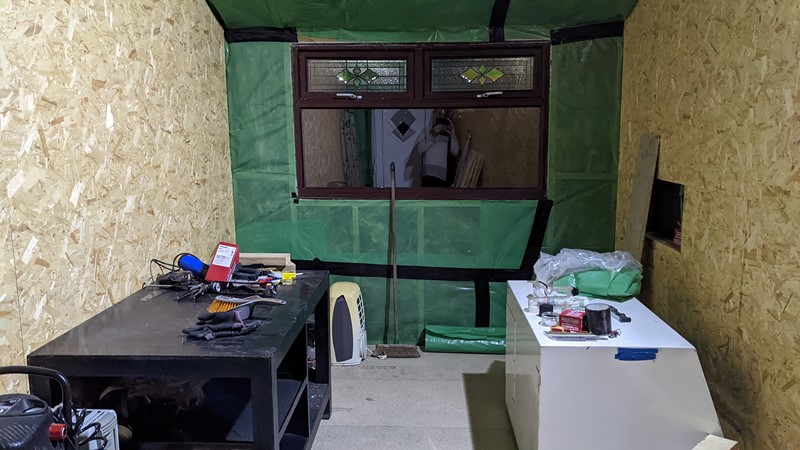
In keeping with the general ethos of the Mega Shed build, the window is, of course, second hand. And quite the bargain at £65, collected locally. While I would have preferred something wooden, this UPVC window matches the frames used in the house and garage. In addition, the faux effect wood should help visually tie the structures together. Hopefully, the rosewood finish should also complement the finished cladding.
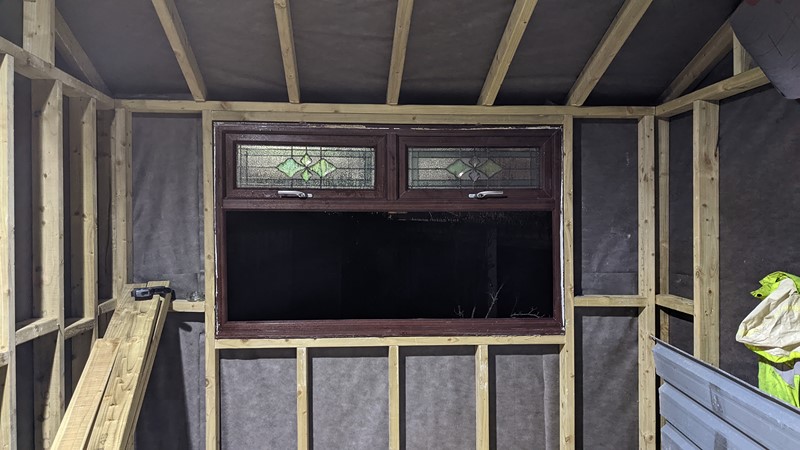
Fortunately, I have a little experience fitting UPVC windows, both new and second hand. As always, preparation is vital. An opening almost precisely 5mm bigger than the frame makes it super easy to install. Installing this window uses the fewest packers I’ve ever needed. It would have gone so well if I hadn’t run out of security tape to make nefarious removal of the glass that bit harder.
Installing the Door
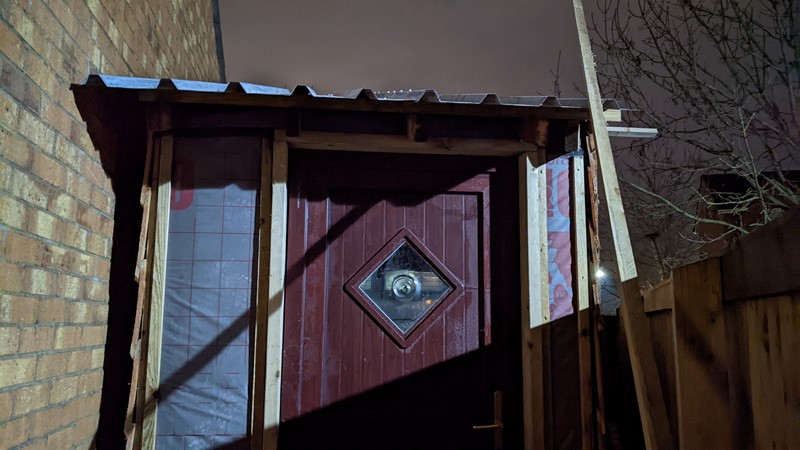
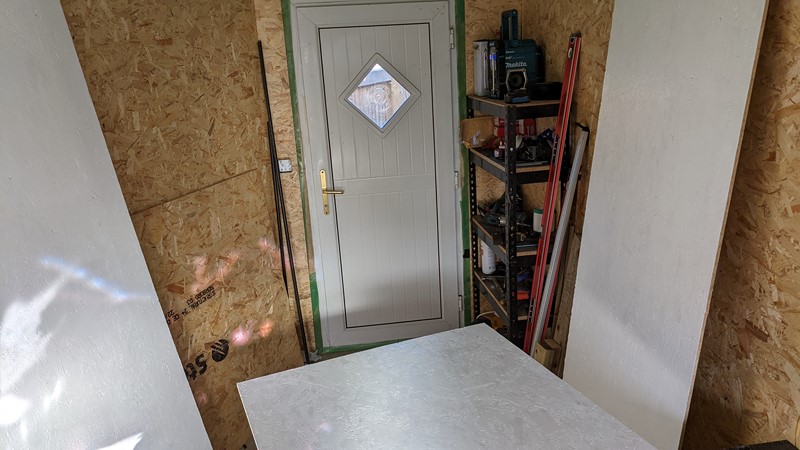
Next up is the installation of the door. When the door end of the shed was being made, measurements were taken directly from the UPVC frame. So it’s no surprise that the rosewood finished portal drops perfectly into the wooden casing. The frame is so square and accurate that it becomes apparent why the door has a split in the outer panel. The door’s mid panel is oversized and causes the edges to bulge. It should be an easy fix.
Interior Insulation
I need two things to keep the temperature consistent and heating to a minimum. Firstly an excellent airtight barrier to stop any heat from escaping or blowing through the shed. Secondly, a decent amount of insulation prevents any heat from penetrating the walls and roof. The breather membrane is an excellent start to getting the shed airtight. And the wooden frame is an excellent thermal insulator, but it needs some help in the gaps between the wall studs.
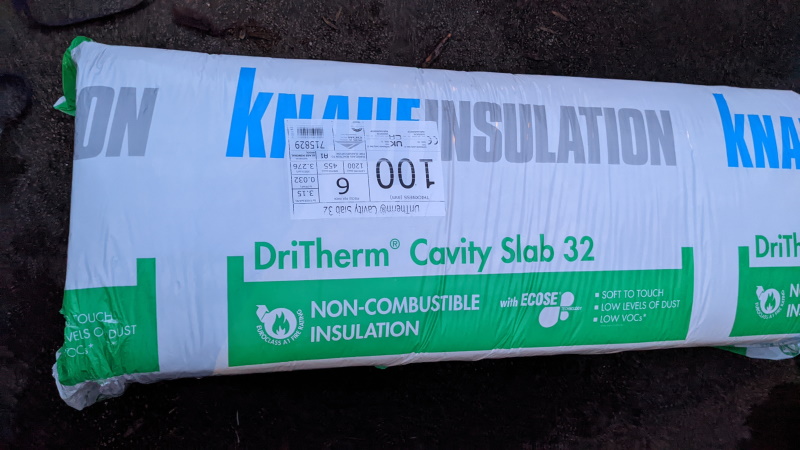
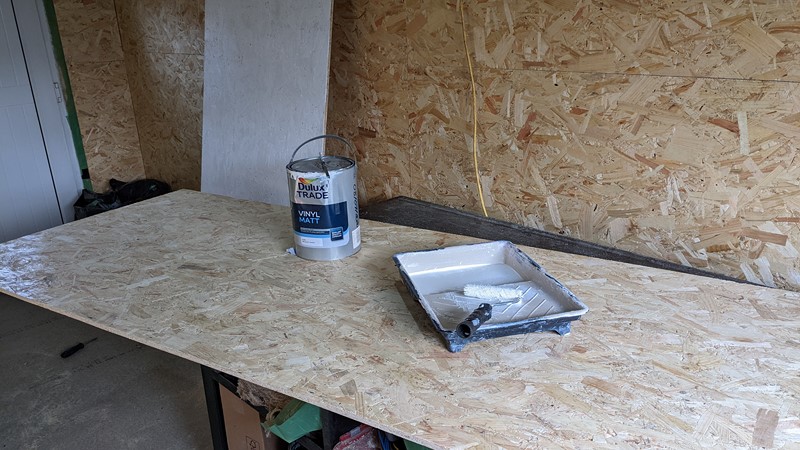
That’s where insulation comes in. just short of 100mm all around the shed’s walls. I intended to use Earthwool cavity slabs from Knauf Insulation, predominantly made from recycled glass bottles. Its official name is ‘DriTherm 37’, and you’ll notice it is not what is in the picture above! Unfortunately, B&Q has both in stock, in the same store area, and the packaging is identical, bar the 32 and the 37. An easy but soon to be costly mistake.
Installing the insulation into the frame
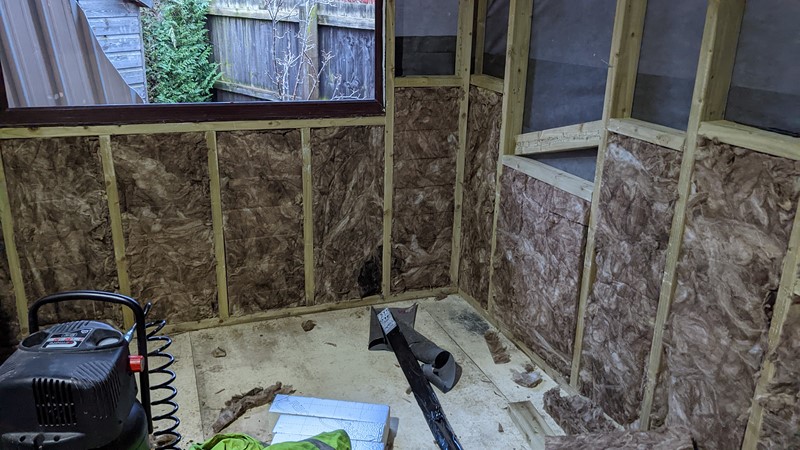
The cavity slabs are a straightforward product to work with. They have a more stiff outer surface than loft insulation, which helps them stay in place. Rather irritatingly, the insulation batts are wider than the spacing in the walls, so there is a lot of cutting involved, but the material is at least easy to work with. I wonder if I should have wider spacing in the wall vertical to match the 460mm width of the insulation.
An unexpected trip to the shops
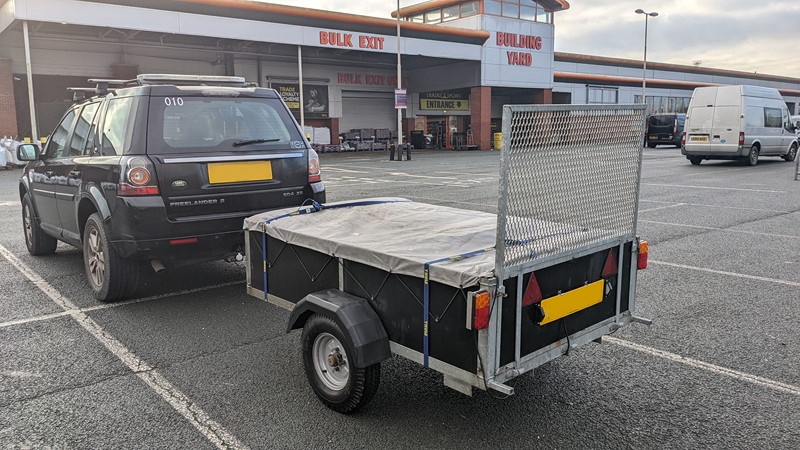
When I ran out of insulation, I noticed my mistake in picking up the wrong insulation. The correct insulation comes in much bigger pack size. Unfortunately, my calculations had been against these dimensions, so I ultimately ordered half what I needed. Not the end of the world. Just nip back to B&Q and buy some more. Unfortunately, the ‘wrong’ insulation is 1/3 more expensive. This insulation is beginning to break the budget!
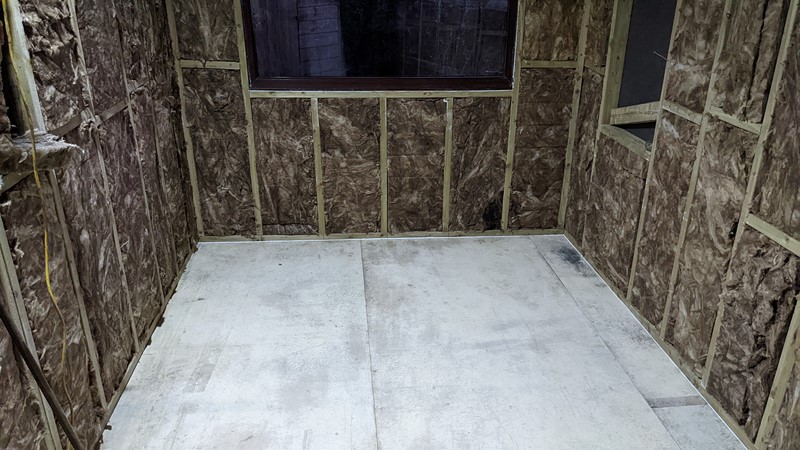
Well, after a few trips to the DIY store and many cuts later, it’s done. Getting the window and door in had already made the space much warmer, as you might expect. However, getting the insulation into the walls has positively warmed the room. About 10degC warmer than outside, just from my body heat!
Installing the Flooring
After laying the insulating into the base early on in the build, I added some thin plywood. A little extra material over the frame for the base made it easier to move around and erect the walls. This plywood wasn’t intended to be the finished floor, nor was it strong enough. However, the material was recovered from waste and did just the job I wanted.
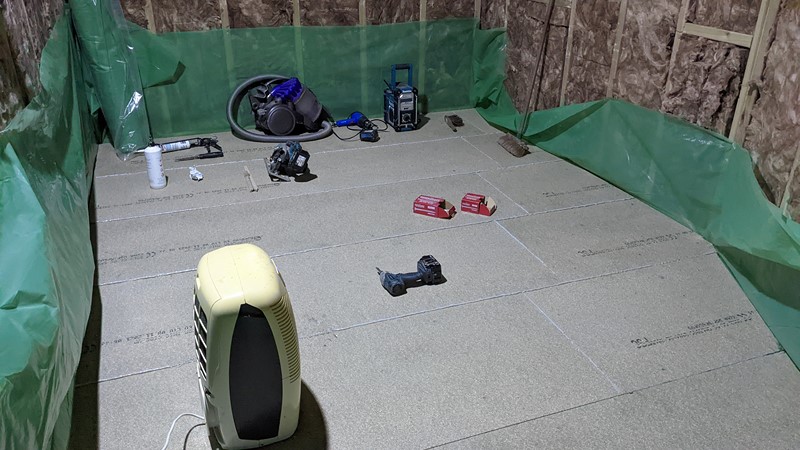
Getting rid of excess moisture
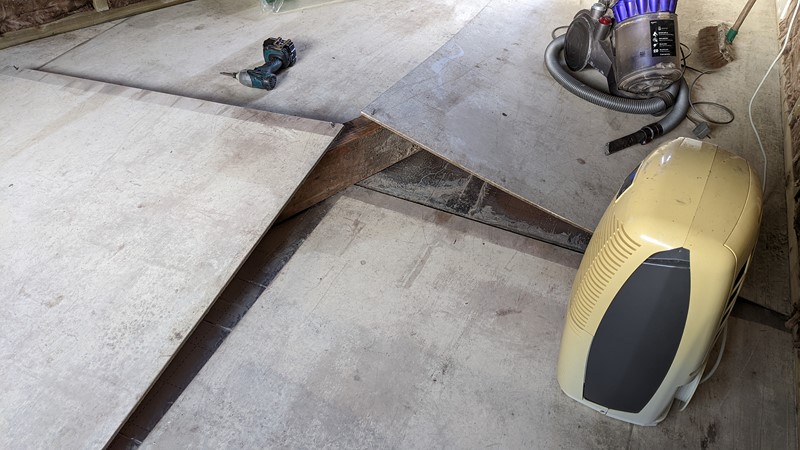
These thin boards were not, however, sealed from the elements. I was aware while walking around that there was water between the boards and the insulation. To remove this moisture, the flooring corners were lifted, and the dehumidifier was used to drag the water out. And it worked really well in the nearly sealed box. Within a few days, the dehumidifier was no longer dragging out moisture, and the boards were dry to the touch.
Laying out the vapour barrier
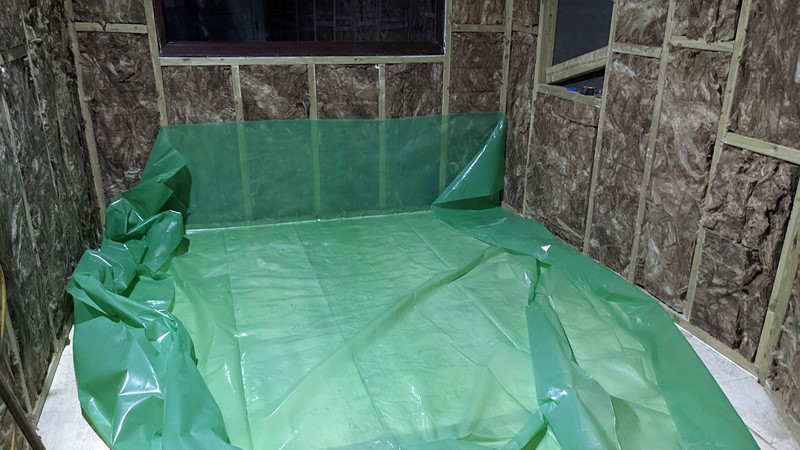
Why was it essential to get the boards dry? To minimise any moisture transfer between the layers of the walls, a plastic vapour barrier will wrap the whole inside. This sheet should stop damp forming on the inner walls while still allowing moisture to escape from the insulation, through the breather membrane, and into the big wide world. The underfloor insulation is sealed in aluminium foil. This foil will trap moisture under the plywood if it’s not removed.
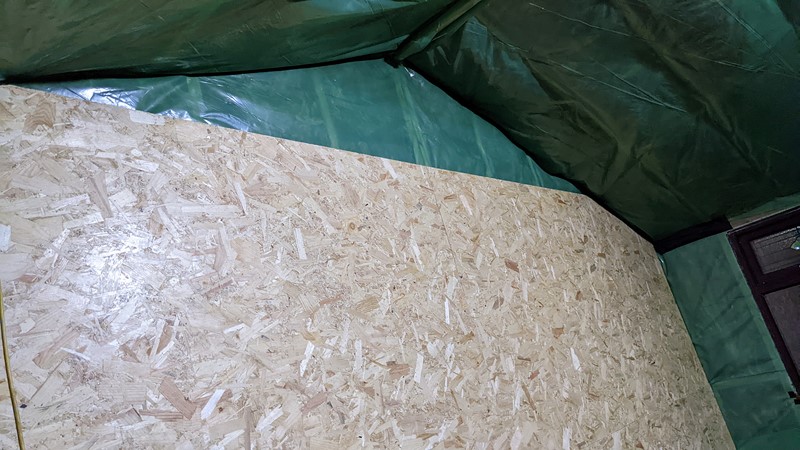
Fitting the flooring
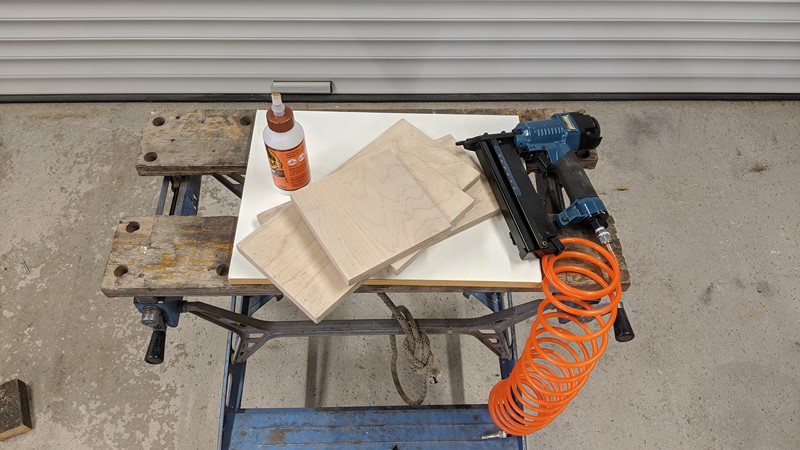
With the green Visqueen vapour barrier in place, I can start to install the final flooring. For this, I am using Caber flooring. A chipboard product which is common in the UK. I’m opting for the 22mm thickness, which is much thicker and more robust than I need. Having the extra strength should avoid damage if I drop something and give me the confidence to install heavy equipment.
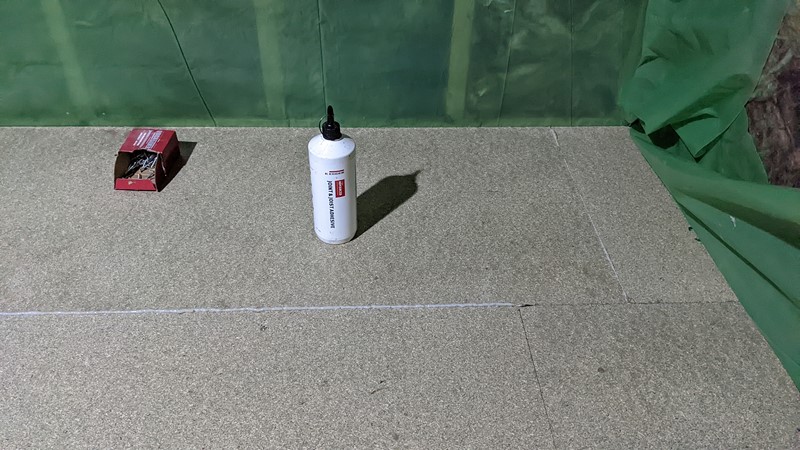
The edges of each interlocking board are glued together with special jointing glue. Typically I’ve always used PVA to join the edges, but this Egger flooring adhesive is fantastic. Using some air-triggered chemical reaction, it foams and fills the gaps. This bond will ensure the flooring is air and, hopefully, liquid-tight.
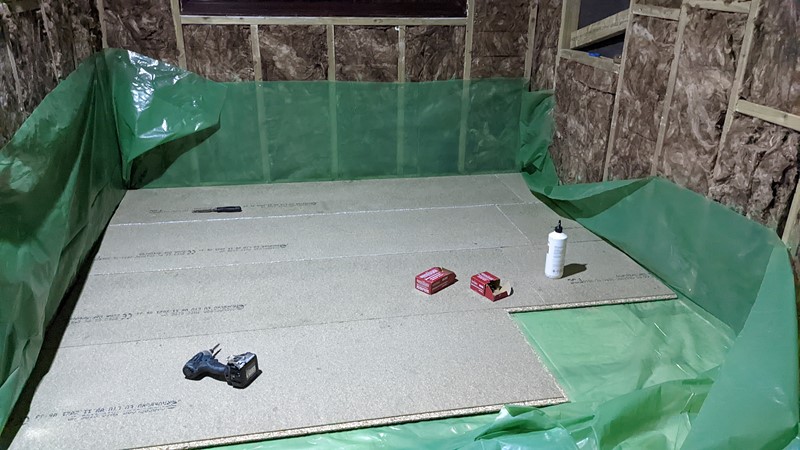
Fixing the floor down
Each board gets a couple of screws to hold it down to the joists below. Fortunately, I thought about this before I started and marked both the walls and the subfloor, where the beams are. Generally, the flooring goes in quickly with no waste, although some of the angled cuts did make me think more than I would have liked. The result is a super-strong floor I can happily jump around on, and it feels absolutely solid.
Finishing The Walls
The process of installing the floor is used for the walls. It’s a bit more complicated as I am typically working against gravity here. Unfortunately, I didn’t have anyone available to help me at this stage of the shed build, partly because I’m doing it late at night. Hopefully, the occasional bang of the stapler won’t disturb the neighbours.
Interior vapour barrier installation
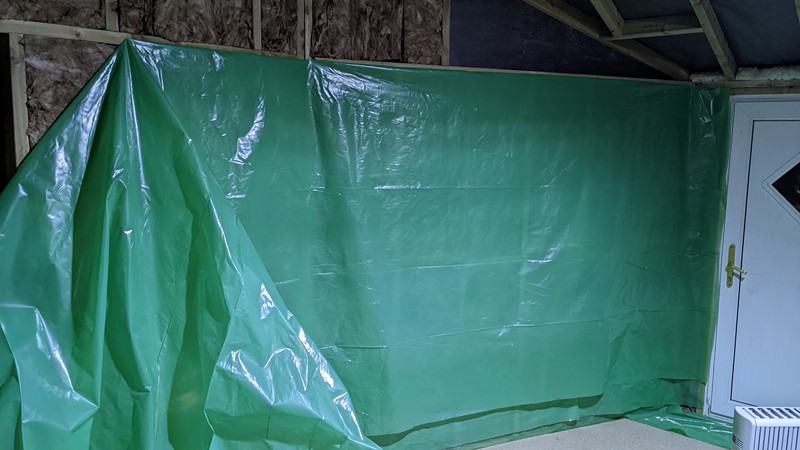
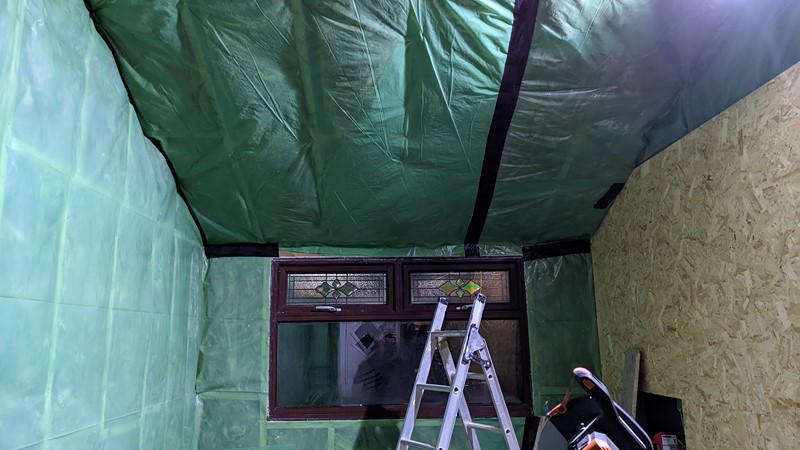
First up is a battle with the giant plastic sheet. The Visqueen sheet is four metres wide which helps to minimise joins but makes it a nightmare to manage independently. But, eventually, I figured out a method and got it tacked to the wall. This wall is oddly tricky because of the bend in the middle.
Installing the wall panels
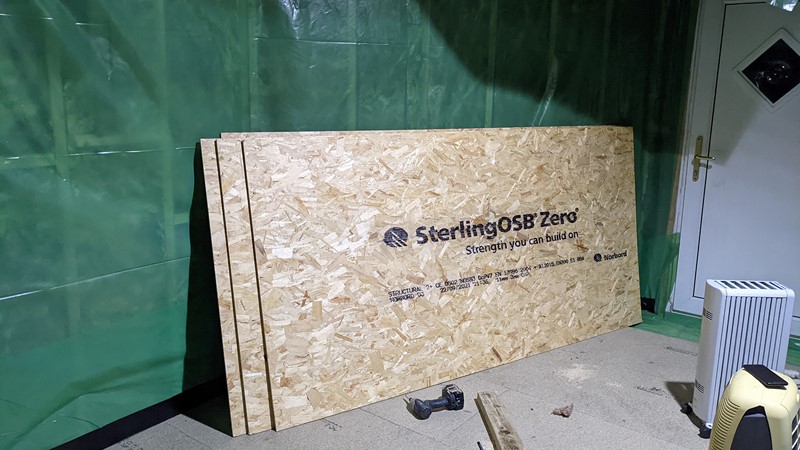
Once the Visqueen sheet is tacked to the length of the wall and part of the roof, it is joined to the floor section. There is around 500mm of overlap between the sheets. The edges are then taped closed 100mm wide PVC tape, which is like super-sized electrical insulation tape. On top of this will go ‘orientated strand board’ or OSB, which is made from old wooden material, shredded and bonded together.
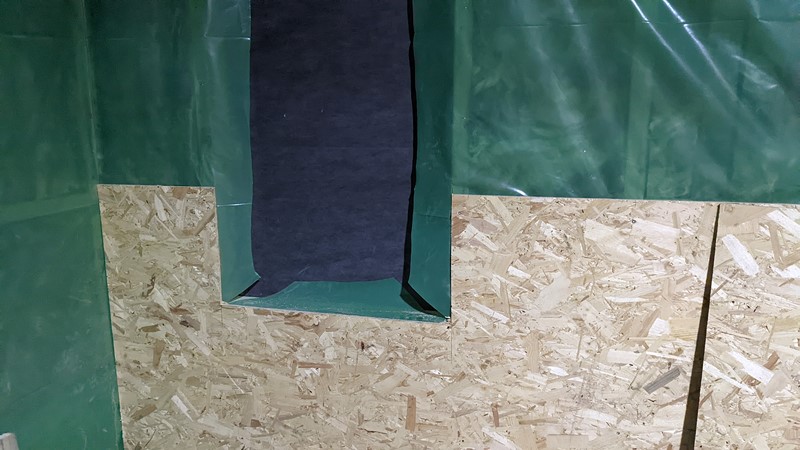
OSB isn’t the most glamourous finish, but it is economical both in material usage and cost. I actually quite like the haphazard finish, and it reminds you at all times that it’s made from waste. During the Mega Shed build, I was given a single extra window. This opening wasn’t something in the original design, and I’m sceptical about using it, but for now, I leave myself options and make the hole for it.
Fitting the panels against the roof.
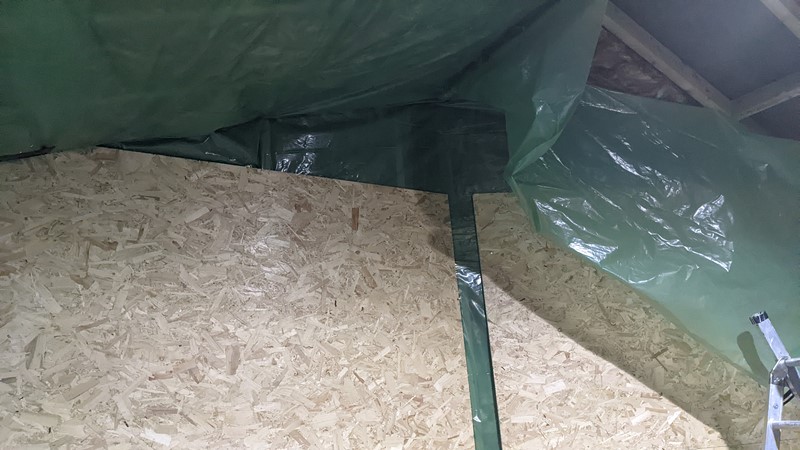
While the bottom sections of the walls are easy to clad, getting the angles right at the top is harder than it looks. It should just be a few quick measurements, but the vapour barrier doesn’t give a fixed edge to work from. More than a few pieces need fettling to fit. I offset the join on the wall with the bend, which will be a bit of a mistake.
The flat garage side wall is a little easier, and there are practically no gaps in the OSB panels once it’s all together. At this point, there is no denying this is a shed. But it’s cavernous, warm, and I love it!
After a few evenings of working away, the walls are nearly done. I’ve also brought the electric oil heater out, and it’s making progress much faster. The whole room warms quickly, which is very reassuring.
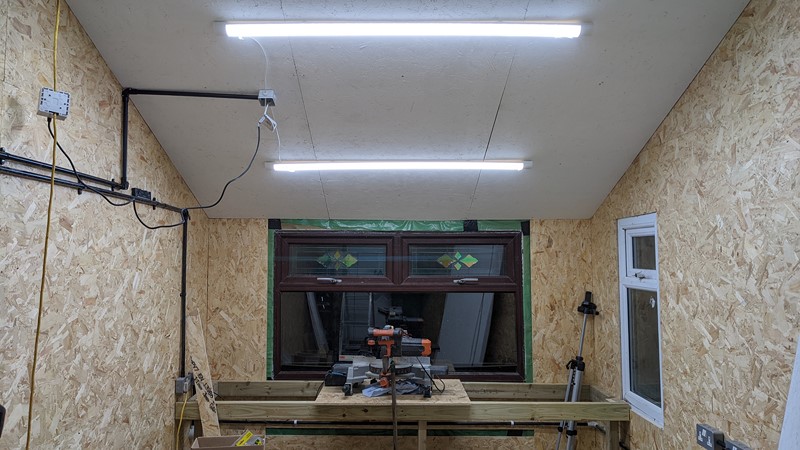
Insulating and Cladding the Ceiling
With the practice on the floor, then the walls, you would think that the ceiling would be easy to do. Well, it wasn’t. It was the most challenging part of the build so far. So many swear words were uttered, which I’ll leave out, but this was not a one-person job.
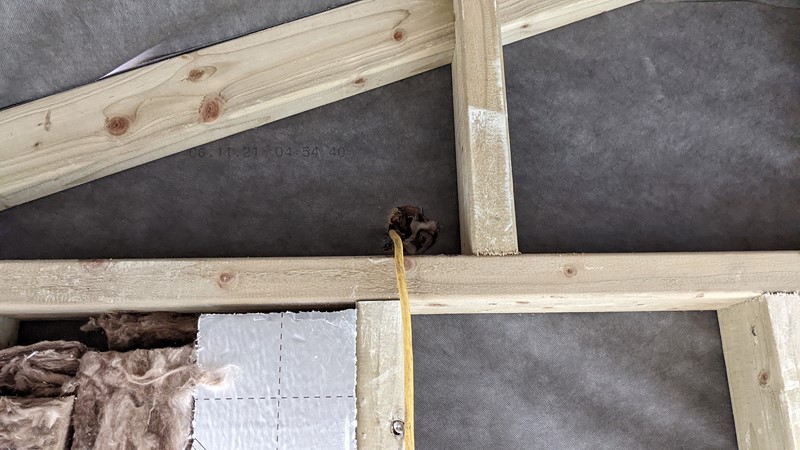
Installing noggins into the roof.
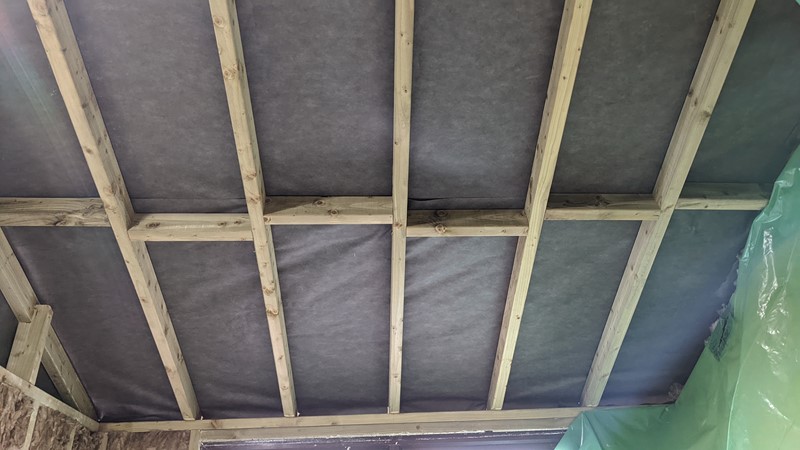
First up, the noggins were installed between the rafters to stop the twisting or bending as moisture and temperature levels change. I initially tried to do this with the nail gun, but that thing is very, very heavy when overhead. Installation quickly turned into a mix of screws and nails from the gun. After the 30th time that I dropped a noggin on my, erm, noggin, I finally put a hard hat on.
Roof Insulation Installation
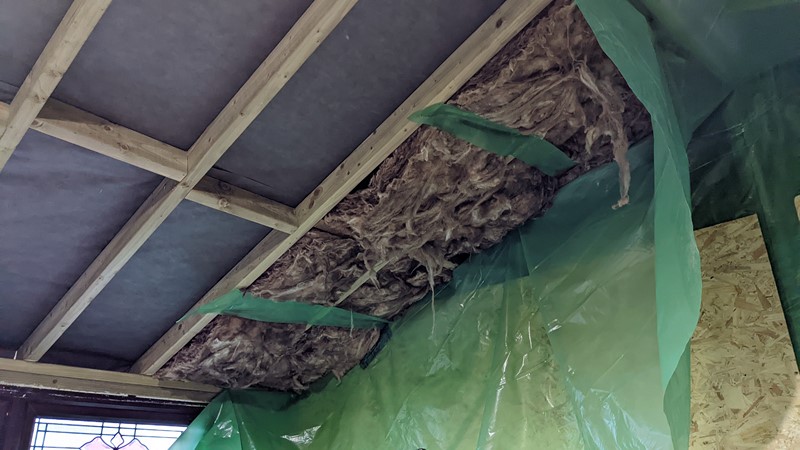
Then the insulation went in. Instead of the cavity wall batts that I had been using, I’m trying to use loft insulation in the roof. The rolls are leftover from insulating the house a few years ago, and there is more than enough to do the ceiling. Unlike the rigid panels used in the walls, these floppy blankets need pinning back in a few places.
Getting the loft rolls to hang in place and then cover with the vapour barrier is tricky. Mind-bending almost. However, the result is incredibly satisfying. The pictures don’t justify just how much the ceiling looks like a giant quilted duvet.
Ceiling OSB panels
Unlike the walls, the calling is getting painted. A simple covering of white paint should give a good reflection of the ceiling lighting. The OSB is covered in a wax layer that needs light sanding to give the paint something to grab on to. This worked pretty well for the garage ceiling, so it’s just a repeat of that process.
Each panel gets three coats of paint. Then, with the heater running, and the edge of the cold taken off the temperature, the boards dry quickly enough to have them all painted in a day. Lifting them all into place on my own and screwing them in place is a nightmare, but the result is worth it. I won’t ruin it just yet, though!
Bringing in the Electrics
Up to now, I’ve been running an extension lead into the mega shed to run the lights, heater, dehumidifier and so on. While this worked as a solution, now that I have the interior walls installed, I can run the main electrical circuits from the garage.
Bringing the wires through the walls
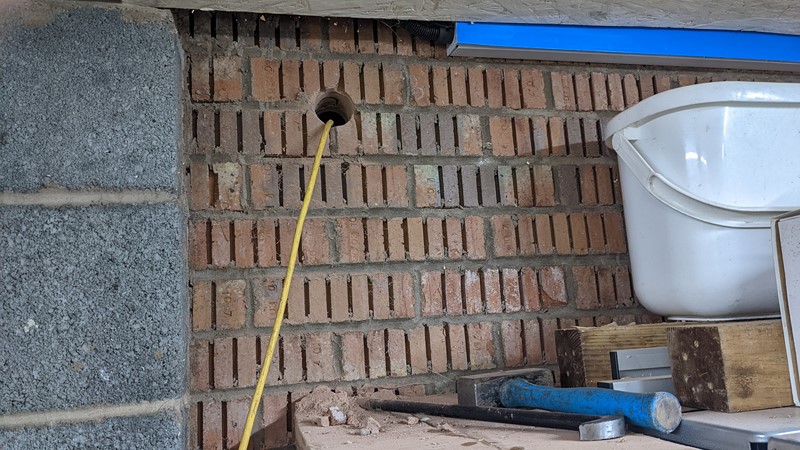
First off, a 40mm hole is drilled through the garage wall. This is a carefully placed hole, and it takes longer to get it in the right place than to drill it. There are natural breaks in the existing ring main that allow the extra shed sockets to be added with a minimum of effort. Almost as though it was planned.
This hole was, of course, drilled through before the walls were insulated, wrapped and clad. This meant I could push a piece of pipe through and bond it in place at each material change. With a bit of careful measuring, I could transfer the hole into the interior cladding. Well, that was the idea.
Running the wires in conduit.
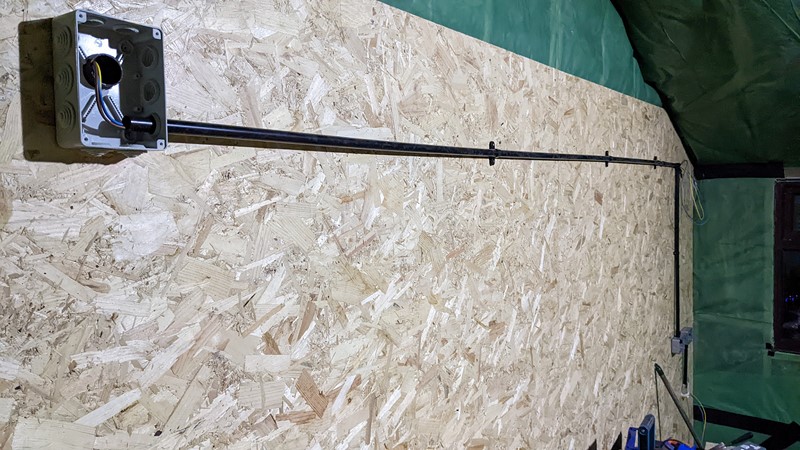
And it worked! A big junction box at either end of the wall pipe makes routing the mains loop and lighting loop that much easier. I’m surface installing all the electrics. Partly because it gives that industrial/workshop feel, and partly because it’s much easier to install (and change) after the walls are in.
Moving on from extension leads
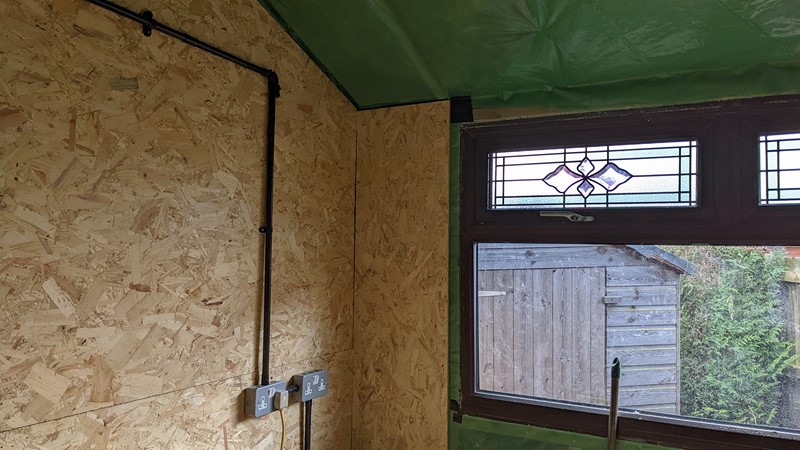
I have the mains loop run around the shed within a morning, and the extension lead is finally banished. Using conduit means I can quickly move or add sockets as needed. I’ve also kept the pipe runs high in case I do ever put a door into the garage.
That Extra Window
The extra window I was given during the build has challenged me to adapt the design. There is really only one place it can go and add any benefit. But this position is hugely overlooked, providing security concerns. I already have the window, it didn’t cost me anything, and I made a gap for it!
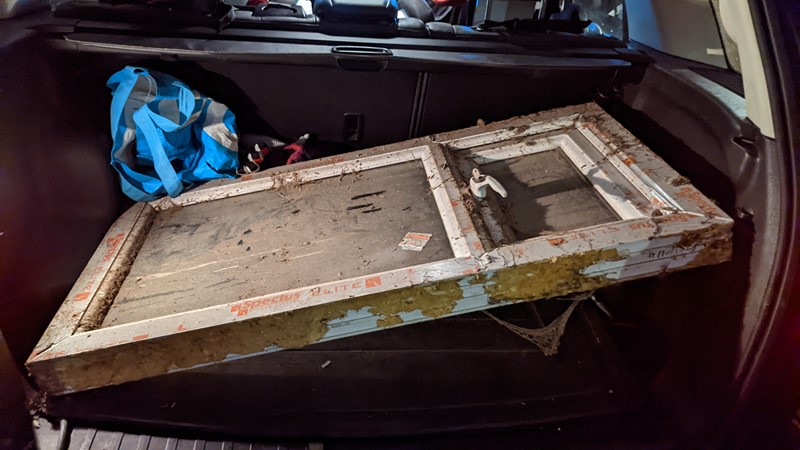
While it may not be pleasant to look at, having been stored on a farm, it is actually in immaculate condition. For a while, it was fitted to a farm as a temporary fix, held in by nothing more than expanding foam. So, although it is white on both sides, it cleans up well.
Making a window hole
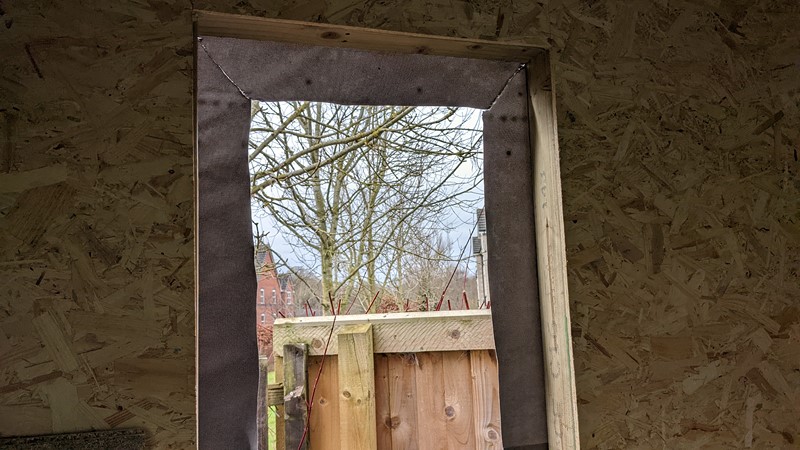
Opening up the hole for the window and deciding to go for it is immediately vindicated. The increase of light in the shed is noticeable. While there is no direct sun in this direction, it will let a LOT of light in during the winter months.
Making the hole fit the frame
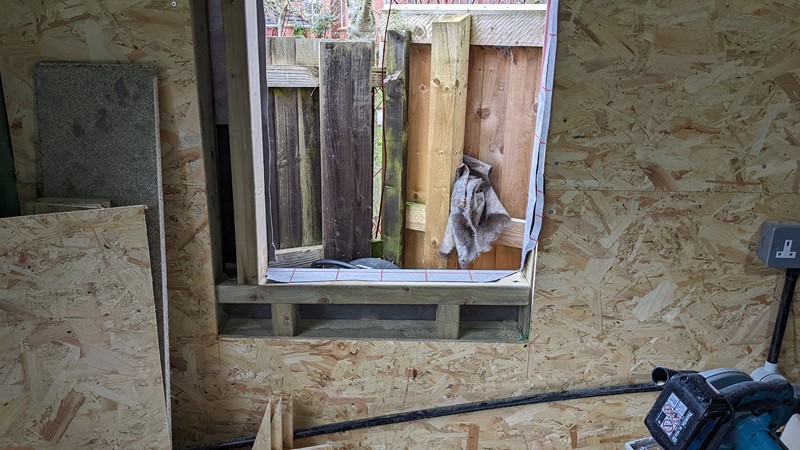
I had deliberately had the opening too tall, but unfortunately, it was too wide as well. A bit of framing work soon sorts this out. I also needed to get a piece of window sill to go with it. A whopping £16 for a one-metre wide piece makes my eyes water, especially when I’ve seen so many sills go to waste. Unfortunately, I couldn’t find anything second hand, so new it is.
Fully installed extra window.
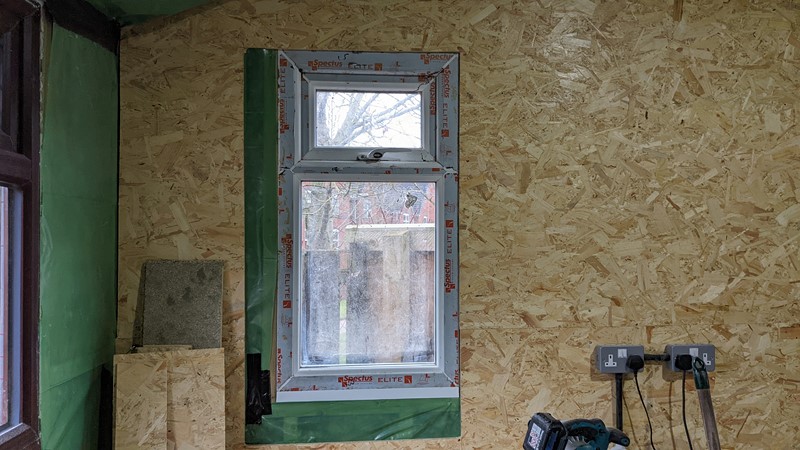
A few hours later and the window is installed. My concerns about being overlooked are immediately realised, as there is a public footpath over the fence. However, with some security film and a slightly higher fence, the positive increase in light will overcome the negative of having a window here.
The End Result
Getting the interior finished has taken longer than I might have liked, but the end result is better than expected. I am both happy and proud of what I’ve managed to create. I can say for certain that buying in a shed, even something with the odd dimensions this one has, would not have been as satisfying.
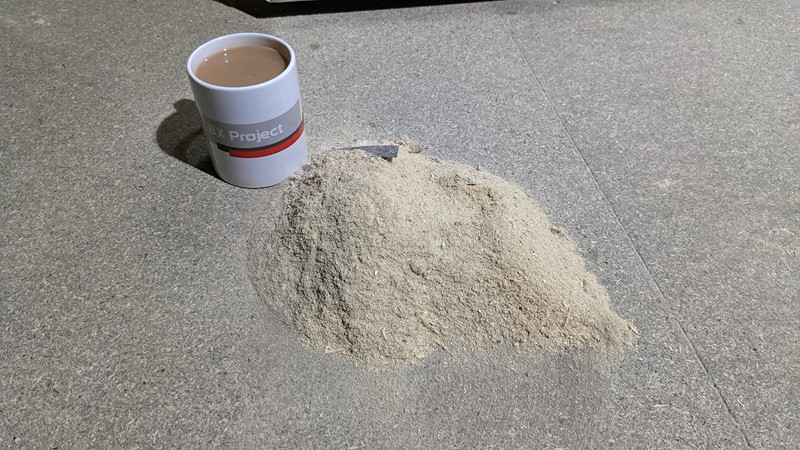
Of course, it must be remembered that the hard work that goes into working with wood can only be measured by the piles of sawdust created. And this pile is just one morning’s worth. Okay, I’m stalling for the grand reveal. Here it is;
The completed (almost) interior
THIS SHED IS MEGA!
Okay, at this point, the interior installation isn’t 100% complete, but it is entirely usable, and I am already using the space daily. I do love it when a plan comes together, and this really has come together.
If it isn’t already obvious, this article hasn’t had all the stages of work in chronological order. There is a huge amount of work that has also gone on outside the shed. However, it made sense to wrap up the interior progress in this one long write up.
I hope you enjoyed watching the interior come together. The exterior will be next!
M
NEXT – Part 13 – Exterior Finishing
PREV – Part 11 – The Shed Roof
Back to Mega Shed Articles
Back to Workshop Articles
Amazon Affiliate Links – Things used in this article
BXProject is using Amazon Affiliate Links. It’s a quick way to show you what I have used in this article.
“As an Amazon Associate, I [may] earn from qualifying purchases.”
Since January 2024, Amazon has blocked embedding images, but I think the links are still valuable.


[…] Link to the original article […]
[…] to tackle this section until I had decided if I would install the extra window. As we saw in the previous article, the difference this glazing makes to the interior was significant and […]