

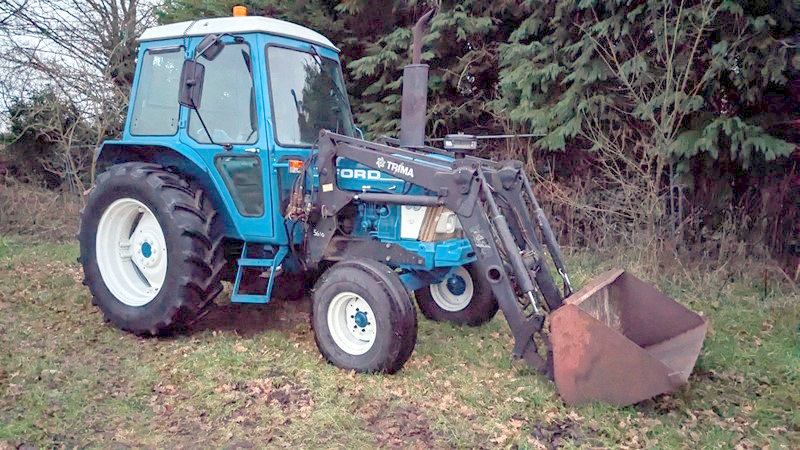
In a previous article about the Ford 7610, I told a tail about collecting and fitting a Trima 1420 loader. This was followed up by installing a free-flow return and getting the loader hydraulics working. I still need to do a bit of ‘tuning’ to the controls, but a loader isn’t very useful without implements. The first implement we needed was a tractor bucket, and this article focuses on modifying the bucket mounts.
Finding the right tractor bucket
‘Fall down farm’, the affectionate name for the farm the Ford 7610 lives on is perpetually undergoing maintenance. While huge steps have been made in tidying up the site, making the outbuildings safe and then functional, there is still a LOT of material handling going on. Be it moving bulk materials like sand and gravel towards the mixer or moving bricks and soil around, there is ALWAYS something that needs moving.
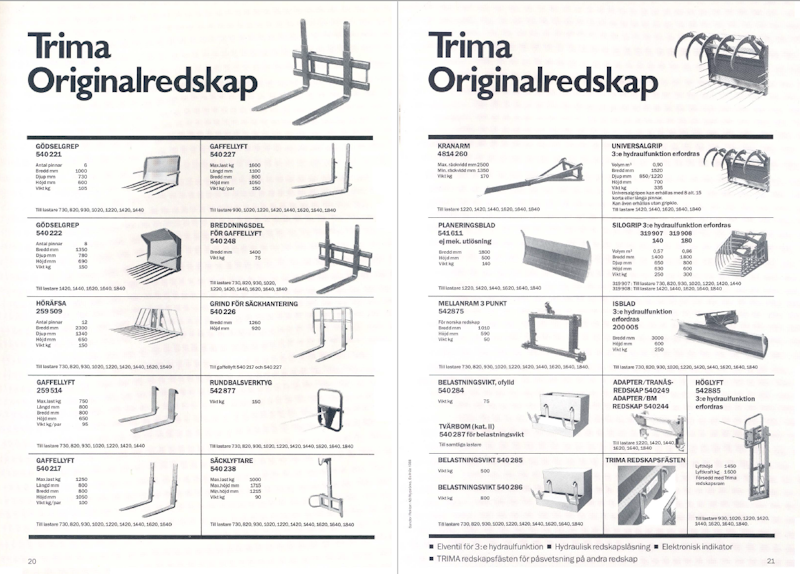
There was some debate about which implement to buy first. Reading the 1989 Trima catalogue really didn’t help when trying to choose a first implement. Many options were considered. Palletising everything and getting some pallet forks would be a huge time saver, for example. However, after a long day on a digger/dumper rented combo, it was clear a decent bucket would be the first port of call. After the tractor service and buying the loader, the pile of pennies was getting rather low, so the budget for a bucket was rather small!
Choosing the right tractor bucket and mounts
A bucket surely can’t be a hard thing to choose, right? How wrong I was! The Trima catalogue alone lists ten different buckets. Digging, light materials and multi-application are among the fancy names brochure names. A spot of research suggested a sub 1m^3 capacity bucket of less than 2m wide would be plenty. So that helped to narrow things down. But then the complicated bit started. Mounts!
Over the last 40 ish years, many loader brands have created many different loader attachment mount designs. These days, most new implements and loaders in Europe use the EURO(8) attachment on the headstock. EURO(8) is about the 8th ‘standard’ for mounts, while the headstock is the bit on the end of the loader that picks up the implement. However, the Trima headstock on this loader uses SMS or Type 5 mounting design that isn’t compatible with the EURO(8) implements. Yet.
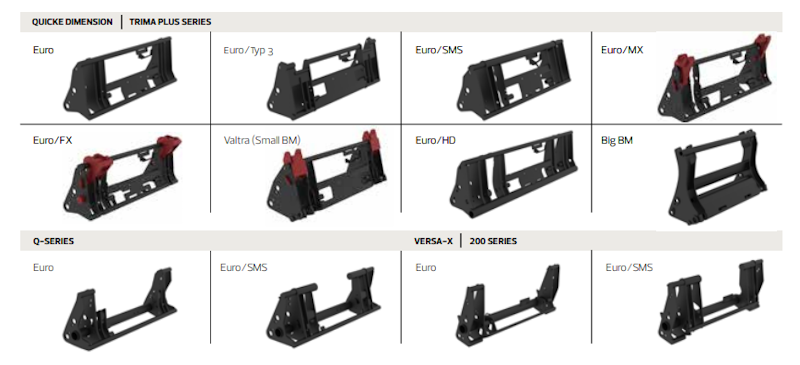
Of course, these implements are big chunks of metal on their own, so it is quite easy to change the mounts. Simply cutting off old mounts and welding on new ones is quick enough. Ideally, I’d like to change the headstock to a EURO/SMS type, but right now, I barely have the money for the tractor bucket!
Finding the perfect bucket
The perfect bucket is relatively easy to find. For less than £2500, I can buy a brand new 2m bucket with the right brackets welded on. Easy. However, my budget is closer to £250! Never fear, though, because the FB Marketplace gods shall provide. Just at the point I thought I would be off to Bristol for a bucket, but a perfectly priced and sized tractor bucket appeared.
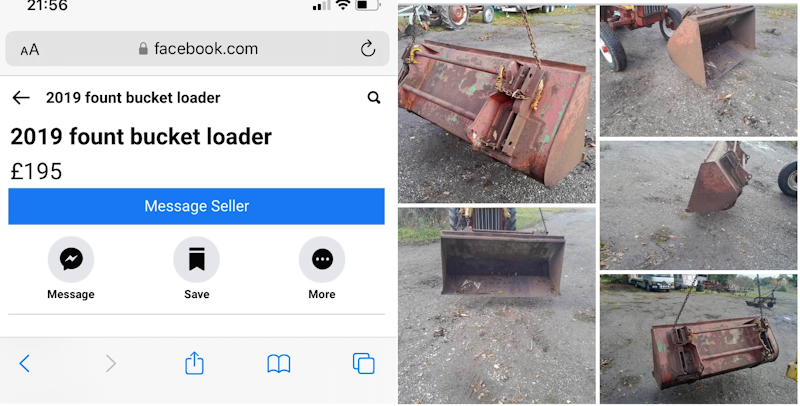
This little gem was less than an hour’s drive away, and the seller was a thoroughly lovely guy who buys and sells old equipment. I suspect our paths will cross again. This is a 165cm wide (5 foot) bucket, which I thought might be a little small. The bucket also has an interesting concoction of brackets welded to the back. Perhaps most importantly, though, the price is set well inside my budget.
Getting the bucket home
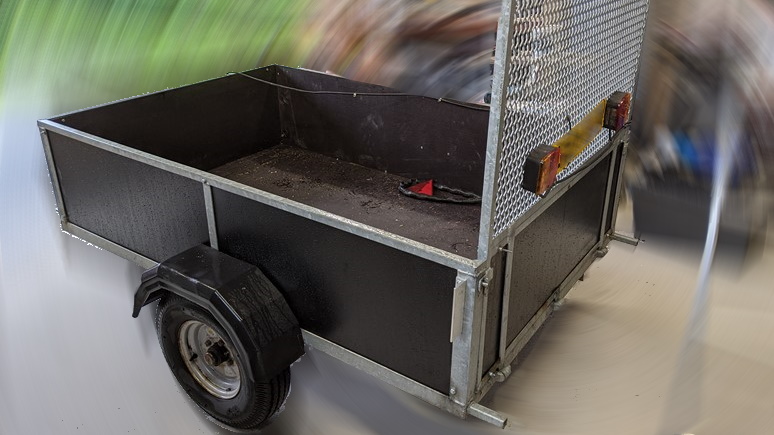
One frosty January morning, only a few weeks after installing the loader, we’re off out again. Obviously taking the biggest of all the trailers, just in case we need to buy anything else while we’re out. After a bit of shuffling implements around, the bucket is loaded up and strapped down.
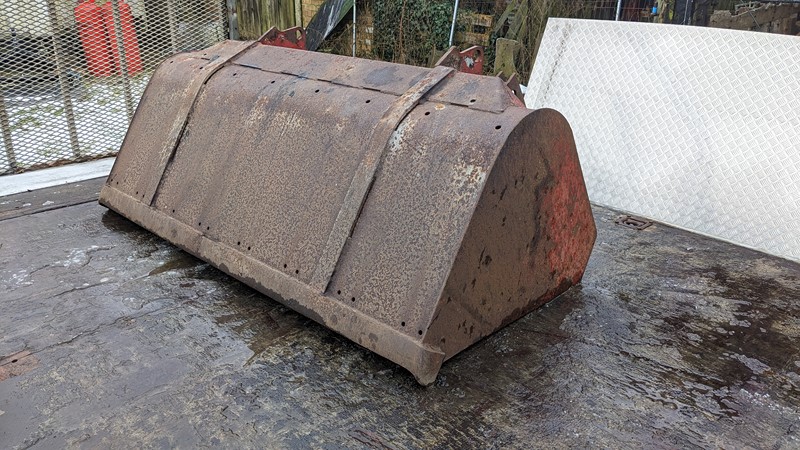
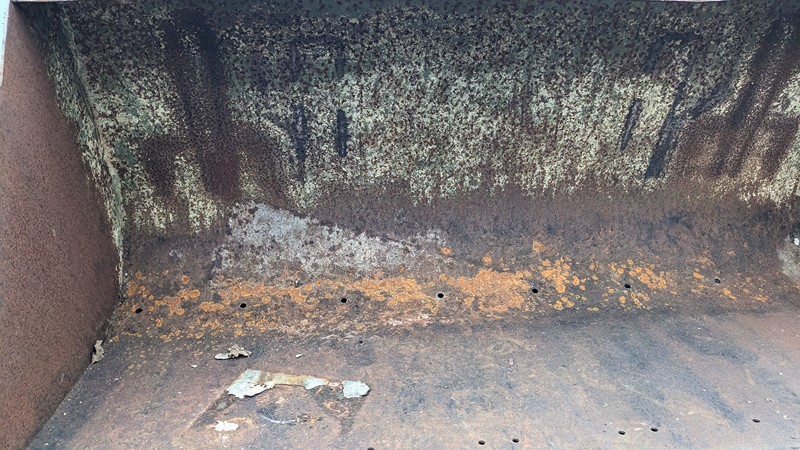
Back home, the bargain bucket still looks like a bargain. While there is the odd rust hole that shouldn’t be present, the bucket is generally sound. The blade around the front lip looks barely worn. I suspect this implement has sat outside for a long time, having only ever done light work.

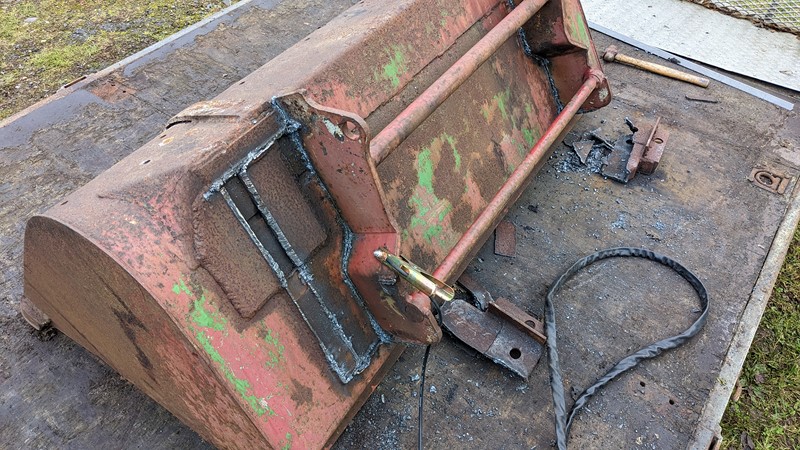
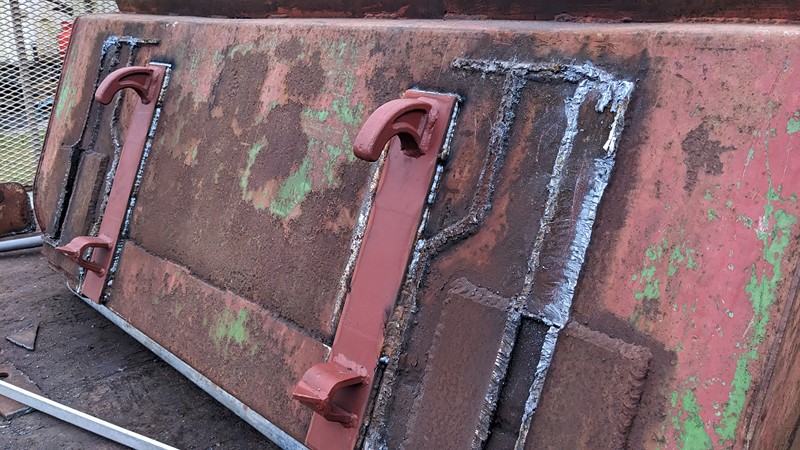
The other side of the bucket is interesting, to say the least. I make out at least two sets of brackets. The original, painted red, looks like some sort of Euro bracket that has then had the upper bar welded in. I’ve seen this before, so I wonder if the modification is to allow some sort of quick coupling. The outer, tremendously DIY brackets are a bit of a hodge podge, but they’re certainly solid.
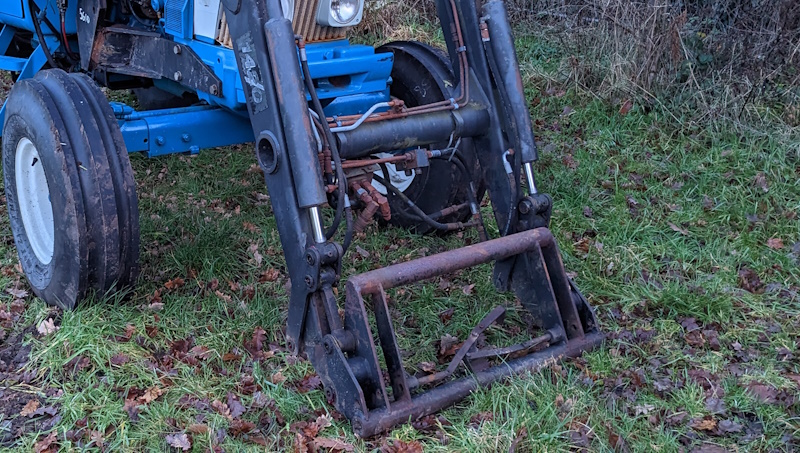
Measuring up the Trima 1420 headstock
I’m not currently interested in modifying the original Trima headstock. I also don’t want to chop off every single piece of old bracket from the bucket. The thought had crossed my mind that some of the existing bracketry may be reusable.
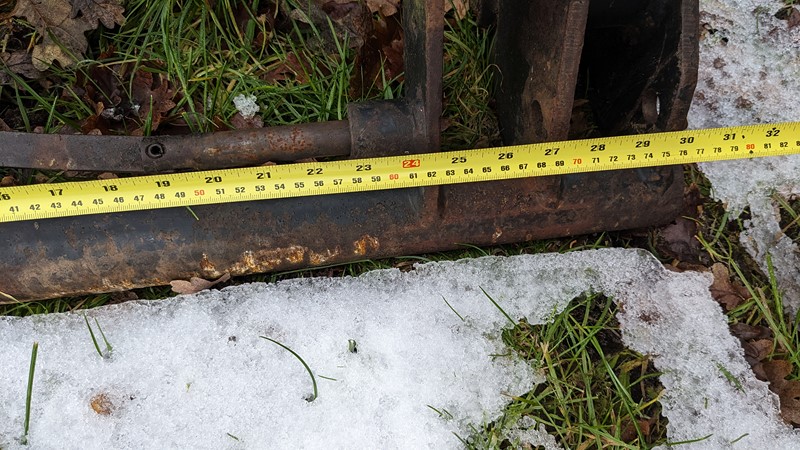
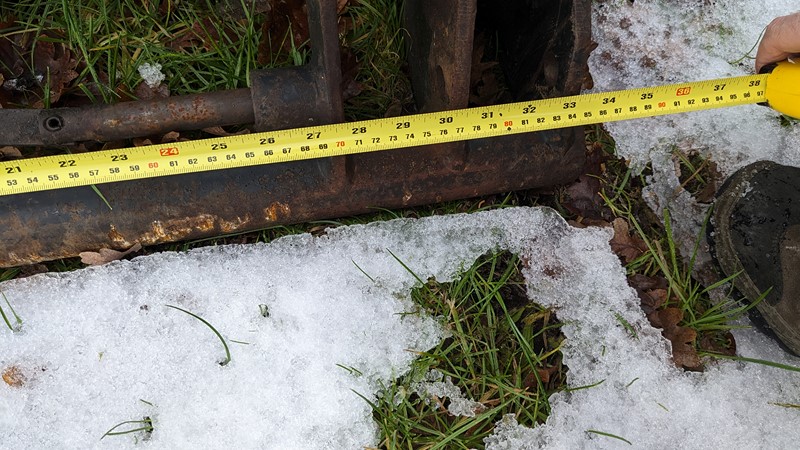

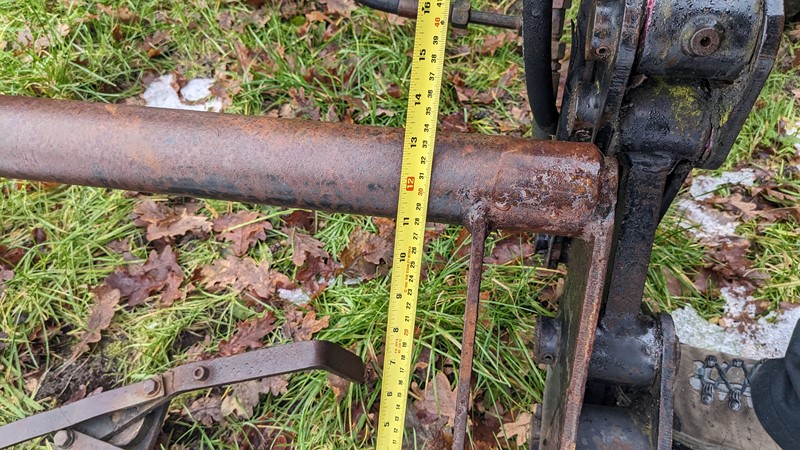
Like a scene from Scrap Heap Challenge, a sudden flurry of tape measure wielding followed. First, the headstock was measured up in a range of places. The intention here was to understand where weld-on brackets would need to go and if they would simply fit inside the existing brackets.


Then, a similar splattering of measurements was taken against the bucket. The prognosis wasn’t good. While new brackets would sit almost entirely inside the original brackets, the headstock wouldn’t be able to engage. There was nothing for it. The original brackets would need to come off.
Off with the old loader brackets
As look would have it, fall down farm had recently added a cheap plasma cutter to the arsenal of deconstruction weaponry. In theory, this would make the removal of the old metalwork a bit easier. However, it wasn’t the most powerful of machines and struggled with the ~10mm steel plates. It would need to be cut from both sides.
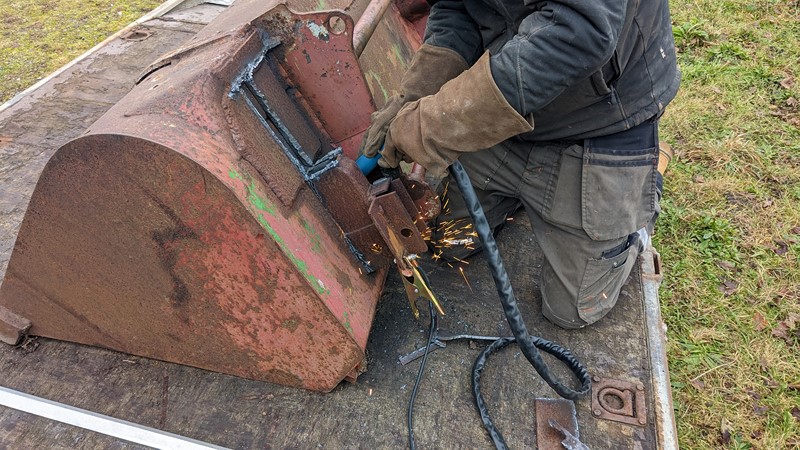
However, to reach both sides, the ‘aftermarket’ plethora of glued-on angle and box sections had to be removed. Removing all this extra metalwork did take a little while, around two hours with lunch.
Despite the slow progress, turning metal into liquid was rather satisfying. The process is generally much calmer than taking a grinder to the brackets. Fewer long-range sparks and a lot less noise. With the metal being so thick and having a complicated structure, I’m not sure a grinder and slitting discs would be a lot quicker.
After all that, with access to both sides, the original brackets were quick enough to remove. Three hours later, all the metalwork is off the tractor bucket.
And on with the new bucket brackets
Fortunately, I had seen sense and ordered a set of weld-on Trima brackets as soon as I collected the loader. For £50, I figured I was almost guaranteed to need them at some point, so it would be money well spent. And how right I was!
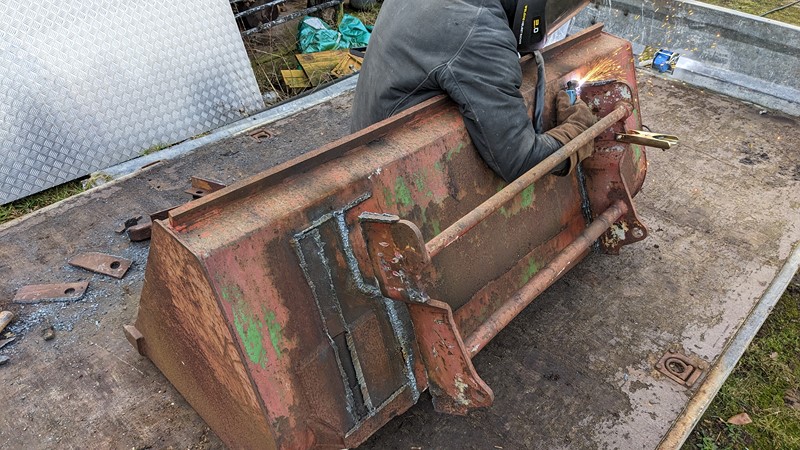
To maximise the bucket’s full capacity, I was going to need an element of precision. I needed to weld the brackets on so the headstock would not hit the ground on full curl. Effectively, the lowest part of the bucket would need to be below the bottom of the headstock.

Some measurements, marking, and balancing of the bucket and then the brackets seemed to get the mount points in the right places. A few tacks on the brackets allowed the alignment to be double-checked before committing to the full weld. I may have let a more seasoned grown-up have a go at this bit.
There was certainly plenty of penetration all around. I think it is safe to call the brackets well stuck to the tractor bucket and ready for use.
To tidy or not to tidy the tractor bucket?
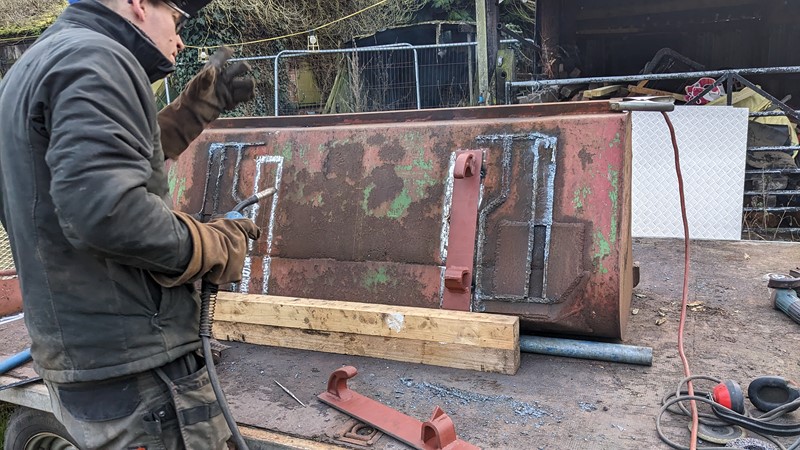
The finished appearance is less than pretty, but the finished article is fully functional. I’m in two minds about whether to spend a few hours on the flap wheel to get the old material flush. Does it really need sprucing up? Then, there is a protective layer to consider. Is it worth getting the whole bucket shot blasted and painted, or just red oxide painting the now exposed metal?
To tart or not to tart is a decision I still haven’t made. Nearly five months on, the back of the bucket hasn’t been touched. The shiny metal has dulled down, and the brackets still look as solid as they should.
The bucket has also been used a decent amount since it was installed. Remembering to park the bucket with the drain holes at the bottom is something that takes a conscious effort. While the implement may have been a bargain, coming in at under £250 (not including copious amounts of electricity), I’ve found the tractor bucket to be very useful around the farm.
I just need to find some pallet forks now.
M
NEXT – Ford 7610 – Loader Legs
PREV – Ford 7610 – Free Flow Return

[…] NEXT – Ford 7610 – Tractor BucketPREV – Ford 7610 – Fitting a Loader […]
[…] NEXT –PREV – Ford 7610 – Loader Bucket […]