

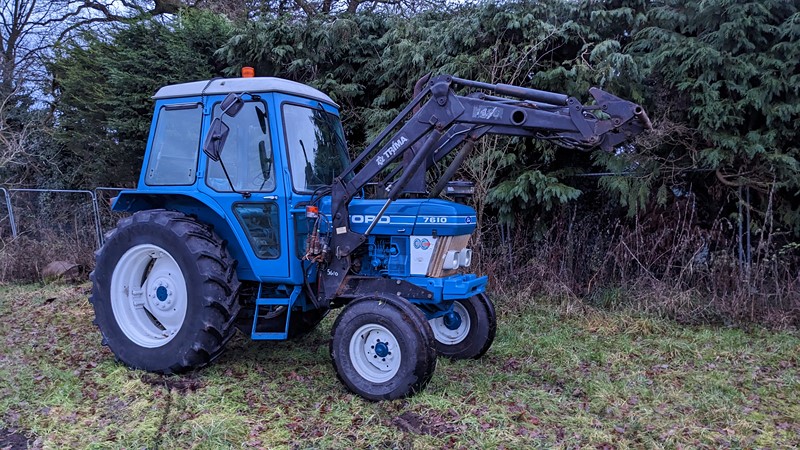
Spurred on by getting the Ford 7610 serviced at Cheshire Farm Machinery, I could finally press the old blue tractor into service down on the farm. But, beyond mowing the grass and dragging implements and trailers around, we needed a way of moving materials around. The solution is, of course, a loader. After months of looking, I’d finally tracked one down locally and once collected, I could start fitting a loader to the tractor.
Finding the right loader
Before starting to look, I knew I wanted something period correct for the tractor. I would ultimately like to lift one-ton bags, so that gave me an idea of lifting weights. And I would want to take the loader off before taking it to shows, so something that has (or could have) stands was important.
Once I started to look on eBay, The Farming Forum and Farmers Weekly, to name a few, I quickly found there is quite a range of loader solutions available. In addition, I quickly learned about the differences between the different types of loaders. The number of options is nearly infinite, from the headstock that picks up the implement, parallel lifting or not and various valve chests for control.

This early research also helped me understand how much a loader would cost. I decided I would probably want a Trima, Quickie or Alo loader. I also found that many eBay adverts didn’t include the tractor mounting brackets or the control blocks. While the adverts looked like bargains, they would quickly cause a headache trying to find the missing parts!
We won’t need many implements, so the actual headstock isn’t too critical. If we find an implement with the wrong fittings, it will
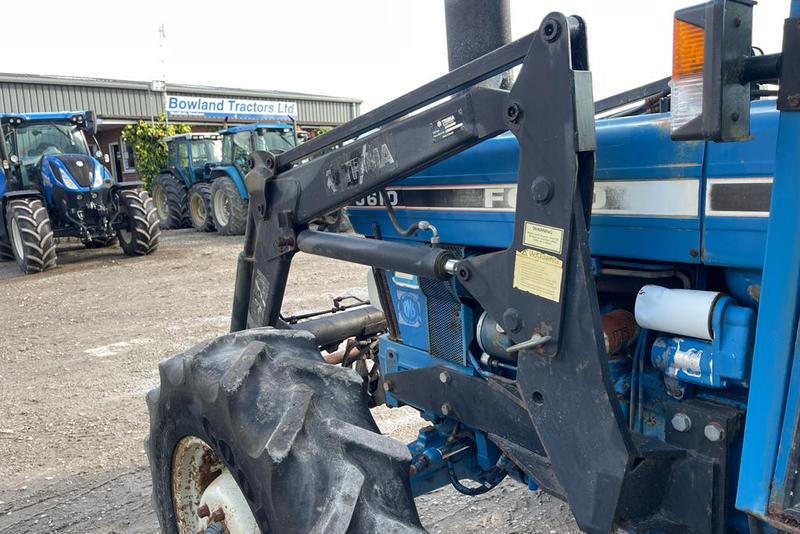
After a few months of hunting, I tracked down what might be the best solution. Bowland Tractors were advertising a Trima 1420 previously fitted to a Ford 5610 Force 2 tractor. The advert included all the hardware and control parts that should allow quick loader fitting.
Collecting the loader from Bowland Tractors
After finding the advert, I called Bowland Tractors to ensure the loader was still available. I was pretty certain it was the right fit for us, so I paid a deposit over the phone and set a day to go and collect.

A cold, wet morning saw the big trailer getting hooked up, and with my partner in crime, we headed off to the Welsh border. Despite the weather, it was a reasonably quick trip to the outskirts of Wales to the Bowland Tractors site. A true playground I could spend a lot of time in. The loader was lifted onto the trailer with a telehandler, strapped down and off we set.
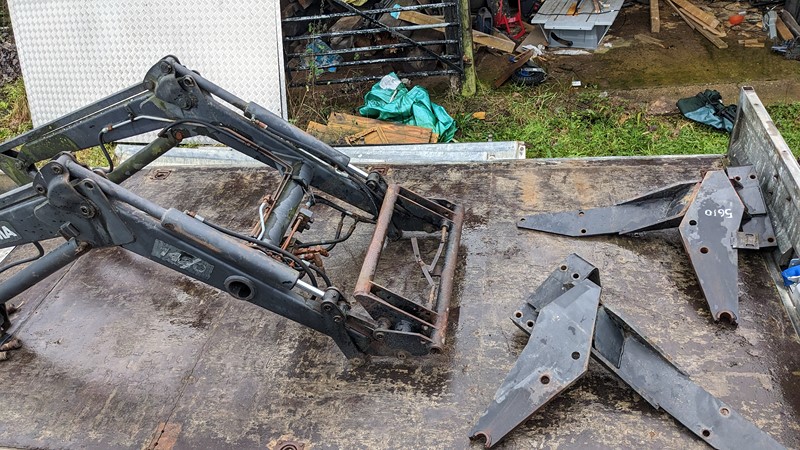
Despite the surface rust, the loader is in generally good condition. Unfortunately, the picture doesn’t do justice to just how solid the brackets are. I can just about pick them up, but fitting will be ‘exciting’!
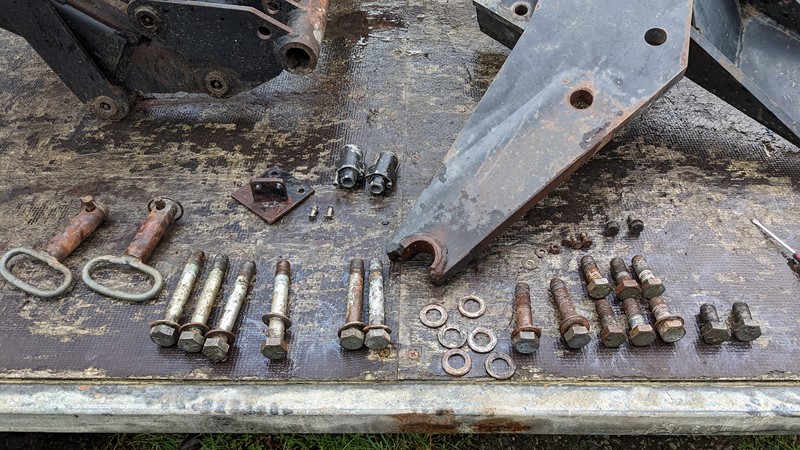
Before trying to fit the loader, I also went through all the hardware to ensure nothing was missing. Compared to the parts manual I’d already managed to download from the Trima site, all the bolts and washers seemed to be present. The threads all get a brushing over before fitting the loader.
Preparing the tractor for fitting a loader
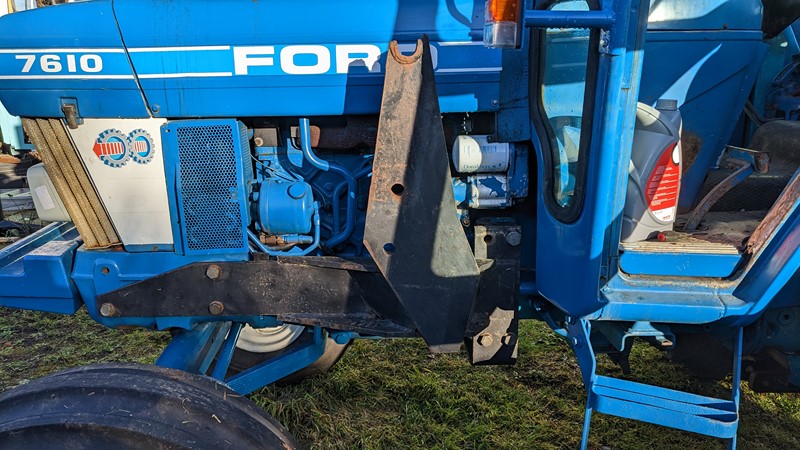
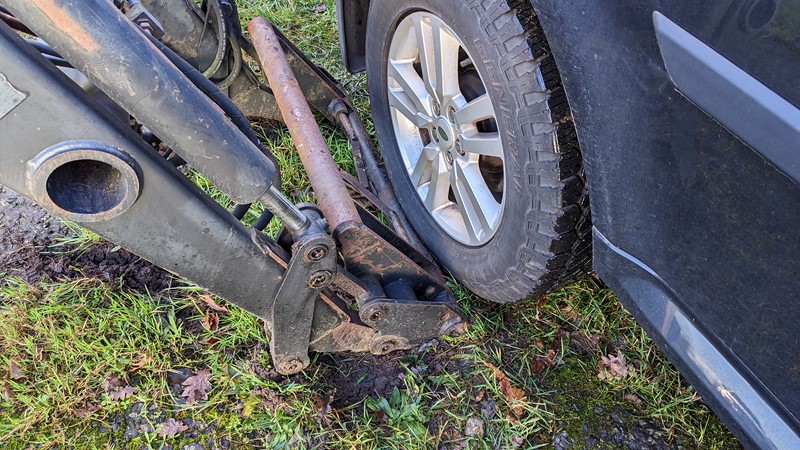
While my 7610 arrived in a generally clean and recently painted condition, it did need some prep before fitting the loader. The tractor has historically worked on some very heavy and clay-filled land. This mud has got in everywhere and wasn’t cleaned out fully before the spray-over.
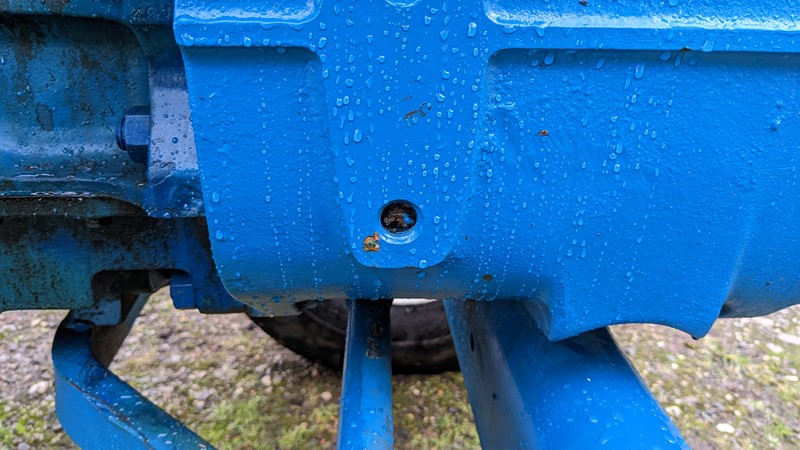
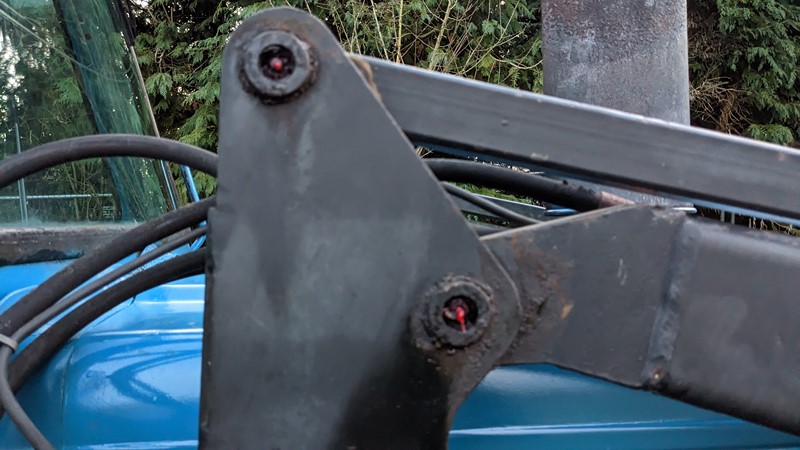
This means a lot of the holes that the loader needs to connect to are filled with soil that needs cleaning out first. A mixture of a pointy screwdriver, a tiny wire brush and an airline eventually get all the mud out of the holes. The holes are probably 3/4 UNC thread, and try as we might, the correct sized thread tap is in hiding.
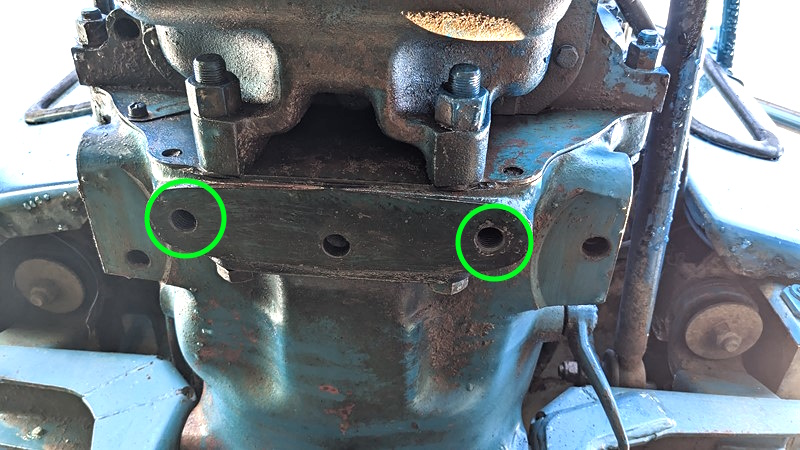
Perhaps not surprisingly, the worst holes to unblock and clean out are the two in the bottom of the gearbox/back-end casting. These two holes actually took a while to find because they were so full of mud. But like all the side holes, the combination of tools eventually gets the threads cleaned out and ready for fitting the loader.
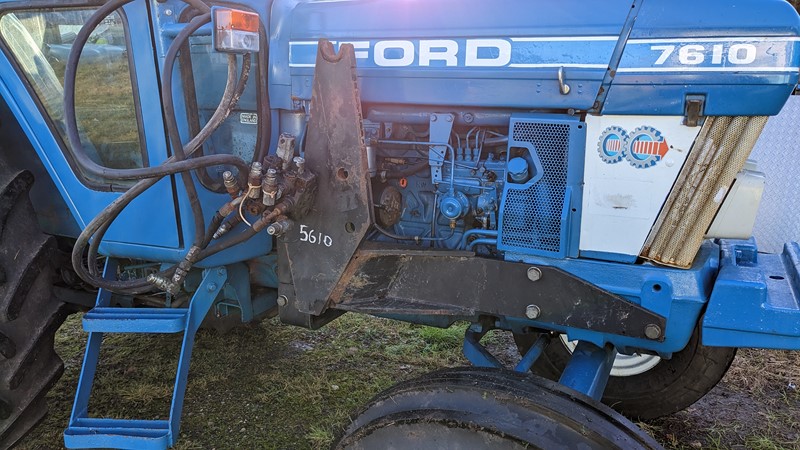
Installing the loader brackets
Oh my gosh, they are heavy. I really can’t oversell the weight of these things. Despite there being two of us, trying to hold them up and get the bolts in was a little bit taxing. We probably could have used the engine crane that was next to the tractor, but that felt like cheating!
The weight of the bracket was mostly held by the first two bolts. Then the rest of the bolts were loosely screwed in. The bolts on the underside of the tractor were the first to be fully tightened, followed by the sides. All the bolts were then torqued to FT.
I should probably note that all of the bolts received a smear of copper slip, which should prevent them from corroding in the holes. Not that I plan to take these damn things off any time soon, but it would be nice if they came out without a battle.
Picking up the loader – Death Jack
Predictably, you need a loader to fit a loader! While there are plenty of chain blocks about on the farm, there isn’t anywhere high to swing them from. The frame of the biggest barn is simply not strong enough to lift anything from, so improvisation is needed.
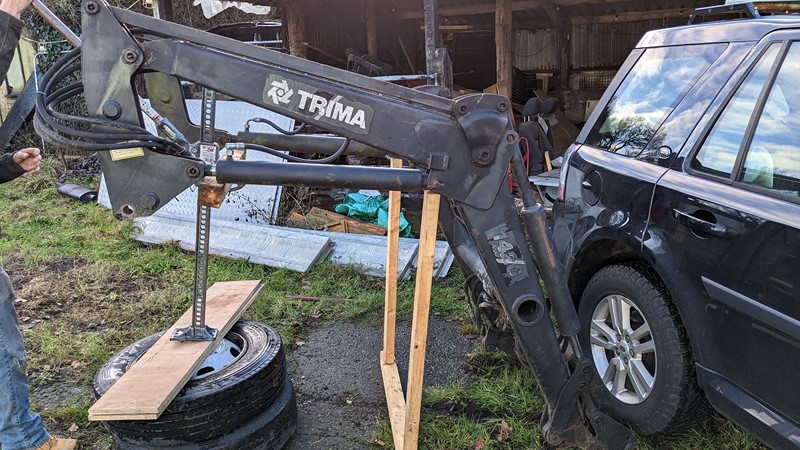
Attempt one involves using a farm jack to slowly lift the loader high enough for the tractor to clear the arms. Once raised with the jack, the frame is supported by some 2x4s. And yes, this method is every bit as dangerous as it looks.
Parking the Freelander on the headstock did stop the frame from wobbling and or moving forwards, and we did get the loader off the ground. Ultimately though, this was not a great solution. Once in the air, it didn’t take long before the whole loader gracefully twisted and found its way to the ground. Bugger.
Picking up the Loader – Improvised Gantry.
Take two involved an improvised gantry. A couple of lightweight scaffold towers made the legs, then an old telegraph pole to make the beam. The scaffold towers were too short, the beam too round, and frankly, this wasn’t as easy as the picture makes it look.
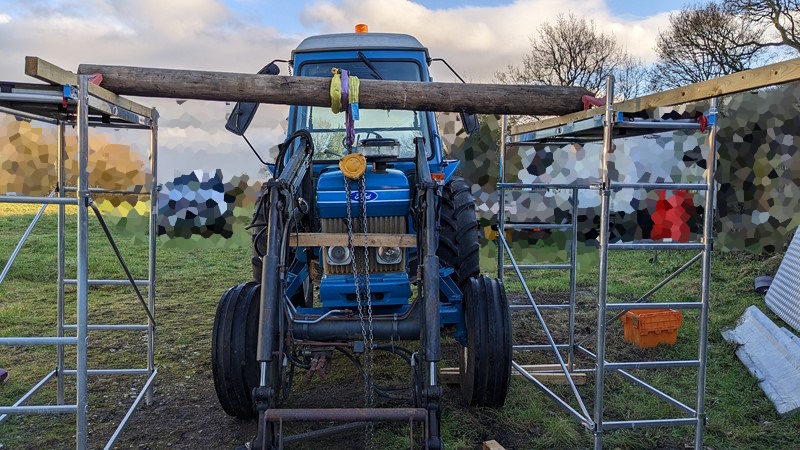
Raising the beam on some lengths of timber, using axle stands as chocks and keeping well out of harm’s way, the loader was finally raised off the ground. With an air of haste, the tractor was driven under the makeshift gantry and the loader arms locked into place on the tractor brackets. Looking back at this picture, it looks like the gantry is on grass, but I promise there is some tarmac under there. Still, this is not a method I would recommend, and the next major tool on the list is a full-height rolling gantry. Clearly, it’s going to be needed!
Connecting up the hydraulics
For now, the hydraulics supply and return were plugged straight into the spool valves. Not the greatest solution, but enough to get the loader off the ground. I’ll cover the whole loader hydraulics drama in a future article.
Installing the cab controls
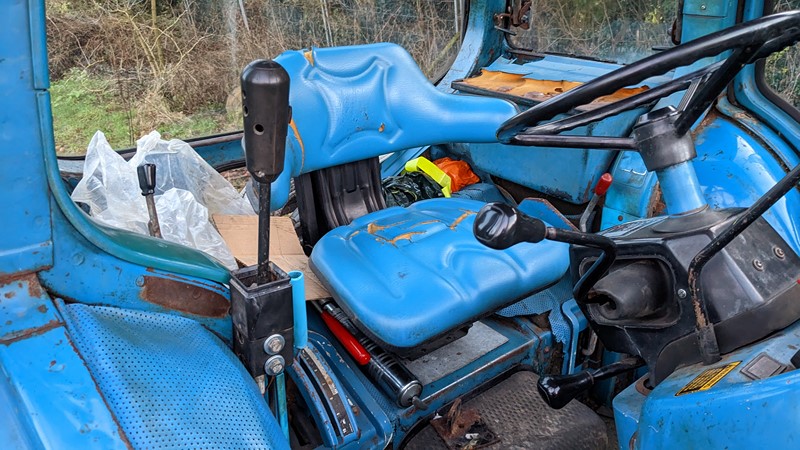
The initial operation of the loader was made with the controller supported only by the cables. The battle to get the control box still relative to the joystick, while managing the spool valves, was something akin to wrestling 25mm armoured cable. Tiring work with pretty useless results. Pretty quickly, fitting the loader started to focus on fitting the controller!
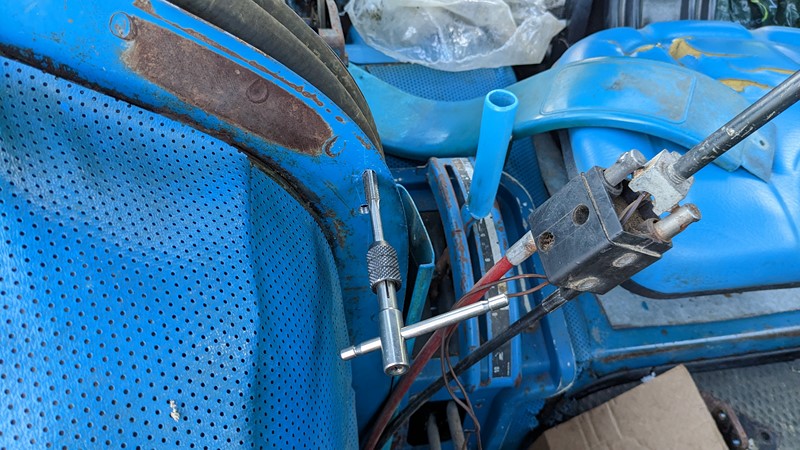
The bracket that came with the loader was not suitable for the early Q-cab 10 series tractors. While trying to find a suitable position and bracket, I realised the ROPS frame was ideal. The double skin allows for a hole to be drilled and tapped and has a good 4mm of a threaded hole to engage in.
My god, my hands were sore after hand tapping the holes, possibly not helped that the pilot bit was a little undersized. Once mounted, the loader operation was much easier, and the joystick position was surprisingly ergonomic. Some adjustment is still needed to get some smooth control, and some lubricant down the cable wouldn’t be missed. But the cabin controller is in and working!
Lubing Up the loader
One last job was to go over the loader frame and apply some lubricant to all the moving parts. Those little grease nipples won’t lubricate themselves, and my word, there are an incredible number of them. It’s clear that the grease that is in the joints is rather old and, in places, quite dry.
There must be at least twenty grease points in total, and just finding them all is quite a challenge, but completing the task was totally worth the effort. Once greased up and cycled from top to bottom, the movement of the loader is completely different. Of course, I don’t know how long the loader has been out of use, but after greasing, the movement of the arms and headstock quickly goes from jerky to smooth.
Fitting the loader is complete.
After the early start to get to Wrexham, and an all-day battle against gravity, the battle of fitting a loader ends. Although it has been a rather tiring day, it has definitely been a successful one. This is part of why I love playing tractors. Getting hands-on and doing mechanical battles is completely different from my day job. Better still, I have something useful and productive to show for it that isn’t simply another list of un-actioned emails.
While the loader can be used, it isn’t very useful right now. To get the most from the loader, I will need some implements. I’m thinking at least a bucket, but probably some forks as well. And if I want to pick up ton bags and not snap my new spindles, I probably need a counterbalance.
Back to shopping for me then.
M
NEXT – Ford 7610 – Free Flow Return
PREV – Ford 7610 – Service turns major


[…] NEXT – Ford 7610 – Fitting a LoaderPREV – Ford 7610 – First Drive […]
[…] Steam Rally. After the ‘fun’ of getting the structure into the air, when I came to fit the loader onto the tractor, I wanted a quicker way to get the loader on and off. This meant I would need some Trima 1420 […]