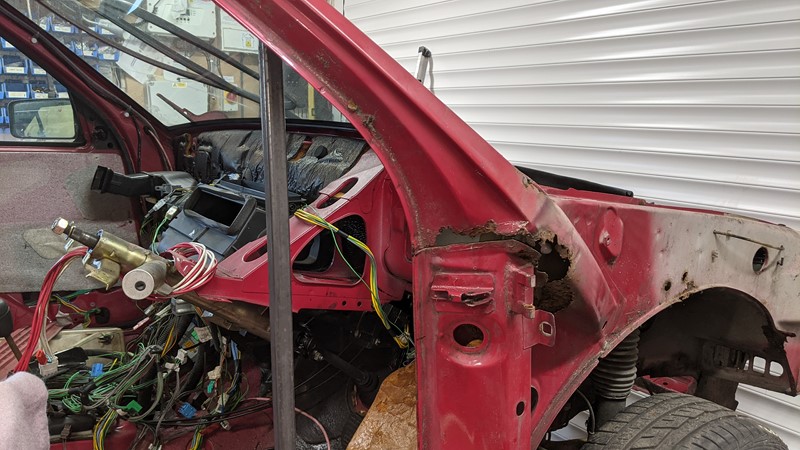
Oh my, oh my! Yet another six months have passed since the last XPO update back in June. This is only the second update in twelve months. Frankly, you’d be forgiven for thinking XPO may have been scrapped. Sorry, my bad. So far, the scrap men haven’t had the joy of carting it off, nor has it been broken for spares. However, I have had an abundant shortness of free time and one soul-destroying setback. Onwards and upwards. With the donor panel repaired, the time had come to start the old A-pillar removal.
To better understand the real-world time scales, I’ll try to date some of the pictures!
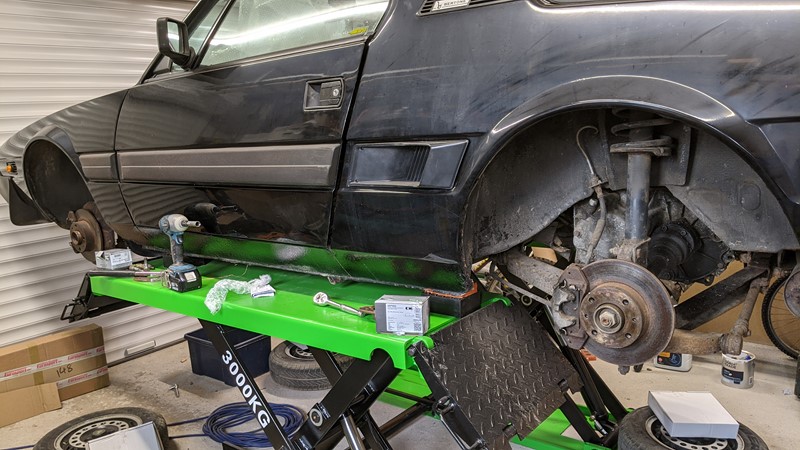
Preparing for the big cut
When I last reported the progress of XPO, I very slowly went through the process I had followed to repair the donor panel to a state it could be re-used. While the panel was now structurally sound and hopefully not warped, it wasn’t completely ready to go back on to XPO. The repair panel continued to be supported by a lot of excess material, like the sill end and scuttle return. Eventually, this excess would need to be removed. However, I couldn’t cut into the donor panel until I knew how much was spare!
Before making the big cut, I would need some suitable reference points to measure from.
Brace Brace Brace
To know just how much of the donor panel I would need to use in the XPO repair, I needed to understand just how far the rot had crept. While it seems simple enough to start hacking into the car to see how far the orange seam ran, that’s likely a recipe for disaster! Better to nibble through the rot one piece at a time.
Before removing any metal work which might be structural, I wanted to reinforce the door opening to stop any movement. In theory, if I leave the laminated screen mostly in place, it should offer a lot of stiffness. Hopefully, being attached to the roof panel and firewall, the glazing should hold the roof up. Theoretically, there is enough structure left that I can cut through the A-pillar without the body sagging. But, unfortunately, I’m not that brave.
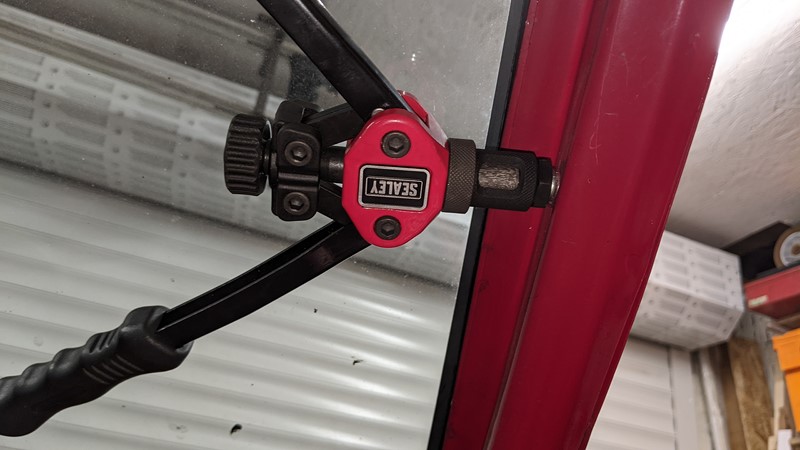
So I came up with the genius idea of a brace bar held in with rivnuts. Well, I can now tell you from experience that rivnuts were not the most fantastic idea I have had. Unfortunately, the rivnuts didn’t set well and rattled around. Although they were helpful as a temporary hold, the brace eventually got tack welded directly to the body.
Windscreen Removal
Protection first!
Next, I needed to access all the metal around the bottom of the A-pillar. This would mean the removal of the windscreen. However, as the windscreen is bonded in place on the BX, it actually forms much of the rigidity of the car’s front end. So, I decided to take just a small piece of glass out rather than remove the whole screen!
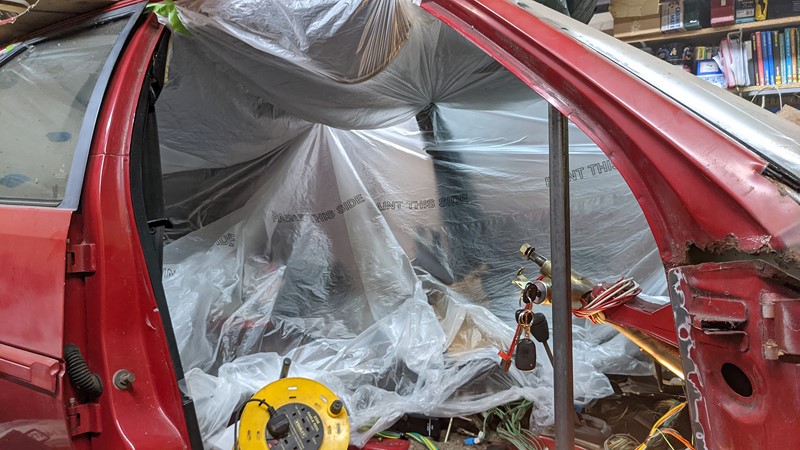
Cutting through sheets of glass would mean a tremendous amount of debris flying into the car, so first things first, protection. Well, a dust sheet of sorts! I find a full-on heavy dust sheet quite a pain to move and somewhat light limiting. So, I have used a roll of painting masking sheet as a halfway measure. Light enough to see through, but still stops most of the dust.
Grindy Grindy

Those who know me will know my penchant for an angle grinder. Most jobs can be completed with 1mm cutting discs. However, many jobs shouldn’t be done with a grinder. Cutting holes in a windscreen is one of those jobs.
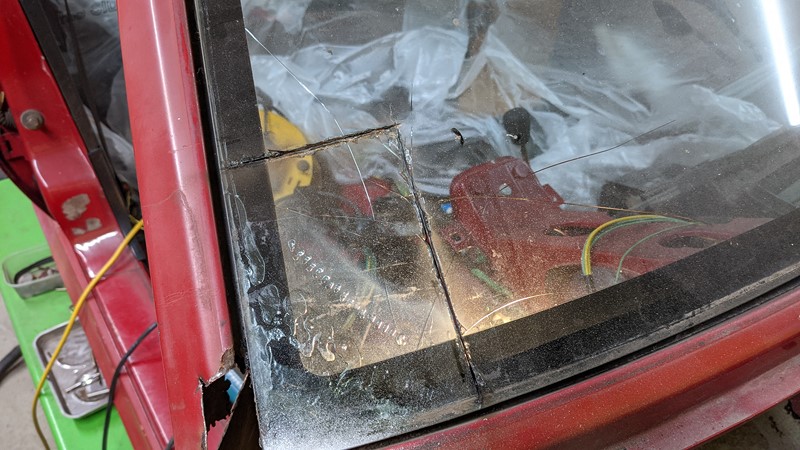
Don’t get me wrong, cutting a laminated glass windscreen with a cordless angle grinder did work, but this small cut alone used an entire 100mm slitting disc. And the mess was astonishing. The grinder didn’t so much nibble away through the windscreen layers as expected but melted the glass into molten balls and then project them across the garage.
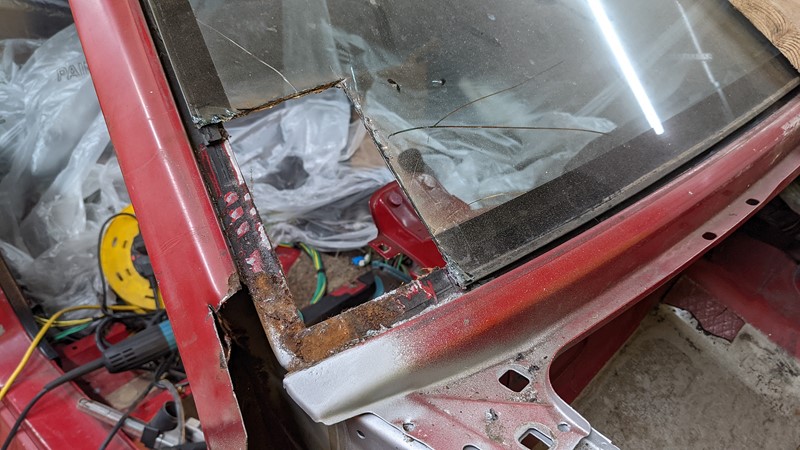
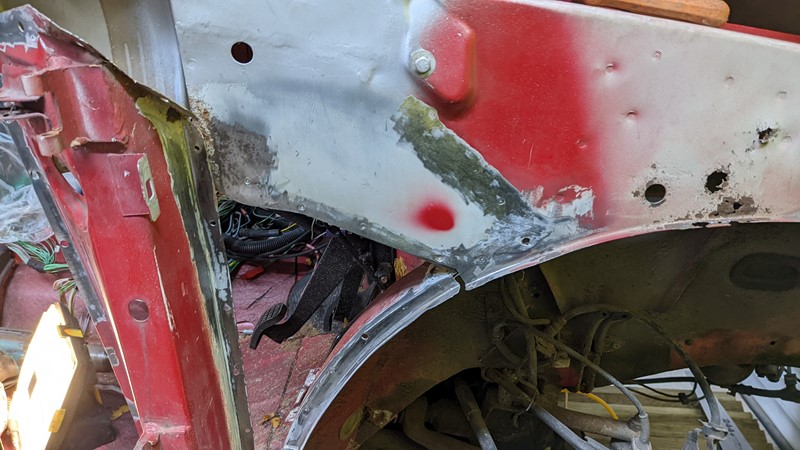
Lesson learned, I suppose. However, I did reach the target of removing enough glass to work around. The rust wasn’t as bad as expected, but it became clear why the BX screen usually fails in the corners. Moisture getting under the paint around the window frame leads to rust, which pushes up against the glass.
Inner Panel Removal
The following few images will jump around a bit for the purpose of storytelling. Eagle-eyed viewers may have spotted that the lower A-pillar was already missing in a previous article, but stick with me. The next step was to remove the chunk of rotten metal that, once long ago, made up the inner A-pillar.

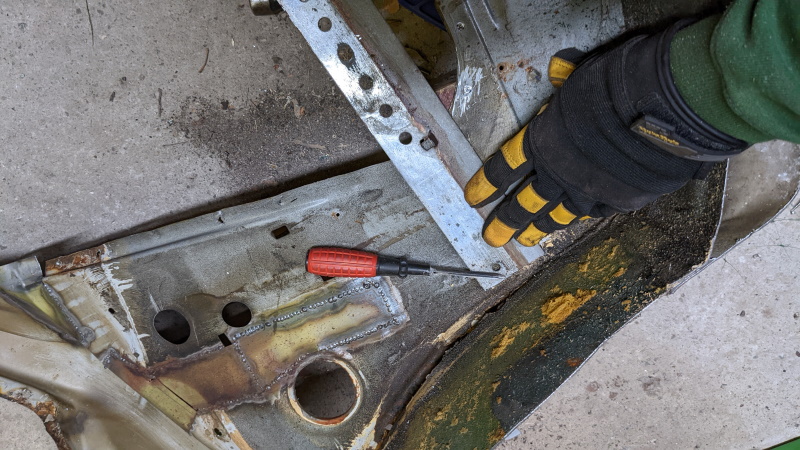
The correct, and I think the easiest way to do this, is to uncover all the spot welds, drill through and nibble out the panel as required. In this case, the multitool with a flat blade makes short work of the underseal, exposing the tops of the spot welds. Sometimes a bit of sanding helps pinpoint the original spot welds centre.
Upper A-pillar panel removal
Once the spot welds are drilled out from one side of the panel, a combination of twisting and hammering breaks off the final bit of the weld. I try to be cautious not to drill the spot welds too deep and go through both layers of metal, as I’ll need something to weld against later. Slowly and carefully, the old A-pillar removal is completed.
Lower inner A-pillar removal
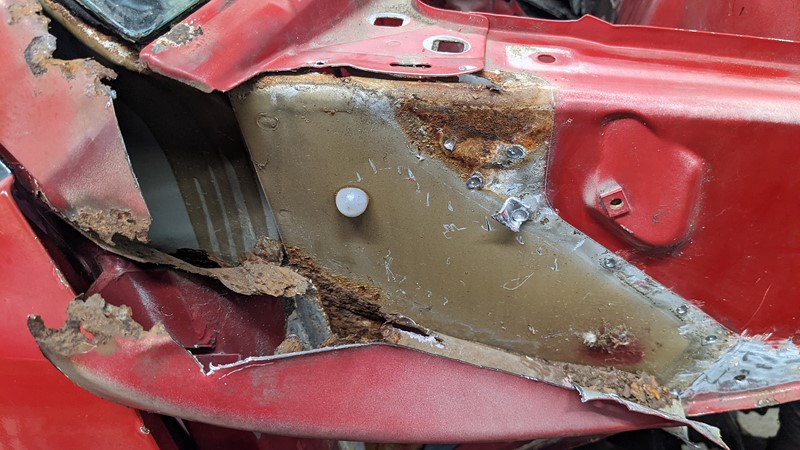
Slowly and carefully, the metal that needs replacing is removed. While this approach is relatively slow, it also does the least damage. The last thing I want is to warp any panels and for things not to go back together nicely. So a bit of prep for the following welding stage is carried out and then covered in weld-through primer. And oh, look, the side of the scuttle is magically repaired.

Once all the metal I can reach from the outside is removed, I can start on the inside. While a lot of the metal here initially looked solid, with no bubbling or rust, it soon fell apart. The reality was that rust had run in the seam, and the metal was relatively thin. There was also little holding the outer A-pillar onto the car.
Finding a datum to take a cut
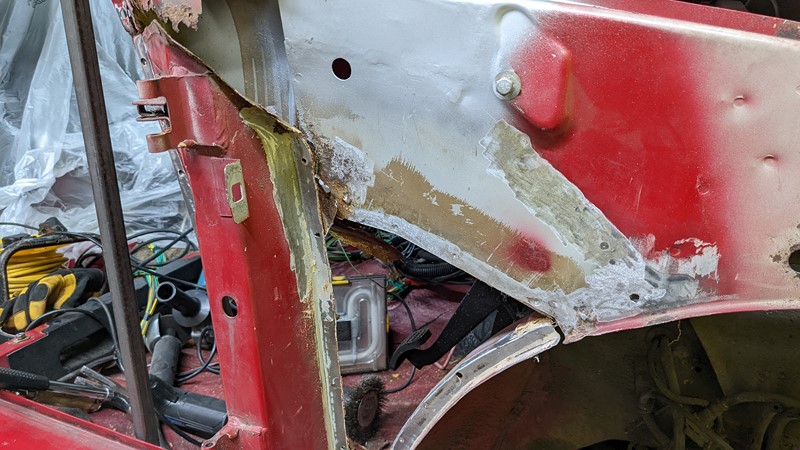
While I had initially planned to cut all of the inner A-pillar panel out, this would mean removing the outer A-pillar and potentially the body kit. However, as I slowly nibbled through the failed material, I found a definite point where all metal was solid. This seemed like an excellent place to join the repair panel to the original material.
An excellent clean cut was established at the bottom of the panel, using the overlapping floor panel as a reference. Remember this point, as it will become important in a minute or so! Next, the back of the outer A-pillar was suitably levelled off with a piece of box section and hammer. Then the metal was cleaned back to good steel, where the welds will be made.
A long day’s graft and all of the damaged material of the inner A-pillar panel is removed. However, this does leave the outer A-pillar panel free-floating. Oh, I rather hope this works! Again, all of the mating faces are stripped back to bare metal and cleaned of grease or other contamination. The exposed metal will then be primed with a weld-through primer.
Cutting out the donor A-pillar panel
When I last reported the progress of XPO, I very slowly went through the process I had followed to repair the donor panel to a state it could be re-used. But I deliberately didn’t finish cutting the required pieces from the body cut. At that point, I didn’t know how much I would need to remove to fit the hole in XPO.
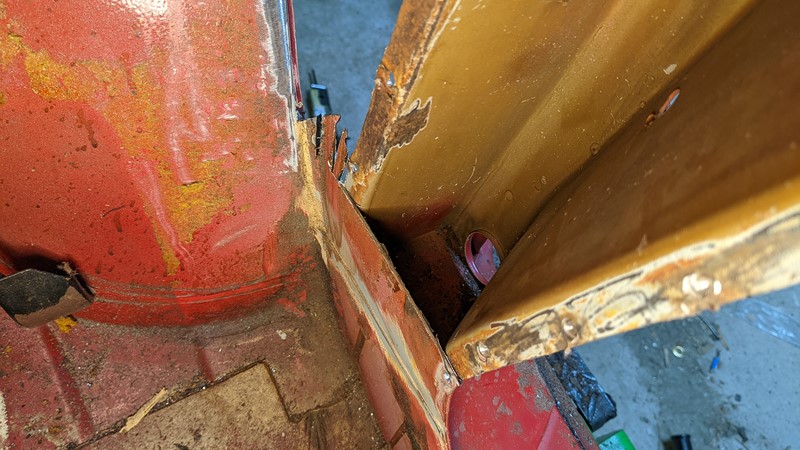
Now with a datum on both XPO and the donor panel, I was able to start cutting. Carefully I measured, marked and cut the bottom of the donor A-pillar panel to what I hope will be the correct length. No going back now. If this isn’t the right place to cut, life is going to get interesting!
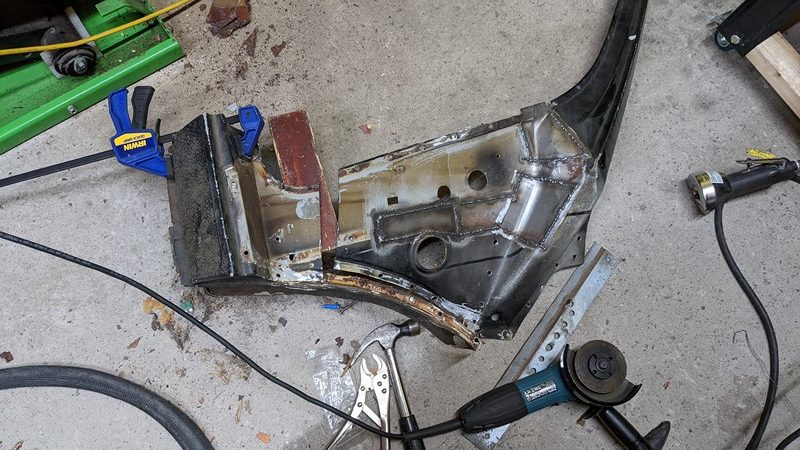
Once the cut was made, all the spot welds were cut out on the donor panel. This released the trimmed inner A-pillar repair section from the body cut. There was a surprising amount of useful material left over. Rather reassuring, as I would hate to have cut too little from the donor car. I’m sure someone will need a sill end at some point!
Next time, the big cut!
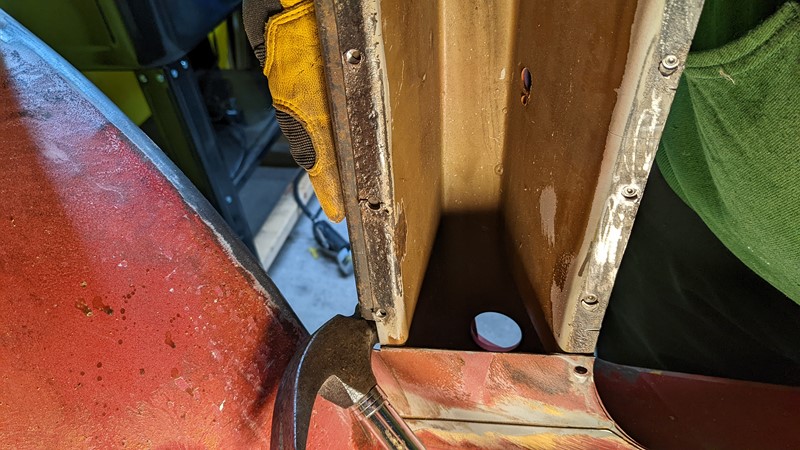
At this point, the inner A-pillar repair panel is released from the body cut, and the old panel is removed from XPO. Finally, I can carefully slide the repair piece in and see just how warped it is. If I’ve been lucky enough, it might drop straight in, and I can figure out where to cut XPO’s A-pillar. This is by far the most nerve-wracking part of the whole process. Any big screw-up in cutting into XPO or the donor panel could set me back months. I guess we’re all going to find out in the next episode!
M
NEXT – Eps22 Making the Big Cut
PREV – Eps20 Donor Panel Repair
Back to Citroen articles
Back to Automotive articles
Amazon Affiliate Links – Things used in this article
BXProject is using Amazon Affiliate Links. It’s a quick way to show you what I have used in this article.
“As an Amazon Associate, I [may] earn from qualifying purchases.”
Since January 2024, Amazon has blocked embedding images, but I think the links are still valuable.