In the last episode of the XPO adventure, I caught you up to April 2022. As we’ll see in episode 27, an issue with the applied finish paint crippled my enthusiasm for the project. But hurrah, writing progresses, and I’ve drafted up to episode 29. Aren’t you a lucky bunch! Situation Report. Back in episode 20, I completed the repairs to the donor panel (from the black BX at Albert Looms). Then in episode 21, I slowly removed XPO’s old inner A-pillar panel. I finally plucked up the courage to make the Big Cut in this episode.
Measure thrice
By April 2022, there was no point in putting it off anymore. No matter how much I may have procrastinated up to now, I absolutely must make some progress. The time had finally come for me to make the dreaded Big Cut to the A-pillar.
Cutting XPO’s A-Pillar
That Big Cut was to the A-pillar, something I’ve been dreading. My penchant for using the angle grinder in all car jobs means I rather enjoy cutting through metal. In fact, I’d say I’ve become rather precise at turning steel to dust. So it’s not the physical cutting that worries me, but getting the cut in the right place.
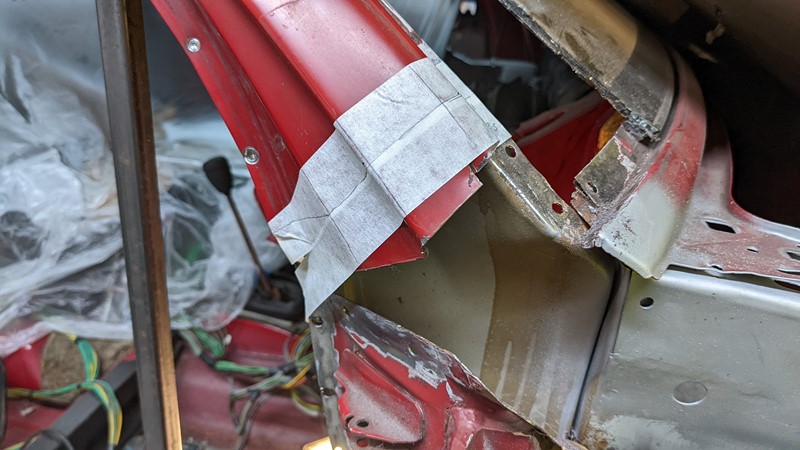
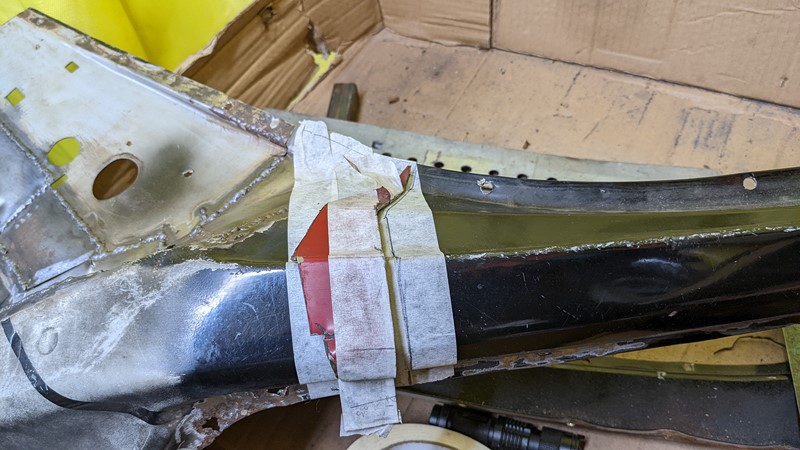
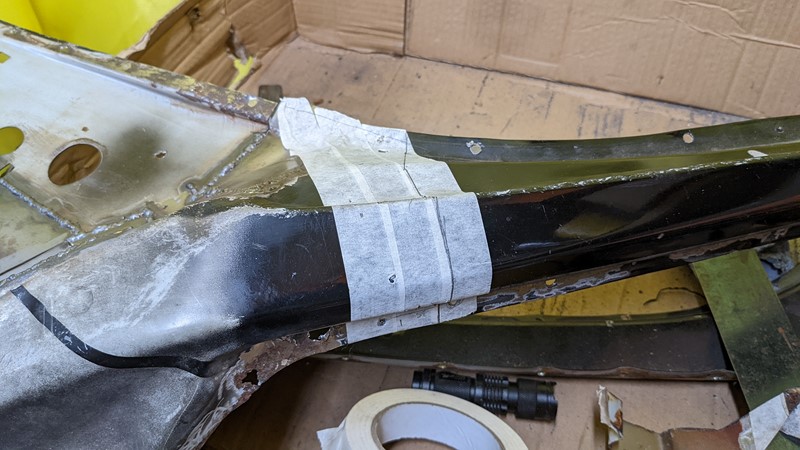
If I can call it that, my plan is to remove as little of the original metal as possible. The best cut I can make with the angle grinder is, of course, a straight line. However, I find it much easier to cut a line straight if I have something to follow. Applying masking tape to the A-pillar gives me something to draw on, and using a flexible straight edge, I can draw a line to follow.
And what is this magical flexible straight edge? Well, it’s the factory-cut edge of a cereal box. The simple application of a layer of print on the outside of the cardboard makes cereal boxes the best for templates and guides. Best of all, it works. I have quickly achieved an excellent crisp cut.
The donor panel Big Cut
Trimming the bottom of XPO’s outer A-pillar is relatively trivial. However, it is still not the big cut I dread. But that time is upon me. First, I need to put the donor panel in exactly the right place. In a perfect world, I need the old and new panels to be less than a few mm apart. Simple? Well, it might be if I had enough reference points left on the old A-pillar, which I removed in the last episode.
I confess I did take some measurements from the bottom of the old A-pillar. However, when I get to the stage of marking out the cut on the repair panel, they aren’t much use. Fortunately, I have a cunning plan. The joins between metal body panels, called spot welds, have been carried out by high-precision robots for a very long time. So, if I match up the spot welds on both panels as a reference, then use the trimmed XPO A-pillar to match the cut profile.
Simple enough. Just to double-check, I’ve taken some extra measurements. First, I measured from the bottom of the windscreen opening on both the donor panel and XPO. Then from the top of the windscreen opening on both panels. The marked cut point seems to be in the correct place, so I take a brave pill and finally make the Big Cut.
Sliding in the repair panel
Then comes the slightly tricky element of sliding in the panel. If I pull XPOs original bodywork apart too far, I risk bending something permanently out of alignment. Or worse.

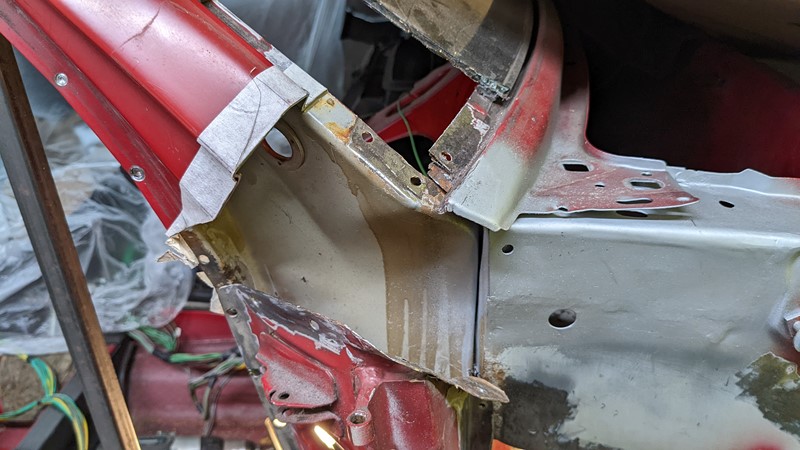
Gently, slowly and carefully, I offer the body cut into place. And at this trial fit, it doesn’t look too bad at all. The profiles of the two cut ends seem to match beautifully. I’m starting to feel relieved that I haven’t fully ballsed up the cut. I need to send it home and ensure the fit is tight.

I need not have worried. The fit is, how shall we say it, sub-optimal. Shit.
Across most of the join, there is a gap of around 8mm, expanding to 12mm at the lowest edge. Never fear, though. I already had a backup plan. Subsequently, I rewatched a Citroen promotional video of the Citroen BX being assembled in Rennes. You guessed it, no robot for the spot welds around the door, all done by hand.
Preventative Welding
No point in crying over spilt milk. I need to press on with cleaning all the surfaces that will eventually be welded together.
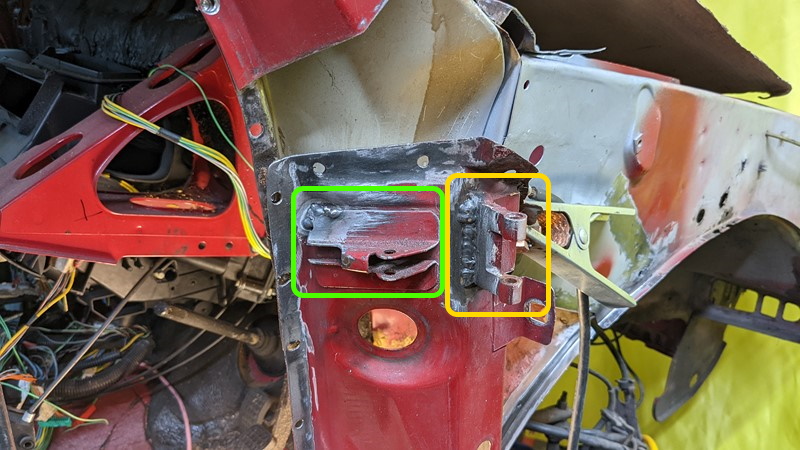
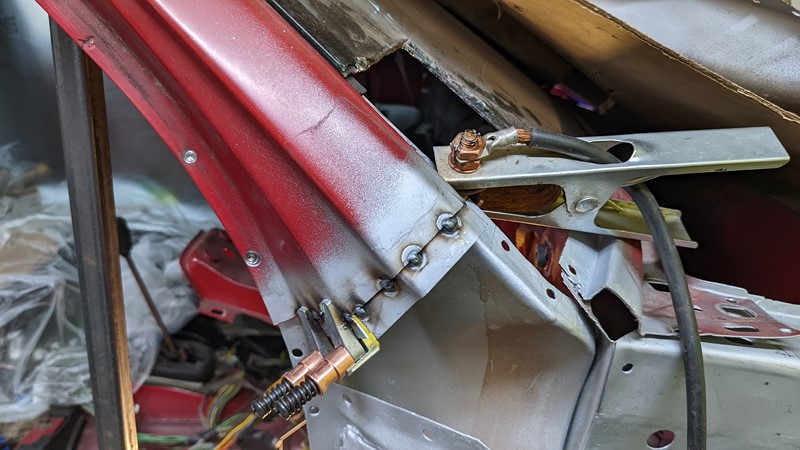
The upper driver’s door hinge (highlighted yellow above) is a bit of an Achilles heel on the Citroen BX. Over-opening the door, usually when caught by the wind, strains the check strap bracket (green). With the check strap bracket and upper hinge bracket being in line, this repetitive strain leads to the weld on the hinge cracking. Once cracked, water gets in, and the rot starts. To prevent this, the hinge and check strap brackets are over-welded. The welding isn’t pretty, but it will outlast the rest of the car.
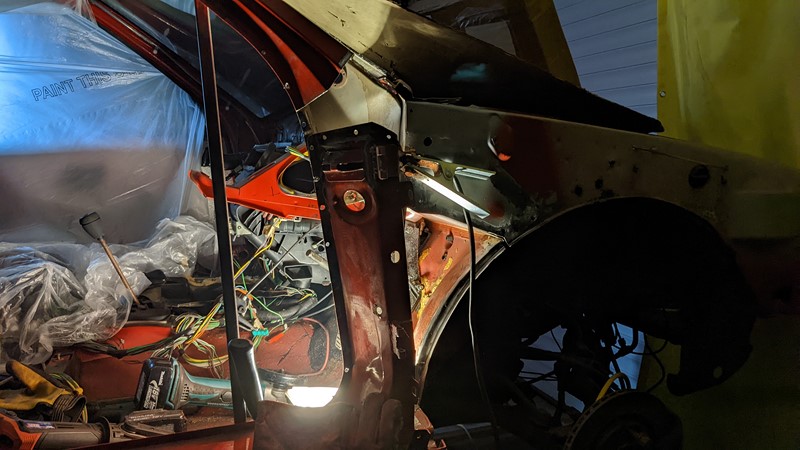
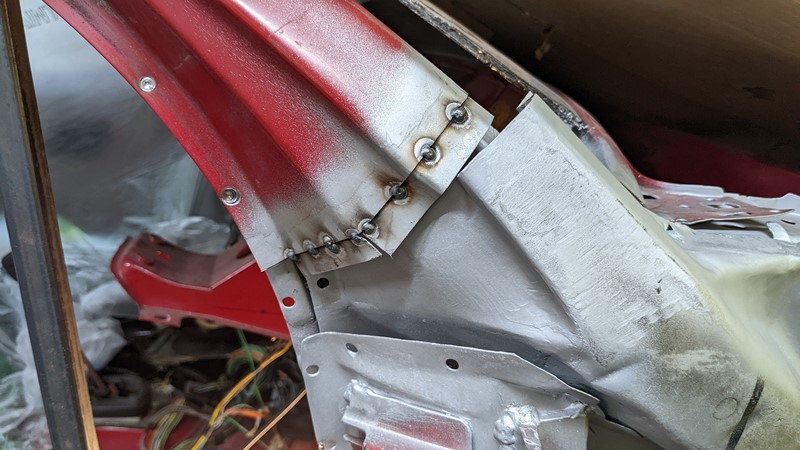
By the end of the day of the Big Cut, I was a little disheartened that the marking out was sub-optimal. I guess I’m spoilt a little by the modern vehicle manufacturing process. However, as I call it a day, and the light wains, I know what to do to rectify the issue. The darkness, combined with a perfectly placed backlight, does serve to show just how much metal has been removed.
Lapping the Gap
There are a few possible solutions to the problem. For example, I could build up enough weld to span the gap and grind it all back. Or I cut to try to cut a bridging piece and weld that into the opening. However, I want a finish that is as close to invisible as possible, with the least amount of filler.
Bridging the gap
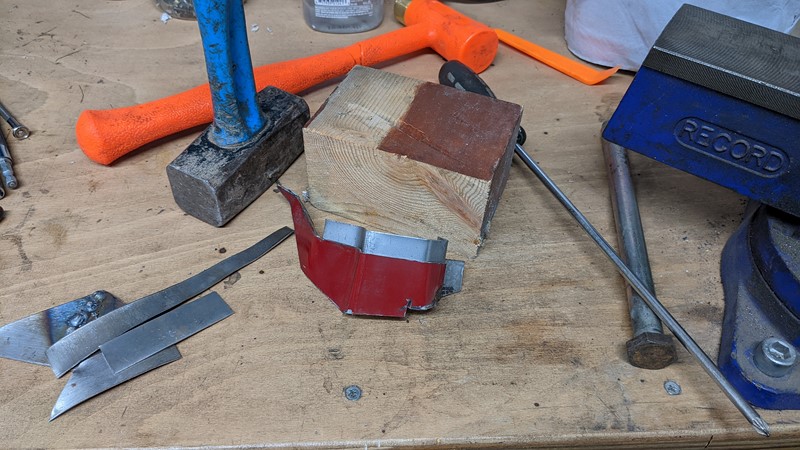
The solution is to lap the joint on the underside. Installing a piece of metal which spans the gap, behind the outer A-pillar, should keep the upper and lower sections aligned. However, trying to do this through the myriad of curves is more hassle than I have the brain power for, so I’ll build the lapping piece up in sections.
There are some incredibly complicated calculations for the length of lap required in structural engineering. However, I’m aiming for around a 5mm overlap, especially as I’m only welding one edge, and then building up the joint.
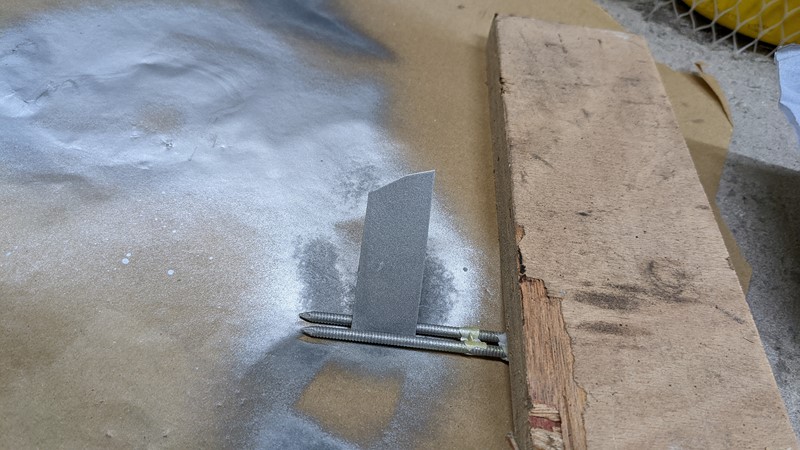
Of course, the new metal gets a thorough bathing in etching primer. I’ve finally found a use for the banded nails used in the nail gun for the Mega Shed build. The spacing between the nails is just right for the 0.9mm steel sheet I’m using for repairs.
Welding the lapping material into place
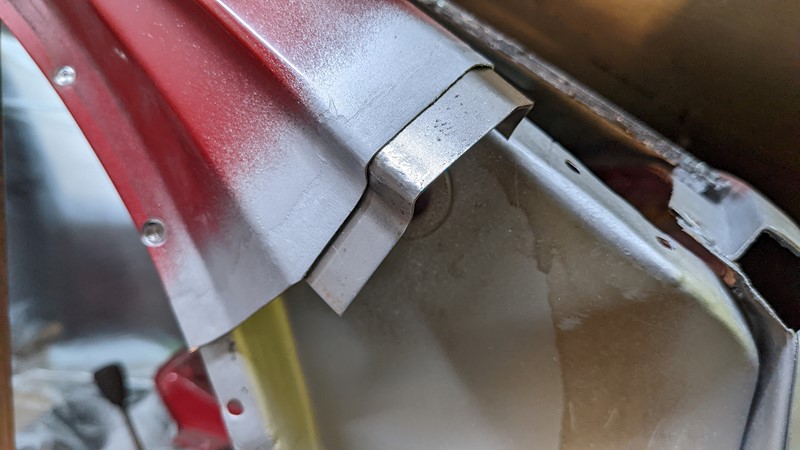
Initially, the lapping material is tacked to the underside of XPO’s original metalwork. I’ll need a little flex in the joint to get perfect alignment between the upper and lower sections. I’m using the Cleco side clamps to hold the two metals together, and they work really well here. I’d go so far as to describe the Cleco system as a game-changer.
With the lapping plate tacked to the upper section of the A-pillar, I can slide the lower panel in and weld it all together. This welding step will need a lot of concentration and a gentle pace to get the alignment just right. Of course, the downside of lapping like this is the step on the back side that will trap moisture if not vigorously coated. But wait, I’ve missed a preparation step!
Preparing the Repair Panel
At the end of episode 21, I finally cut the repaired replacement panel from the body cut. Perhaps you remember the general state of the panel with unfinished welds, bare metal and a plethora of partial coatings.
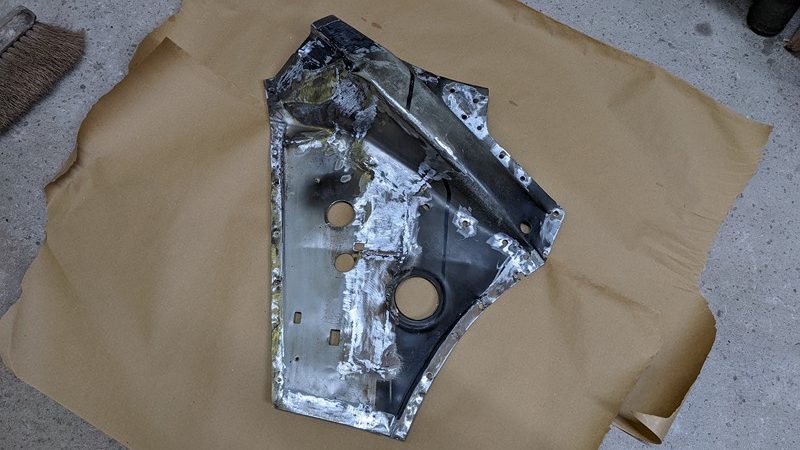
Preparation work was carried out on the repair section before being offered into place for the final time. First, all of the welds that would be between the inner and outer A-pillar, once welded, needed to be ground back flush. A step of weld would make joining the inner and outer panels rather tricky. Some of the other overly proud welds were also ground back. However, I’m generally cautious of over-grinding. I would rather have a proud weld than overly thinned metal.
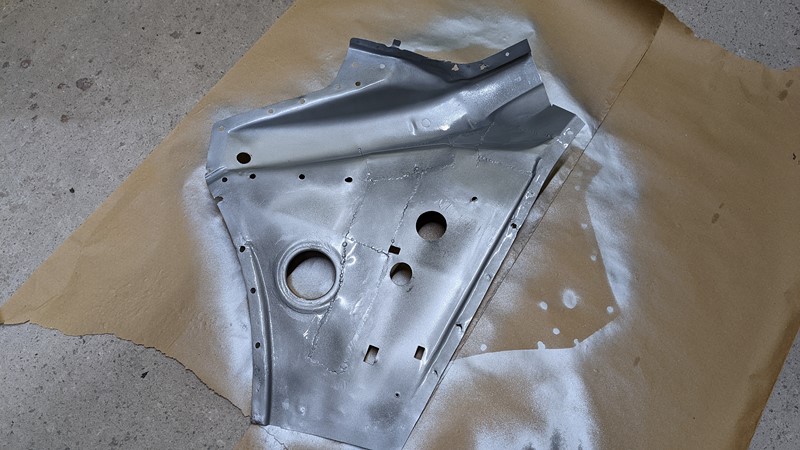
With the welds suitable attacked back to flush, the panel could be coated. I found there was a surprising amount of thin wax on the panel. I believe this wax was applied in the factory during manufacture. However, I have no doubt this was another process carried out by hand, with significant variation in coverage. I removed the wax with panel wipe fluid, then keyed the whole surface with a 120-grit sanding pad and finally sprayed the surface with etching primer.
Joining it all together
While the Big Cut didn’t go as well as I might have hoped, cutting into the panels wasn’t a complete disaster. However, I feel a little embarrassed to get it as far wrong as I did. Perhaps I might have reached a better alignment of the Big Cut if I had been a little less fearful of what might go wrong. Either way, what’s done is done, and I can only move forward. The next step will be to glue all the panels back together. However, that task will have to wait for the next episode!
M
NEXT – Eps23 Welding in the repair panel
PREV – Eps21 Removing the old A-pillar
Back to Citroen articles
Back to Automotive articles
Amazon Affiliate Links – Things used in this article
BXProject is using Amazon Affiliate Links. It’s a quick way to show you what I have used in this article.
“As an Amazon Associate, I [may] earn from qualifying purchases.”
Since January 2024, Amazon has blocked embedding images, but I think the links are still valuable.