The previous episode of the XPO project ended at the point I finally made a cut in the A-pillar, in less than an optimum place. Well, I guess these things happen, and at the end of the day, what’s done is done. However, the unplanned gap does help to make a much more robust joint. Time to align the metal work and start welding in the repair panel.
Lining up the panels
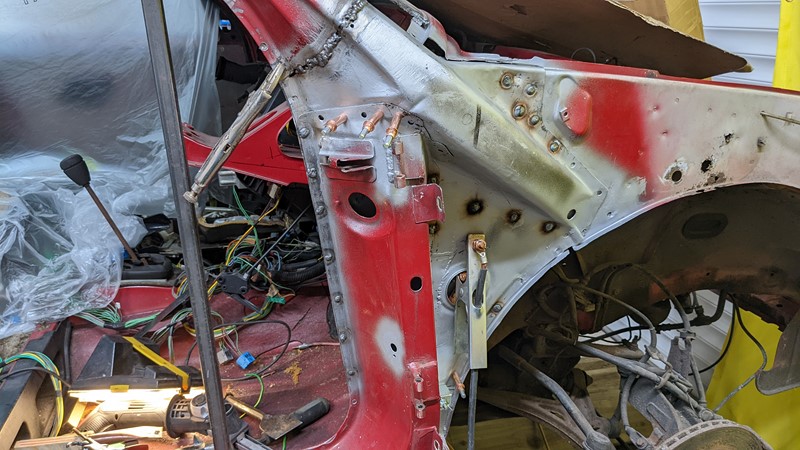
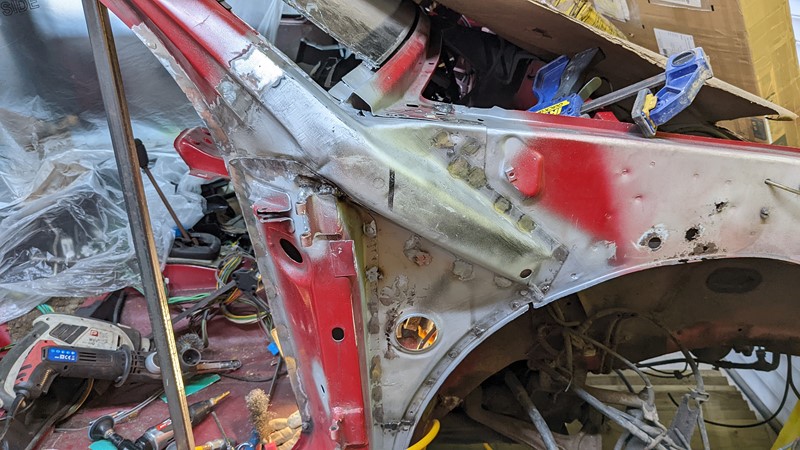
By this stage, it was pretty clear that the spot welds on the body cut donor and XPO were absolutely not in the same place. Comparing the spot welds on XPO to the welds on my own car, there were some obvious differences. While the total number of connections was the same on both vehicles, the locations had quite a bit of variation. Although most welds were placed perfectly on the midpoint of the lip, some were clearly made in a rush, and only just joined the panels.
Because my original plan was to match up the weld holes, making sure the alignment was correct suddenly got a little bit harder. However, I need not have worried. Fortunately, the repaired donor panel wasn’t significantly warped and dropped into place quite nicely. It certainly seemed to touch in all the right places. More positively, the majority of the spot welds actually lined up.
Welding the outer A-pillar back on
The outer A-pillar is a very stiff pressing and one of the thickest pieces of metal on the car. I hope this means that it won’t have lost any shape either when I removed the rotten panel, or in the years the car has been sitting. Compared to the repaired inner A-pillar panel and the cut-off upper A-pillar, this is likely to be the best place to start welding.
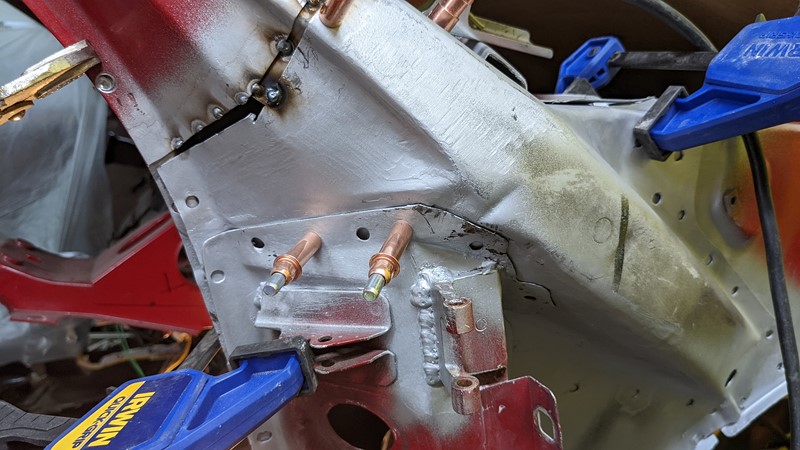
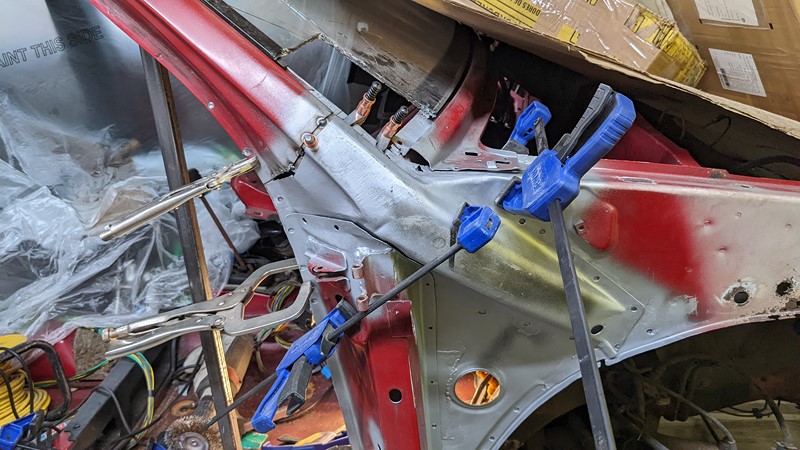
The Clecos are a brilliant device. Once the inner and outer A-pillar are aligned, a small 3.5mm hole is drilled through both sheets. The Cleco spring is compressed then the legs are fed through the hole. When the spring is released, the legs on the Cleco expand to hold the rear panel, and the spring pulls the two panels tight.
Finally, after months of preparation, the first weld goes in to mark the point where XPO is finally going back together. It may seem like a single plug weld on the surface, but for me, this is a pivotal moment in the restoration process. There are, of course, going to be many more like it, but this one is rewarding.
Over the years, I have slowly been getting better at these plug welds. However, the proof of the pudding is always in the eating, and in this case, we can see the back of the joint. And in this case, we have plenty of penetration. Hopefully, this is a sign of things to come, and the rest of the welds will go so swimmingly.
Welding the inner A-pillar back onto the car
With the first welds made between the inner and outer A-pillar, the final adjustment is made on the rest of the panel joins. While the alignment around the panels is generally quick and easy, the join around the door opening is a little bit tricky.
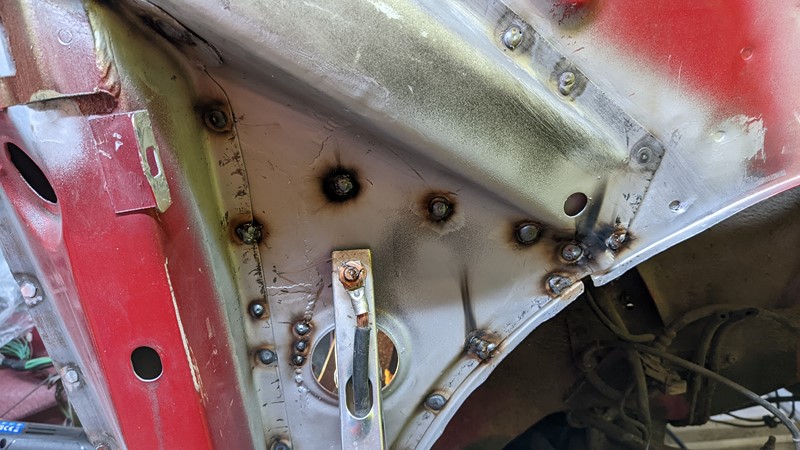
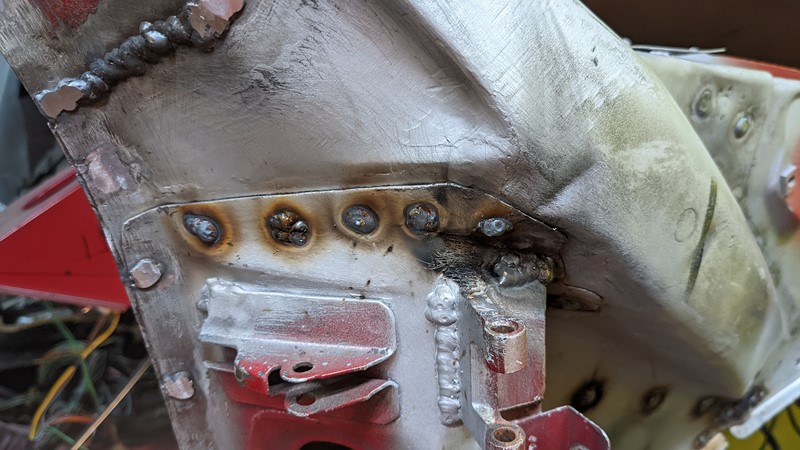
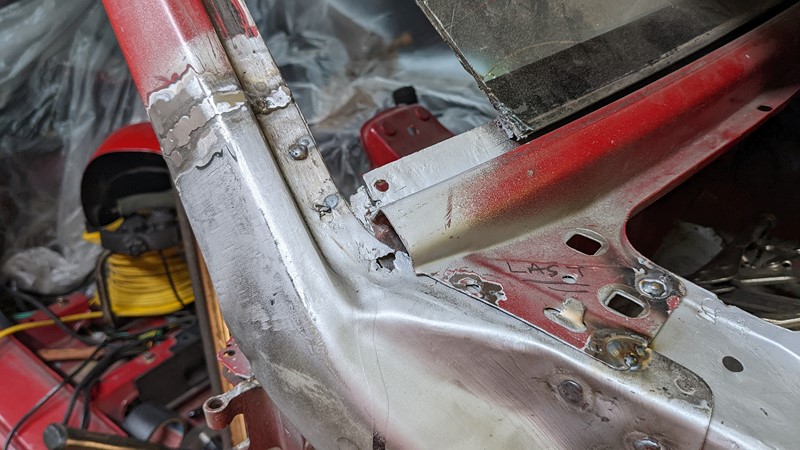
With a few tweaks to the panel alignment, I’m ready to press on with applying molten metal to the remaining spot welds. Pretty quickly, the plug welds are made over the top of the original spot welds, and the panels are joined once again.
Once I get going, the process is particularly quick, with weld after weld going onto the car. Within a few hours, nearly all the outward-facing spot welds are remade. Welding over the bridge takes a little longer. Too much heat and both the upper and lower sections will warp. Instead, the join is built up slowly and cooled in between each step.
The final A-pillar connection
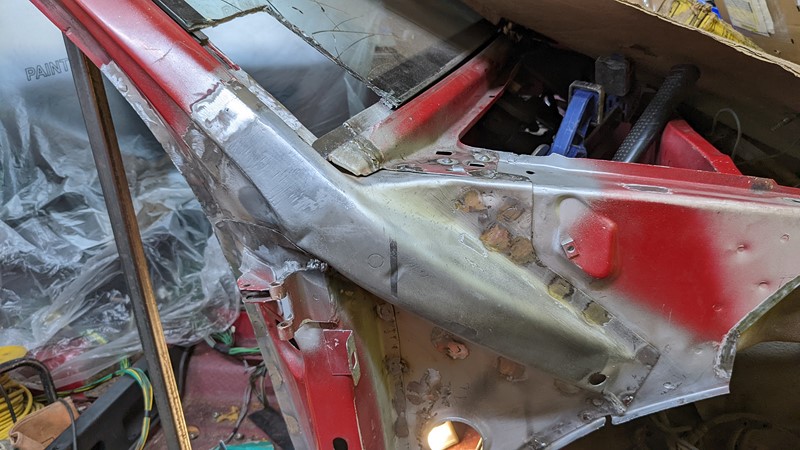
The final connection on the outside of the body is the top of the outer A-pillar. The outer A-pillar lip with the original spot welds needs a little hammering to get it flush with the inner panel. Then the original spot weld holes are plug welded. Once the Clecos are removed, the alignment holes are also welded over.
The final repair panel connection
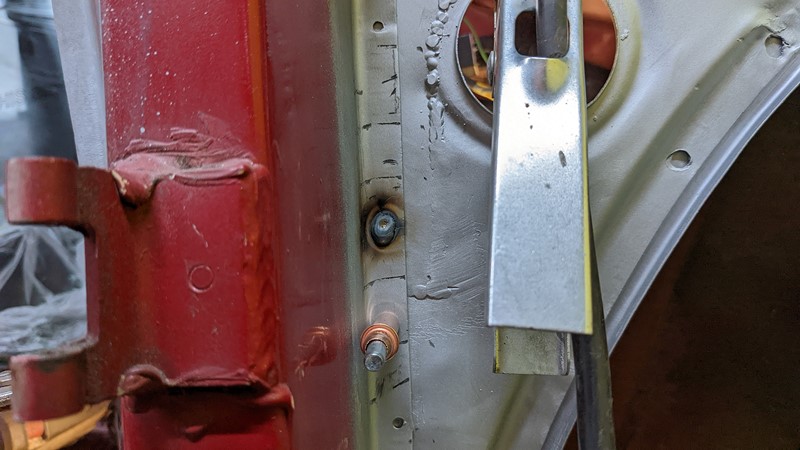
On the back of the repair panel, the process starts the same, plugging the old spot welds. Clamping inner and outer a-pillar panels above and below the joining hole ensures the panels are nice and tight. Hopefully, once the welder is applied, the panel gap is minimised.
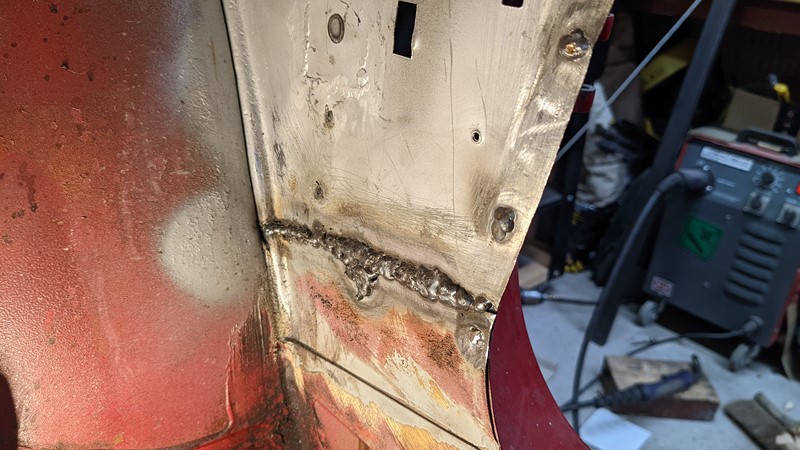
Then comes the tricky bit. Seam welding the old and new metal at the lower edge. This is the last bit of welding in the repair panel and probably the slowest. Using a butt welding clamp to hold the middle of the panels flush, I can get some tacks in to hold the metal in place. However, getting the butt clamp in place was a nightmare, and I really shouldn’t have bothered! Tacks are carefully built up until both sections are securely joined together.
Cleaning up the welds
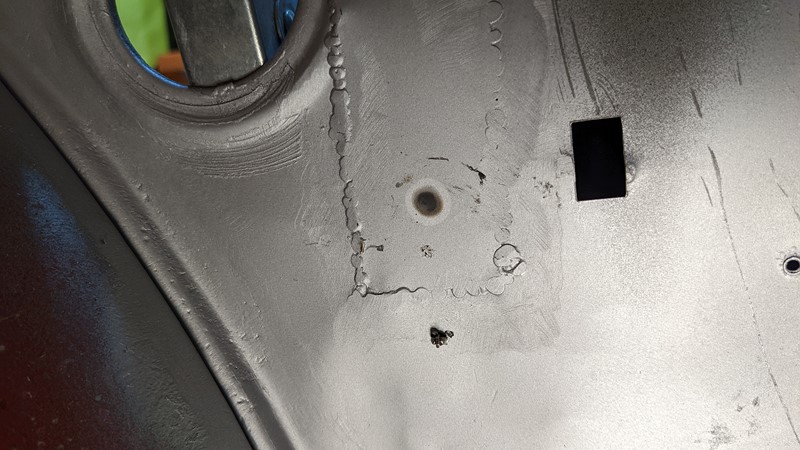
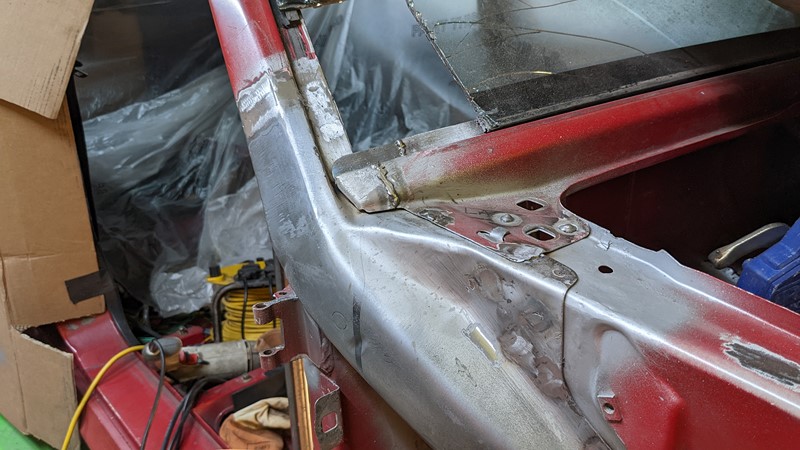
After all the welding comes a biblical amount of cleaning, and I don’t mean the filth on the floor. Aesthetically, having all the built-up welds exposed and spray-painted looks rather ghetto, a little heath robinson, some might even say a little hill billy. Instead, all the welds are ground back flat.
First, the tallest of the welds are ground back flat with a Dronco 40-grit flap disc from WeldEquip. These are a very quick way of knocking back the built-up weld, however, cut through the steel equally fast. It takes a light touch and serious concentration not to cause a lot of damage.
Once the worst of the welds are removed with the rather aggressive flat disc, a less aggressive method is used to thin the welds down a little more. In this case, the finger sander is employed. First, with an 80-grit abrasive belt, then finished with a 120-grit belt. While the area will see some filler to finish it off, so a perfect finish isn’t required, the closer I can get to perfect, the better.
Welding around the windscreen
Exposing the hidden joint
During the first trial fit of the repair panel, I had a moment of revelation. Firstly, I could not fit the repair panel in because of the lower windscreen panel. Secondly, I couldn’t finish the spot welds that would be under the lower windscreen panel.
The solution is always in the angle grinder, but in this case, the resolution genuinely came in the form of a 1mm cutting disc. By cutting off the end of the lower windscreen panel, I could slip the repair panel in, and spot-weld everything back together.

While I was a little reticent to do this at first, I’m rather glad I did. Cutting off the windscreen panel end exposed a rather rusty return lip which is sliced off and repaired. I suspect this is the lip that causes the all-too-common delamination in the panes of windscreen glass. The rust causes expansion of the metal surfaces and leads to upward pressure on the glass.
Welding the tip back on
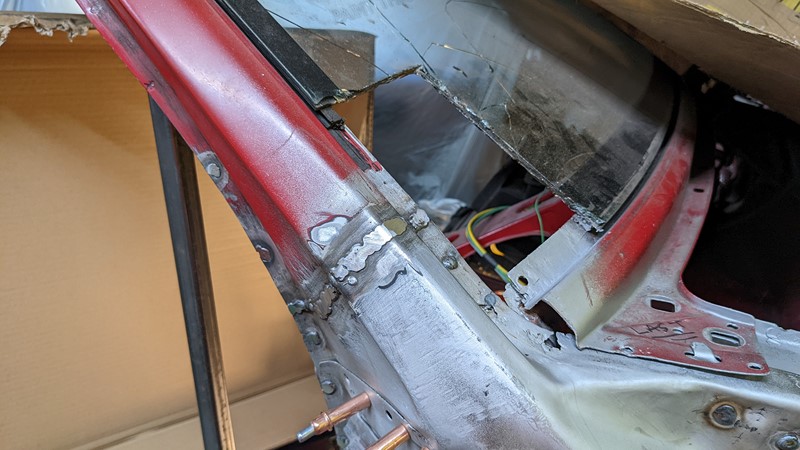
Once the spot welds are made between the A-pillar panels, and the return lip replaced, the chopped off tip can be sewn back on with some liquid metal. This is a rather tricky procedure, requiring measurement and on-the-fly adjustments to keep the two parts of the panel apart by exactly 1mm.

I didn’t get a good picture, but ultimately I used an old 1mm cutting disc between the two panels, while holding the tip in place with a magnet. Once a tack weld was made, I used a ruler as a gauge and carefully adjusted the tip to get it just right. This was followed by more welding and grinding.
Tidying up the welds
It always amazes me how long the grinding back takes compared to the actual welding. Of course, this is partly due to my lack of welding skill and predisposition to ‘over weld’ to ensure I have a solid joint. Combined, this means my usual weld is a tad taller than it perhaps needs to be.
That said, as I start grinding back the welds between the original metal and the repair panel, I’m happy with what I see. The spot welds are all well-formed. No gaps, no holes, and no inclusions. Somehow this makes the grinding back a little less onerous.
Finally ready for paint?
By the end of April 2022, the repair panel is well and truly attached. While it has taken far too long to get to this point, finally, XPO has a solid A-pillar again. Welding in the repair panel has been incredibly satisfying and has spurred me on with the restoration process. Finally, after more than a year, XPO is just about ready for paint.
M
NEXT – Eps24 – Wheel Arch Repair
PREV – Eps22 – The Big Cut
Back to Citroen articles
Back to Automotive articles
Amazon Affiliate Links – Things used in this article
BXProject is using Amazon Affiliate Links. It’s a quick way to show you what I have used in this article.
“As an Amazon Associate, I [may] earn from qualifying purchases.”
Since January 2024, Amazon has blocked embedding images, but I think the links are still valuable.