
The A-pillar repair panel was finally installed at the end of the previous episode of the XPO restoration series. The body was structurally sound for the first time in a long while. I ended by suggesting that I would finally be ready for paint, but you know what they say about best-laid plans! Before ploughing into the paint, a small amount of welding needed tackling first, the wheel arch repair.
Common Corrosion
Corrosion in the wheel arches is THE most common location for rot in the BX. Both wheel arches have been tackled on my daily BX. The reasons for decay always starting in this area are multiple but predominantly a result of design.
Firstly, the wheel arch liner. While it does an excellent job of protecting most of the bodywork around the wheel, it also traps a lot of filth. This is because the liner has a pretty big hole to allow the suspension turret through. This hole lets a lot of road grime, water and mud into the space above the liner, where it then can’t get back out.
Secondly, the plastic liner has a clip on the top that slowly rubs through the paint on the lip of the wheel arch. As the paint fails and moisture gets into the now bare steel, rust quickly creeps through the thin steel from both sides.
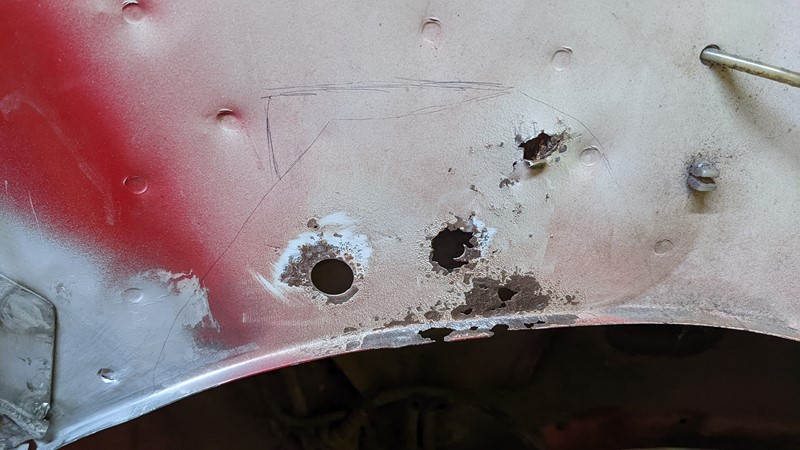
The only way to entirely inspect the area is to take the liner out and the wing off. On first inspection, XPO doesn’t look too bad at all, but experience tells me that I’ve likely caught the rust in the nick of time. In most cases, the first indication that rot has got hold is when the seal sealer starts to split in the engine bay.
Making a wheel arch template
When I tacked the near-side wheel arch on my BX, one of the trickiest parts of the job was recreating the lip. The lip profile must be kept for the wheel liner to clip back in place. I’ve tried cutting out a flat repair patch then welding a lip on afterwards, and using an original replacement panel. Taking a cut from a brand-new panel is the easiest method, but I don’t have one in stock.
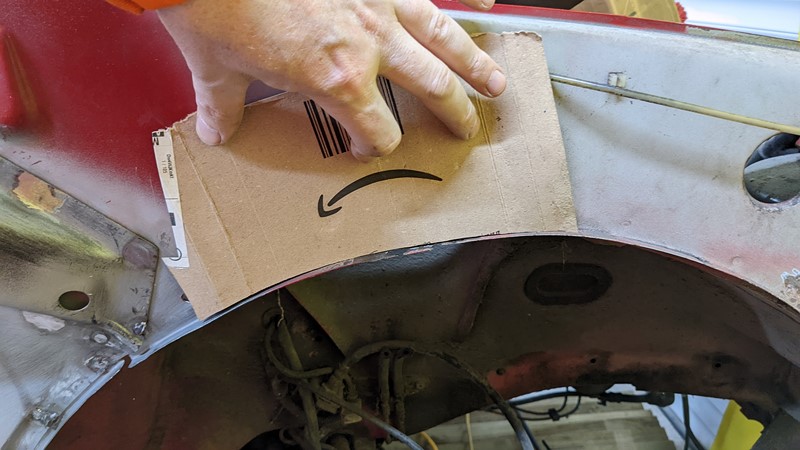
Instead, I plan to beat a lip into a repair panel. I may well have been watching too much ‘Jap Hand’s’ on YouTube and think my skills have magically improved. However, no matter how good my panel-beating skills may or may not be, I must start with a template. I’ve run out of cereal boxes, so yet another Amazon box is cut down to match the existing arch profile.
Cutting Out the Inner Wing
The true extent of the rust really can’t be seen until the inner wing piece is removed. Perhaps the most worrying aspect about this familiar rust spot is what lies behind it. Although the inner wing panel, where the rust starts, is relatively thin and structurally insignificant, it hides something more critical.
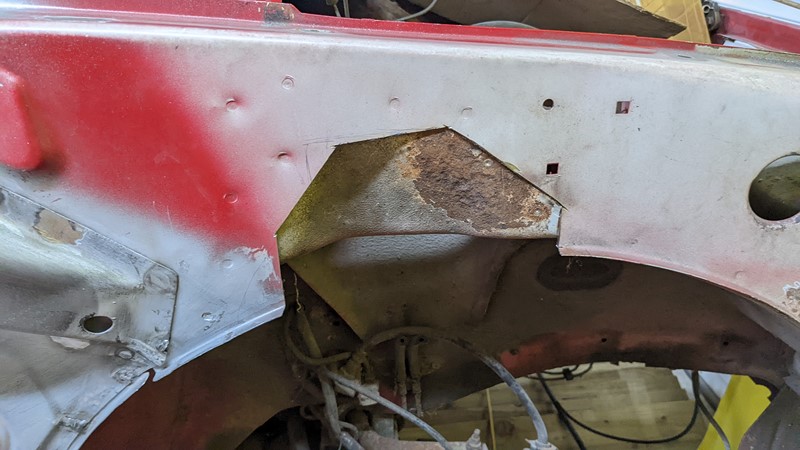
The top of the suspension tower behind is exposed, with the outer panel cut back. I would argue that the car is a write-off if the corrosion is too advanced into this panel. And I’ve seen some pretty bad deterioration in this area on scrap yard BXs. Bad enough for light to pass through. Corrosion in the strut tower occurs when moisture is trapped between the panels leading to rust. Over time the rust creeps from the outer to the inner panel.

Fortunately, in this case, the corrosion hasn’t penetrated into the suspension turret. So I’m happy that I can treat the rust in the area and seal and paint it later. Initially, the worst of the surface rust is carefully ground back without thinning the good steel underneath. Then a healthy dose of RC 900 epoxy rust converter from Dinitirol is applied. This spray solution will convert any remaining rust and seal the bare metal.
Beating out a new wheel arch panel
I mentioned earlier that I’d used a few methods to make the wheel arch repair panel in the past. The first time around, I welded on a lip after repairing the hole. Then on the other side of the car, I was able to source a genuine Citroen repair panel. Having been watching a lot of ‘Make it Kustom’ on YouTube, I wanted to try having a single repair piece with an integral lip.
So having watched the Make It Kustom hammer forming video, I set at it. As a first step, I used the cutout material to make a card template and then transferred that to a piece of new metal. When cutting out the repair panel, I deliberately left a lot of extra metal for the lip. Then I used a cold chisel to create a crease that would follow the curve of the wheel arch.

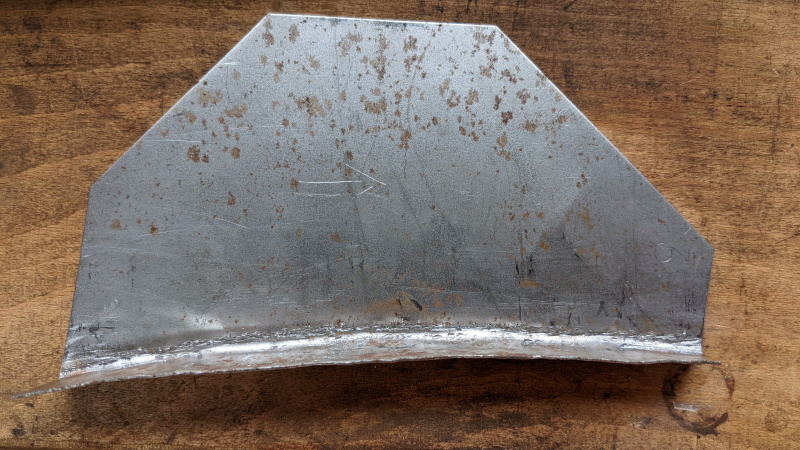
Slowly and carefully, the excess material was hammered over to form the lip. It took a little while, partly through fear of wrecking the material, but the lip was formed over a little time. Periodically I placed the removed material on the repair piece to see how well the new lip matched the original profile. Although this was a new method for me, it seems to have worked pretty well!
Finishing off the repair panel
Although the new repair panel curve is a little flat, the metal has become rather still. If I try to force that little bit more curve in, I will likely buckle the larger flat area of the repair panel. On the other hand, I’ve done it before, so I best try to learn my own lessons.
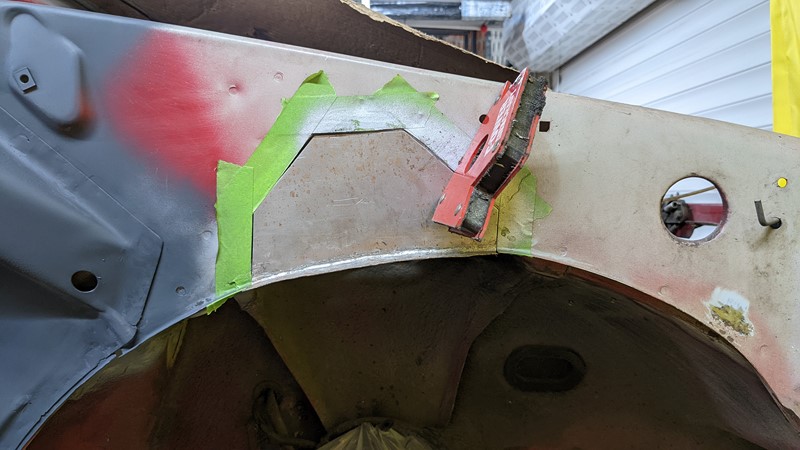
The wheel arch repair panel is a fantastic fit. Despite all the practice I’ve had at making these repair sections, even I am impressed at how well this has fit the hole in the body. For a repair like this, it is important not to have the panel too tight, or the heat in the welding process will make it buckle. This panel seems just right!
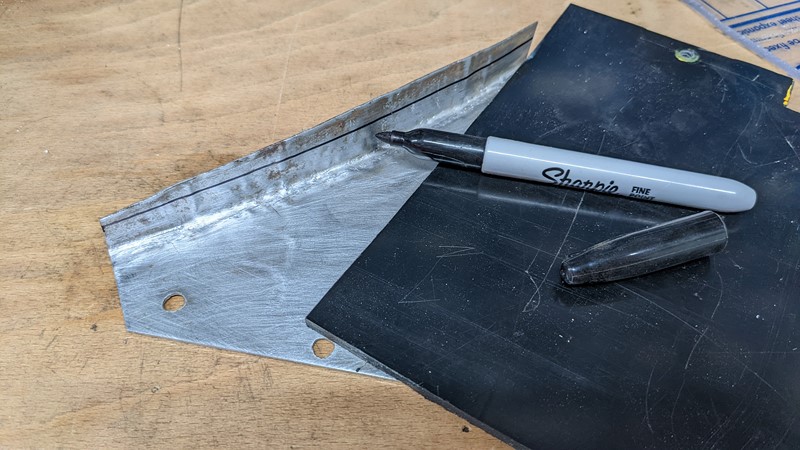
The material used to form the lip is still excessive. So while the repair panel was offered up to the car body, I marked where the old and new lips met. Then a highly technical process was employed to mark a straight edge to join the two marks. Sometimes simple is best.

Finally, the angle grinder is rolled out to trim down the excess material. All in all, this panel has turned out pretty well. I’ve also drilled the holes for the plug welds in the matching locations to the spot welds in the body.
Priming the wheel arch repair
The final step for the wheel arch repair panel is to prep it for welding. The panel was keyed with sandpaper to improve the paint’s adhesion. And before painting, the panel gets cleaned with panel-wipe to make sure there is no grease or other unexpected fluids.
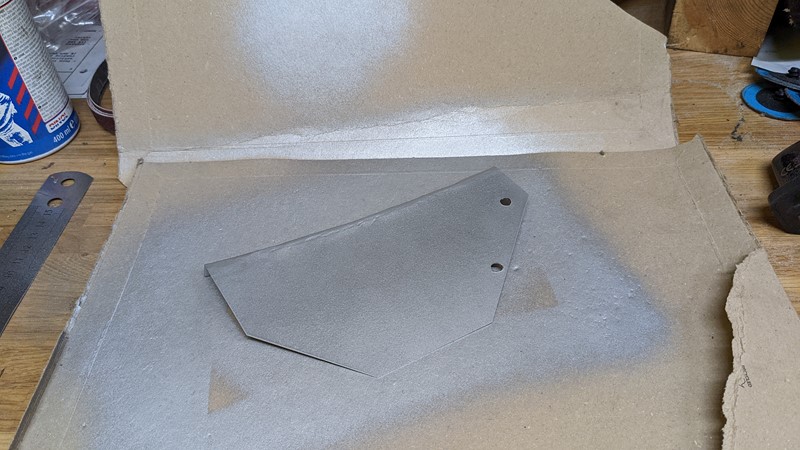
The panel gets a thorough coating of weld through primer, and finally, it is ready for welding. The suspension turret also gets a coat of primer too. The back of the panel will be accessible once welded, so it will get more treatment and right up into the gap between the metal sheets.
Welding in the wheel arch repair
After all that preparation, it’s finally time to weld the repair panel in place.
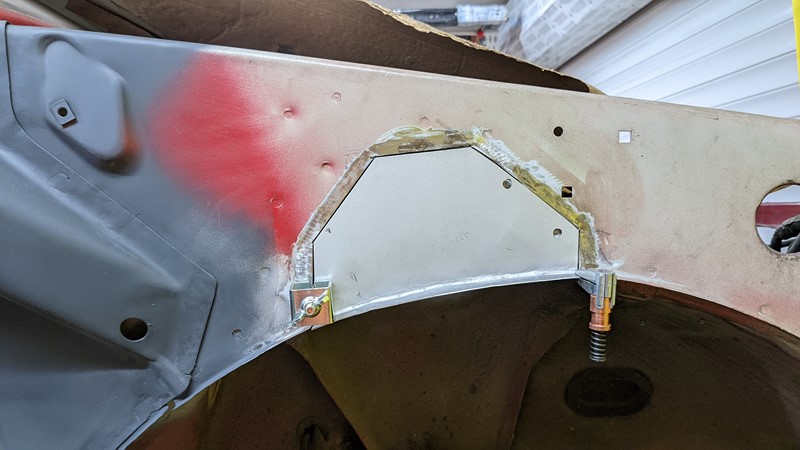
The Cleco’s are back out to hold the panel flush and hold the lip ends together.
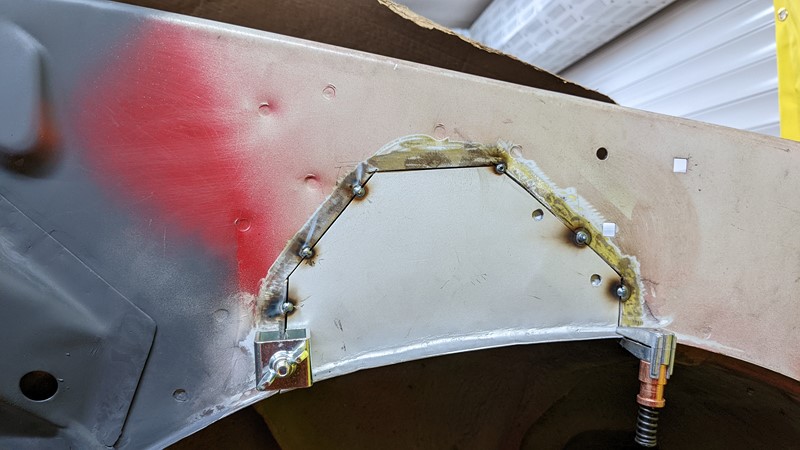
A few tacks are slowly built up to hold the panels together. Fortunately, I can get my hand behind the panel to get the top edges flush. I’m pretty happy with the final adjustment. The wheel arch repair panel is lovely and flush with the original metal.
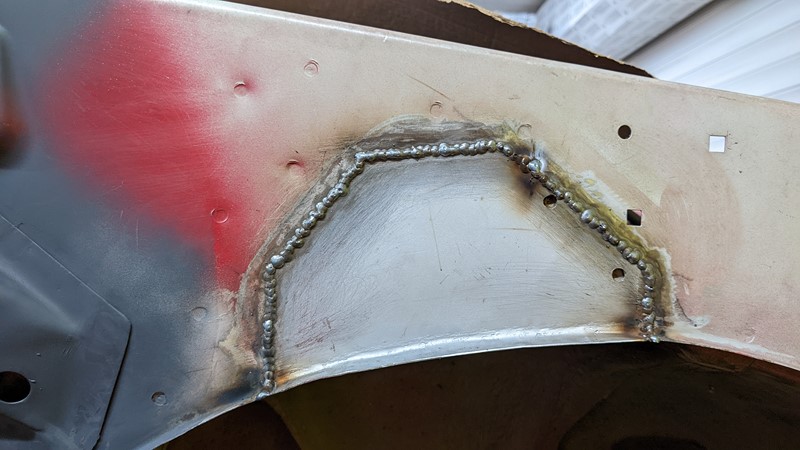
The tacks are slowly built up until there is a continuous bead around the joint. It’s a slow process with plenty of cooling in between each stage to stop the panel from buckling, warping or expanding too much. As a final step, the old spot welds are plugged in.
Finishing off the wheel arch repair
Once the welding has cooled down a little, the tops of the welds are made flush first with the finger sander. Next, a finer finish is achieved with an air die grinder with an 80-grit, then a 12-grit sanding disc. This is a new tool for me, inspired by watching Make it Kustom, and it doesn’t half work well to flatten down the wheel arch repair.
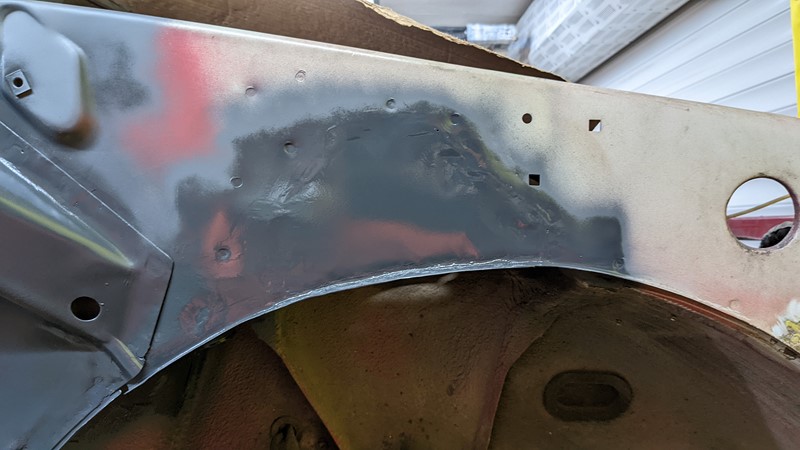
The final step is a coating, front and back, of etch primer, then high build primer.
And that’s it. Finally, after more than a year since XPO arrived, the major repairs are complete, and the car is just about ready for paint. This is a good day. However, as we will see, once the painting starts, it doesn’t last.
Until next time!
M
NEXT – Eps25 – Painting the A-pillar
PREV – Eps23 – Welding in the repair panel
Back to Citroen articles
Back to Automotive articles
Amazon Affiliate Links – Things used in this article
BXProject is using Amazon Affiliate Links. It’s a quick way to show you what I have used in this article.
“As an Amazon Associate, I [may] earn from qualifying purchases.”
Since January 2024, Amazon has blocked embedding images, but I think the links are still valuable.

Nice little repair. Top tip for creating lips on repair panels is to put a Hacksaw cut into a piece of bar to the depth to want the lip to be, then push the resultant slot onto the edge of the repair and gradually work you way round bending the lip into shape as you go. Your repair is great just suggesting an alternative for ant future repairs.
Cheers Panky, I’ll give that a whirl. I suspect on a curve it might ripple the panel, but there is one way to find out!
M
Often used on Mini front wheel arches when cut back to fit big wheels, you just need to work the curve gradually and it works great.