
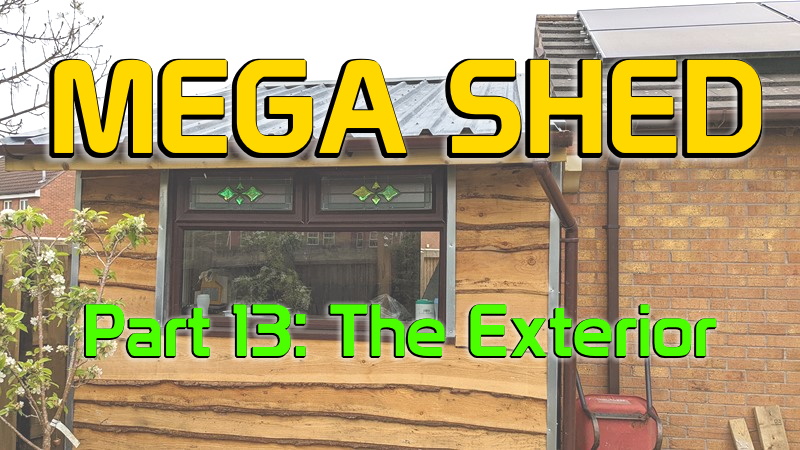
I have had a tonne of feedback since the previous article on the interior. Most of the feedback has been the same. So, when do I expect to complete the mega shed? Well, February 26th 2022, 8 pm. Yes, that’s right, the Mega Shed has been complete for quite a while, and I’ve already moved in. Writing this final Mega Shed article has been delayed whilst I tried to complete the shed exterior. However, due to my lack of time and material availability, there are still a few cosmetic bits to finish. So, let’s crack on with the article, and I’ll show you where I’ve got to.
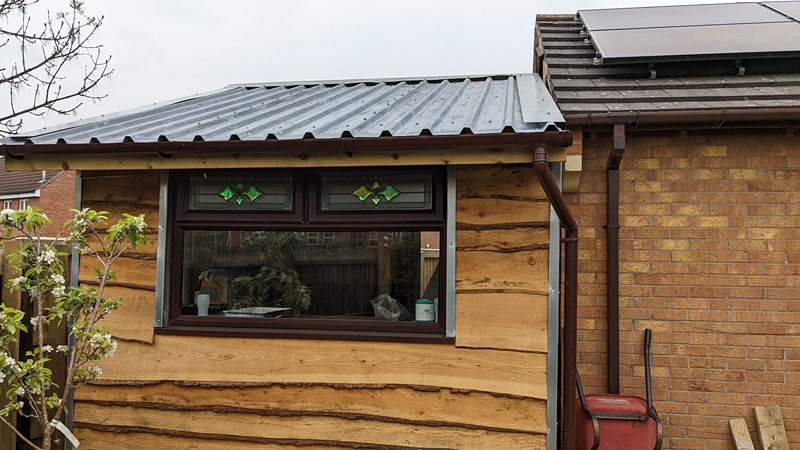
Window End Exterior Cladding
The window end cladding, perhaps obviously to regular readers, was installed before I completed the interior installation. That means some of these pictures are out of order to collate better the story of finishing the exterior. I have deliberately held back some of the better looking and more even cladding for this wall. Unlike the garage or fence wall, this one will always be visible.
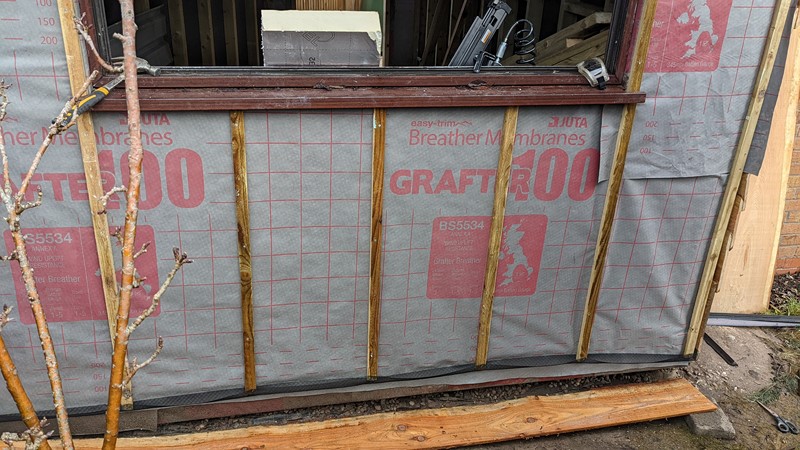
First up, all the joins in the breather membrane are taped together, and the edges stapled down. Then the battens are cut to length and nailed in place. This cladding preparation had to be completed after the plastic frame went in so there wasn’t a clash with the window cill. Finally, at the bottom of the run, the anti-insect mesh gets trapped behind the battens and stapled back to make a u-section.
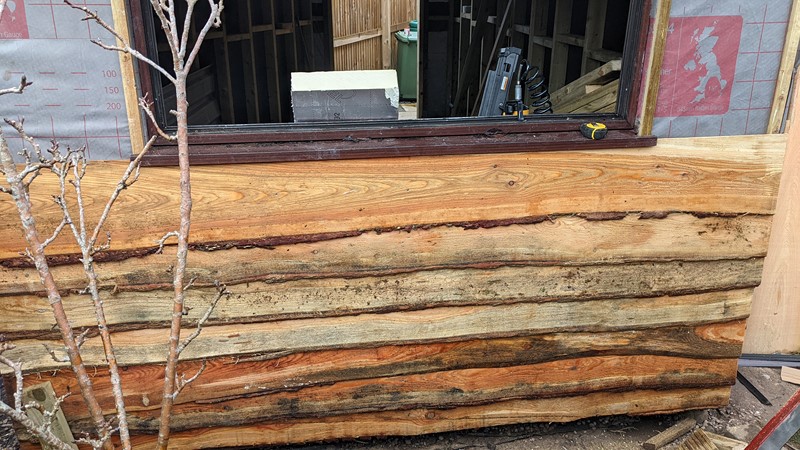
Carefully chosen cladding lengths are then offered up and nailed on. These timber pieces are generally about 18″ wide and cut flat on one edge. This uniformity gives a more even finish, which is aesthetically more pleasing once complete. I’ve also avoided any heavily stained or marked timber.
Joining corners
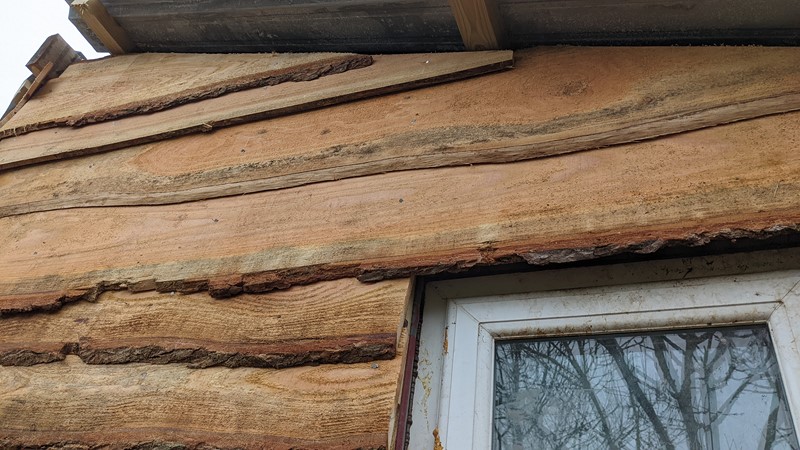
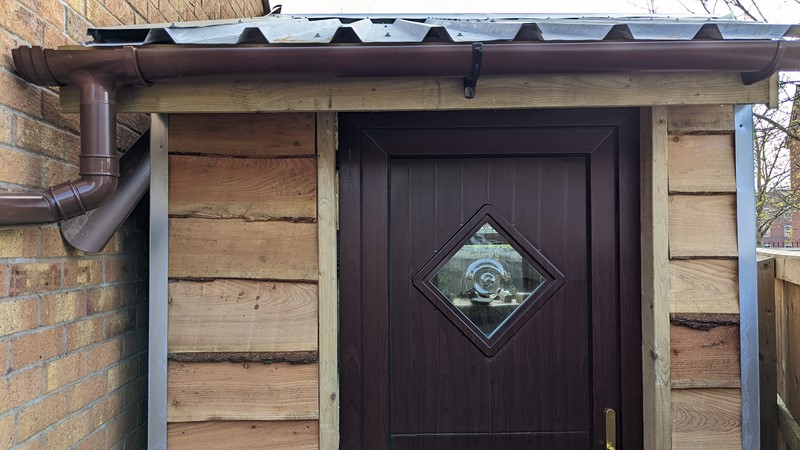
My original plan to cover the gap where the cladding on the two walls met was very optimistic. The idea was to get some wide square timber widths and cut them down to fit over the corners. Machining a smaller square from the big square timber would leave a narrow ‘L’ section.

I’ve had this work in the past, on a much shorter run, and it worked okay. However, the gaps between the panels were too wide, and I couldn’t machine out such a long length with my little saw. The worst gapping can be seen in the picture above. I wish I have given this a little more thought as there is a range of solutions that I could have used. For example, including corner ‘posts’ for the cladding to butt up to would have been a much better solution.
Suspended ceiling stockist saves the day
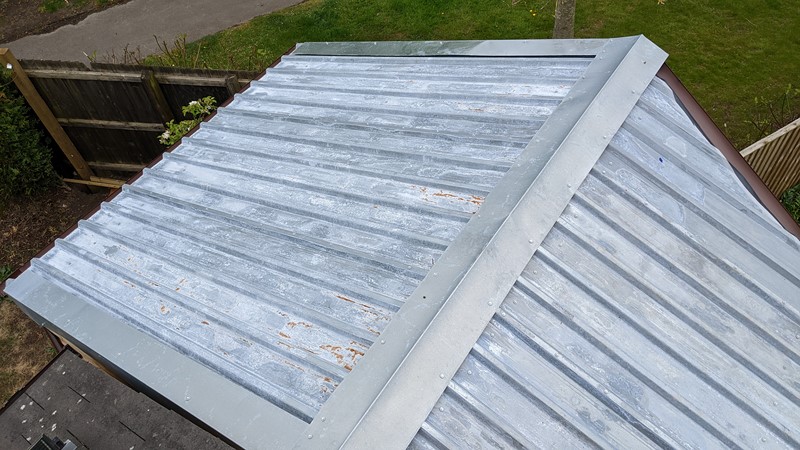
Eventually, I came up with the idea of using come thin galvanised metal angle. And you’d think this would be straightforward. I calculated that I would need about 75mm on either side of the ‘L’ in the worst case. However, try as I may, I couldn’t find a thin galvanised angle of that size in metal stockists.
In the end, I went with this 50mm angle from Profile Store, which is meant for trimming a suspended ceiling. The capping is a little narrow for some gaps and has some exciting screw placements to pull it all straight. Right now, it’s a little shiny, but much like the roof, it should look excellent once the weather has got to it.
Finishing off the cladding
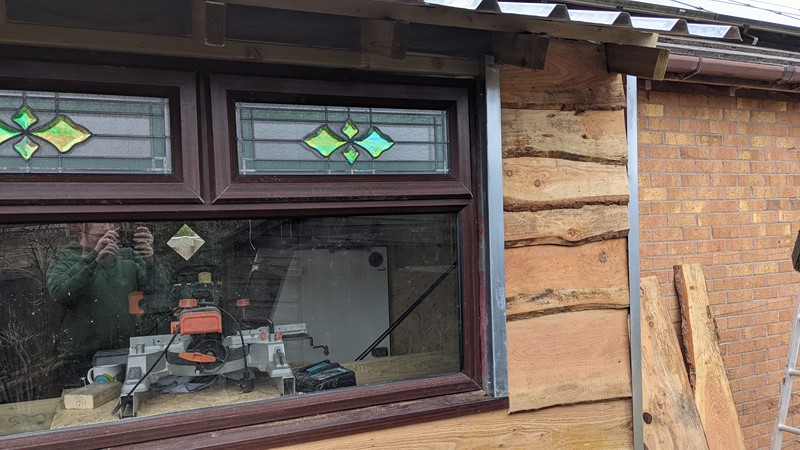
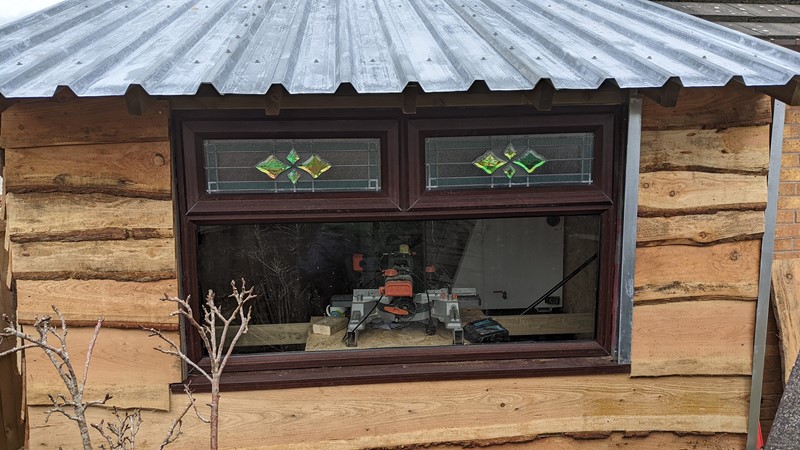
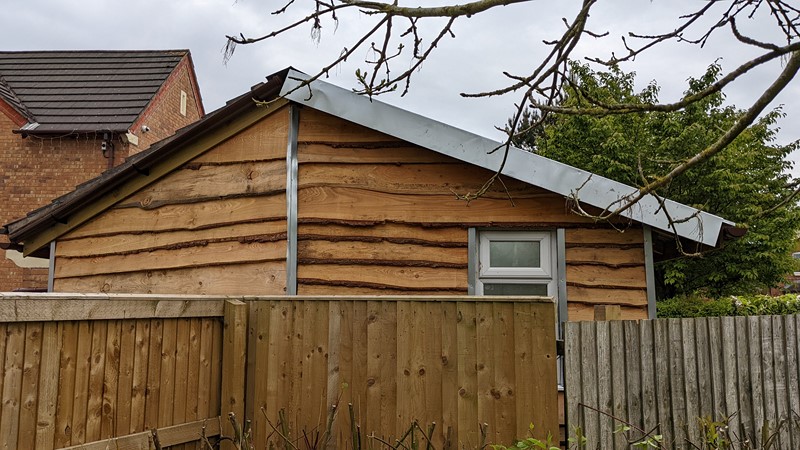
There was just one final piece of the shed exterior cladding to install. I had waited to tackle this section until I had decided if I would install the extra window. As we saw in the previous article, the difference this glazing makes to the interior was significant and worthwhile.
I could now clad up to the sill and around the opening with the frame installed. Then the tricky task of cladding up the apex. By this stage in the Mega Shed build, I must have finally become comfortable with the angle cuts. This cladding section went on pretty quick and without the need for multiple correction cuts.
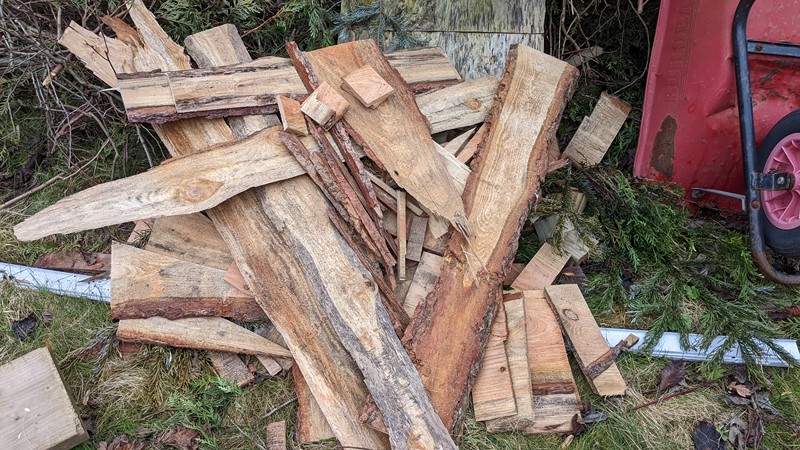
The aftermath of getting all the shed exterior cladding finished is a massive pile of conditioned larch offcuts. These would be perfect for a wood-burning stove. Larch has the highest calorific density of all the softwoods. It is a shame I don’t have anywhere to burn it. Yet.
Installing the guttering
Well, this is where the finishing of the shed exterior stalled. I’m already in the shed and using it regularly, and it hasn’t been raining much. But that’s bound to change. The rest of the house is in a brown square profile plastic. However, I’ve never found a way to get a square profile downpipe to transition around a corner.
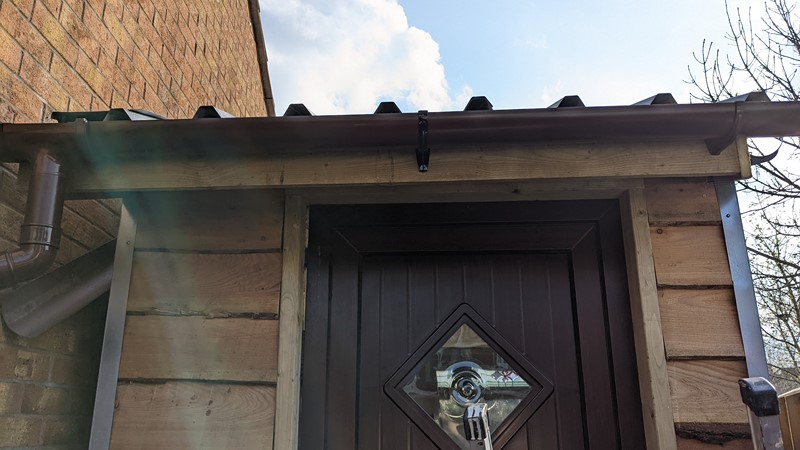
There is only one solution to take the drain pipe around the garage corner to the square section. Round profile downpipe! Being a circle, it doesn’t have an up and a down and wraps over the 90-degree corner with ease. Sounds simple enough. Once a facia board was installed, the first section across the shed door went on pretty quickly. And it looks great.
It looks great after I took it off and put it back on much higher, so the water from the roof goes into the gutter! Oops. And that’s where the gutter installation got stuck for a very long time. The problem was simple. There appears to be a UK shortage of brown 65mm downpipe sections.
A countrywide lack of brown round plastic drainpipe
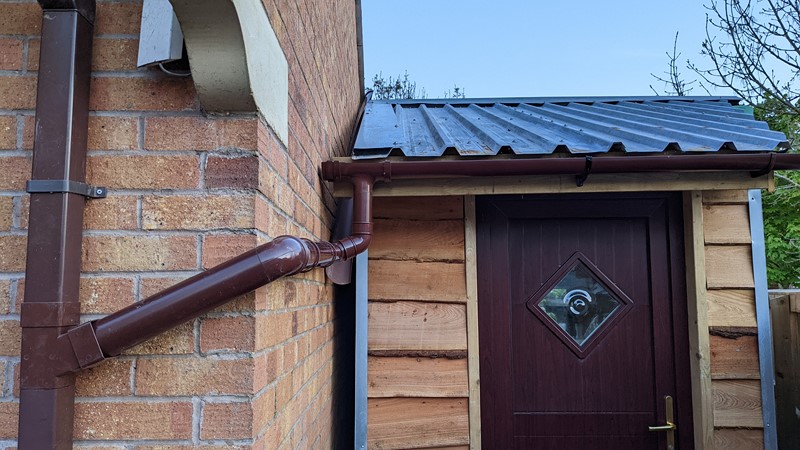
Eventually, just five weeks after the first pieces of guttering were installed, I finally got the last connections from the local supplier. And just in time for a little bit of rain. The problem piece was the 90-degree section that runs over the corner of the garage. It might seem like a basic part, but they are currently on eBay for as much as £20. I paid £3 for this one, so well worth waiting for.
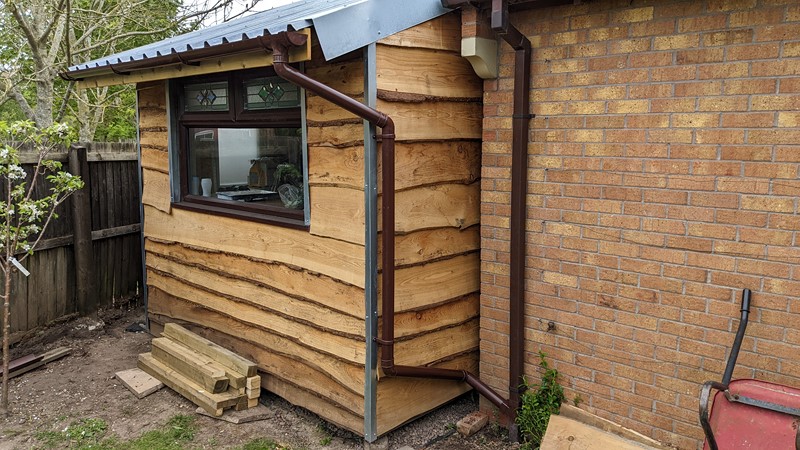
At the back of the shed, there is a perfect place to site a water butt and run hoses to the veg plots. That, however, is a job for another time. For now, that’s the drainage and plumbing complete, and I’m more than happy with the way it turned out. Even if it did take far too long to finish.
Closing the exterior cavities
I am a little concerned about birds nesting between the roof sheeting and the breather membrane of the roof. Or worse, if squirrels get into the void and dig through the membrane and into the insulation. And around here, we get a lot of small birds that like to get indoors.

I doubt the plastic mesh will hold out birds, and it certainly won’t hold out squirrels. So some 100mm wide galvanised wire mesh, with 5mm spacing, was bought from the great Amazon. I had ordered 2mm spaced stainless steel mesh, but this never turned up.
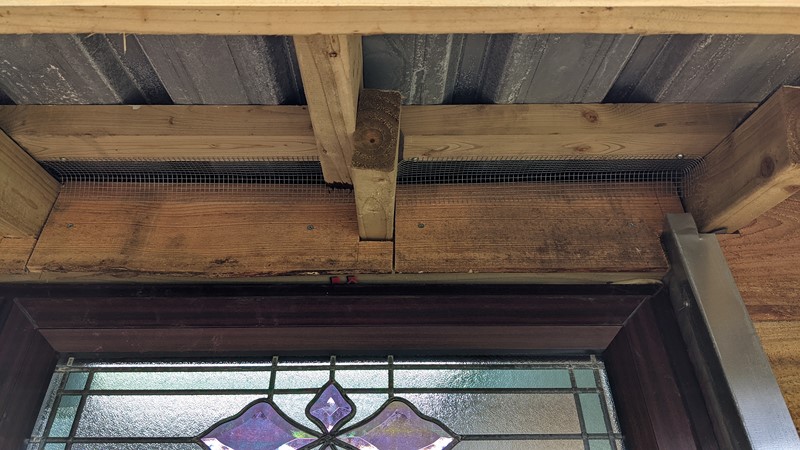
It’s pretty spikey on the edges and holds itself in place, but I’m sure an industrious animal will get in. So a couple of flange-headed screws were put into each section to keep the mech in place. I debated if I needed stainless and what size mesh to use. Finally, I concluded that it wouldn’t see much weather, and 5mm should keep the birds out.
Living with the MegaShed
As I write, I’ve been using the shed for several months now. The Mega Shed is fantastic! One of the most useful spaces that I’ve ever created. It has exceeded my expectations in practically every way. Beyond being much bigger than the shed it replaced, it’s warmer and brighter, and I can spend time in the building pondering what to do next.
While a few small things are left to finish off, I’m surprised at how well the Mega Shed build has turned out. I could happily sit down and stare at it on a lovely sunny day. The golden larch cladding looks fantastic in the sun, and I can’t wait to see how it changes colour over time. I love the farm spec roof, and now it has weathered a little. It looks like the hole Mega Shed has been in place for years.

Inside, the fit-out has progressed a lot. I have various shelving on the walls allowing me to start organising the parts and materials I was forever tripping over in the garage. The offcuts from the shed build have been used to make a very sturdy workbench frame. This is topped off with whatever scraps I could find, as material prices have doubled since the first timber order.
Since moving into the Mega Shed, I’ve managed to get some of the larger tools up and running and even found a little time to use them. The CNC router (more on that in future articles) is set up and has even managed some credible machining. And having uncovered the mini-lathe from under a pile of XPO car parts, I’ve been able to spin it up for the first time in over a year.
The Final Word on the Mega Shed
From the outset of the project, the purpose was to create significant working and storage space to make the garage more useable. So far, the Mega Shed project has been a resounding success. I’ve freed up enough room in the garage to get back to work on welding the project car. Perhaps more helpful is that I can access all the boxes of spares without a massive game of Tetris.
The extra workbench, bright lighting and relative warmth have made nipping out to the shed for a half hour to work on a quick project a reality. This project has had a significant impact on my well-being. Not just being able to spend short spells in a nice warm shed, but knowing that I can. And the construction of the DIY Mega Shed hasn’t been too costly either. I haven’t done the finally toting up, but it stands at around £3500. Pretty much on the nail for the budget!
I look forward to spending more time out here. In fact, I already do. Some of the smaller projects are finally progressing, and now I just need to catch up on the write-ups!
M
NEXT – Mega Shed – SOTY Edition
PREV – Part 12 – Interior Installation
Back to Mega Shed Articles
Back to Workshop Articles
Amazon Affiliate Links – Things used in this article
BXProject is using Amazon Affiliate Links. It’s a quick way to show you what I have used in this article.
“As an Amazon Associate, I [may] earn from qualifying purchases.”
Since January 2024, Amazon has blocked embedding images, but I think the links are still valuable.


Well done that man it looks great. Just one comment (there’s always one) instead of the steel angle on the corners wouldn’t a square baton have fitted into the recess?
Well, if I had designed it in, that would have been the ideal solution. Unfortunately, the batten placing behind the cladding doesn’t allow it, well not without pulling all the cladding. I guess I thought about it too late. That’ll teach me!
[…] Link to the original article […]