
When installing covert blue lights for CSI Basics, I keep finding the same problem. When the charity can afford a full Whelen light set from Woodway Engineering, the installation goes pretty smoothy. But sometimes there is a requirement to use less expensive lights, and make bespoke window pods.
It’s all about the angles
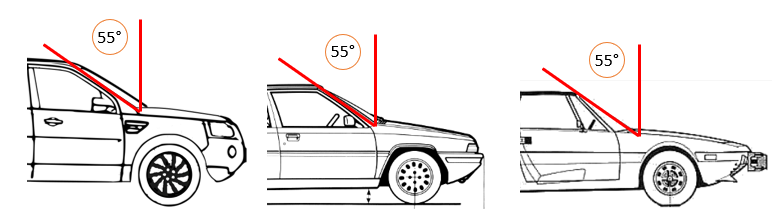
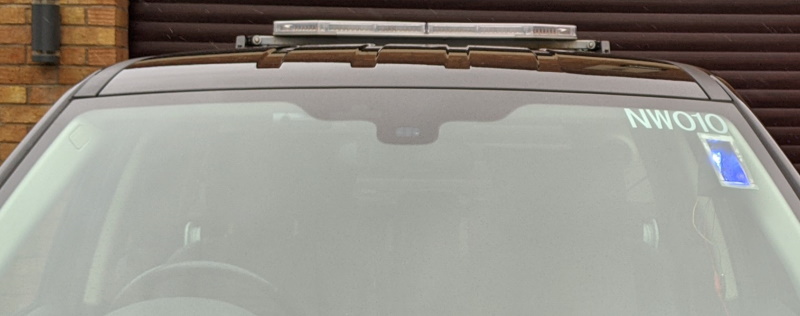
In a perfect world, all windscreens would be flat across there width and installed at the same angle. This would make light installation quick and simple. Despite my example above, not all windscreens are installed at 55°. And there aren’t many vehicles on the road with a flat windscreen that are much use for responding to a medical emergency.
The Woodway pods for the ION range of lights are designed at 65° and for most windscreens, their inbuilt adjustment makes for a good windscreen fit. Unfortunately, the CSI BASICS charity doesn’t always have the luxury of a full Whelan light set. An amount of panel beating, handcrafting and bodgery is required. But what if there was an easier way?
3D Window Pod Design
The perfect solution would be a bespoke window pod to fit every car. And for me the best way to do this would be by using a 3D printer, and I just happen to have one. Unfortunately its the absolute cheapest printer money could buy, but is it good enough? First I need a CAD model.
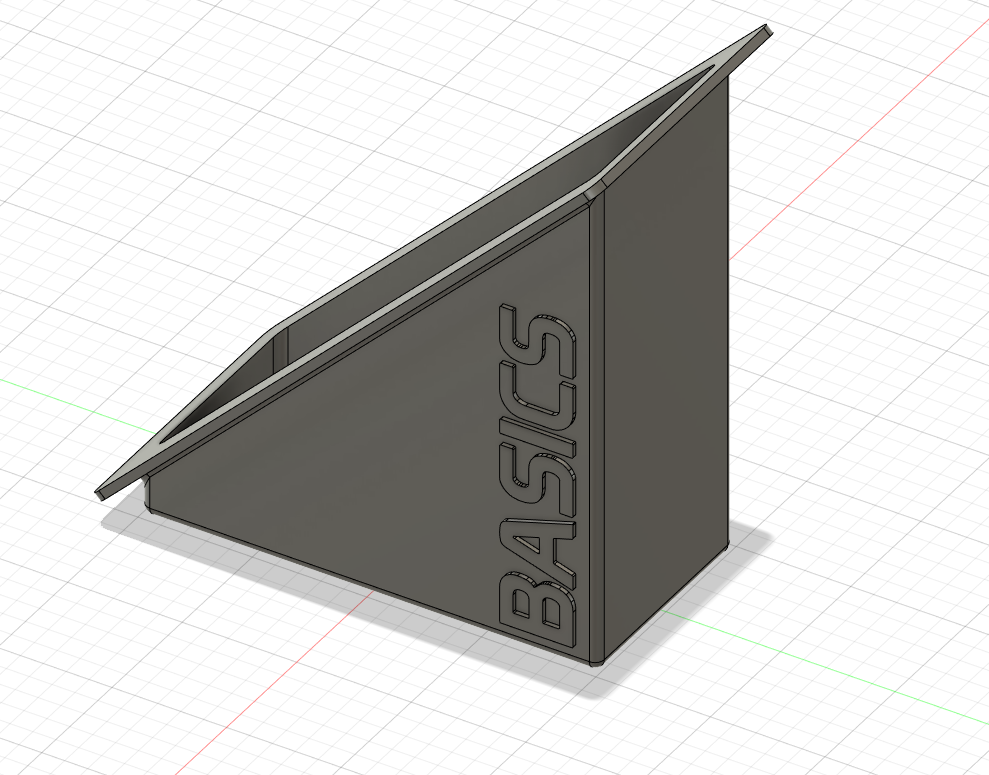
I’ve always downloaded 3D parts from Thingiverse, but there was nothing available to fit the Bullit BX31 light modules that I’m using. Instead, I downloaded free to use Fusion 360 software and set about creating my own pod design. With a bit of care, I was able to create the CAD model so I can change a single number to customise the window pod angle.
Printing the window pod
With the design created in Fusion360, I could export this to a slicing program. Cura allows me to turn the 3D model into a set of instructions for the 3D printer to follow. If you want to know more about 3D printing, I strongly recommend having a read of the All3Dp website
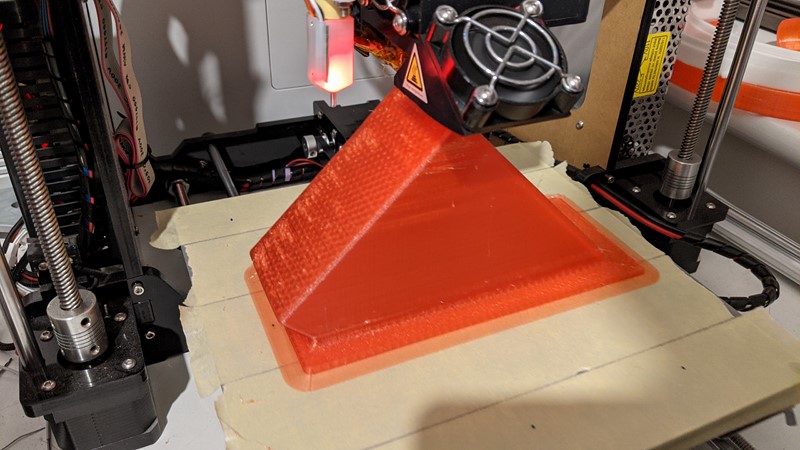
And, after just 8 hours, the first window pod is completed. As this is a ‘practise’ part, I’ve used some old red transparent PETG filament. It’s not the best quality filament, but the final part is structurally sound.
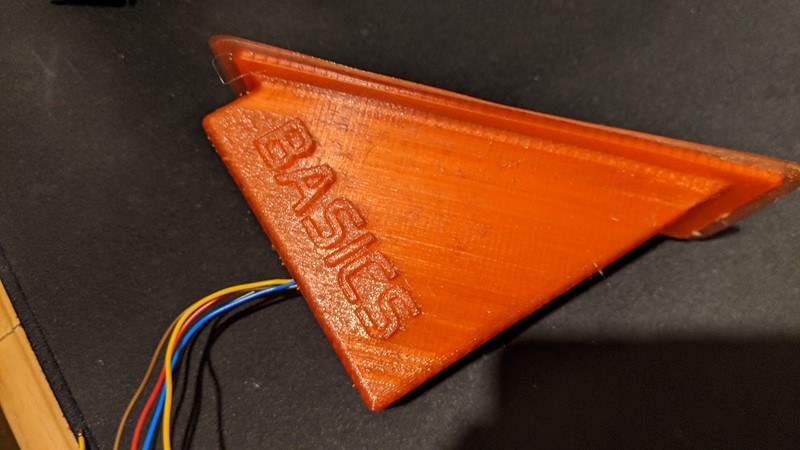
For the overly fast print speed and no calibration that went into the printing, the result is really impressive. The mating surface for the windscreen is silky smooth, which should help the bonding of the 3M double-sided tape. Even the ‘BASICS’ branding has come out pretty well, certainly better than expected.
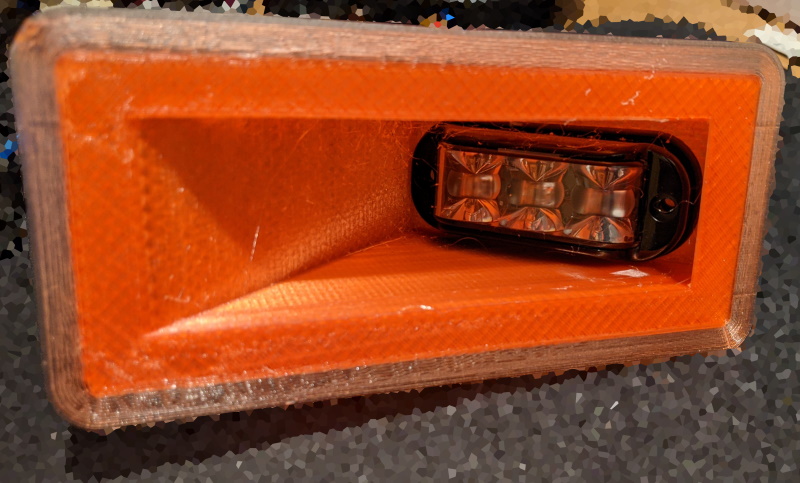
Perhaps most importantly of all, the light module fits very well indeed. At this point, the printed window pod is largely unfinished. The thin edge pieces are to help the print stick to the printer and not move around. The volume also needed printing with some supports which have been taken out in the picture above but need tidying.
A little finishing touch for the prototype
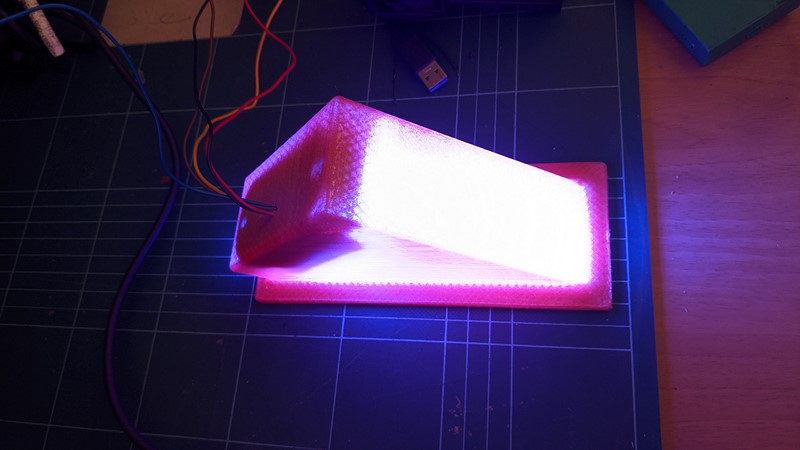
Remember I said the plastic was transparent, well it’s not going to be much use at the moment! I’m quite surprised at just how much light is bleeding out. This would be no use on an emergency blue light run. Light bleed through and around the window pod is one of the biggest complaints from the CSI BASICS guys.
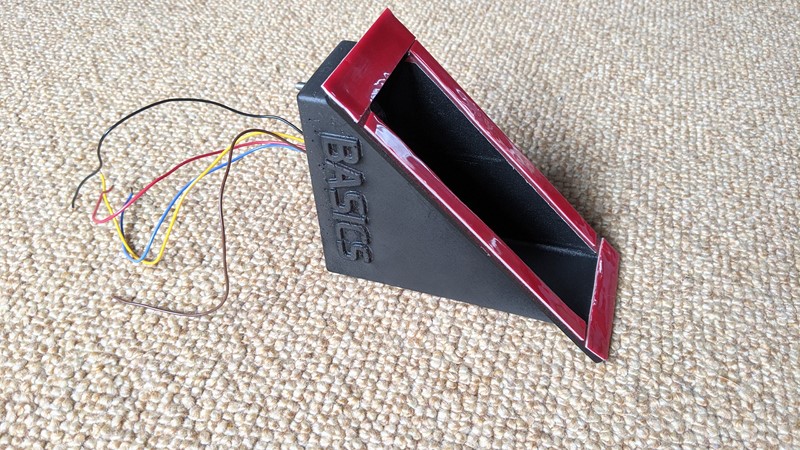
If I start to make the window pods in any sort of volume for CSI BASICS then I will obviously print in a solid filament. Probably a black PETG, or perhaps something with carbon reinforcement. But for now, this pod has been spray-painted with automotive primer and a black topcoat. Hardly a perfect finish but it does a good job of blocking out the light
Field Testing in the Freelander
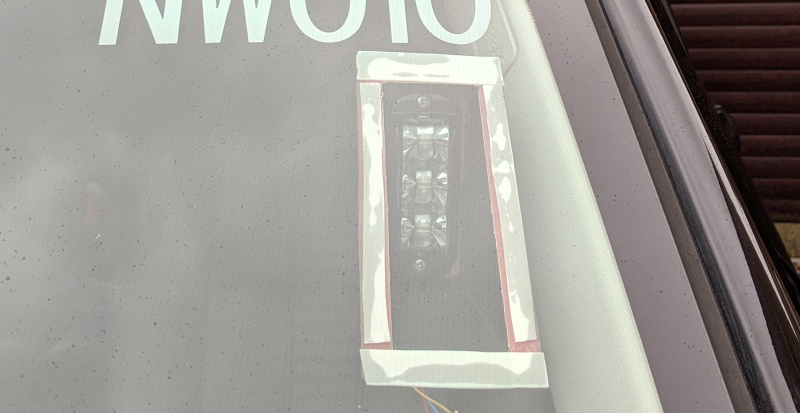
To get an idea of the performance of the pod, I’ve installed it into the Freelanders windscreen. Its the car with the most glass area, and the most used in the current wintery conditions.

I’ve put some power to it to test the light leakage and visible angle, but unless I get a blue light driving permit, they won’t be wired to the car. I’ll still get to see how the pods resist temperature fluctuations and vibrations.
Design Improvements
There are a good number of improvements I can make with the design.
The BASICS lettering should really be on the horizontal and not vertical edge of the window pod. I guess I missed when I considered which way up it would be installed.
The wings that press onto the windscreen are 3mm thick and just a little bit too stiff. Because of the windscreen curve, they tend to fight the double-sided tape. I could do with some black tape too!
I didn’t design in holes for the installation to the original CAD model. This currently means the plastic is a bit squidgy where the bolts go through due to a lack of reinforcement.
The Freelander has a particularly curved windscreen which means the pod is aiming the light outboard. This will reduce the impact when on a blue run, but it should be easy to correct in the CAD model. It will mean the pods are handed so I’ll have to remember to label them!
And finally, I’m a little concerned about how much heat the lights will generate when running for a few hours. They could end up overheating the plastic and making it melt. I’ve been scratching my head for a way to allow air to pass through, without leaking too much light.
Real world testing the window pods?
The next step in this little project will be to improve the CAD and print some custom window pods in some black filament. Then I just need a willing victim to try them out, and I may have just the person!
Hopefully, these custom window pods will help the CSI BASICS charity save some money, reduce light bleed into the cabin and open up new light unit options. All being well they should last at least as long as the volunteer responders have the cars, and maybe longer.
Perhaps in a year or so I can make an update on how well they worked!
M


Thingiverse file can be found here;
https://www.thingiverse.com/thing:4783747