

Finally, after months of intermittent operation, I’ve found enough time to change the boot release switch on the Freelander. I’ve no idea why I put off the job for so long, possibly the usual fear of jobs cascading. There’s always the risk that starting on the boot might result in taking the dash out. Anyway, replacing the Freelander boot switch only took 15 minutes, and this is how I tackled the job.
I should add that this write-up is completely over-detailed. You can probably figure out most of the steps just from the pictures. I won’t hold that against you. Well, not too much.
Fade to nothing
As is typical with the Freelander 2, there comes a time when the boot release switch decides it no longer wants to do its job. There’s not a lot to the switch, as we’ll see. Like many other owners, I’ve found the boot harder to release with my switch. From occasionally not working to a more recent need for the button to be fondled in just the right way to fire the lock and access whatever junk was in the trunk.
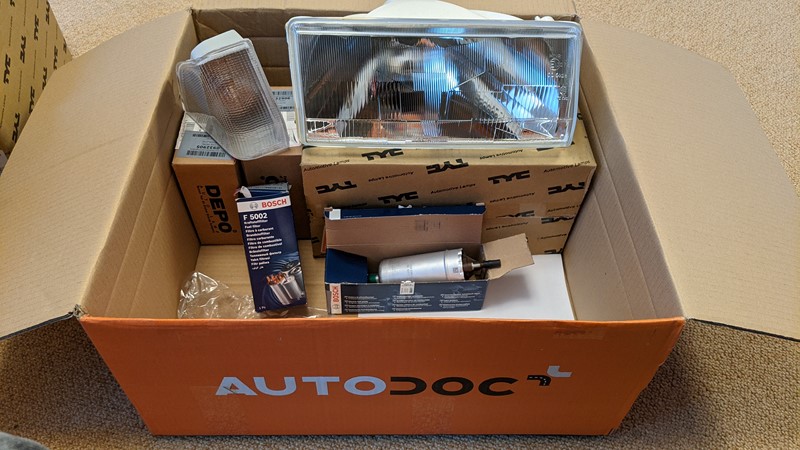
Finding Parts
Finding Land Rover Freelander 2 parts has changed quite a bit while I’ve owned my FL2. Historically an amount of Googling and routing around Britpart was needed to find the right service part number. However, more recently, I discovered the LRCat website, which has a quick-access version of the JLR TOPIX parts catalogue.
LR Cat
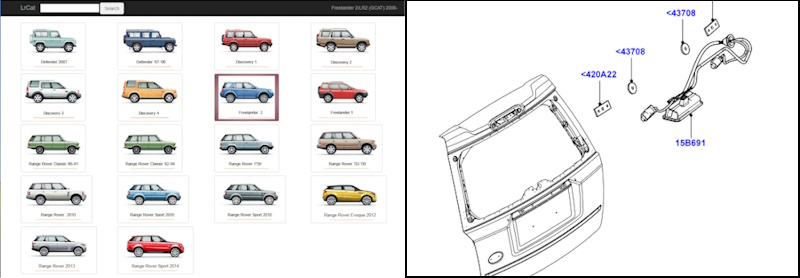
The website (new.lrcat.com) has what I suspect is an older version of TOPIX data. Most of the text is in Russian, usually with an English explanation. There is exactly enough data for me to navigate the interface and generally finding the aftermarket reference. In this case, 15B691 is for the boot release harness.
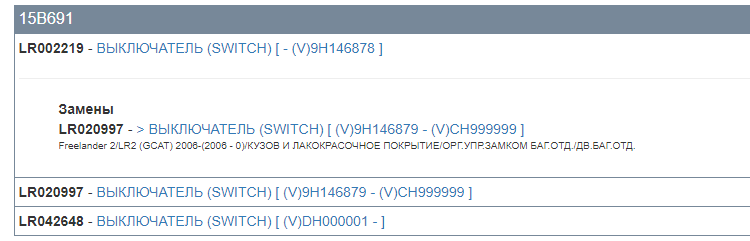
One benefit LRCat has over some other online Land Rover catalogues is that it gives a good idea of the history of the part and alternative part numbers. This comes into its own when cross-referencing. So if this is the original part, and I mentioned the index is not the latest version of TOPIX, how do I find the latest version of the part?
Land Rover Classic
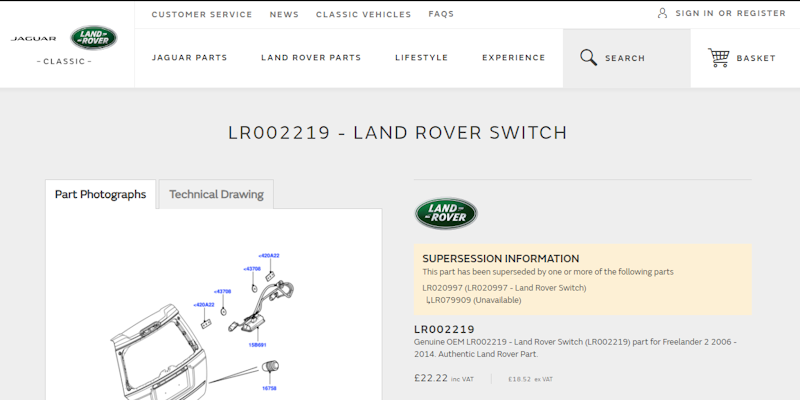
When Jaguar Land Rover (or do I have to call them JLR now?) set up Land Rover Classic, they put a lot of the TOPIX database online for older models. Land Rover Classic does not yet recognise the Freelander2, however, the parts are in the database. Because the FL2 is not in the index, you have to search for the original part number, i.e. the one from LRCat.
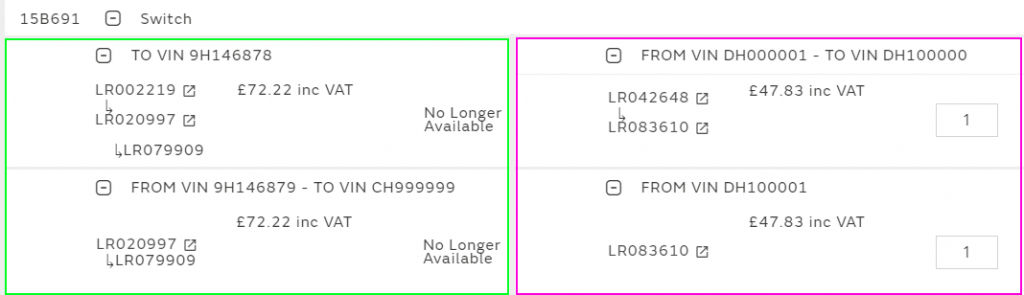
Interestingly, after some digging, a pre and post-facelift switch is listed. I find it curious that multiple suppliers are listing the early part number in the green box for later cars. LR Parts, for example, list this part to the end of 2012, while Rimmer Bro’s list through to 2014 (although they have a VIN range that matches the 2012 date).
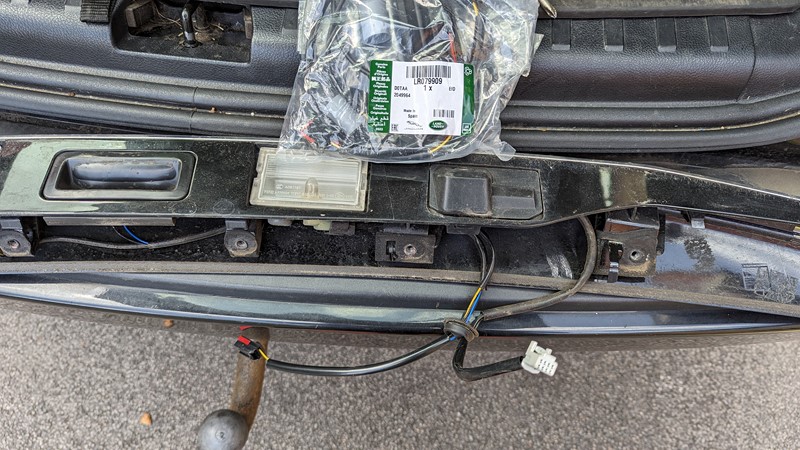
I didn’t realise there was a difference, so I ‘incorrectly’ ordered a Genuine original LR079909 from ‘Transglobal Trading’ on eBay for £40 delivered. Having done a quick search now, I can’t actually find anywhere other than Land Rover Classic that is definitely offering the genuine LR083610.
Installation of the new boot switch
I have to confess now that I’m not a beginner at getting trim out of the way on cars. I’ve had a go at most brands, and some generally universal principles exist. I’ve also had the boot trim off the Freelander 2 more times than I care to discuss outside of a therapy session. Unfortunately, that gives me an unfair advantage in swapping the switch out. However, I genuinely tackled this process in less than 15 minutes. And that included getting tools out and cleaning up afterwards.
Step 1 – Remove the tailgate trim
Two screws and some clips.
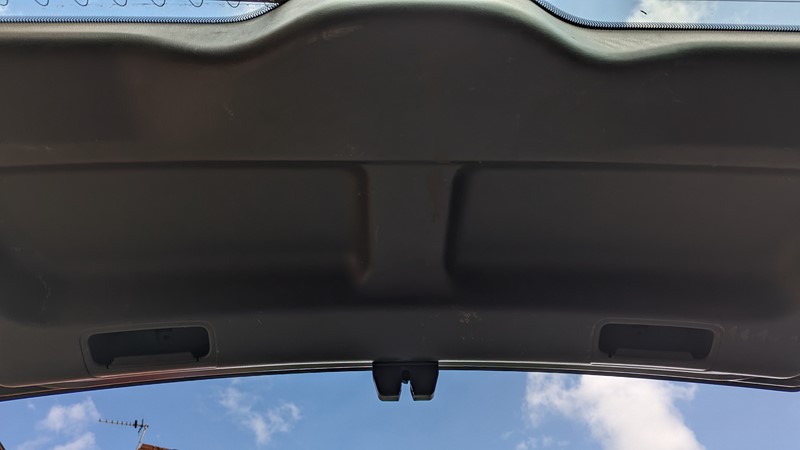
No, really, that’s all that holds the lower boot trim to the vehicle. But those clips, man, they are strong. I find it easier to take the Freelander 2 boot trim off with the tailgate fully open. Fortunately, the clips stop the panel from dropping on your head. Really they are that strong.
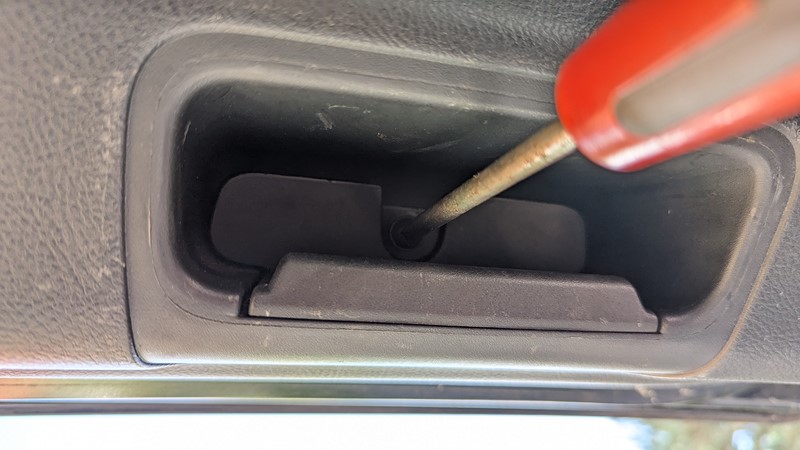
There is a screw in the back of each of the grab handles. Unusually for trim screws, the head is PH2. A standard Philips screwdriver will swiftly dispatch them. Well, no doubt they’ve now dropped to the floor unless you were quick enough to catch them?
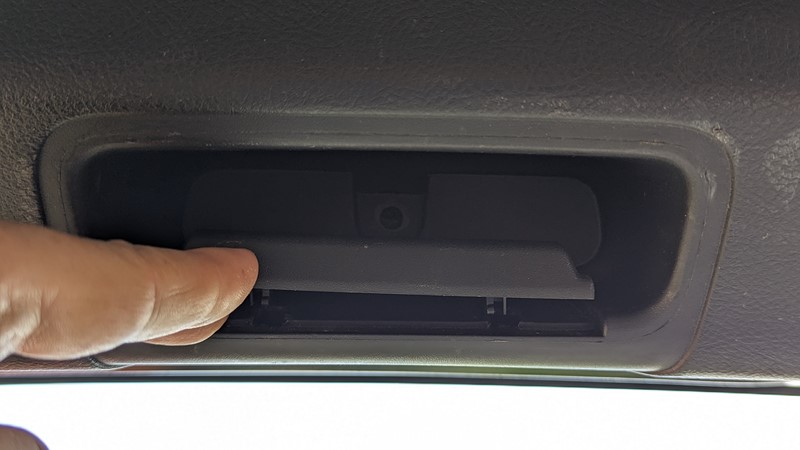
Next, lift up and pull out the grab handle finishers. They should stay clipped into the main trim while you pull it off the car, but from experience, they’ll jump out and run for safety directly under the car. No one needs to see your posterior while recovering them, so take them off now.
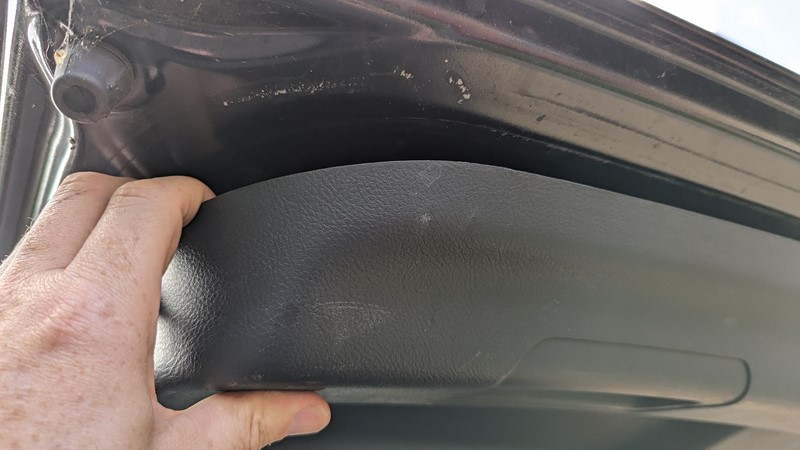
At each corner, a swift tug should see the plastic trim clips escape their metal entombment. With the corners and plastic trim clips separated, grab the top of the trim by the glass and tug off the whole panel.
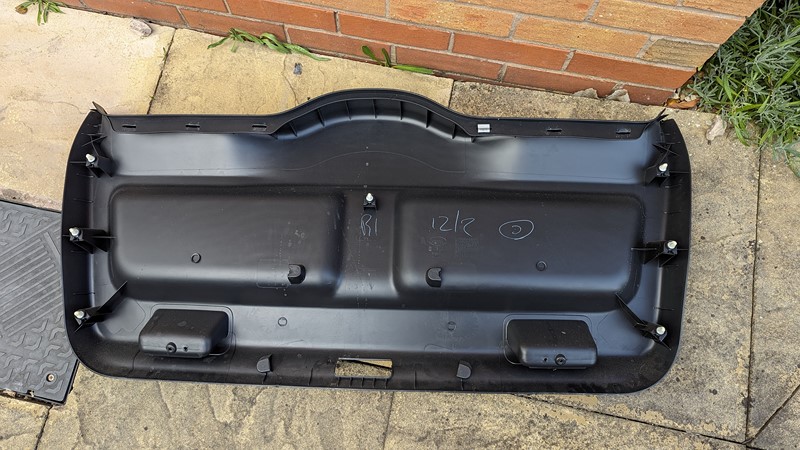
It’s usually easier to envisage where the clips might be if you can see the back of the panel before you start. So here you go. Seven white plastic trip clips and six holes for the metal trip clips. Oh, wait . . .
Step 2 – Recover lost trim clips
Depending on how successfully you tug off the panel, you may find one or more of the metal trim clips some with the plastic when it really shouldn’t.
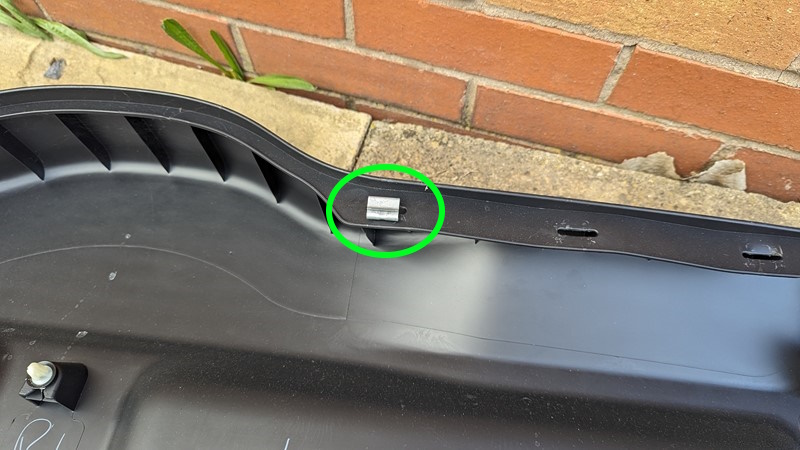
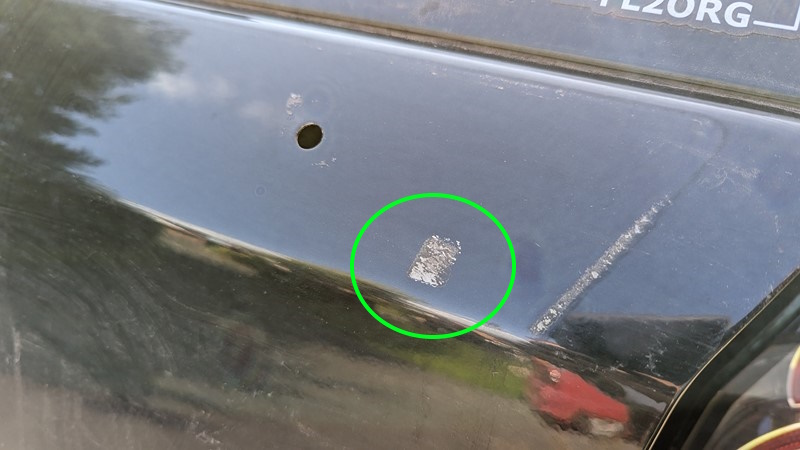
And right on queue, the green circle above highlights where the metal clip has come off the tailgate when it should have been left behind. I have my suspicions that the last guy in here buggered something up. And yes, that was me.
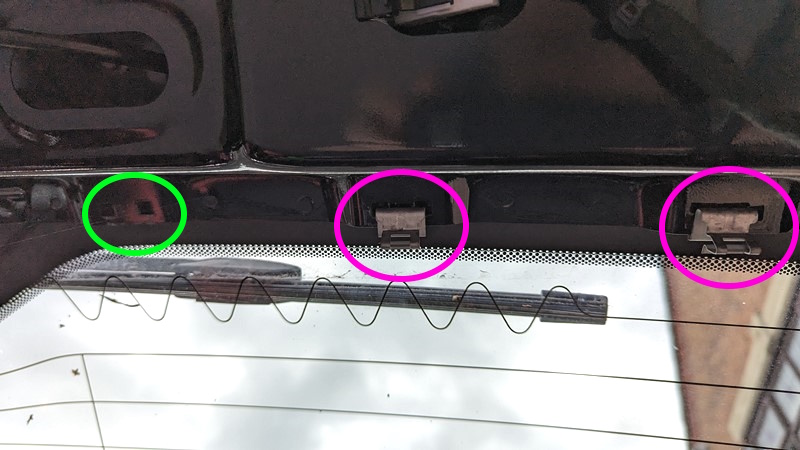
Best to recover the clip from the plastic trim now and slide it back onto the metal frame of the tailgate. The image above shows where metal clips are correctly fitted (in pink) and where my missing trim clip needs to be slid back onto the receiving lug.
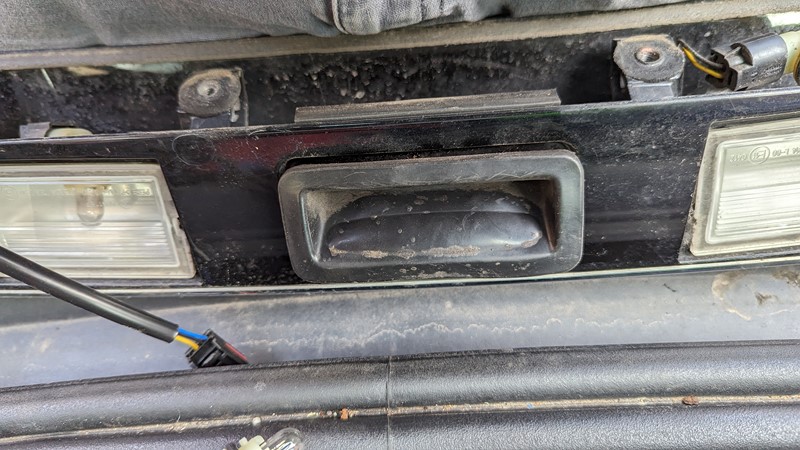
Step 3 – Remove the exterior boot handle
Three minutes in, and things are about to get serious. Now is the time to separate the exterior boot handle from the metal tailgate. I have a post-facelift FL2 with a full-width boot handle. I expect the process is much the same if you only have a little one.
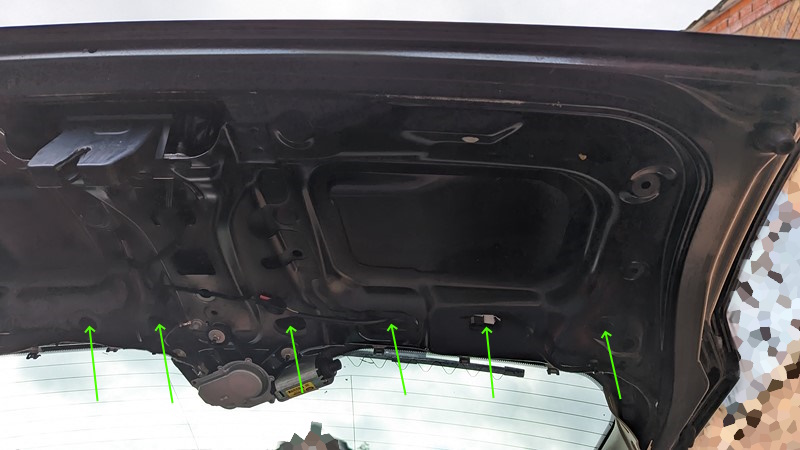
Roughly indicated above is the location of six of the eight M6 bolts that hold the exterior handle to the tailgate.
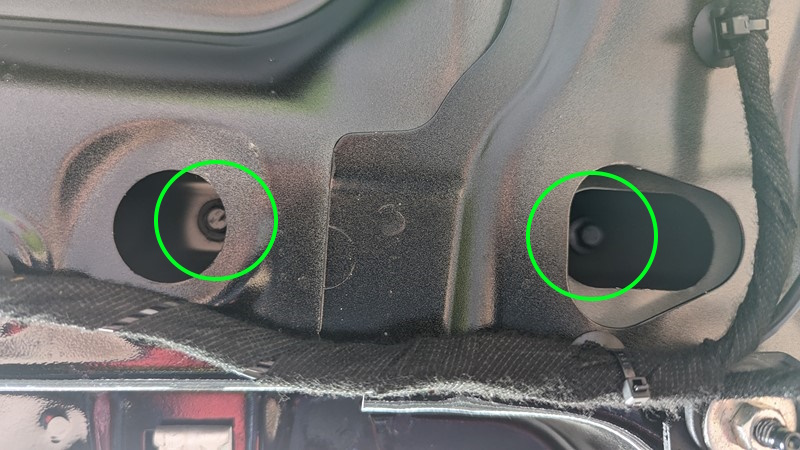
Oh, look, there they are. You’ll want an 8mm socket to remove them. I would advise AGAINST using an impact driver to put them back in.
There are a couple of plastic tags on the exterior handle that will stop it from falling off, so don’t worry about taking all the bolts out now. Unless someone already broke the tags off?
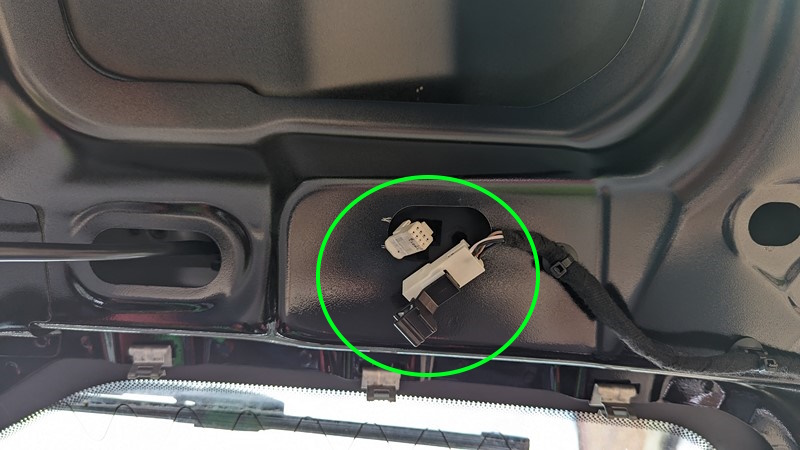
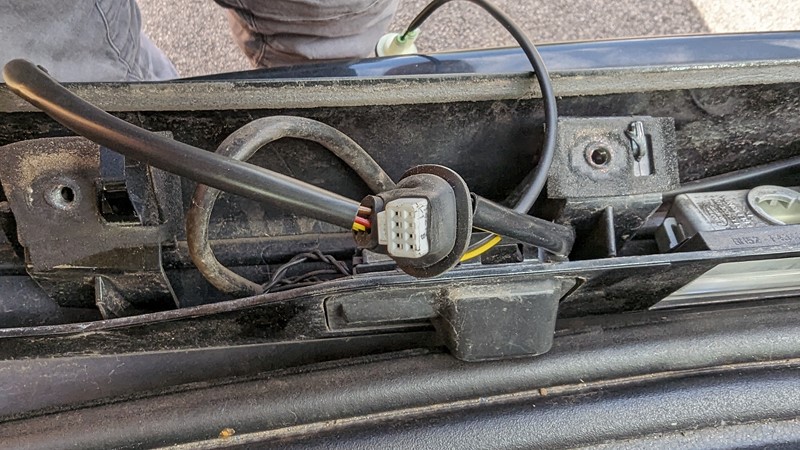
If you have a rearview camera installed, lucky you. One of the bolts is hidden behind the connector, so you’ll want to disconnect it to reach the bolt. If you don’t have a reversing camera and would like one, then I have a write-up specifically for that!
One more thing to disconnect is the wiring harness. Do it, do it now!
Before closing the tailgate, PUT YOUR KEYS IN YOUR POCKET. I learned this the hard way once, I disconnected the boot switch wiring and closed the boot with the keys inside. I hadn’t opened the doors so had to get a spare key to get back in. You’ve been warned.
Close the tailgate, and the door handle pretty much rolls off. The wires and plug should just pull out. Easy peasy.
Step 4 – Changing the Boot Switch and Harness
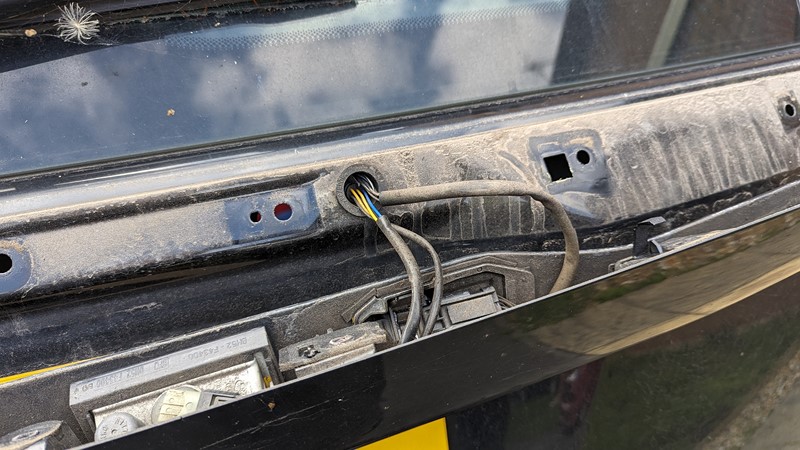
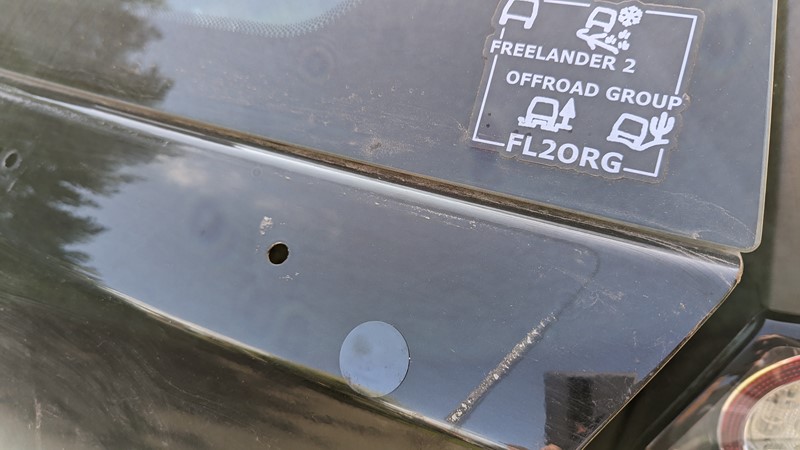
Changing the boot switch harness is relatively straightforward. You need to pull the old harness through the hole for the switch.
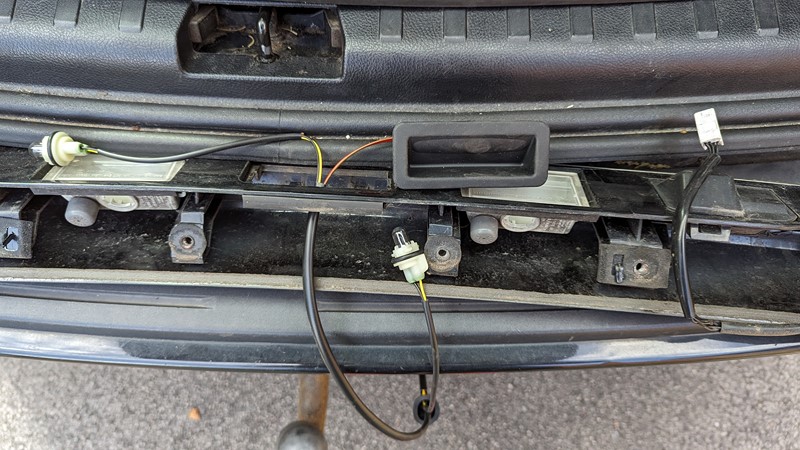
Disconnect the registration plate lights, then unclip all of the harness wires.
The boot switch has a lug on either side that needs to be pressed in then the whole switch pulls out with the harness.
Refitting is the opposite of removal, so so says the Haynes manual. Feed the harness through the switch hole and install the boot switch the right way around.
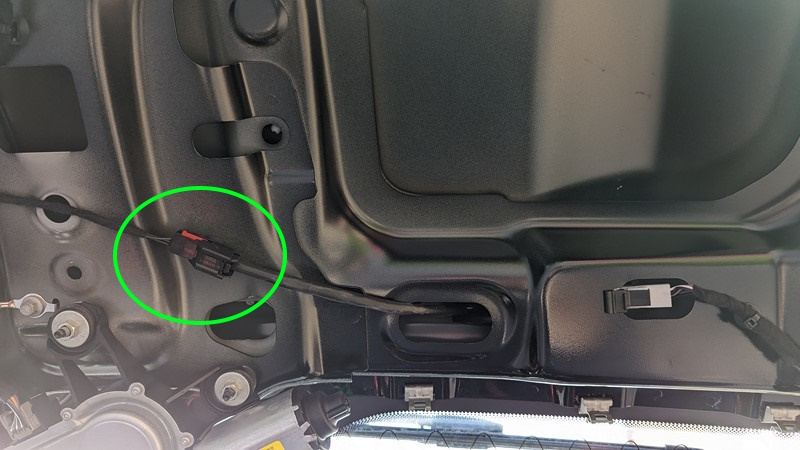
Finally, if you have a camera, you’ll need to get the connector through the grommet. I simply poke that Philips screwdriver through the rubber, then stretch the rubber over the connector. The result should be a nice close-fitting passageway.
Step 5 – Prepare for Re-assembly
On the back of the external boot handle is some foam. That foam is meant to stop the plastic trim edge from scratching through the tailgate paint. But it really doesn’t.
Generally, a bit of paint scratched where you can’t see it doesn’t worry me. But at each end of the trim is a rectangle of plastic that is always in contact with the tailgate. From what I’ve seen, this is the first point that rust breaks out on the facelift tailgates.
So I fit one of these anti-abrasion pads. I used to have most of a roll from a Tesa tape rep, but I’m down to my last few, and don’t have a reference for them. But some something abrasion resistant on here, it will be good for your health.
Step 6 – Test the Boot Switch
Clip the handle back in, but make sure it works before you bolt it all down. Connect up the wiring and close the boot.
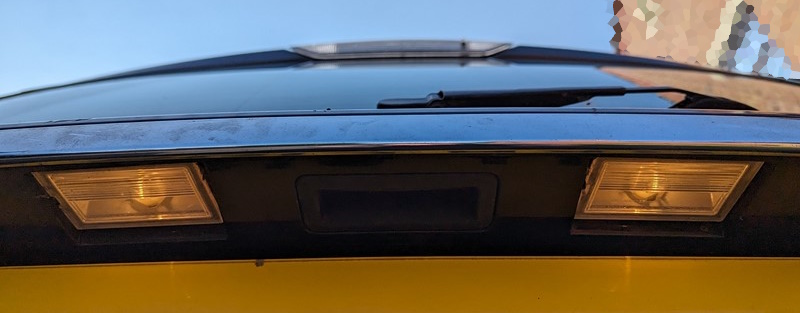
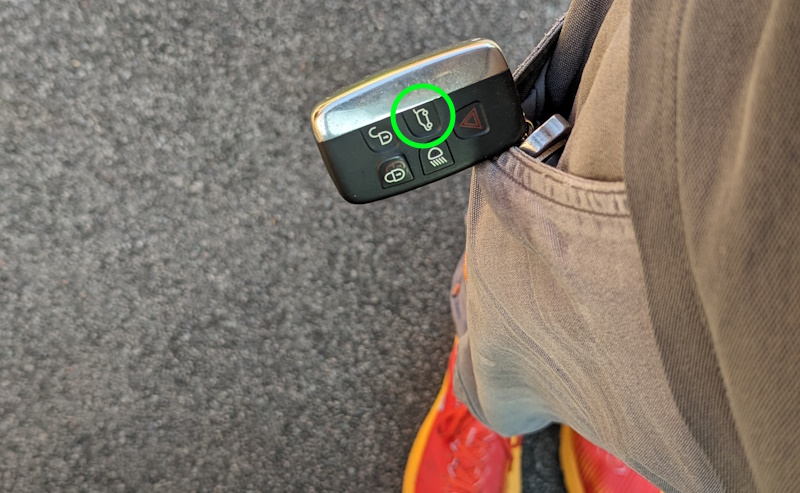
I’m lazy and use the key to trigger the ‘welcome’ lights by pressing the unlock button. And by magic, they work. And the button releases the lock too. Happy days. Right, eight bolts, two screws and a total of 15 minutes, and the tailgate is all back together and working happily.
Dissecting the boot switch
The engineer in me can’t resist breaking things apart to see how they failed. I’ve heard in the past that the boot switch fails on the FL2 due to water ingress.

Well, there is no sign of any moisture damage on my old switch. I’m pleased to see how simple the mechanism is, although the tiny microswitch really doesn’t look up to the job. I can see why so many have had problems.
Generally, I open the tailgate to the right of the switch with one finger. I wonder if always offset loading the microswitch is the cause of the failure?
Wrapping up on the Freelander boot switch change
Freelander boot switch change? Completed it, mate!
And now I don’t understand why I put the job off for months. It really was simple, and I would go so far as to say enjoyable. I got a little concerned when I realised I had the wrong replacement switch harness, but the ‘old’ one fits and works perfectly. The wiring has different colours which made me nervous, but you can’t argue with a working system. The registration bulb mounts are also different but clearly compatible. The later switch is used on several vehicles, so I wonder if some come as standard with LED bulbs and hence the extra connector for the registration lamps?
Maybe an opportunity for a future upgrade.
For now, I’m going to get something out of the boot.
M
NEXT:
PREV : Freelander Tail Light Security
Back to Land Rover Articles
Back to Automotive Articles
Return to Home

[…] NEXT: Freelander Boot SwitchPREV : Freelander Lantra TrainingBack to Land Rover ArticlesBack to Automotive ArticlesReturn to Home […]