

Following the Ender5 printer article last month, someone contacted me about getting some trim clips made up for the Citroën BX. Anyone who has ever had the doors for the storage bin in the Citroën BX will know they are very much an afterthought and easily broken. However, a replacement trim clip seems like an ideal task for the 3D printer, so I agreed to have a go!
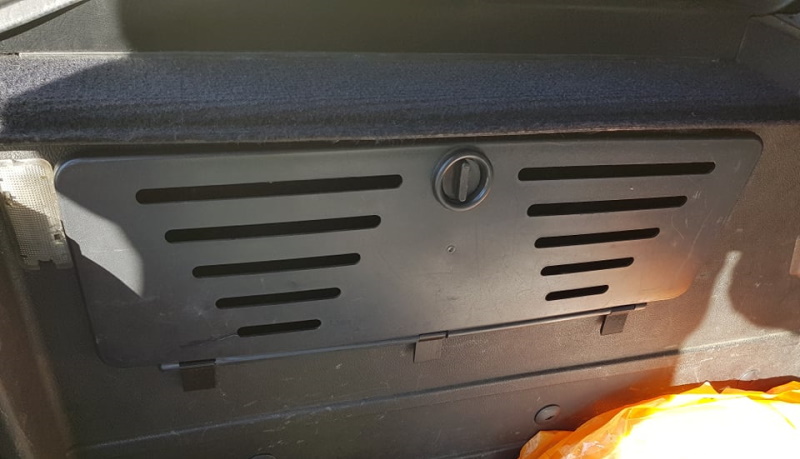
The Genuine Boot Trim Door
The standard BX comes with a nice big storage area above both rear wheel arches. Usually accessed from the boot, this is a great area for storing the usual spares on an old car, along with the wheel nut speed brace. But whatever things you put in are pretty much held in by optimism and a one-inch lip on the boot side trim panel.
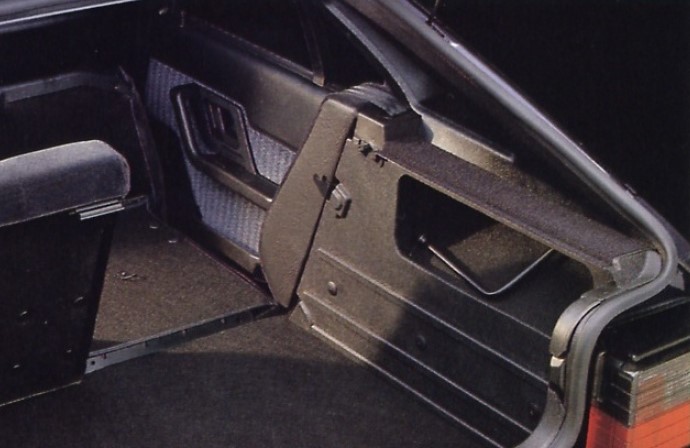
To cure this problem, Citroen released a Genuine accessory. The storage area doors are a convenient addition. However, they are very much an afterthought in design. The three clips that make the hinge are often broken, turning the door into a less than useful piece of plastic.
Unfortunately, I don’t have plastic trim panels in either BX. This makes designing trim parts from scratch rather tricky, I could have a guess, but that’s not the way of winners. The chap who requested some replacement clips has one complete one left and has posted it up to me. After that, it was time to hit the CAD.
Finding the trip clip dimensions
To print the part, I need a model I can use to create the instructions for the printer. The easiest way to do this is to draw the part in a Computer-Aided Design (CAD) package. This is still something of a dark art for me, even after years of doing it. Recreating a part in CAD usually means a ton of precision measuring, but I have a shortcut for something small like this!
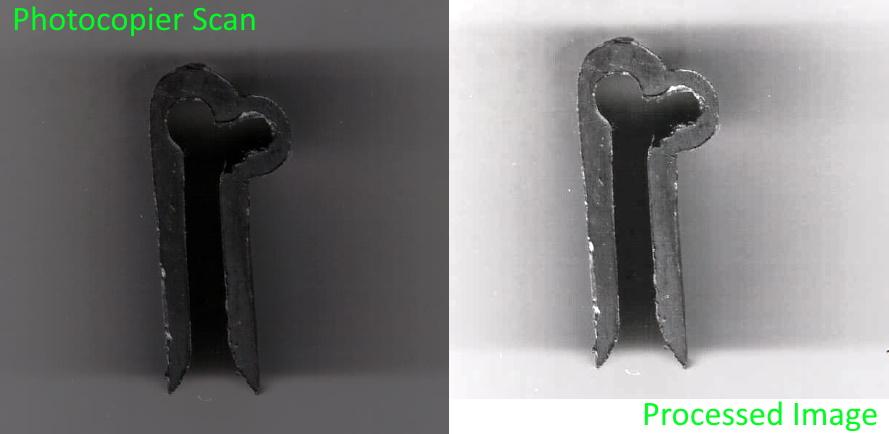
This shortcut is pretty simple, scan the part in a photocopier. The simple extruded shape of the clip means I can quickly trace the outlines of the part in the CAD package and then scale it to match the actual size of the piece. But before I can trace the original photocopier scan, I need to process the image. A few clicks in Paint.net, and I have an image that I can actually trace!
Sketching the part in CAD
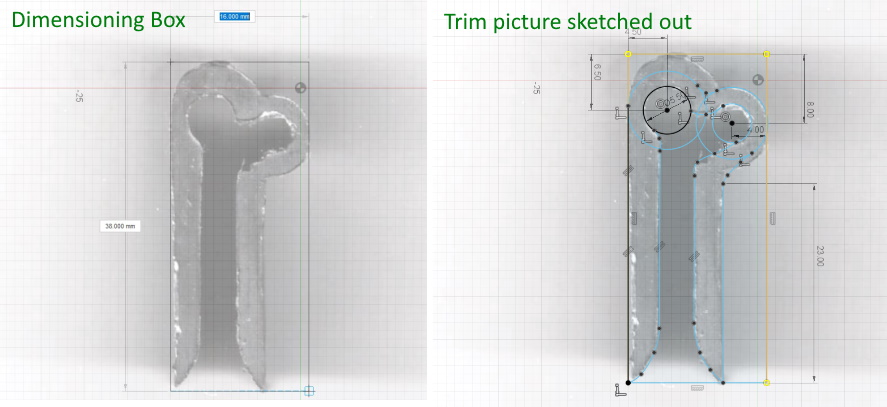
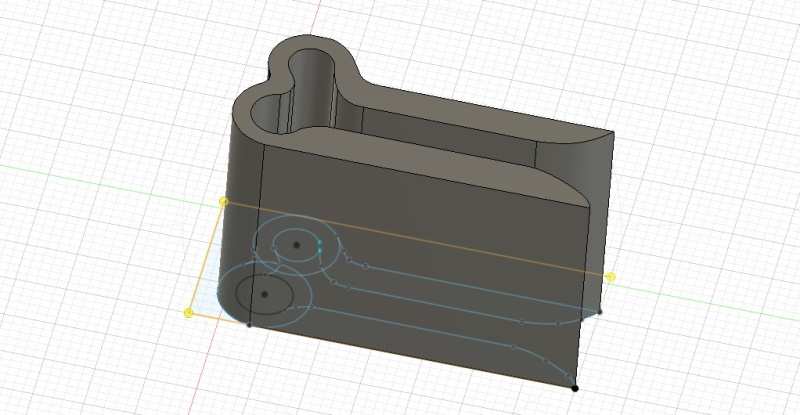
Loading the picture into Fusion 360, I want to scale the part first. To do this, I measure the overall dimensions and draw a box in the CAD package the same as these dimensions. Now I can rescale the image and start tracing out the lines. As I trace the lines, I can double-check the lengths and gaps by measuring with a set of callipers.
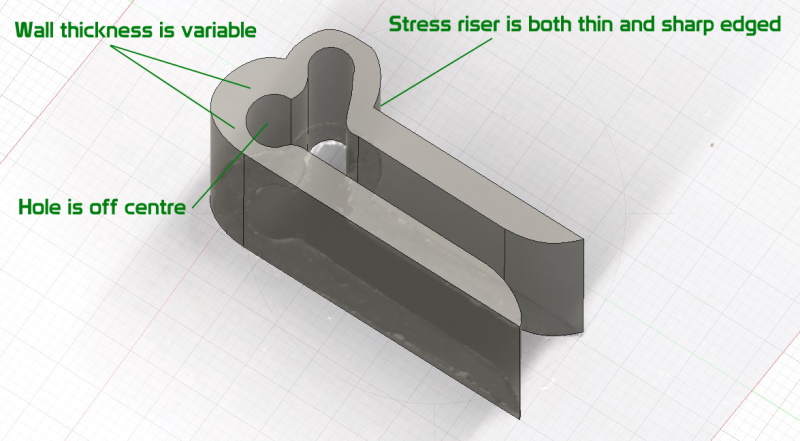
Based on the sprue holes on one side of the original trip clip, they were clearly injection moulded. When I was sketching the picture of the original part, it quickly became evident that the original tooling for the clip was made in a hurry. The hole for the edge of the boot trim is quite a way off-centre. That’s not my bad drawing in the sketch above. It really is that far out. A very obvious stress riser will also cause the clip to snap. It’s not just a skinny piece of plastic here, but a very sharp edge. Straight from the factory, these trip pieces were waiting to snap.
Creating the solid model and getting it into the printer
From this simple sketch, I can now create a solid model. This trim clip is pretty simple, so it only needs an extrusion to the right height. Unfortunately, this direct copy of the original part looks horrid. The sketch is dimensionally accurate, I promise, but like so many things in engineering, if it looks wrong, it probably is wrong.
While the design above is pretty accurate to the original part, I can’t bring myself to simply print it and see if it works. No way, no how. Instead, the original sketch gets tidied up. The wall thickness around the holes is evened out, and the stress point is removed with a simple fillet.
There is a risk that some of the odd shapes were deliberate. This trim clip design will definitely need a trial fit, but I’m happy with this design and can get to printing.
Printing out the first trim clip
So the solid part that I’ve designed in Fusion 360 then gets exported into a file type the 3D printer can understand. The Cura software then turns this model into a set of instructions for the printer. The resulting GCODE is then loaded into the Ender5 printer, and off it goes.
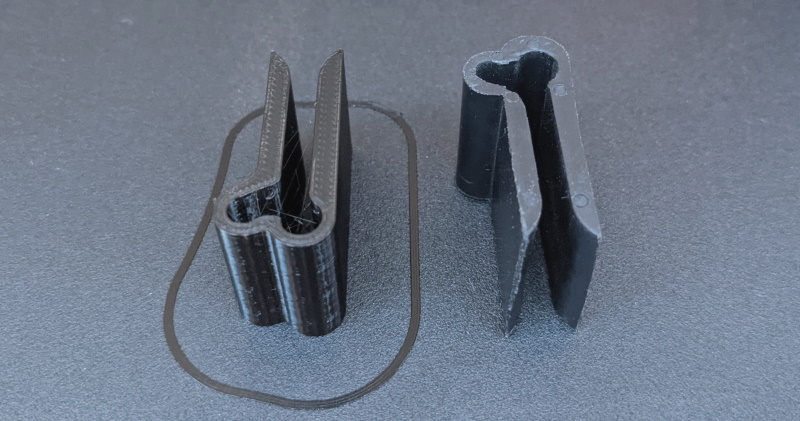
The printer takes just under 1 hour to print out the new clip design. I’ve used Filamentive rPLA for this print, and since it’s made from recycled car parts, it feels like closing the loom to make new parts with it. There is a little stringing (the thin wispy bits), but otherwise, the part has come out really well!
Still not happy with the trim clip design.
While the revised version 1 trim clip looks much better than the original and has printed really well, I’m still not happy with it. Before I send the samples off for test fitting, I figure I might as well have a go with some improvements on the design.
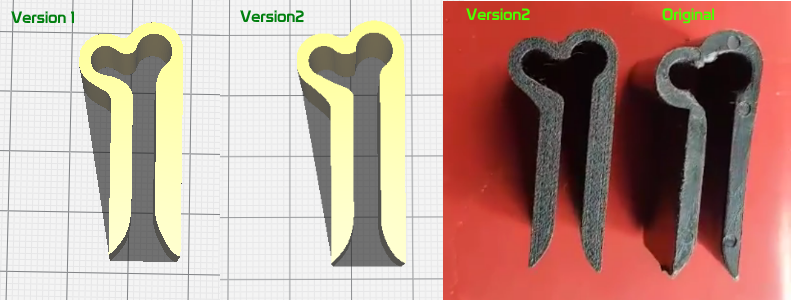
The tweaks are pretty simple and perhaps not completely obvious to the naked eye. The most notable change is where the door hinge sits. It’s the hole on the left in these pictures. Also, the width of the trim where it clips onto the boot liner is slightly narrowed and gives a more prominent top edge. The idea here is that the clamping force should be greater, and the clip won’t just fall off.
Testing and validation of the new trim clip design
The three parts get sent off to my contact, who has the doors and the boot trim in the same place. Perhaps expectedly, there is an issue with the design. The door is camming out when closed and not latching properly, but fortunately, this is on the version 1 design. The version 2 design works much better. But that is with just a new clip. What if all the clips are changed?
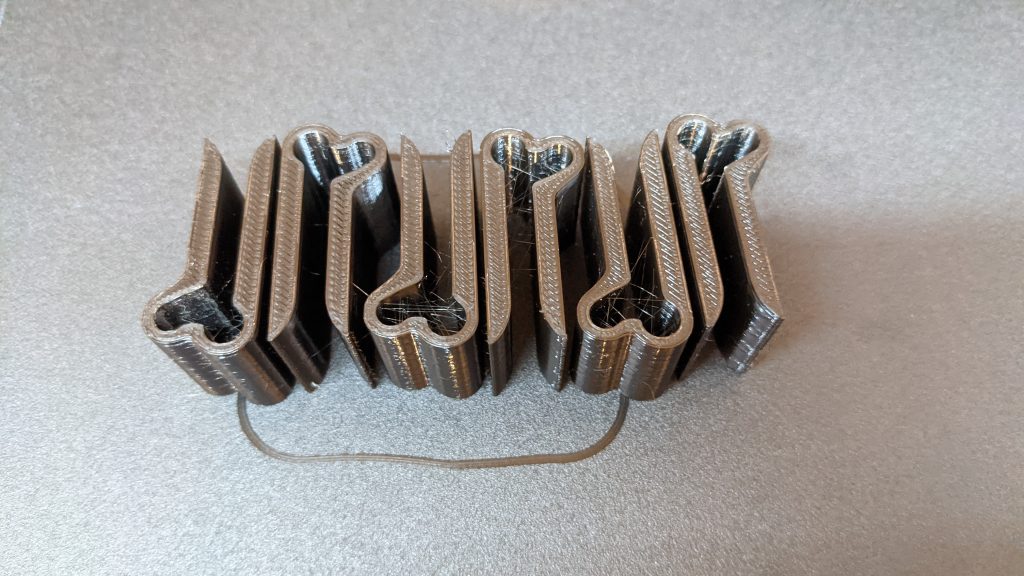
So the printer is turned up, and six of the new version 2 clips are printed out, three for either side. The trim clips are printed in sets of three, taking a little over 2.5 hours and 3.6 metres of filament. Once printed, these are sent for trial printing. It’s a bit of a nervous time awaiting the news, but it finally arrives.
And the news is good. The redesigned trim clips work perfectly. The boot cover panel opens, closes and locks. What more can we ask for? Definitely a success story for both my design and the purpose of the Ender5 3D printer, replacing impossible-to-find parts.
Making the trim clips available
I’ve been asked by a few others for these trim panel clips. I’m a little lost as to what to do. I want to support the BX community, and I’m happy to print the clips. But without more testing, I’ve no idea of the longevity. Is the design strong enough, and will the plastic age well? Moreover, it costs both time and money to print the parts off. But would people accept that there is absolutely no validation on the parts, nor warranty implied? I don’t want to be creating a ball and chain for myself. Yet could the benefits of printed parts be expanded into a side business? Decisions decisions!
I’d be grateful for any feedback on the topic of mass production. And any potential orders!
M
NEXT – DIY Ender5 Enclosure
PREV – Ender 5 Review
Back to 3D Printing Articles
Back to Workshop Articles
Amazon Affiliate Links – Things used in this article
BXProject is using Amazon Affiliate Links, it’s a quick way to show you what things I have used in this article.
If you buy from this link, I may profit from it.
Good report on the BX boot storage door hinges. I don’t think you need to worry about the lifetime of the parts, because they are not exposed to UV from daylight, and the doors are extremely weight and very fragile, so they are likely to be treated with care.
The only improvement I can suggest is that the hinges are drilled through and an M3 nut and bolt used to secure them to the panel. This would increase the strength of the installation and if the bolt heads were black, would look original.
Thanks for the feedback Mike, I’ll look to adding a nut arrangement into a revised design, it seems like a sensible idea. Thanks for the support in testing these out for me too!
M
I finally go around to uploading to Thingiverse, if you want to print your own!
https://www.thingiverse.com/thing:5753295