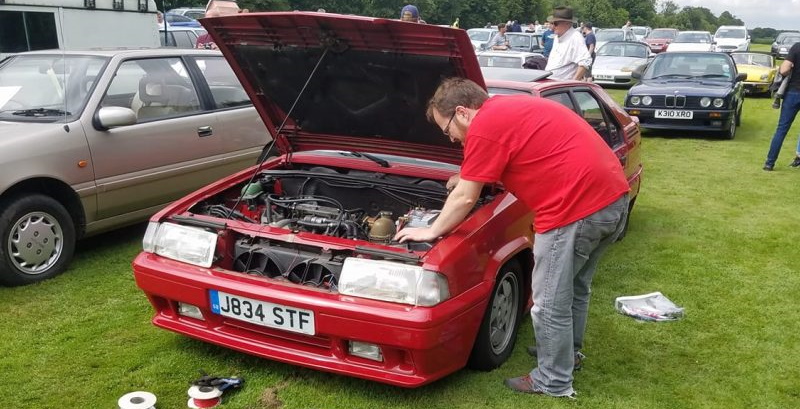
I’m not too fond of the cooling system on the Citroën BX 16v. There, I’ve said it, and now I can heal. Regardless of which engine was in the car (there have been many) or the general running state of the vehicle, the coolant usually causes me problems. On the XUD Diesel engines, this was typically mechanical. The fun never ended from pipes that only leaked under pressure, catastrophic pipe failure while towing, or just generally throwing coolant out of the exhaust. So I really wasn’t surprised when a cooling fan died outside FotU. That said, I’m not driving it again until the car has had a cooling fan replacement.
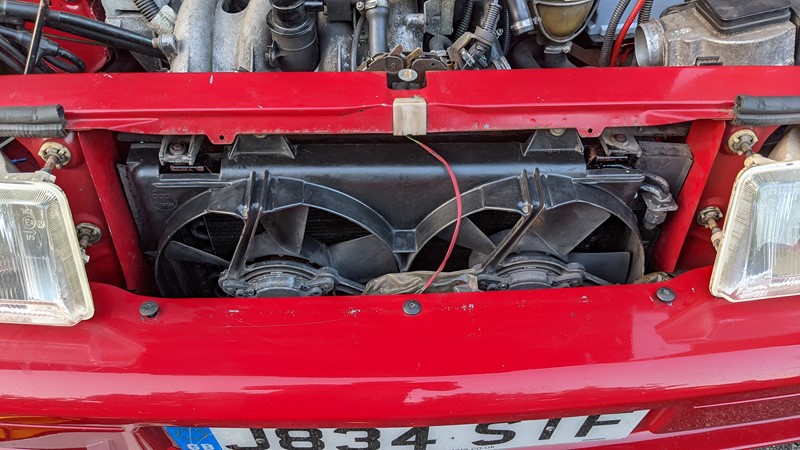
Getting the cooling fans out
I completed 90% of an AC conversion on the car many years ago, missing only an idler and belt. So, unlike many BX 16Valves, this one has a condenser and twin fans. Typically getting the fan unit out is straightforward, but the condenser takes up the free play that would otherwise allow the fans to lift straight out.
Instead, there is a lot of wiggling to do. First, the radiator top cover comes off to allow the rad to be pushed backwards. Then the cooling housing needs to be ‘jiggled’ off the condenser finishing trim. What generally happens is an awful lot of swearing. The radiator isn’t original, but it is dated 1999, meaning it’s brittle. Very brittle. The condenser will protect it a little, but that too is pure unobtainable.
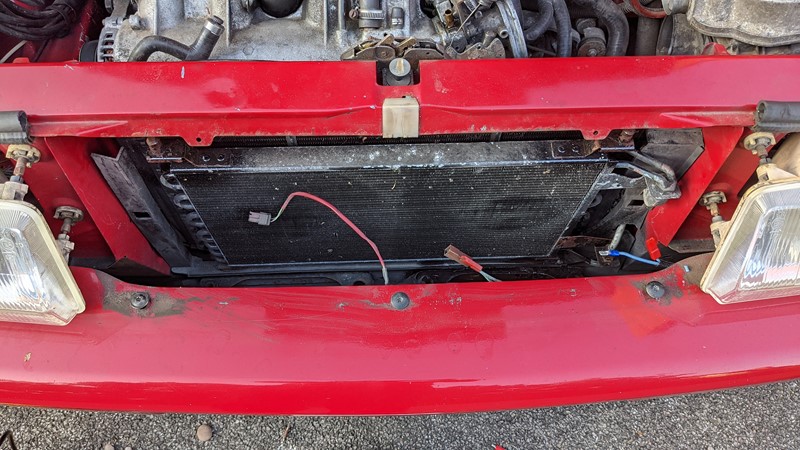
After discovering a few carefully chosen swear words, not all in French, the cooling fans and housing are finally separated from the car. And I’m greeted with a very tidy-looking evaporator and a nearly unmarked radiator. Both are very reassuring signs. The top of the radiator looks a little crusty and rusty, so it gets a liberal coating of Dinitrol. This should extend the operational lifetime. Eventually, I’ll likely have to get an aftermarket aluminium rad from China which is reportedly quite good but not original.
Finding a donor fan motor
Despite my optimism, the fan that had seized outside the Festival of the Unexceptional is still terminal. While the motor turns, the bearings have clearly failed, so a replacement will be needed for now. There are a few fan motors on eBay with part number 95 593 547. They’re common with the C15 and, no doubt, other motors. Unfortunately, all the eBay stock is in Europe and incredibly overpriced.
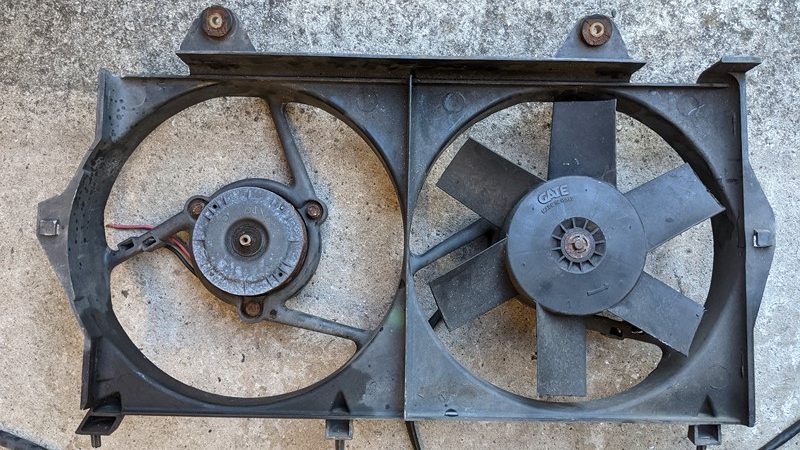
I should have a couple of BX fans and a couple of 205 ones in the loft, but I can find neither. So my temporary solution is to ‘borrow’ a motor from XPO while I source another. There are two in the housing, one branded GATE and one branded ‘aop’. The GATE type is common on the XUD-engined Citroen BXs. Given that XPO is not an aircon car, I suspect the GATE motor is a retrofit from a previous owner. So I will use the ‘aop’ one as a replacement.
Amazingly, both the bad motor and the good motor come out of their housings without shearing screw heads or snapping bolts. I’m pretty surprised. The cables on the donor fan have no connectors and are incredibly long, so they will need looking at. Otherwise, the motor rotates without grinding and appears to have no play. Putting the wires across a battery and the motor near takes my handoff. That should do.
Preparing the replacement cooling fan motor
Something becomes immediately apparent with the motors out of the housing and sitting side by side.
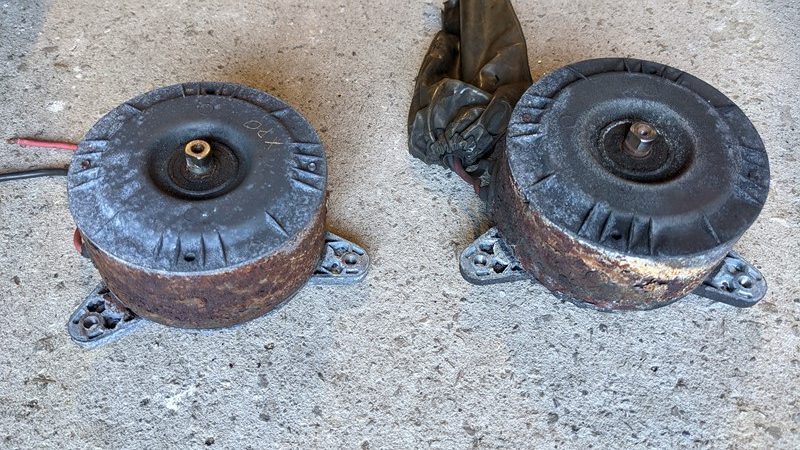
Although the top and bottom castings of the motor are aluminium, I didn’t realise the rest of the housings are mild steel. Plastic fan blades usually cover these. Both motor bodies are heavily corroded, but the failed fan is considerably worse. When I pull it apart, I suspect I’ll find the corrosion continues into the machine and may well be the cause of the failed bearings.
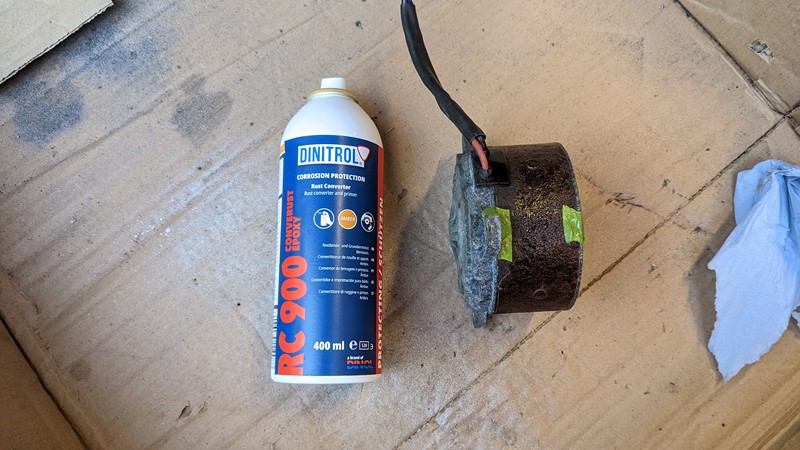
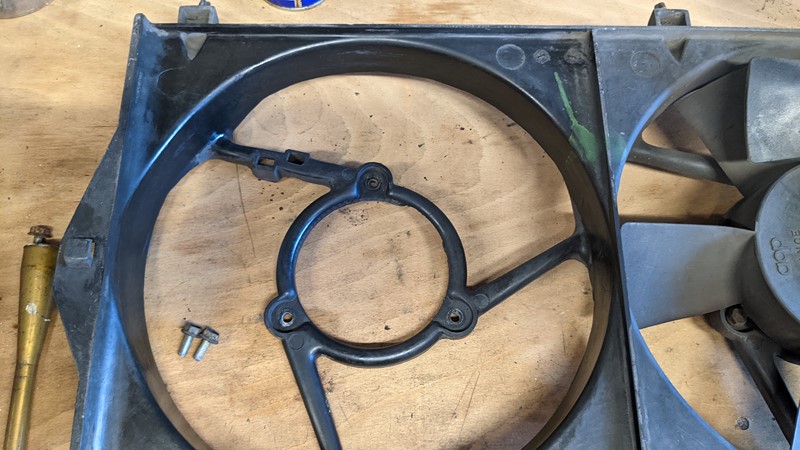
To save the replacement fan going the same way, the mild steel casing gets a rub down and a good coat of Dinitrol RC 900. I’m a big fan of the ease of use of the Dinitrol products, although I’m a little cautious with the RC 900. I’ve seen it land on some surfaces, usually plastic, and go sticky rather than harden. So rather than risk the replacement cooling fan getting gummed up, the vents in the housing get sealed up before the RC 900 is applied.
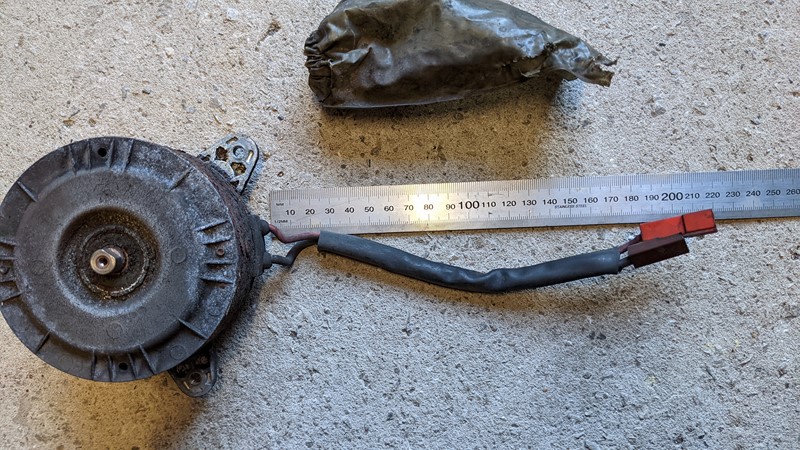
Neither of the cooling fans on XPO has any connectors, and the wire on the replacement motor is nearly two-foot-long. So I need a quick measurement to trim the wires to the right length. It turns out the wires are 200mm long on full extension. Who knew. Crimped terminals are added to the bare wire ends, and the correct coloured caps are added.
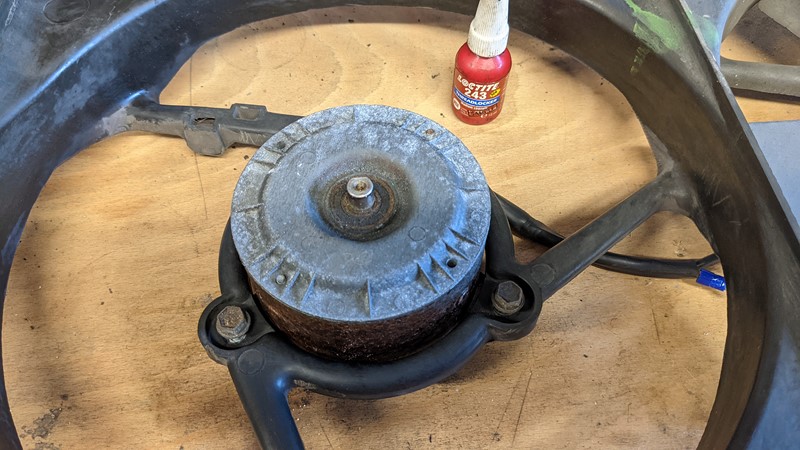
While the original bolts didn’t seem to have any form of thread lock on them, I’m fairly convinced they should. In theory, the aluminium casting should corrode onto the bolts and give a pretty good grip. However, the amount of vibration in the housing and the motor suggests that the bolts need something a little more to stop them from falling out. And so the bolts get just a little Loctite 243 before they go back into the holes in the fan motor.
Returning the cooling fans to the car.
I can’t miss an opportunity to do a little cleaning, so the fan housing gets cleaned and wiped with a bit of WD40. And before I try to refit the fans in the space that is clearly too small, they both get tested on a power supply. Fortunately, after all the faffing, they both still work. Phew.
Reinstallation is nothing like removal, as the Haynes manual might suggest. The housing with the replacement cooling fans drops back in without lube or swearing. I’m so excited about them being back in the car. I even give the bumper a bit of a clean. Then the moment I’ve been waiting for, do the fans work? Being an AC-ish car, I can easily force the fans to run at the ‘slow’ speed at the flip of a button.
Regaining confidence in the cooling system
I’m relieved the cooling fans are all working again and just in time for the Retro Works show. But this isn’t the only maintenance I have planned for regaining confidence in the cooling system. The coolant gauge has never been reliable, and I need to understand why it jumps to 70 degrees when the ignition is turned on. This is despite the under bonnet wiring and cooling sensor being replaced.
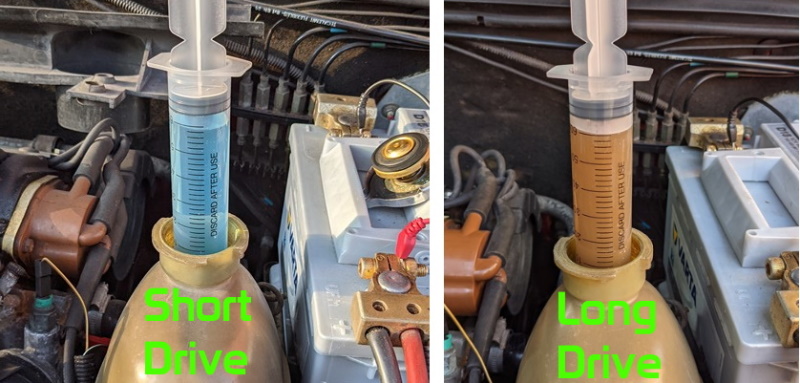
I took a coolant sample after running the engine for a short while and moving it around the drive. I was very excited to see some nice blue, clean coolant. But the excitement was short-lived after going for a much longer drive and finding there is, in fact, a lot of sludge in the coolant once it is fully mixed. So the coolant system will need serious flushing as soon as possible.
I also want a second opinion on the engine coolant with a sensor and gauge separate from the dash instruments. Ideally, I want a solution I can log over a journey to get a good idea of actual temperatures in the coolant system. Then and only then, I might start to get some confidence.
M
PREV – Festival of the Unexceptional
NEXT – Retro Works
Back to Automotive articles