

Between the previous week’s fuel leak and far too many hours at work, the preparation for this year’s FotU is horrendously behind time. When the fuel pipes gave way on the hottest day of the year, I was trying to start it up to investigate a hydraulic leak. An investigation I still haven’t started. Then to top it off, it still hasn’t been washed. And I’m about to take a shortcut I’ll regret as it creates many more leaks.
Impatience, short cuts and car washes
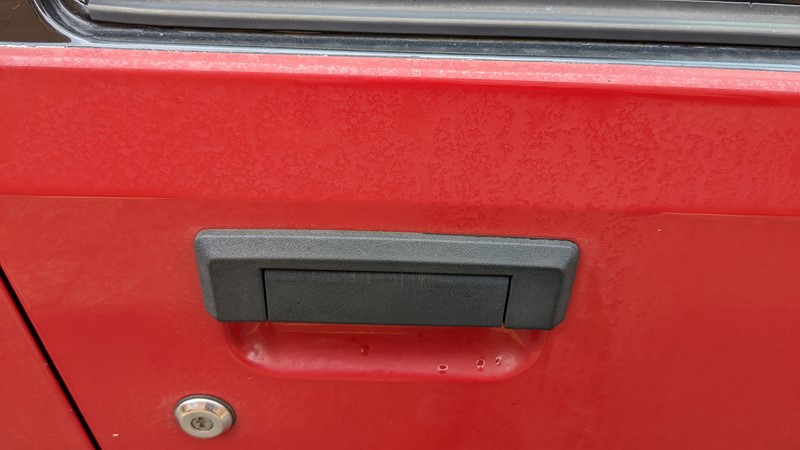
It is Friday afternoon before the 2022 edition of Festival of the Unexceptional. I’m still at work, facing some anti-social meeting timing worrying about the long list of things I need to do on the BX to get it ready. So I figure that I can take a shortcut before I tackle the hydraulic leak and go to a car wash machine.
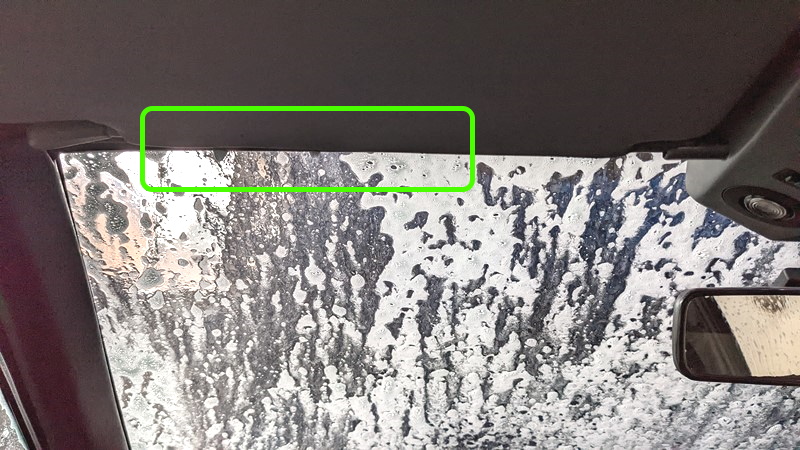
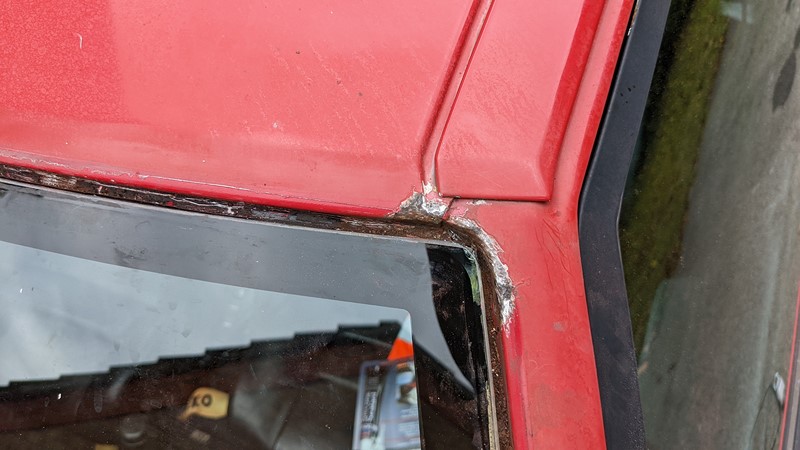
My logic was, in part, that I have taken several modern cars to this particular IMO car wash recently, and the vehicles have all turned out okay. So how bad could it be for a BX? Well, I may have forgotten one minor factor. The windscreen seal, over the years, has begun parting ways with the car. The rain was already getting into the cabin in a downpour, and the leak is ten times worse in a car wash.
I mean, there’s getting water into the car, and then there’s hosing out the interior. The candy scent flooding the car is mixing with my misery at my own stupidity. All I can do is sit and wait as the chemicals and water flood in around the seal.
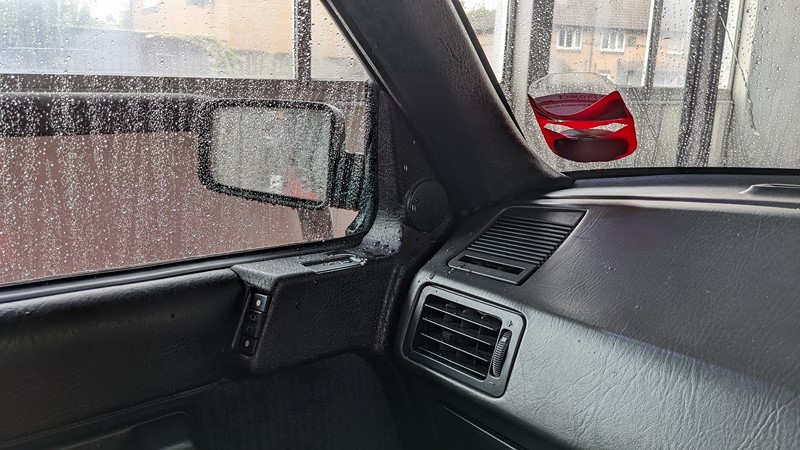
There is also little I can do to catch the torrent. With a high vis vest, the best I can manage is to divert the flood towards the floor mat and mop it out later. Why? Why have I been so damn stupid?
And this is the result of the car wash V’s windscreen seal. A predictable low for the hardened old rubber. The shame consumes me. So after roughly shoving the seal back into place, I set off in the direction of Halford for a bucket of sealant.
Car wash leaks are not the only damage.
I have had past horrendous experiences with machine washes, or more specifically, the acid waste that gets sprayed on. Really I should have learned my lesson. I took the car to a similar wash about ten years ago and burned the paint with the etching mess they splattered on.
And guess what, I’ve gone and done it again! This time the damage looks more like something that has been left behind on the paint rather than burned into the surface. This gives me a little hope, but not a lot. I suspect correcting this will be rather expensive.
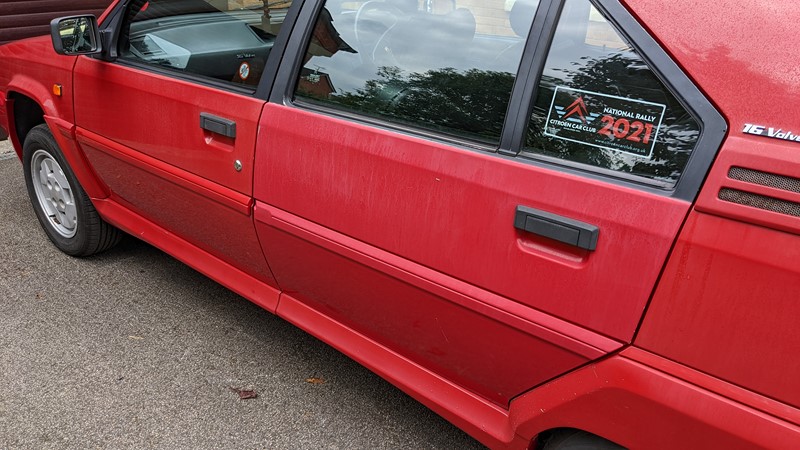
The damage does really emphasise the replacement rear passenger side door. This door was taken from an H-Reg car and replaced after coming together with a Ford KA, which sustained no damage. My own damn fault and something I’ve had to live with. I now know the door that came off was entirely salvageable but went to scrap.
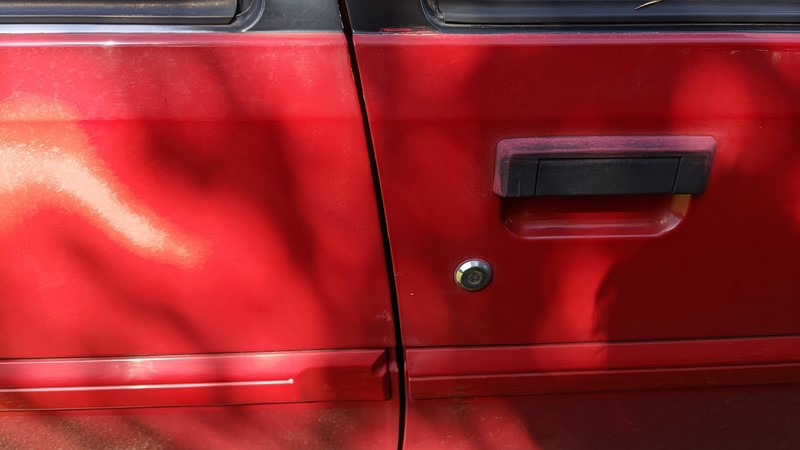
A once-over with some coloured T-cut, a very gentle formula, and the damage is at least hidden a little. And after my tame valeter has been to visit, it looks like this miss adventure will cost around £150 in total. There goes all that wage from working overtime. Overtime which forced the shortcut in the first place. Bugger.
Tackling the first of many leaks
The leak around the windscreen and the escaping windscreen seal are things I’ve known about for a while and failed to tackle. The route cause is, as often the case, a poorly fitted replacement windscreen before I had the car. There have been a few attempts at slowing the damage, but now is the time to go big or go home.
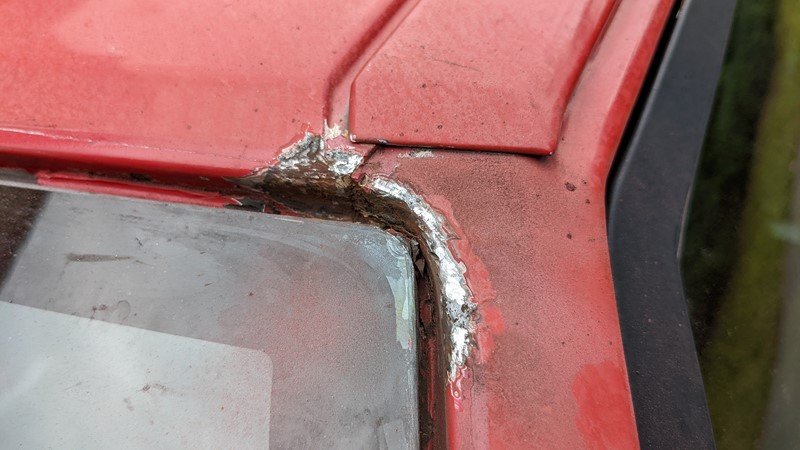
Removing the rust from the window frame.
Starting with a bit of good old screwdriver poking, the top of the A-pillar is quite crunchy, despite being treated just four years ago. Part of the reason for the seal escaping is that there isn’t enough room between the corner of the glass and the steel frame. The seal cant grab hold of the window like it should.
With some careful and slow application of a Dremel grinding wheel, I manage to open up the gap glass to steel gap. This is nerve-racking stuff, a little too much pressure, and the screen could well go bang. I’m almost resolved, at 4 pm, to the fate that I won’t be going to FotU this year.
Getting a flush fit on the window seal
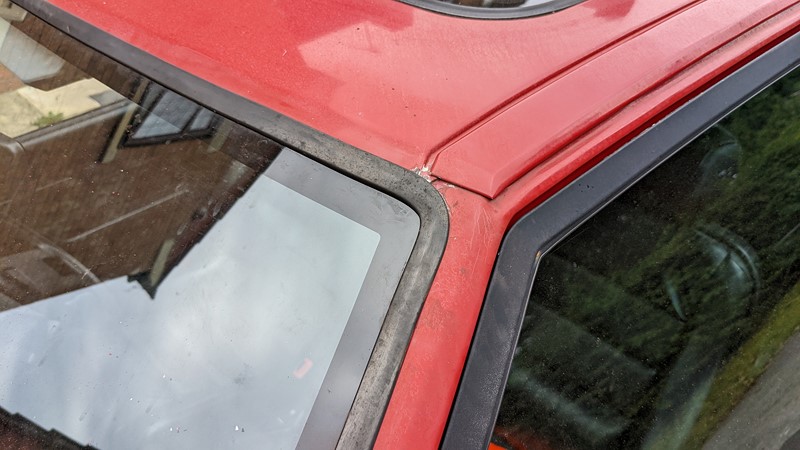
However, after a half hour of gentle whittling, grinding and sanding, the seal is flush again. This is actually the best fitment the seal has had in my ownership. There is no time to waste, though. The exposed metal work needs treating fast.
Treating the exposed metal
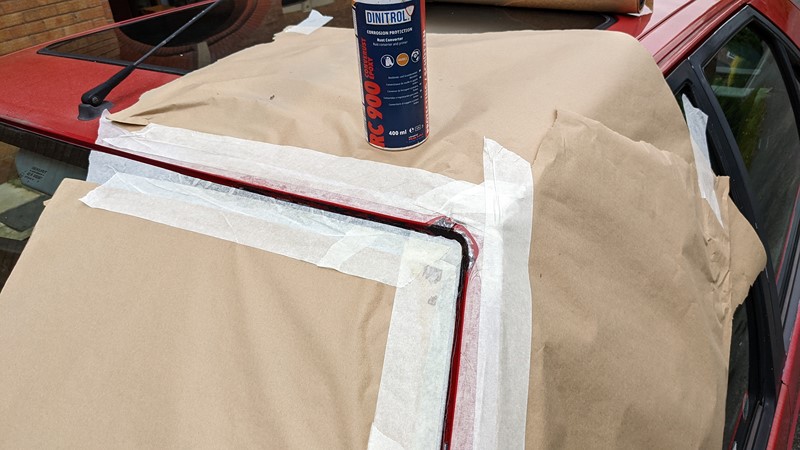
After what is probably excessive masking, the exposed metal work gets a few coats of Dinitrol RC900. I’ve been using this epoxy rust converter/sealer for many years now, and it gives pretty good results. Better still, it takes paint well. So once the Dinitrol has dried, the area sees a few coats of high-build primer.
Sealing the seal back in place
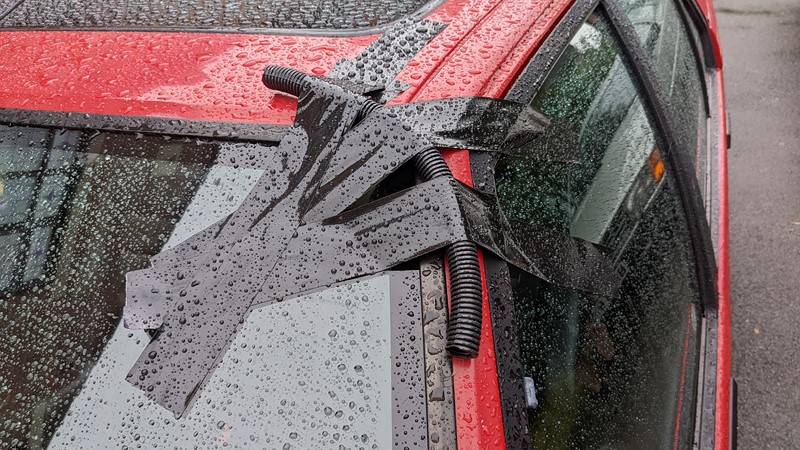
I’m fighting drying times, and while I normally leave layers a good 24 hrs to cure, I don’t have the luxury. After the Santorini black top coat becomes touch dry, the seal goes back in. It goes in with a half tube of Granville black silicone sealant. Not the ideal sealant, but it should stop the many leaks around the seal.
The somewhat elaborate holding method for the seal, while the sealant cures, seems to do the trick. After 400 miles, the seal hasn’t lifted, and there have been no more leaks. Clearly, the windscreen will have to come out at some point, but maybe in another five years?
Changing the radiator, more leak prevention.
Regular readers will know that last year’s trip to FotU nearly ended in a terminal disaster. Failure of the cooling fans in the ‘FotU Endurance Entrance Event’ led to an overheated engine. Since the festival, the fans have been made operational again, but improvements are still needed.
First up is a coolant change. I don’t think the coolant has changed for around ten years. And while it was a 50/50 mix of coolant and de-ionised water, it is clearly past best. I bet if I let this murky green coolant settle out, there will be a lot of brown sludge there, too.
Flushing out the cooling system
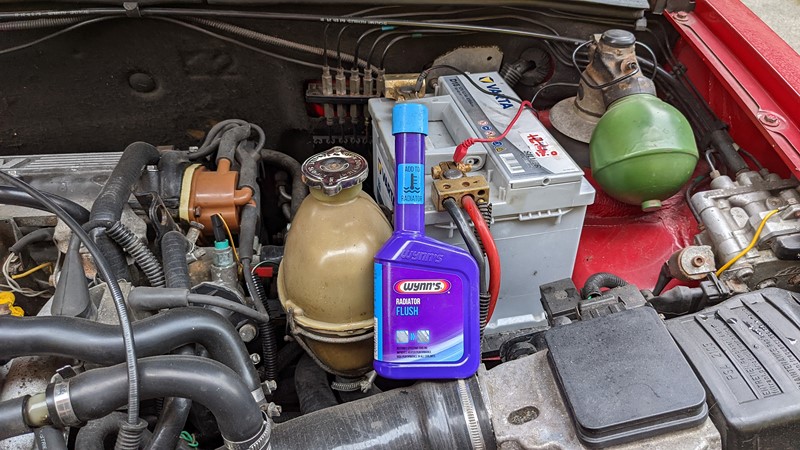
I’m all for a little helping hand in loosening the grime in the coolant system. So along with a decent reverse flush and scrub of hoses, I’m going to through in some Wynns Radiator Flush. It may, of course, be snake oil, but it certainly seems to have some detergent-like quality.
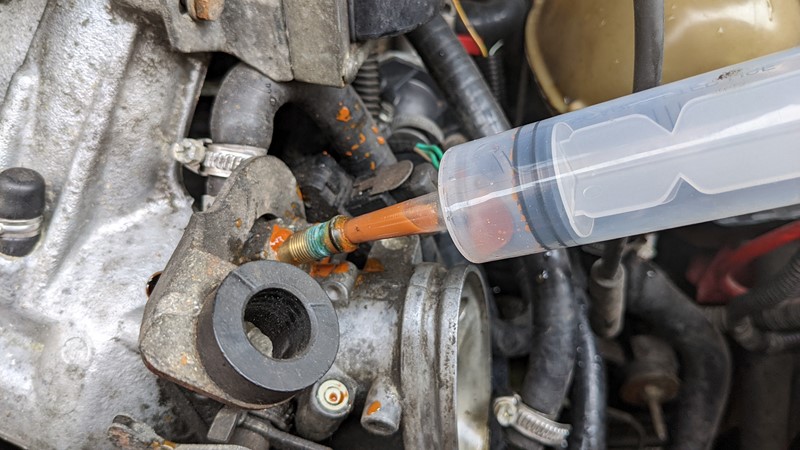
While most of the pipes seem to flush out clean, the small gallery through the throttle body is completely blocked. A small screwdriver, wood screw and application of both vacuum and pressure eventually free up the passage. It’s more time I don’t have, but there is no point in tackling the coolant change if passages are blocked.
Preventing cooling failure with a new radiator
Bulk buying all aluminium radiators
I’ve recently invested in a Chinese-made all-aluminium radiator, having struggled to buy a new replacement radiator. In fact, I’ve invested in a pallet load. While the original Ordenez radiator doesn’t leak, it is 30 years old and probably past best. And if it fails, there aren’t any more OEM replacements.
To prevent any disasters waiting to get into car shows, I figure a replacement aluminium radiator can’t be any worse in performance than the OEM and is worth protecting the engine with. These radiators are neither of the current offerings found on eBay.
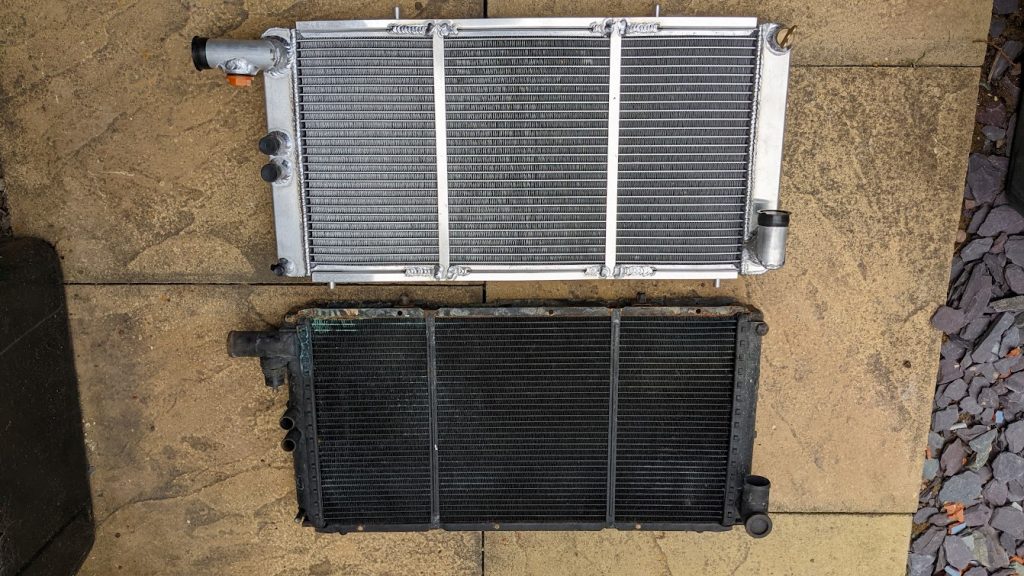
The GPI Racing (£280) and Winner Racing (£319) have both been used successfully by members of the BX community. Both have design issues, and compared to the £150 radiator I have acquired, they are both rather expensive.
Removing the Citroen BX 16Valve radiator
The inlet manifold on the Citroen BX 16Valve engine is rather large, resulting in the radiator being installed under the front slam panel. Many BX models have the radiator behind the slam panel, taking space in the engine bay but allowing a bigger surface area for cooling.
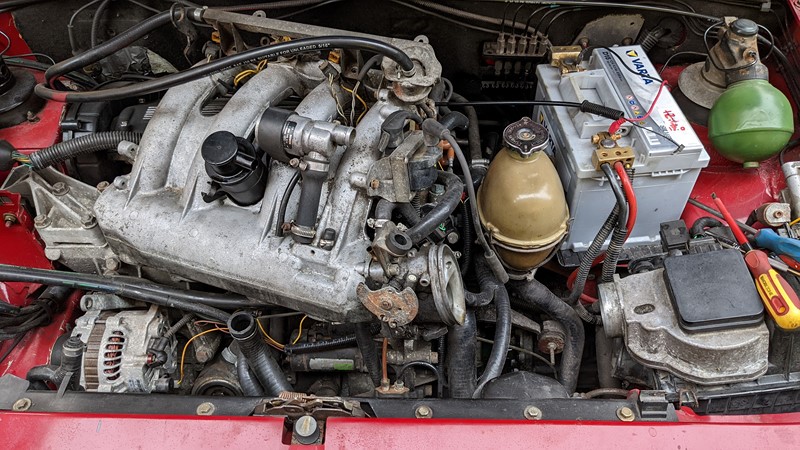
The large intake and installation position means a lot of work is involved in changing the radiator. However, while it may look daunting, it’s a straightforward task and something I have rehearsed many times before. In total, it takes about 30 minutes to get the old radiator out.
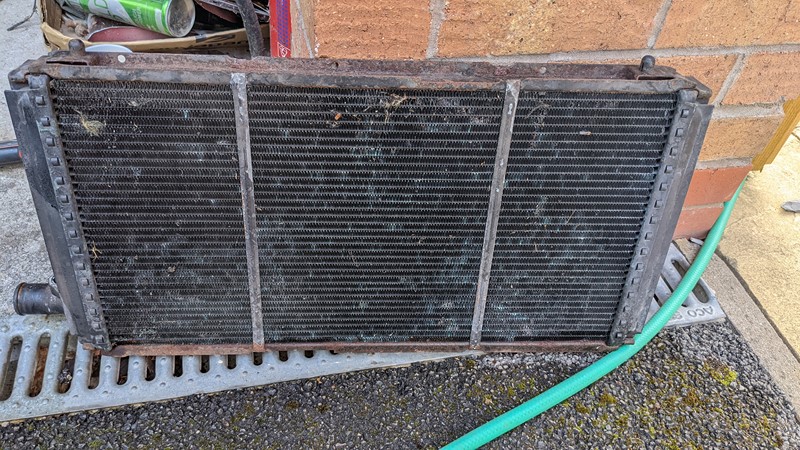
Once the old radiator is freed from its tomb, it doesn’t look too bad at all. Sure the frame that supports the top and bottom is crusty. But the fins are all intact, not damaged and not perished. A quick flush of the radiator and there is a reassuring lack of slime pouring out. It will stay in the spares pile for now.
Installing the new aluminium radiator.
Although I’ve measured up the new radiator against an old one, and they are dimensionally accurate, I’m yet to fit one! If I can’t fit the new radiator, this could be another nail in the FotU coffin. Let’s hope it fits!
First thing is to carry over the rad fan switch. Now, for a long time, I had been convinced the radiator had a diesel switch fitted. This has lower switch points, and so I had always been concerned when the cooling fans kicked in ‘late’. However, the radiator appears to have the original spec 88/93 switching points.
One difference I had already spotted was where the coolant dual outlets sit above the main radiator outlets. On the original radiator, one of these feeds the oil cooler, while the other is blanked off. This aluminium radiator allows flow through both outlets, so it needs a cap to be added to one port.
Overall impression of the new radiator
Perhaps to be expected, the aluminium radiator drops in quite happily. The radiator core is slightly thicker than the OEM radiator, but this doesn’t seem to impact installation. Overall there are fewer fins in the core. This reduces surface area to allow heat transfer, but the bigger spacing allows more airflow. I’m not sure if this will help or hinder overall cooling.
The only issue I can find with the new radiators is a small clash with the air feed pipe that runs to the engine’s air filter. The piping is all plastic, so easy enough to push past the radiator’s inlet pipe. I’ll need to keep an eye on this area for abrasion, but for now, it’s fine.
Refilling the coolant system
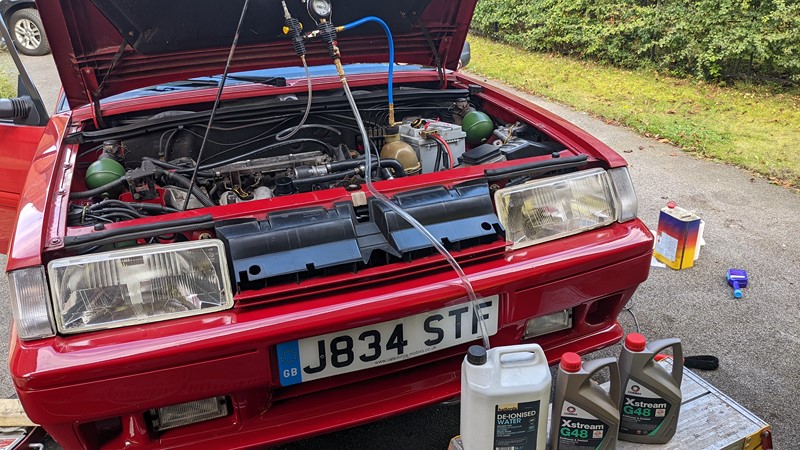
Being limited in time, I’ve grabbed whatever coolant Halfords have on the shelf. In a previous life, I have used hundreds of litres of Halford’s own brand coolant with excellent results. Unfortunately, they were out of stock, so I’m using the Comma Xtream G48. It’s probably the same stuff. I also try vacuum filling, which simply can not draw enough vacuum with my weedy compressor. So it gets filled as best I can. Later I can look forward to a few hours of chasing the bleed nipples around.
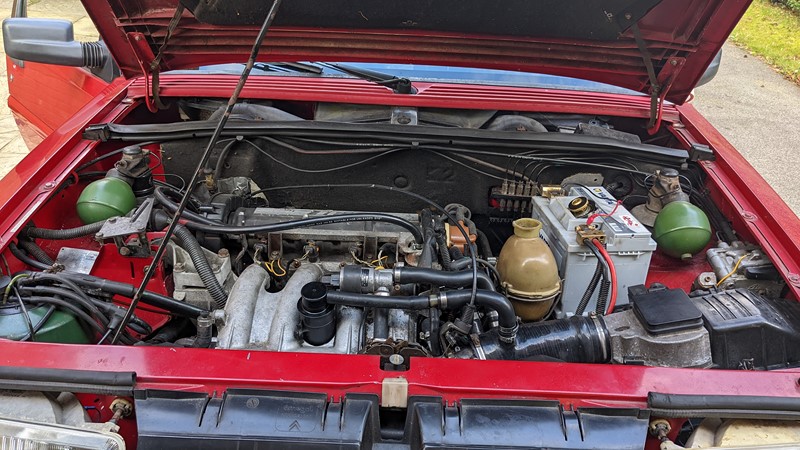
Changing the engine oil
While I’m changing fluids, I figure it’s about time I change the engine oil too. While it’s only around 6000 miles since the last change, that’s a lot of years ago, and it is well overdue. Once again, I plug the Wynns products, this time the Engine Flush can of wonder. I’ve been using these for years on petrol cars. I’m pretty sure they are just a can of kerosene, but they certainly seem to help get more gunge out.
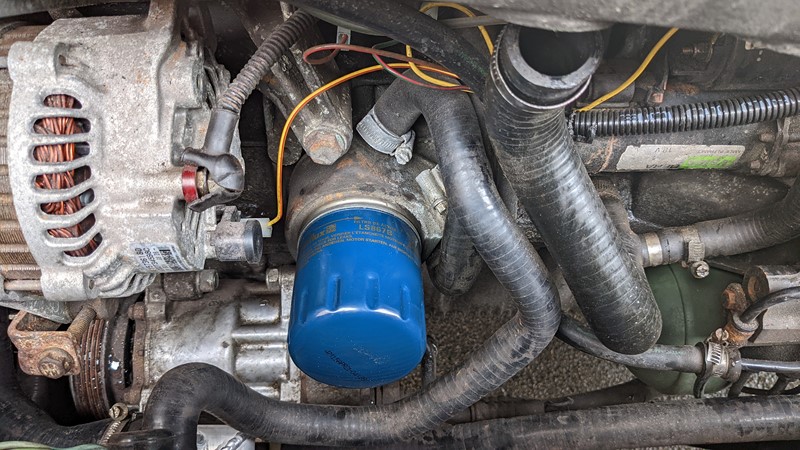
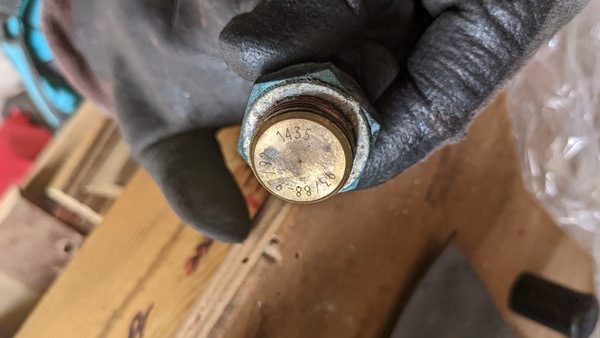
The other benefit of having the inlet off is that the oil filter is readily accessible. It can be removed from underneath, but the non-functional air con pump I carry around on the engine makes it very difficult to get out. While I hadn’t planned an oil change at the start of the day, I do keep filters and sump plug seals in stock for rainy days.
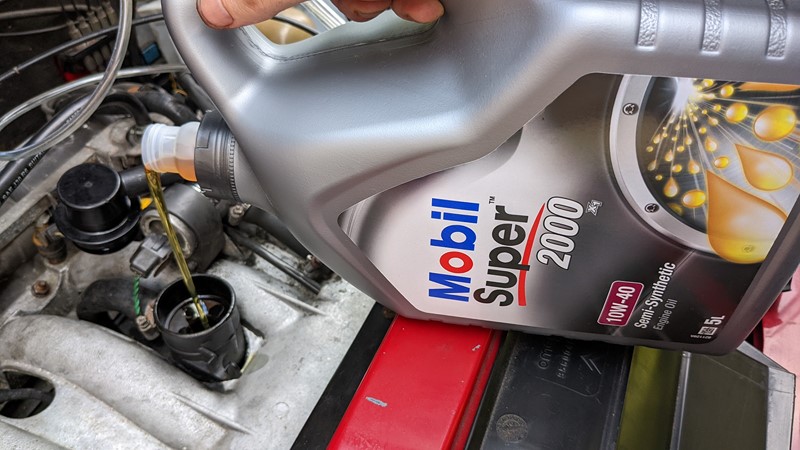
I’ve always preferred Total Quartz 5000 mineral oil for the Mi16 engine. This is the correct oil for the car, but it seems to have become obsolete. In fact, all pure mineral engine oils have disappeared from motor factors. So I’m giving this Mobil Super 2000 a try, and I’ll have to see if I can detect any difference. Probably not!
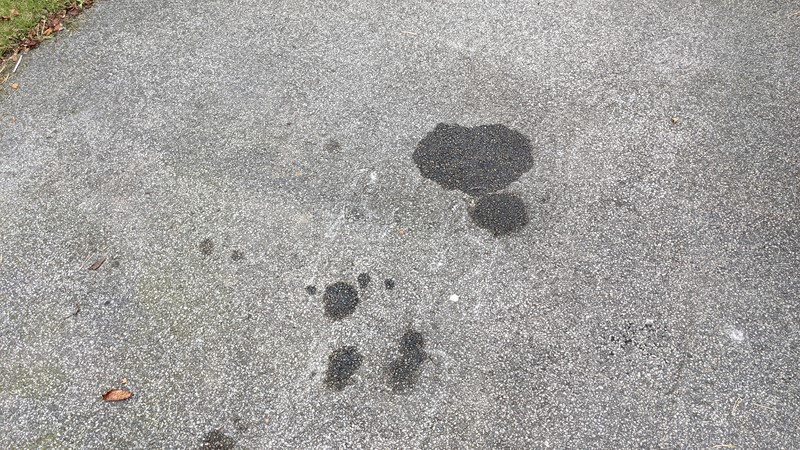
Finding the illusive fluid leak
I’ve been aware of an engine bay fluid leak for a while now. The tarmac driveway really helps to show it up! The leak is roughly on the gearbox side of the engine bay, although it wasn’t clear if it was ahead or behind the gearbox.
A potential leak quick fix in the engine bay?
One thing I did know was that it has been getting worse and worse. The large puddle above wasn’t there before I went for a test drive after replacing the fuel pump. This is certainly not something I’m happy to drive around with unless I know where the leak is coming from.
I knew that the brown-coloured front to the rear pipe was weeping in the engine bay. While it is moist, it’s not leaking enough to cause the size of the fresh puddle on the driveway. A quick nipping up should solve that one.
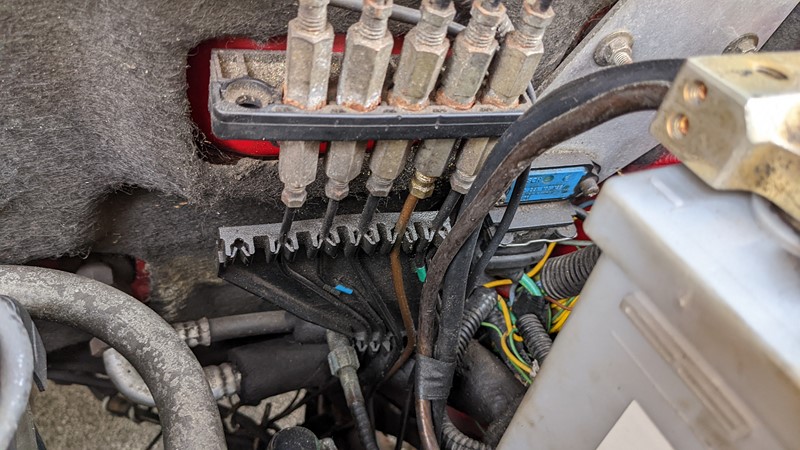
All the leaks are black, and the source is, erm?
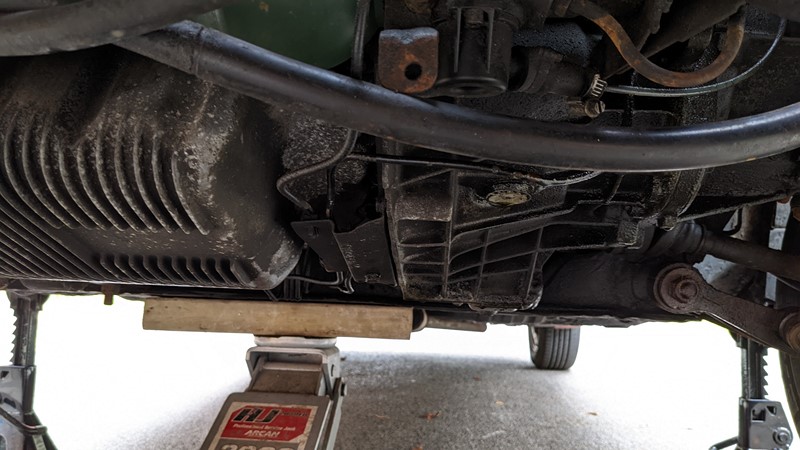
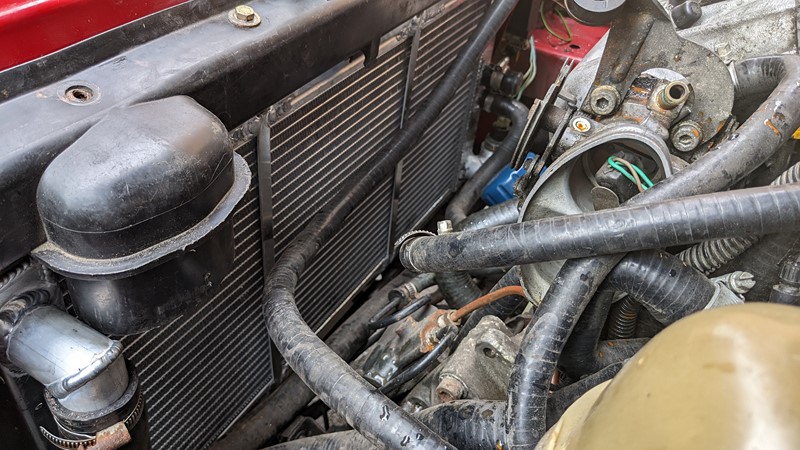
Getting under the car doesn’t tell me much, either. Drips are everywhere, and the fluids are all black when running over the engine or gearbox. The underside does get a bit of degreasing and gentle hosing off in the hope that I can better diagnose the leak’s source later.
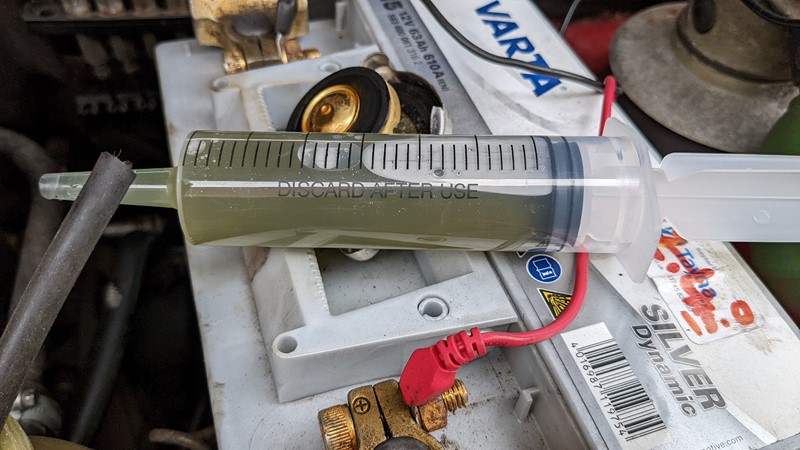
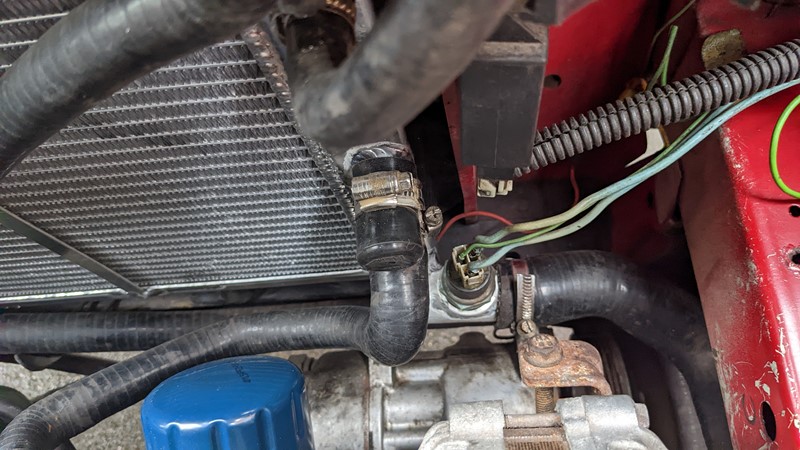
A hydraulic feed pipe leak
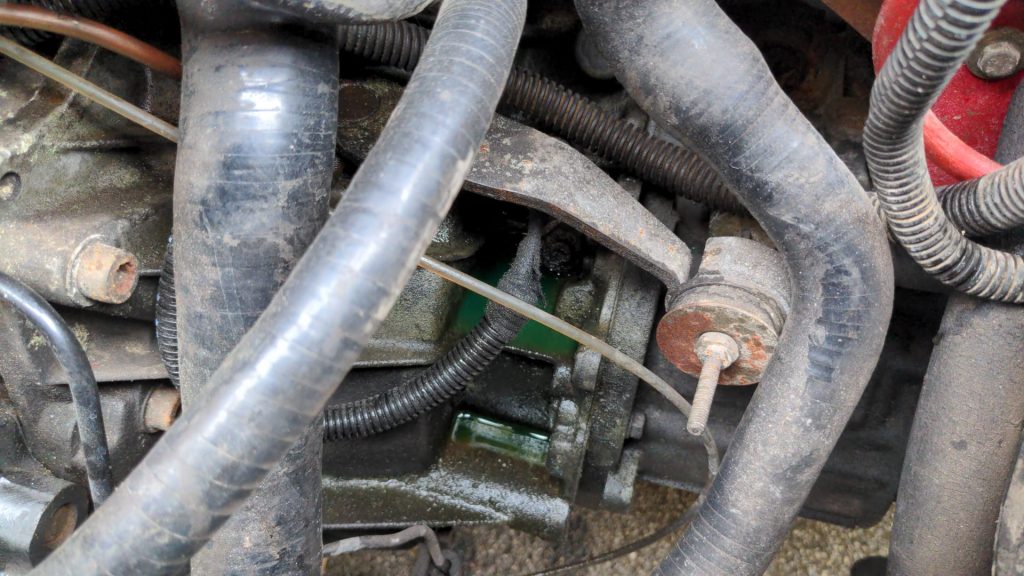
I remove the coolant header tank and back up the top of the engine, searching for a leak. Underneath is a huge pool of bright green LHM. It’s probably 50ml to 100ml of fluid. That is no small leak, and it really shouldn’t be there. In this area are only two pipes. The low-pressure feed to the HP pump and the high-pressure metal pipe that supplies the green magic. And sure enough, there is a weep on the pipe.

Sure enough, once the pipe is removed, there is some clear damage. There isn’t an obvious hole, but this is a high-pressure line, and even a small amount of damage can lead to a huge fluid flow. From memory, the system runs around 180 bar and can spike to 300 bar. The fact the pipe hasn’t ruptured is a miracle.
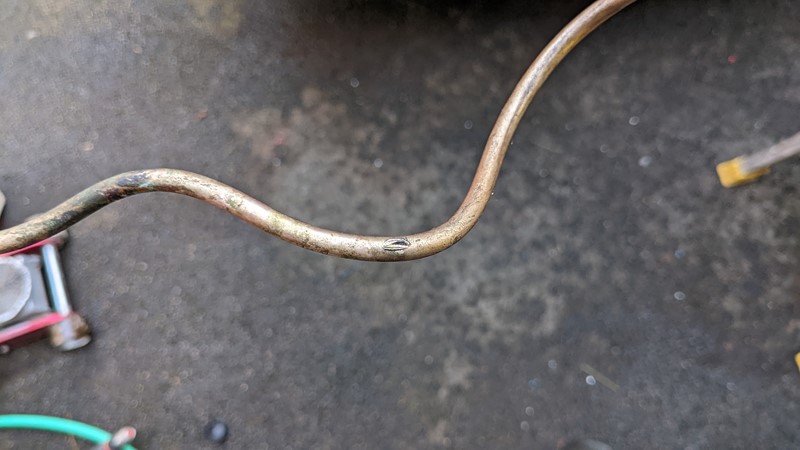
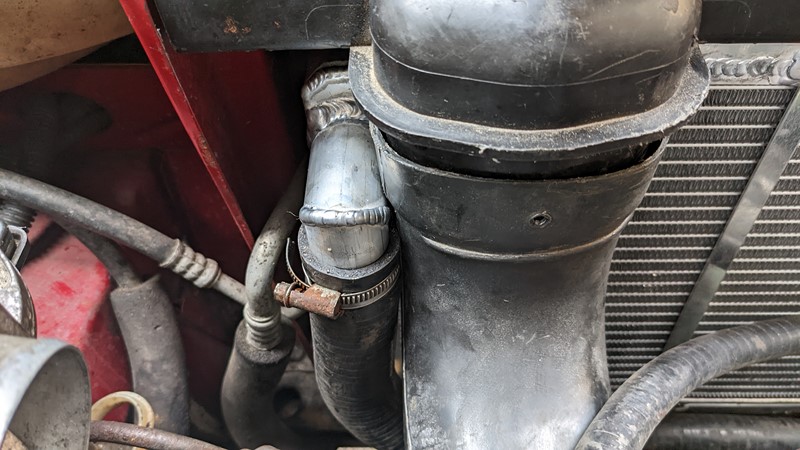
I don’t have a spare pipe, so this definitely puts me out of the running for FotU. Or does it? The pipe on XPO still sits on the car, and while it’s rather bent, it looks solid. Cleaning it inside and out, I manage to bend it just about back into shape. In fact, it pretty much drops into the car. XPO’s pipe shows me how the replacement pipe I installed a few years ago was completely miss routed. Doh!
Will I need to cure more leaks?
The answer to the question ‘will I need to cure more leaks’ is undeniably a definite yes. But right now, I have my fingers crossed that the car will get me to the festival. It’s will be around 120 miles, and I’ll be travelling with good company in their Hyundai Steller. Between us, we should manage to fix any other breakdowns.
With the engine bay all back together, I need to stake stock of the last few weeks of maintenance madness.
- The fuel pump, fuel filter and rear fuel hoses were all replaced
- Coolant system flushed, new radiator installed and all refilled
- Engine oil was flushed, drained, replaced, and a new oil filter fitted
- Windscreen seal removed, metal work treated, glass trimmed, and reinstalled
- The main hydraulic line was replaced
- The whole car gets abruptly T-Cutted to hide the paint damage.
As I see it, the chances of making it to FotU without some sort of issue are very small. I don’t even have time to road test. By the time everything is back together, it’s gone 9 pm, I’ve not eaten all day, and really I just want to sleep!
M
NEXT – Festival of the Unexceptional 2022
PREV – Citroen BX – FotU Prep – Fuel Leak
Back to Citroen articles
Back to Automotive articles
Amazon Affiliate Links – Things used in this article
BXProject is using Amazon Affiliate Links. It’s a quick way to show you what I have used in this article.
“As an Amazon Associate, I [may] earn from qualifying purchases.”
Since January 2024, Amazon has blocked embedding images, but I think the links are still valuable.


Nail biting stuff : )
Hey mate, enjoy this blog, well done- i would love to know where you got the radiator- which supplier etc- as they are impossible to get over here in NZ, and the llast attempt with a chinese supplier was a disaster! Cheers!