
With the engine build coming together, I need a place to put it. Since the initial inspection of XPO, it has been clear that I will need to do an amount of bodywork repair around the A-pillar. Unfortunately, repair panels don’t exist for this area. So I need to know how significant the rot is and just how much needs to be replaced. Then I can consider taking a body cut from another car to take repair panels from.
Getting into the rot
To get a feeling for how much tin worm is in the A-pillar of XPO’s, I need to get under the surface panels. I’ve already stripped out the interior to be able to see one side of the rot. How many layers of the A-pillar are rotten will determine how much metal will need to be replaced.
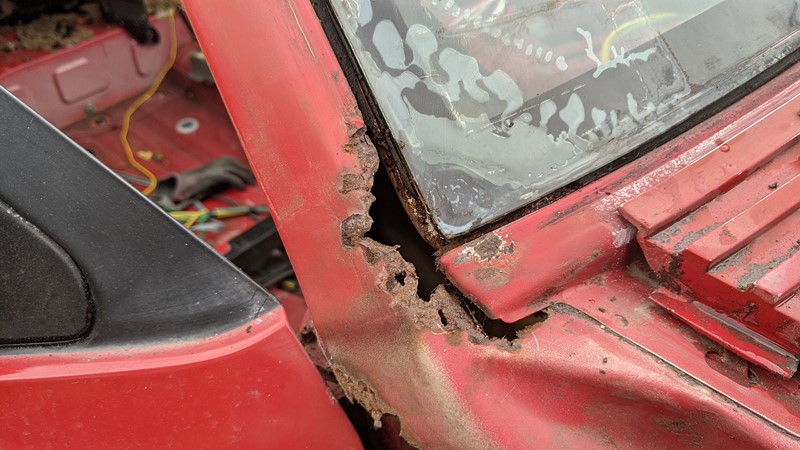
The very bottom of the A-pillar is so heavily oxidised it doesn’t offer much strength. I’m happy to cut into it. However, the consistent gap between upper and lower segments indicates how little of its original function it currently serves.
Fortunately, and unexpectedly, the door panel to which the hinges are attached seems very solid. Typically the flex induced by the door, coupled with the multi-layer construction, causes serious oxidisation around the car side of the hinges. Eventually, if left, the door will fall off. I’ve already had to tackle this on my daily BX.
Cutting off the bottom of the A-pillar also shows the rot isn’t as bad as it first seemed. The inner wings, while they need attention, have plenty of solid metal. The rust is primarily contained in the vertical panel behind the door pillar and the lower half of the outer A-pillar.
There is also an amount of rust in the scuttle under where the washer bottle sits. Usually, this starts when trapped dirt, along with the car’s vibration, slowly wears through the paint. Then, once moisture gets in, the rot quickly tracks into the panels, hidden by the washer bottle.
Finding the right body cut
This investigation into the rot gives a good idea of how much I need to cut out of a donor car. The main reason I need a body cut is the complexity of the a-pillar panel. These are curved and tapered in every direction. Something akin to Penrose stairs, those mind-bending pictures with staircases all over the place. Not something I am confident to bash out of a flat tin.
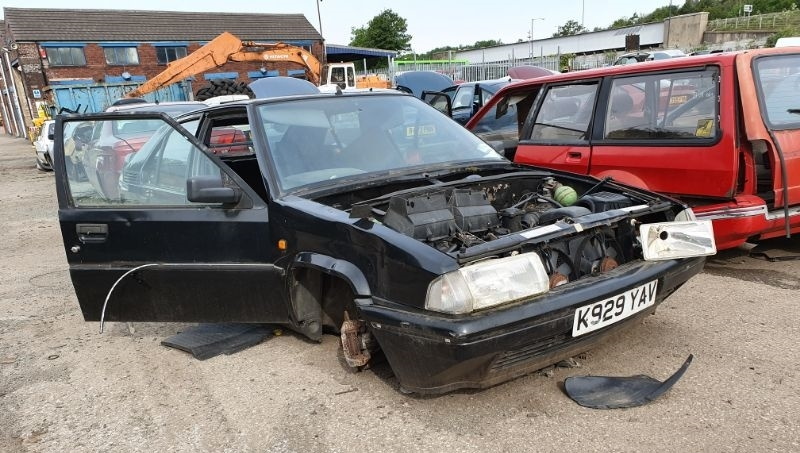
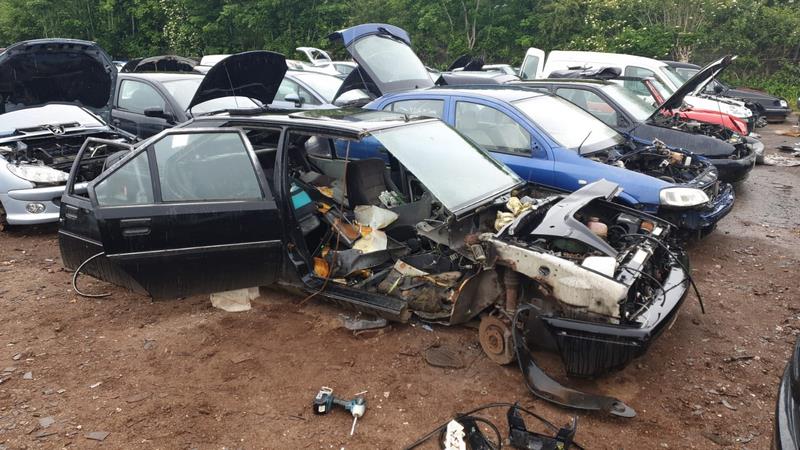
The original plan was to take a body cut from a donor car a local Citroen Specialist has. But that car is complete. I’d recently found out that my favourite UK car dismantlers had a BX in stock! The vehicle had been there since 2018, so I was suspicious as to what condition it would be in. I had a quick chat with guys at Albert Looms in Derby and soon had pictures of the car’s current state.
Taking the body cut from a donor
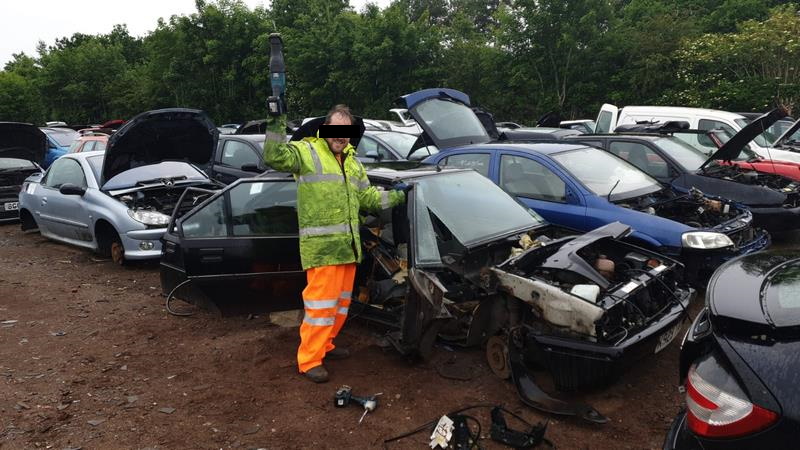
From the pictures sent by the guys at Albert Looms, the car looked like a perfect donor. It’s not red, but I’m not too concerned as all the repaired panels will need painting. They also won’t be visible. So with a boot full of tools and an assistant usually referred to as “brute force”, I set off to the outskirts of Derby to chop out the bodywork I needed.
Choppy Choppy

Perhaps not surprisingly, this is not the first body cut I’ve taken from a car, so I arrive well tooled up. There is a lot to be said for a battery reciprocating saw. I’m surprised just how well it will go through a laminated glass window. Best of all, the cleaved pieces of glass don’t have horrendously jagged edges. This is fortunate given how many times I head butt the cut-glass edge while hacking through the floor.
Success In Dismemberment
While the door pins were initially reluctant to give up, I had the door off pretty quickly with a bit of brute force and a carefully crafted scrap yard tool. I’ve no idea why I’ve saved the door on this tatty donor. Cutting through the hinges would have been much quicker than taking the pins out. Hopefully, the effort will help someone in the future.
Only a little hurt in this destruction
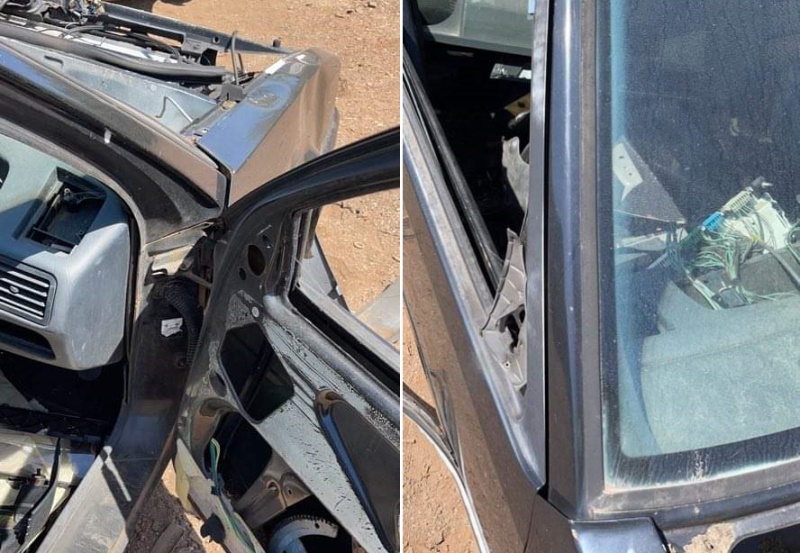
It’s a surprisingly neat job in the end. The only snagging point was in the floor panel just behind the wheel. It turns out multiple panels overlap here. While I’d cleanly cut through one panel, the other had escaped the repeated impalement of the reciprocating saw. In all, it takes about 2 hours to get the door off and the body cut taken. A final cost of £25 for the cut, window seal and other bits and bobs seems like a bargain. I love Albert Looms scrap yard in Derby. It hasn’t changed much in the decades I’ve been going, cheap as chips and super friendly.
How good is the body cut?
Perhaps not surprisingly that a BX sat in a scrap yard for at least three years has a touch of rust. Especially when it has sat there with doors open and no bonnet. Going by the floor pans and wheel arches, I suspect rot is possibly why the car went into the yard in the first place.
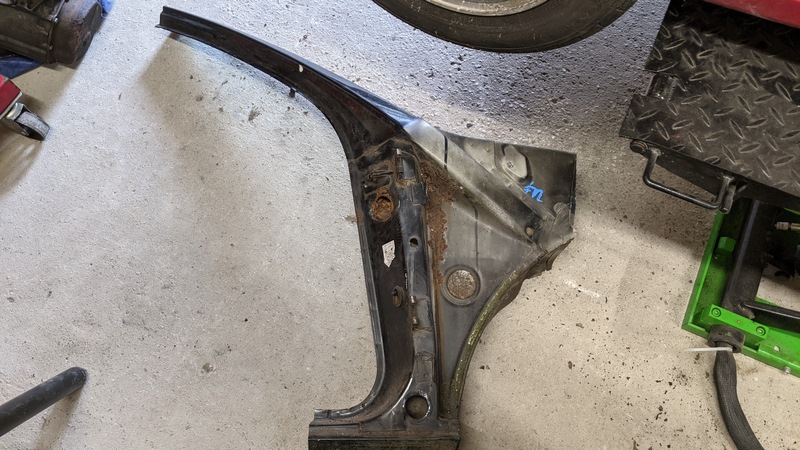
Despite the tin worm climbing through the car’s structure, the pieces I need are in reasonable condition. Now that they are back home in the dry, I can start to pull apart the parts I need and repair any damage in the donor panels.
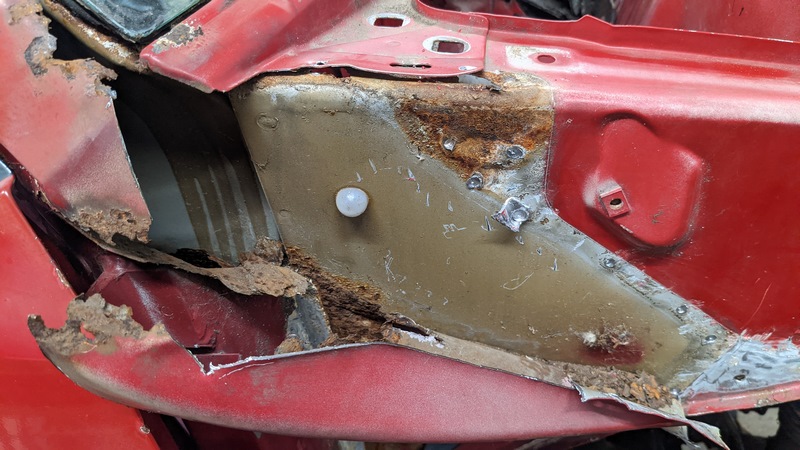
While I know the door hinges often rust out due to repeated flexing and several panels being stitched together, I’d never really understood the structure. The picture above shows the area that is home to the windscreen washer bottle. The wheel arch is to the right, windscreen towards the left. What surprises me is how badly the individual layers overlap. There are big gaps and a considerable amount of seam sealer used between the layers. It’s no wonder moisture can get under the paint and do so much damage here. But I guess this is the oddity of looking after cars well past their design life.
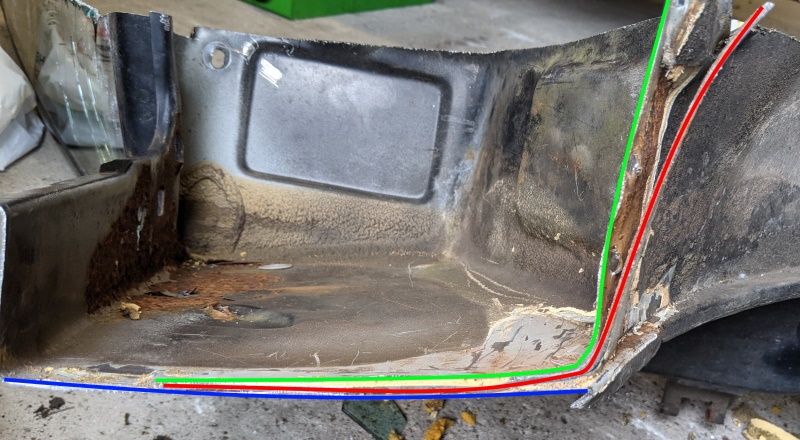
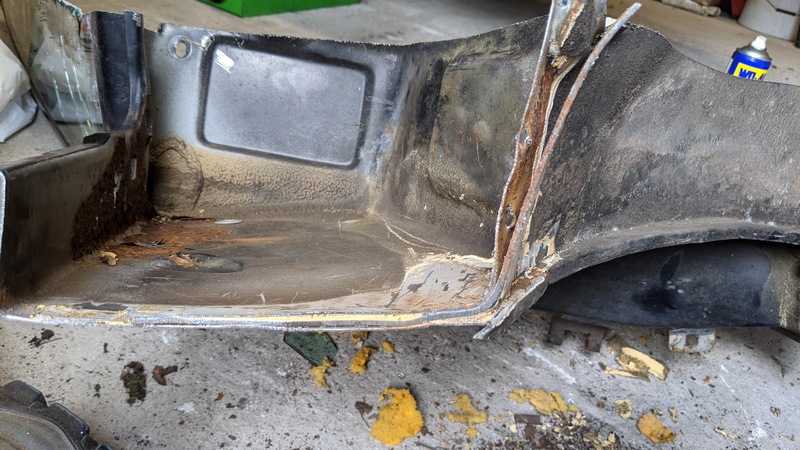
In the picture above, I’ve tried to highlight some of the key panels in the area. The red line is the 2mm strut mount panel. This panel holds the car off the floor, so it is some of the thickest metal in this tin can. The blue line is the ‘inner wing’. The area under the corner of the windscreen is looking particularly crispy which is not a surprise. It is common to find rust in this area. It’s usually treatable but many owners don’t realise they have rust here. Finally, the green line is the engine bay firewall. Rot in the scuttle typically starts at the leading edge of this panel.
Tackling the repairs
While there is quite a bit of rust in XPO at various levels of dereliction, none of them is particularly worrying. Individually I’m happy I have most of the skills required to tackle the repairs. But as a whole, I’m a little nervous. It is such a patchwork of holes that attempting to tackle in one hit will end in tears. By which I mean it’s akin to a giant tower of Jenga that’s been played by drunk adults for many hours. Yes, it is still a tower, but it will not take much to bring the whole thing crashing to the ground. Or worse, simply twisting the body of the car.
After much deliberation, the approach I’m going to take is to tackle each of the accessible areas before pulling the A-pillar off (with the door hinges). I’ll start in the scuttle area, over the off-side suspension turret. Repairing this will let me pick the car up by the subframe rather than the sill. Hopefully, this will stop the a-pillars collapsing against themselves. Then the outer wing will get a few patches. It is not structural, but it’s something I’ve tackled before, so I’ve confidence in how to approach it. Then the huge holes will need to be tackled.
I guess what sets the milestones for future articles. The schedule, however, will, as always, is set by the family!
M
NEXT – Citroën BX – XPO – Welding the Suspension Turret
PREV – Citroën BX – XPO – Mi16 Engine Assembly