
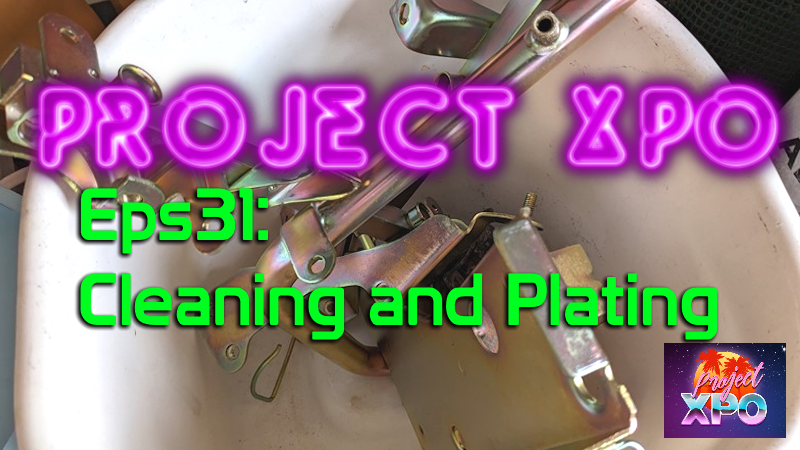
Let’s be honest and open. At 30 years old, XPO is no spring chicken, and I never want to achieve a concourse condition rebuild. Despite the many years this build is taking, I only want to get the car back on the road, safe and reliable. That said, some of the parts are so filthy or corroded, that even I struggle to tolerate them. Rather than farming them out and adding more cost, I will attempt cleaning and plating the most visible parts myself.
The state of corrosion
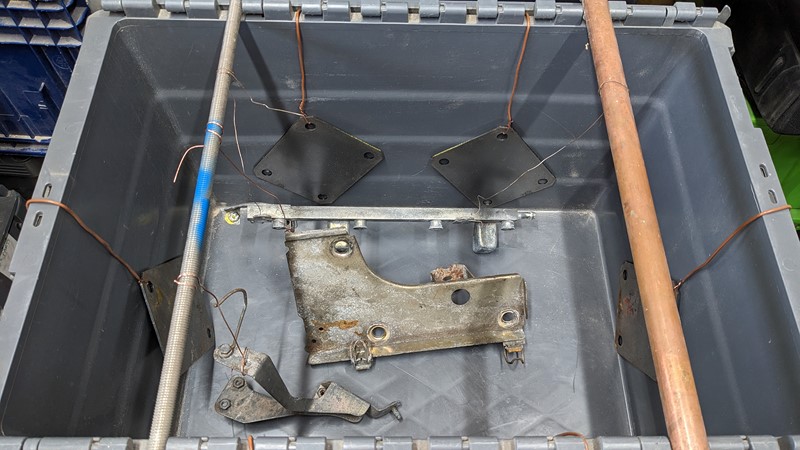
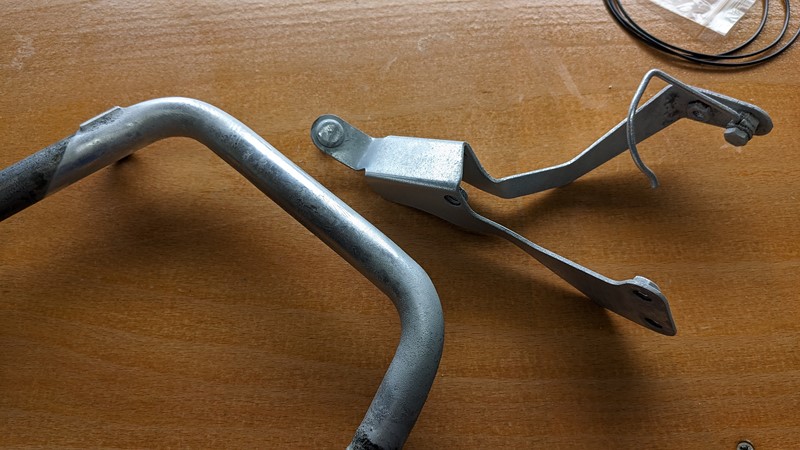
Despite XPO having been ‘off the road’ since 2008, there are definitely some parts of the car that look like they have been under the sea. As far as I know, since 2008, the shell has always been stored outside, which certainly shows!
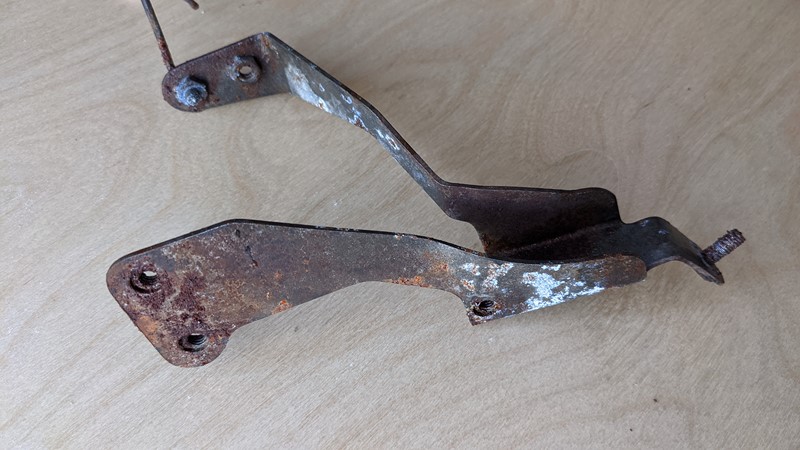
The coolant expansion chamber bracket (95636989) is a prime example of what I face with so many of XPO’s parts. The corrosion is, fortunately, only surface deep, but it will need some serious cleaning. The plan is to do more than a quick rub down, but to do some serious DIY cleaning and plating.
Electro cleaning
The quality of plating is entirely in the preparation. For the DIY cleaning, I’m starting with electrolytic cleaning. A chemical bath of salts with electricity running through it and the parts may sound excessive, but the reality is quite simple.
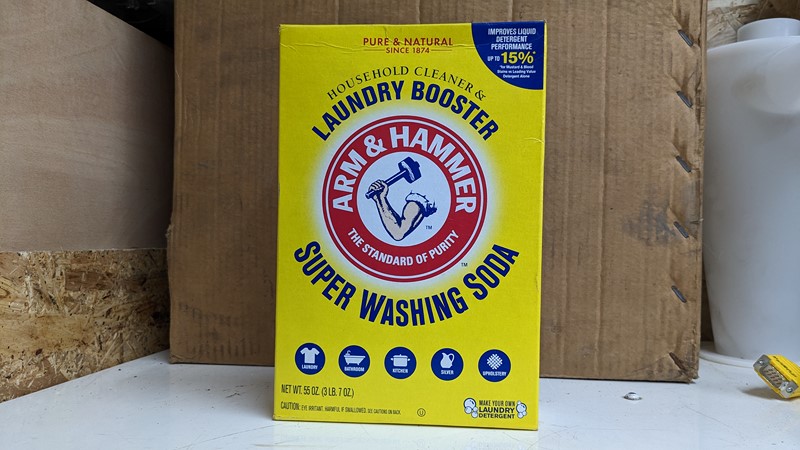
First up is the chemical bath of salts. At the fundamental level, the salt bath allows the electrons to flow from the dirty part to the anode, taking the rust with it. I won’t claim to understand the chemistry in detail. I know just enough to make it work, but plenty of good online resources exist to learn more. You can buy many formulas from specialist vendors, but I like the triend and tested simple method. Arm and Hammer washing soda is all the salt bath I have ever needed.
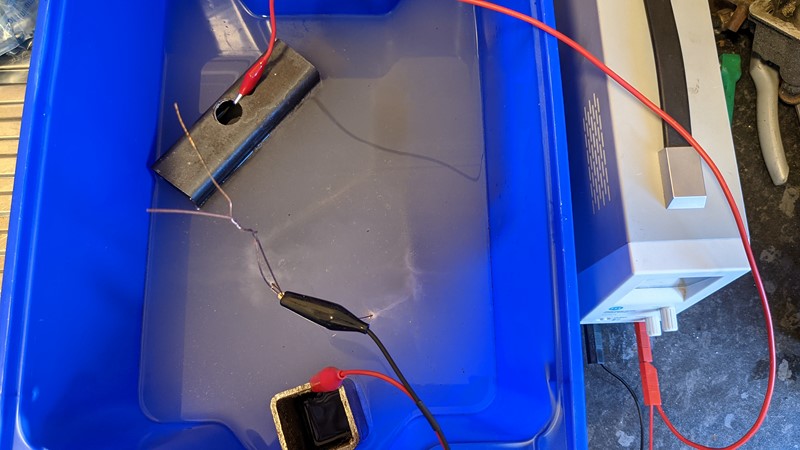
Mixing up the salt bath, the parts and receiving anodes go into the tub. When the power is turned on, the mild steel box section will ‘pull’ the rust off the target part. And the process doesn’t take a lot of power either. Once the electricity is flowing, you’ll know the cleaning has started by the flow of bubbles coming off the part being cleaned.
Upping the cleaning power
As great as the little blue 5-litre box is, some parts are too big to fit. Eventually, the bath needs to grow, and the power needs to be cranked up.
I want to say I went for a minor upgrade, but nope, all in with a 40-litre bucket. And there is no sink in the mega shed, so filling and draining this monstrous box is a little challenging. That said, I can get just about every car part I need into this massive vat of salts. And most at the same time.

The new bucket may be giant, but it’s also incredibly rewarding to see the bubbles forming when the power is turned on. Even more satisfying is the brown slick of rust that pours off the parts. Mmmm cleany!
Maybe too much power?
With more water, parts, annodes and wire, I need more power and a bigger power supply. While the 5amp power supply is current controllable, the only ‘big’ power supply I had to hand is a fixed voltage 40amp supply.

Well, all that power and all that wire might have been a little bit too much for the plastic bucket. After about 15 minutes of running, the wires got hot enough to melt through the box. Oops. A quick rearrangement and a current controlled power supply, and the cleaning could resume.
DIY plating kit-ish
In April 2021, when the XPO rebuilt project was still young, I already had dreams of doing my own plating and bought a kit from Classic Plating. At the time, the kit cost £124!
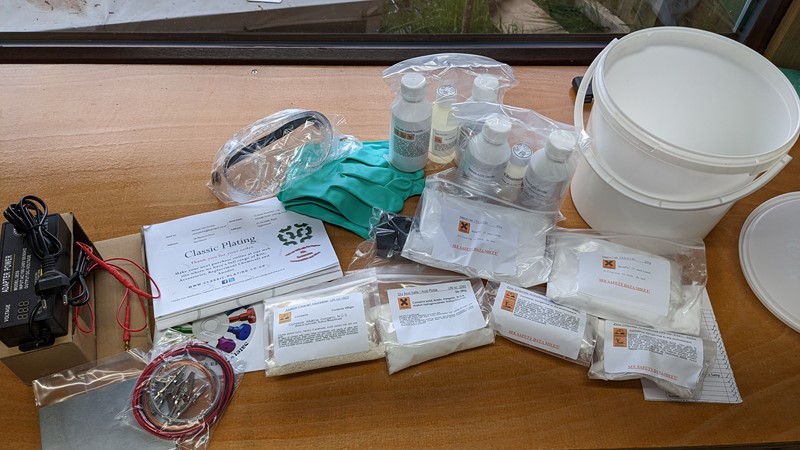
Well, where would you like me to start with the kit? First off, this is far from being a complete kit. To use this kit properly and efficiently, you need multiple buckets. In theory, I guess you could just use one, but really, you need multiple that are not included.
Poor quality power supply
During the cleaning process, I found the power supply was woefully inefficient for the job. Beyond having a Euro plug and being a £3 China cheapo, it didn’t really work. Once a euro adapter was found and the PSU plugged in, the indicator lights would illuminate, but getting power out was challenging.
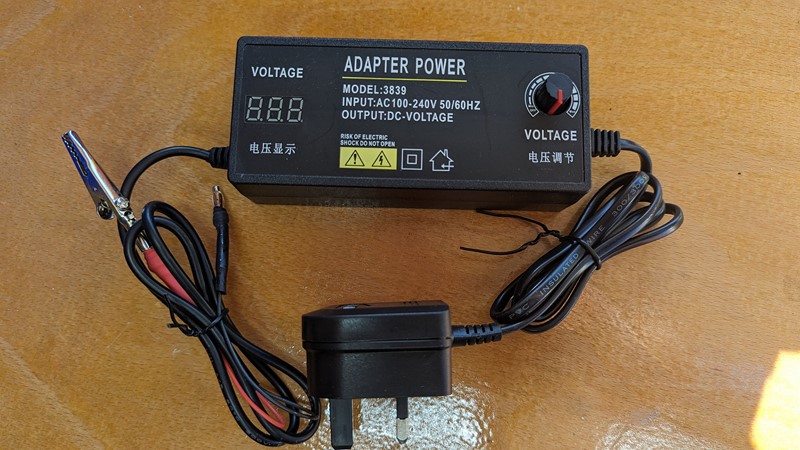
The PSU seemed to have some sort of soft start or switch mode that really didn’t want to know. If I could persuade the device to supply power, it wasn’t much and didn’t last long. It is not the end of the world, given my power supply stockpile, but it is disappointing non the less.
Difficult instructions
The printed instructions are somewhat optimistic. I work with complicated instruction sets, often poorly written, daily. However, the included instructions feel like someone’s scattered thoughts from 20 years ago, roughly typed up in a hurry. Then, they were printed out, dropped out of a window, collected back up and stapled together. I think there are instructions on the CD, but as it’s 2023, I can’t think when I last saw a computer with a CD drive. Okay, I have a few, but it smacks of effort.
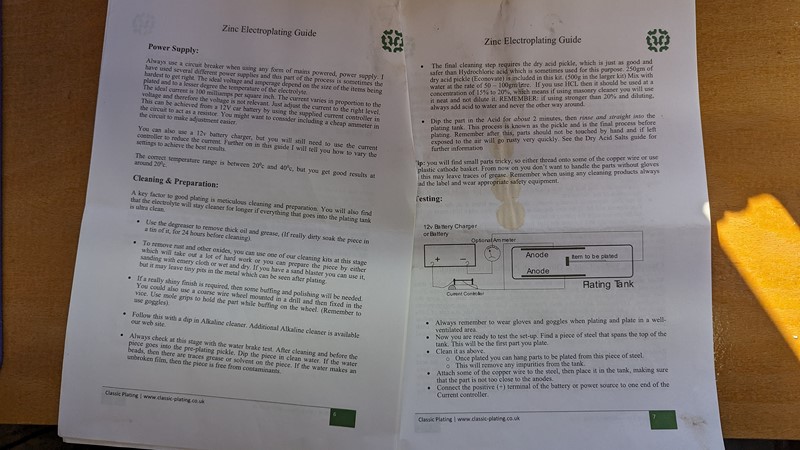
I guess related to the instructions is the vagueness of warnings. There are several “don’t mix A with B” warnings. But the impact isn’t explained, nor is the resolution if you make the wrong solution. I don’t want instructions closer to a chemistry paper, but better guidance would be good.
And yes, I did mix the wrong things together. Specifically one of the cleaning agents with etching primer solution. I seemed to get away with it, but decent labelling of the chemical packets, like giant numbers on the backs similar to Lego sets, would have gone a long way.
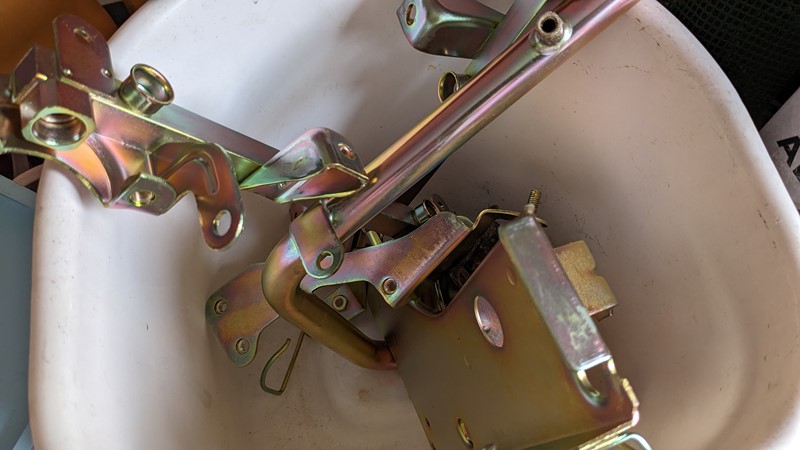
The DIY cleaning and plating results?
Well, the cleaning solution didn’t do any better than the tried and trusted washing soda, but honestly, Arm and Hammer powder does wonders. The etch chemical (the second time around) definitely had a meaningful and observable benefit.
Trying to zinc coat small parts in the tiny bucket was a mixed result. The actual zinc layer was thick and solid, where I could get the parts into the tiny bucket. The finish was variable from plenty shiny to mottled. I think this is really down to the substrate and insufficient preparation.
The actual ‘gold’ colouring chemicals are still firmly sealed, and unlikely to ever come out of storage. After battling the poor instructions and fighting the stupid bucket, I ran out of patience and buckets. I guess the kit is more aimed at coating small parts like nuts and bolts rather than brackets and components.
Going to the professionals
Despite the cost and the time already invested, continuing with the DIY kit to get the parts yellow coated wasn’t viable. Instead, I took a trip to the professionals to see about getting the plating appropriately done.
A drive to Niphos Metal Finishing in Crewe was absolutely worth the journey. They did pass comment on my attempts at the zinc coating. I get the impression I’m not the first failed DIYer to drop into the store.
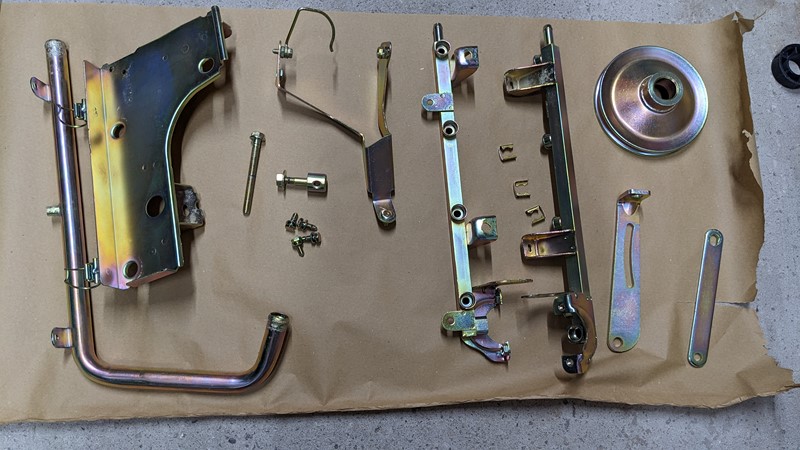
A few days later, I stopped back to collect my collection of parts. I don’t think they get many nappy buckets of parts brought to them. For less than £40, the results are fantastic. Absolutely not worth my effort trying to DIY the plating, although I did clean all the parts first. For the £124 the kit cost, I could have had Niphos plate every single engine bay part for less.
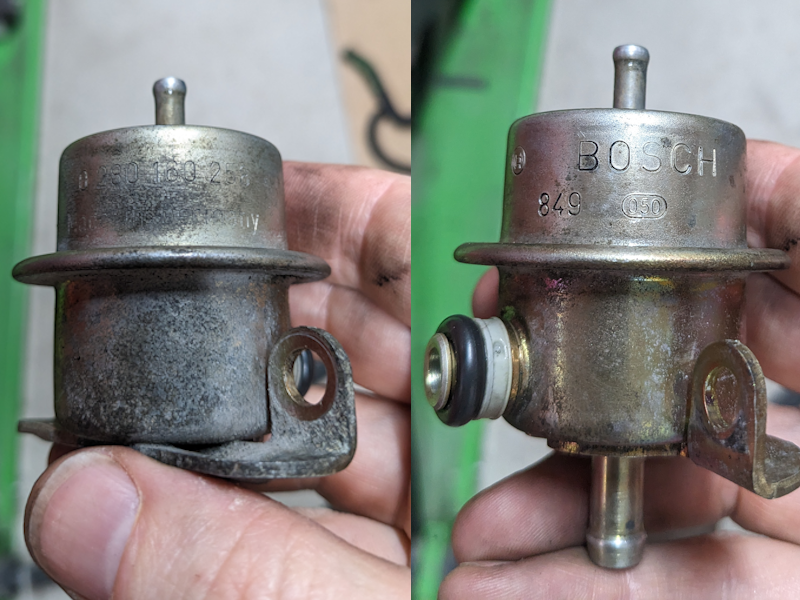
Sometimes, elbow grease and WD40 are the answer
The players weren’t so keen to plate the fuel pressure regulator. Between the cleaning and plating chemicals, they didn’t fancy the chances of having a damage-free regulator by the end of the process.
My cleaning and plating advice
Unless you have buckets of time to do it, leave the plating to the experts. With more time and some research, I suspect the Classic Plating kit is probably enough to DIY plate the needed parts. But the poor instructions and insufficient materials make the kit more hassle than it was worth. I confess the cleaning and plating processes are incredibly satisfying to get the results. So, if you’re more patient than I am, there is a world of satisfaction in DIY cleaning and plating.
However, if your time is valuable, you too, might be better off finding a grown-up to help with the plating.
M
NEXT – Eps32 Tackling the Scuttle
PREV – Eps30 Steeing Rack Boots
Back to Citroen articles
Back to Automotive articles
Amazon Affiliate Links – Things used in this article
BXProject is using Amazon Affiliate Links. It’s a quick way to show you what I have used in this article.
“As an Amazon Associate, I [may] earn from qualifying purchases.”
Since January 2024, Amazon has blocked embedding images, but I think the links are still valuable.


[…] NEXT – Eps31 Cleaning and platingPREV – Eps29 Windscreen removal […]
Valliant effort, beats my citric acid bath and epoxy primer routine.
[…] NEXT – Eps34 Electrics Part OnePREV – Eps31 Cleaning and Plating […]