
While the driver-side wing looks resplendent, wrapped in new paint, the welding repairs are not yet complete. As is often the way, both A-pillar tops on this BX need attention. The driver’s side was previously tackled with the A-pillar repairs, and now it is the turn of the passenger side. As we will see, this isn’t the only part of the windscreen surround repair that is needed!
Windscreen Surround A-Pillar Tops
Rotting in the top of the A-pillar is not uncommon on the BX. A number of panels join at the top of the screen, with some of the joints being hidden by the screen rubber. Both boxed profiles of the roof sides and windscreen sides end here, so this is one of the most structurally significant parts of the car.
I’m unsure if the rot starts because of a moisture trap behind the windscreen seal or simply entrapment at the end of the box sections. What I do know is that A-pillar top rot is always much worse on 4×4-equipped cars. This leads me to believe that the torsional twist in the body, which is much higher on the 4×4, is a significant part of the problem.
Assessing the damage
The only guaranteed way to completely tackle the rot is to remove the windscreen. I’ve tried on a few cars to tackle the rot with the screen in place. Good cleaning, treatment and sealing of the A-pillar tops will undoubtedly slow the degradation down. However, only replacing rotten metal will cure the problem.
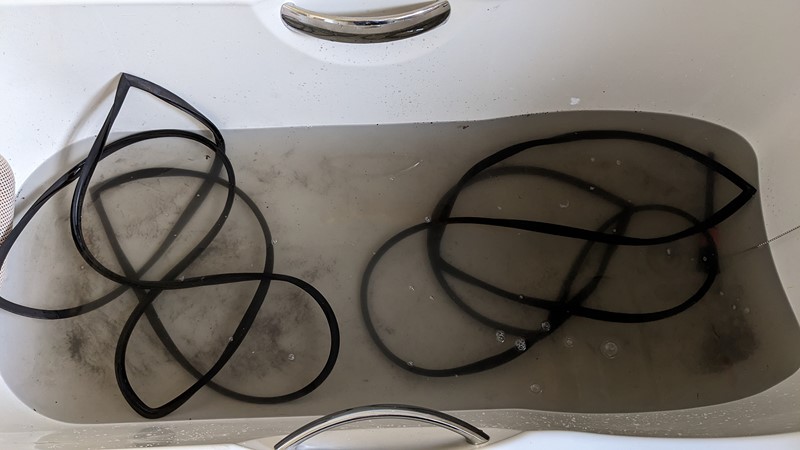
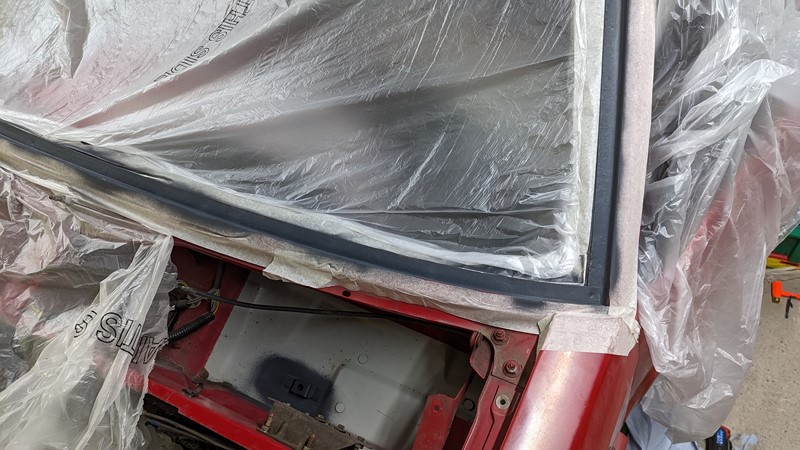
The first step in removing the windscreen is carefully recovering the seal. Seal removal depends on how well the last glass was installed. Fortunately, this is a factory screen, so the seal comes out with little battle. Once out, it can take a bath to get the worst filth out.
Windscreen Glass Removal
I’ve tried no end of ‘techniques’ to release a BX windscreen. I’ve never had much luck with a dragged-blade glass remover. I find they have a tendency to buck and dig into anything but the windscreen bonding glues. My attempts at using heated resistance wire tend to result in a smokey, fuming mess with little cutting action. Instead, I prefer an electric multi-tool and a scrapper attachment.
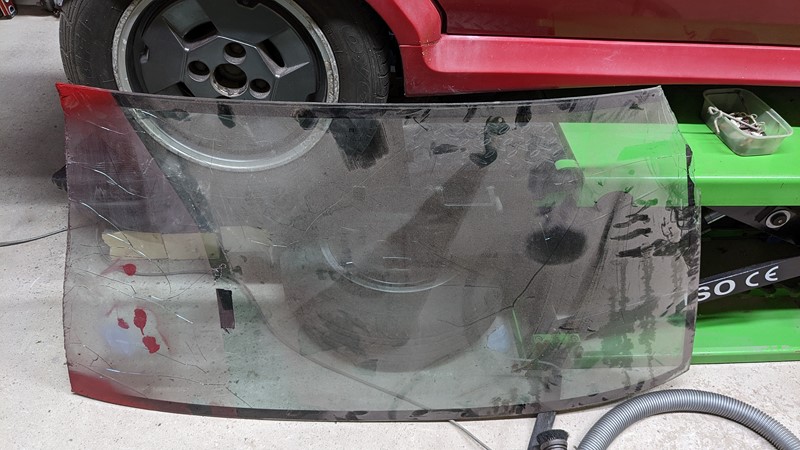
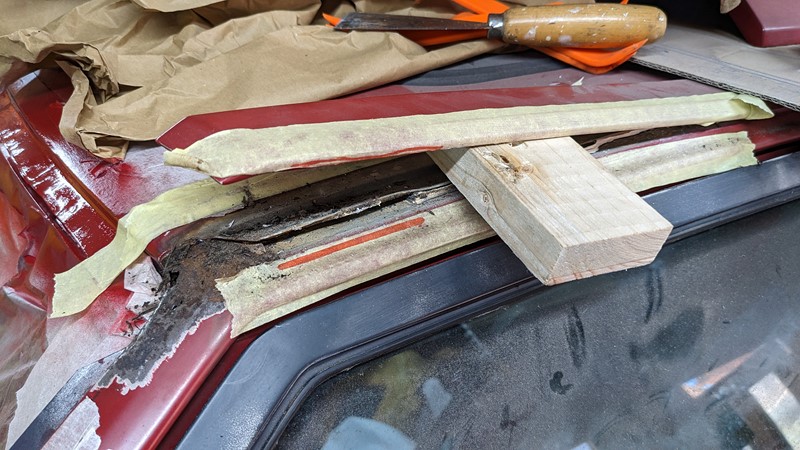
Running the scrapper blade all around the screen separates most of the sealant from the car’s body. Then, gentle pressure is applied to the glass to gently break any remaining bonding. A big chunk of wood helps to apply pressure while and remaining sealant is split with a sharp knife. It takes me about 30 minutes to remove a screen like this, and although slow, the glass tends to come out in one piece.
Removing the old windscreen sealant
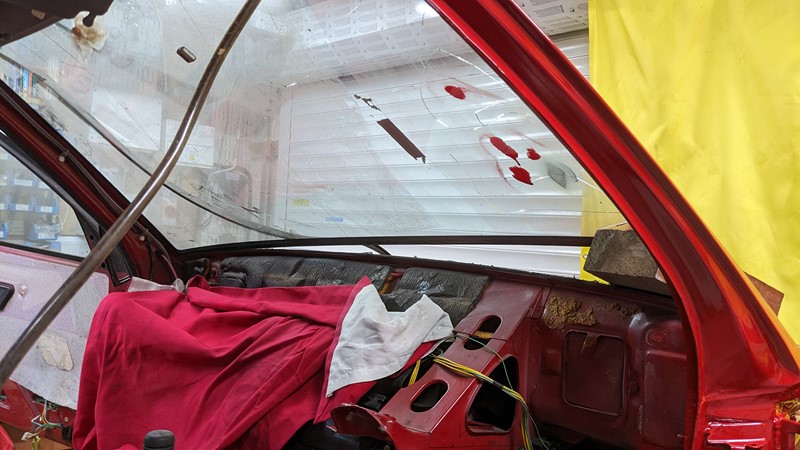
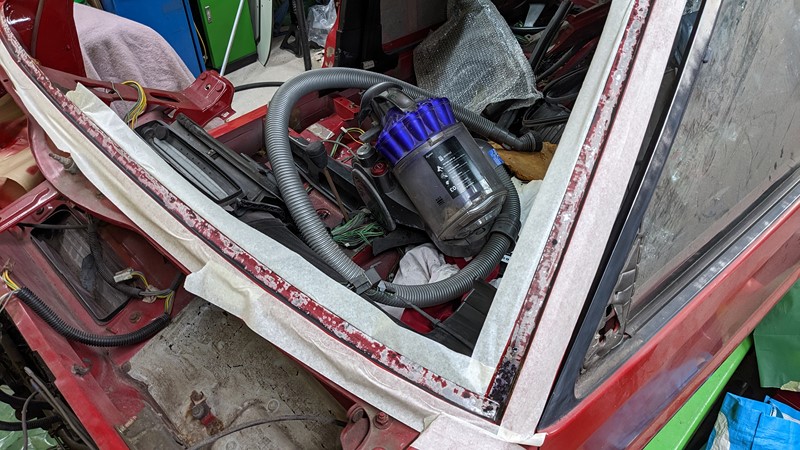
With the glass out, there is still a lot of old sealant present that needs removal before the extent of any windscreen surround repair can be understood. This slow and often tedious process needs patience to avoid damaging the already fragile metalwork.
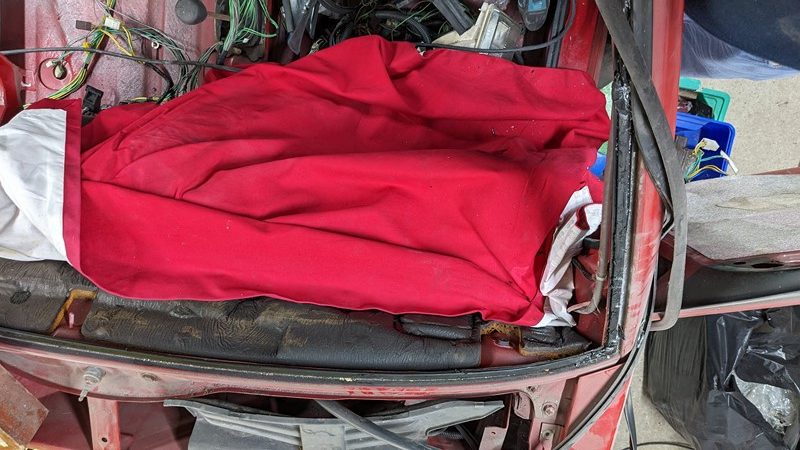
I’ve always found a BX with no windscreen to look incredibly weak. Spindly little A-pillars and a lightweight window surround emphasise the significance of the glass in the structure. What is left with the glass removed is a thick layer of adhesive that needs to be carefully separated from the vehicle body.
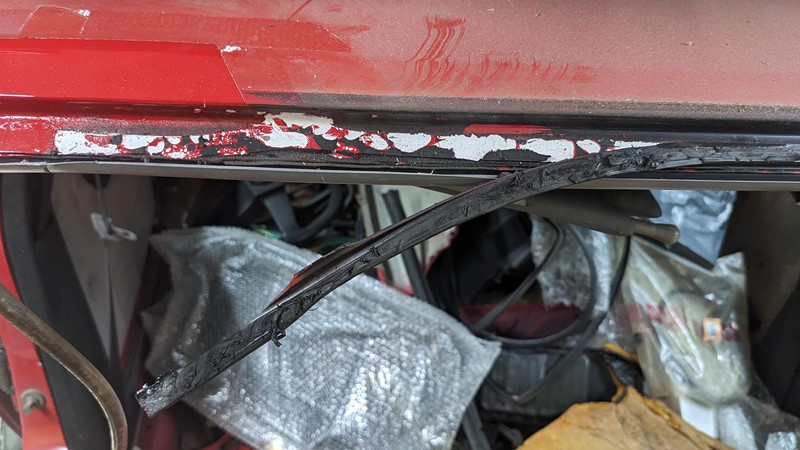
In some cases, the old sealant is relatively easy to get off. Across the top of the windscreen, the old adhesive pulls simply off, albeit with some of the factory paint. Im not sure if the paint peeling results from the multi-tool and scraper blade or simply poor layer adhesion.
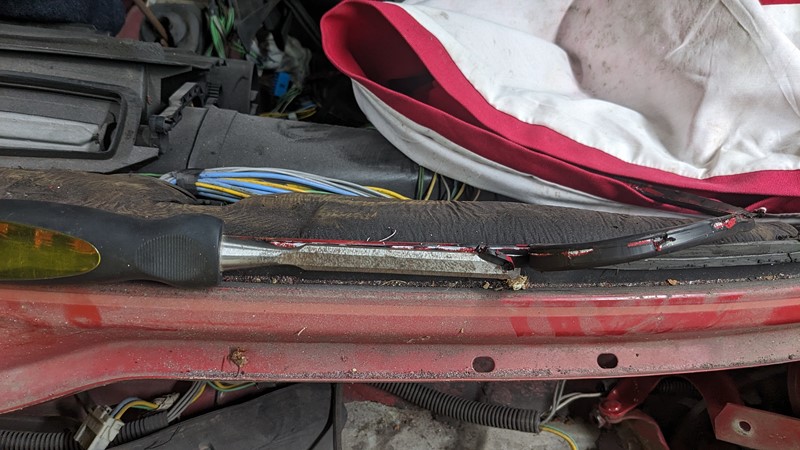
At the bottom of the windscreen surround, considerably more effort is required to prise the old sealant from the body. Careful application of a sharp wood chisel aids the separation of the thickest material. Later, finger sanding will get rid of the final remnants.
Windscreen Surround Repairs
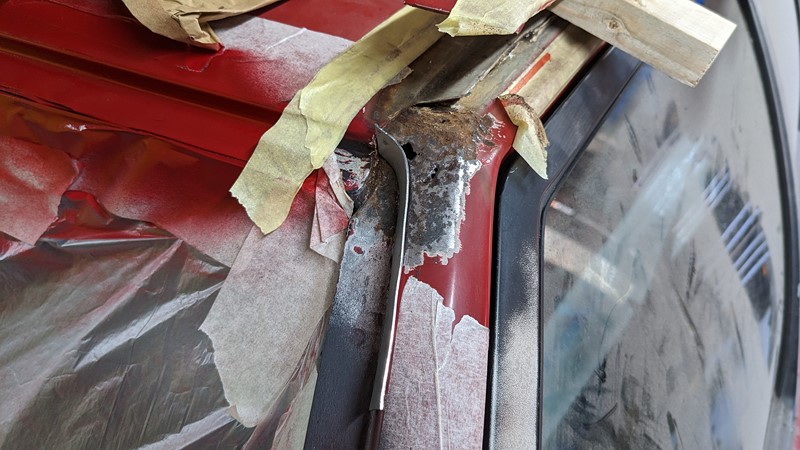
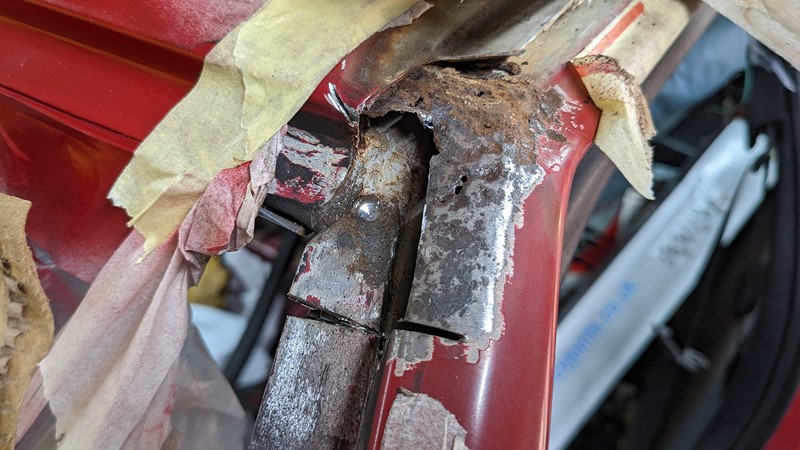
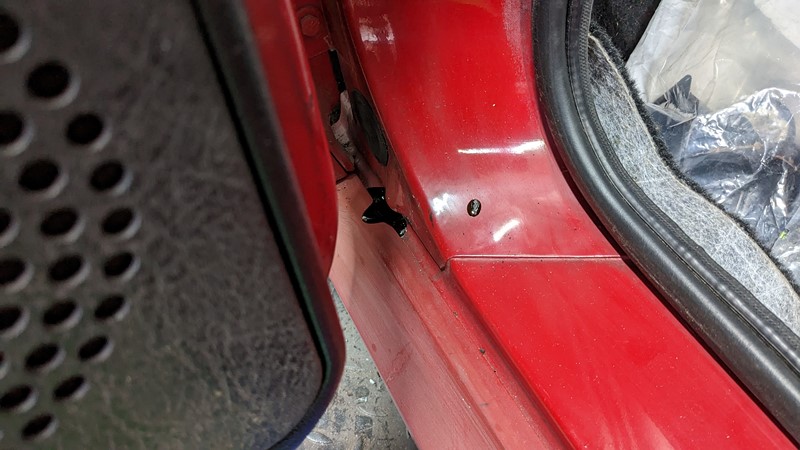
As expected, more corrosion is found once the glass and sealant are removed. At the bottom of the passenger side pillar, corrosion has started, but fortunately, it is not too advanced. Again, the corrosion here is where the vertical and transverse panels join.
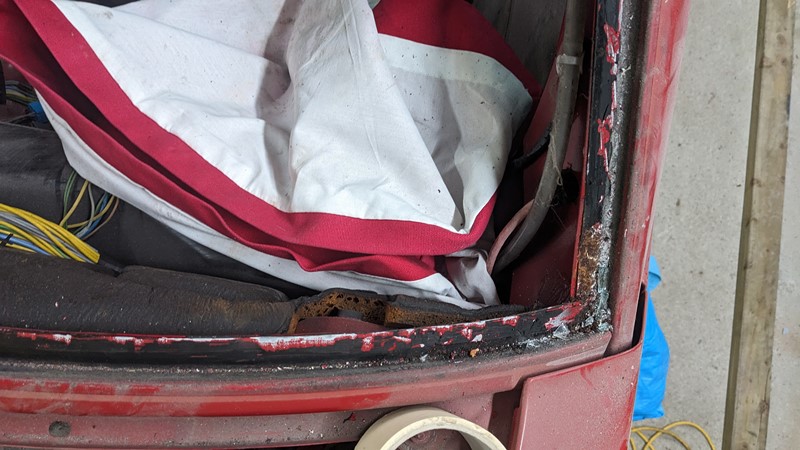
I first thought this corrosion was so advanced that the metal was holed, but fortunately, this was not the case. What I thought was a hole was actually a piece of the black sealant. The metal was reassuring solid under the surface rust.
Many hours later, the remaining sealant was removed entirely from the windscreen surround. The surface rust at the bottom of the pillar was gently rubbed back and treated with Dinitrol RC900 epoxy converter/sealer.
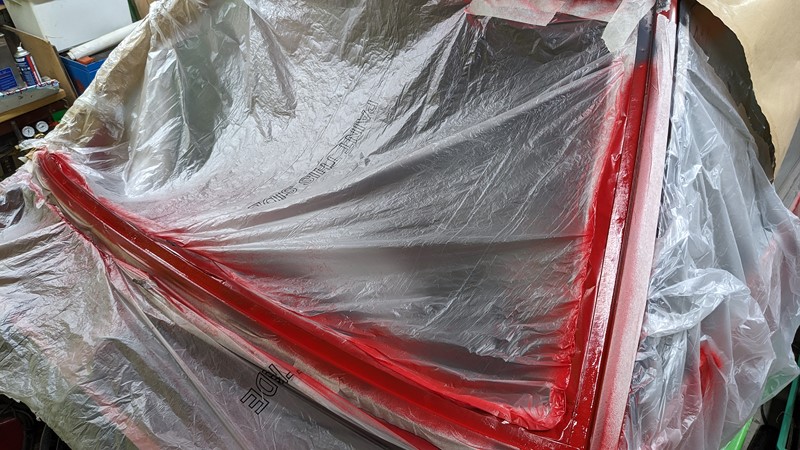
With plenty of over-spray protection, the whole area was treated to a few layers of etch primer. While it was perhaps unnecessary to coat the entire area in etch primer, spraying the whole area was the only way to ensure all the exposed metal was protected.
Standard ‘1k’ was used to finish off the windscreen surround repairs. Layers of primer, basecoat and lacquer were built up to give a finish that is well adhered to the body. Hopefully, this is a good base for the new windscreen to be glued to.
How bad can the windscreen surround damage be?
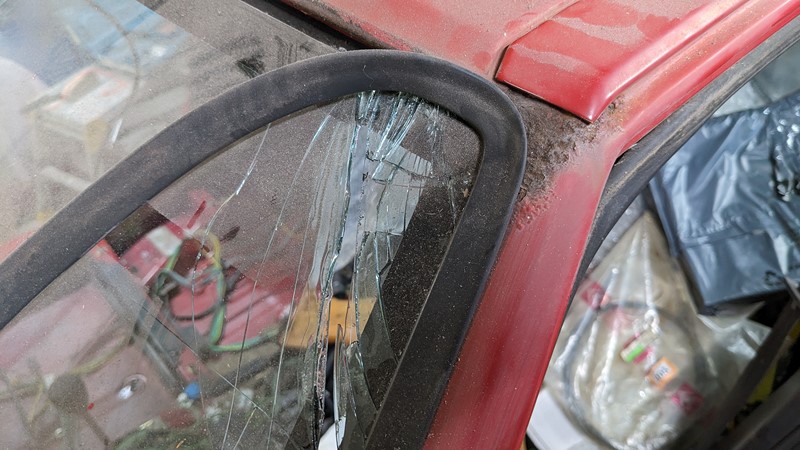
So how bad can the rot be at the top of the A-pillar? From experience, the corrosion always tracks further than it first appears, hence the need to remove the whole windscreen. And this BX is no different!
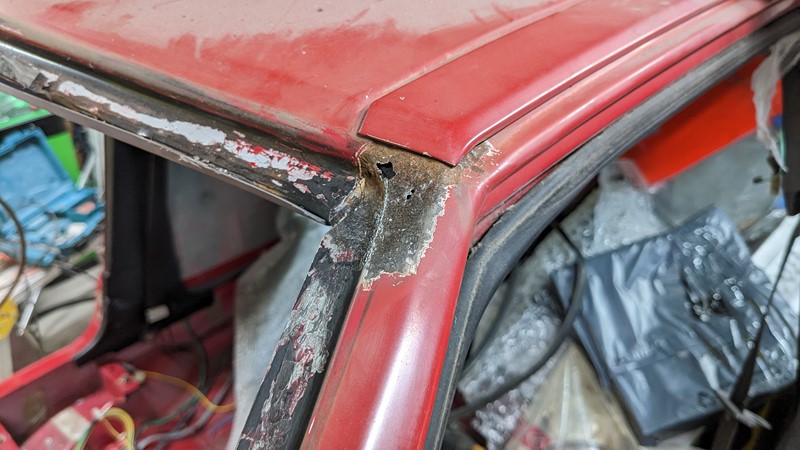
Corrosion has set in some two inches above and below the top of the glass line. The decline is almost all the way across the panel too. As much rot was under the glass, seal and roof moulding as was visible before the windscreen was replaced.
Repairing the top of the A-Pillar.
Surprisingly, the amount of rot found with the windscreen out was just about what I expected. I guess I’ve seen so many of these now predicting the level of corrosion creep is getting easier. However, I’ve never tackled the repair myself, which is a little nerve-racking.
Removing the roof capping
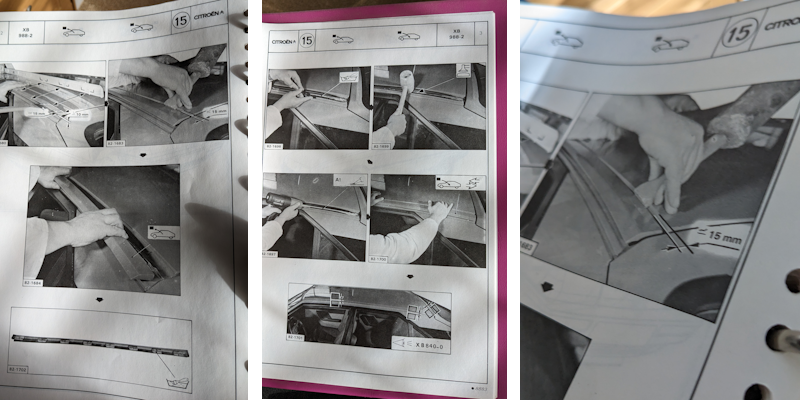
An attentive eye might notice that a lot of the windscreen surround was repainted before the worst damage was tackled and wonder why. Well, I needed to build up the courage to pop the roof cap off. The Citroen technical manual excerpts above suggest this is a simple thing to do. Just knock it off.
The reality, of course, is that it is never quite so easy if you want to reuse the trim. There is a line of sealant to be split, and then it helps to open up the flap that traps the flange on the trim. Of course, if you go at it like the official manual, you will also damage the rest of the paintwork. A slow and gentle approach is required; in the end, patience pays off!
Removing the rotten metal
Unlike some previous repairs, I don’t have a donor panel to work from. So before I go chopping into the windscreen surround metal, I need to copy the shape of the curve at the top of the A-pillar. This is important to get right so that the new glass and seal fit correctly.
Despite appearances, the curve is not a simple radius. The vertical section twists, so no amount of CAD will help. I considered a few techniques to replicate the profile, but bending a matching profile and blending in later seemed the best solution.
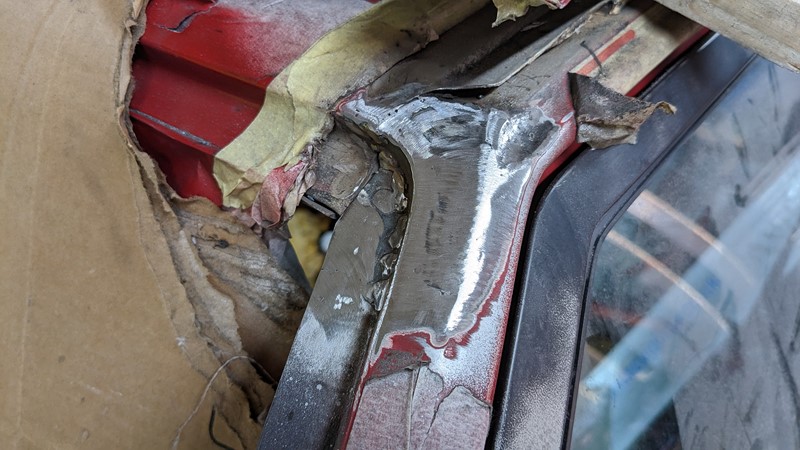
With the template made, the cutting could begin. As expected, the lower part of the A-pillar box section was unscathed save for surface rust around the spot weld. Getting back to good metal under the roof capping was a little bit harder.
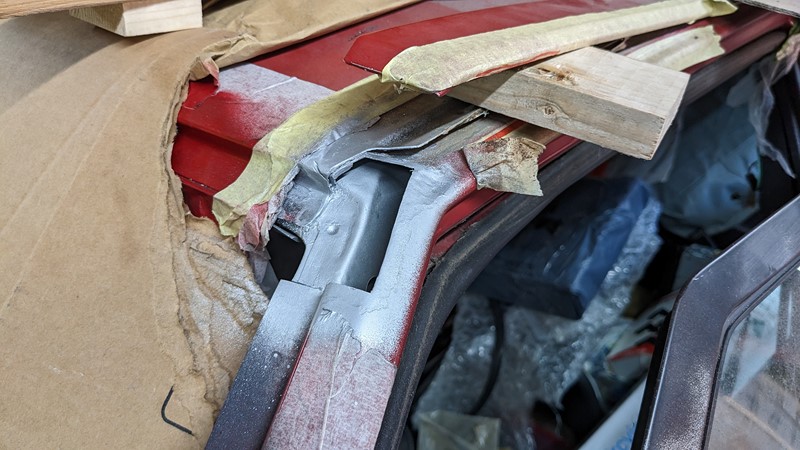
Some cautious chopping later, the rotten metal is out, and the remains are cleaned. Surface rust was rubbed back to clean metal, and weld-through primer was applied far and wide.
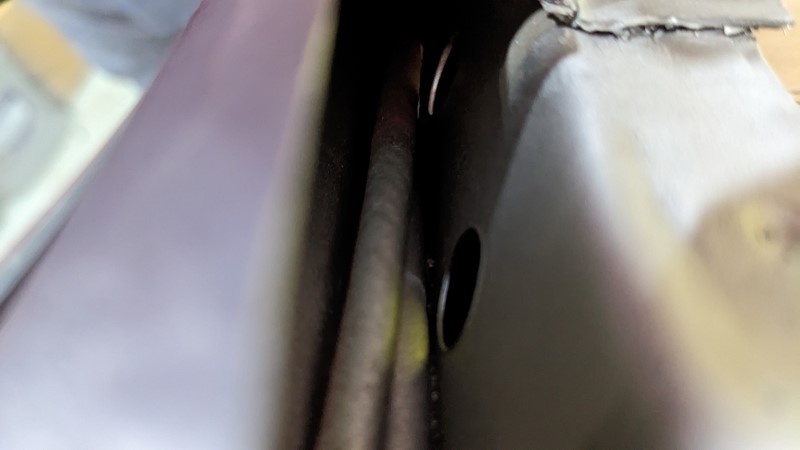
A quick visual up the A-pillar and into the roof rail suggests the rest of the body is in fine fettle. Quite why I then used a potato to capture the moment, I do not know, but trust me, on the sunscreen.
Building up the windscreen surround repair
Once prepped, the repair pieces could be made up and welded in. I hate making repair sections in multiple panels, but in this case, it’s hard not to. Fortunately, there is plenty of access behind the panel to apply plenty of preservatives later.
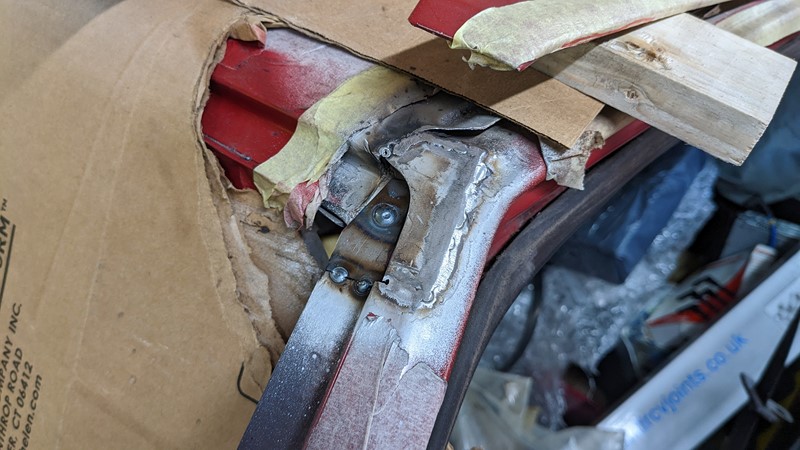
The repair panel that joins the upper and lower segments of the A-pillar box is added first. The more complicated bend on the upper A-pillar panel is then added in. While it doesn’t initially look great, hopefully, the finger sander will help a bit.
The premade curved panel is then welded into the repair panel. The panel was deliberately left ‘tall’ and welded across the back edge. The excess could then be shaped to match the existing profile without disturbing the weld.
Painting the repaired windscreen surround
The standard process applies now, rub back, clean, etch prime, high build, base coat and lacquer. But only after a lot of sculpting of the metal.
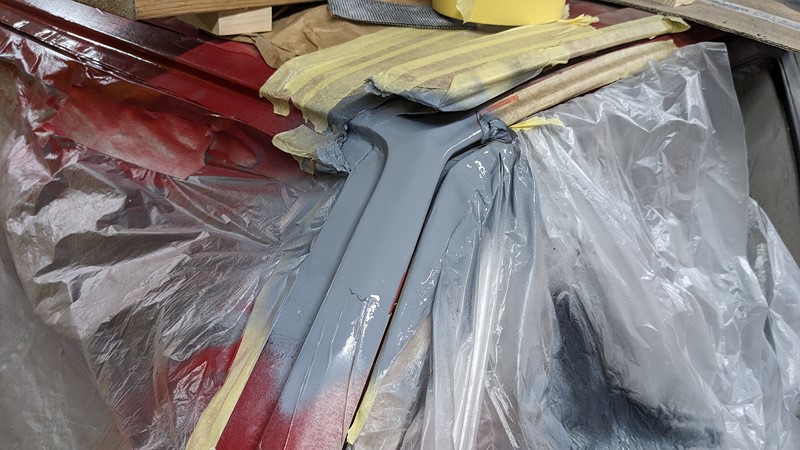
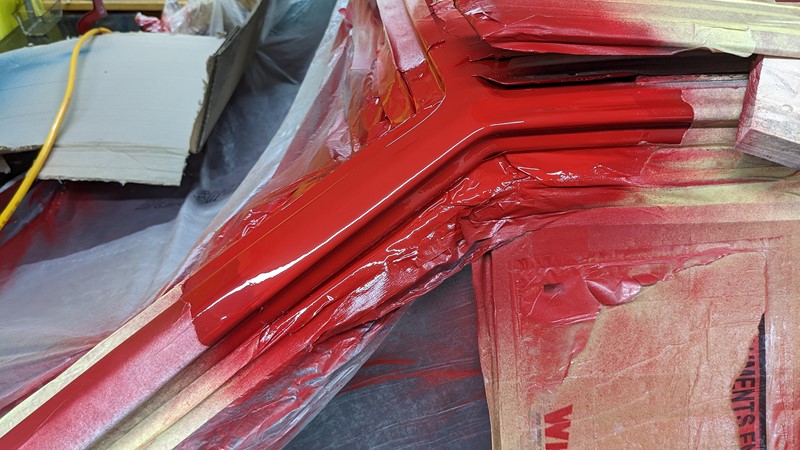
While it looks good in wet high-build primer, it takes a few layers to get an even smooth finish. In this case, there is no filler used. The primer was just enough to iron out the imperfections, which was rather a surprise.
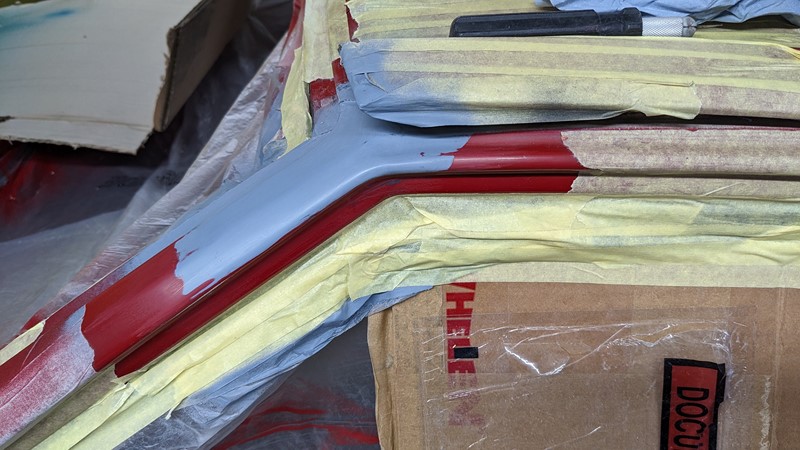
I’ve never been great at blending the edge of the new and old paint. Getting the primer to sit well with the existing paint took far too long, and several weeks passed getting the base right.
Rather annoyingly, I did manage to get a run in the paint. Only minor, but even in the picture above, the light garage lights make it stand out. This one streak took days to rub back.
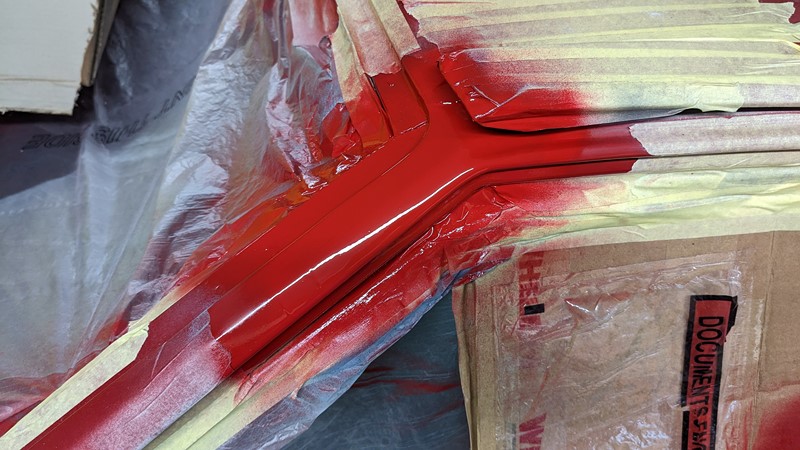
I was a little curious about how the different paints appeared when lacquer was applied. I was a little concerned that this would show in the final job. On the non-metallic BX’s, a single-coat paint was used (I assume a form of two-pack), so they don’t have a separate top coat. This will be the reason for the initial concerning line in the paint.
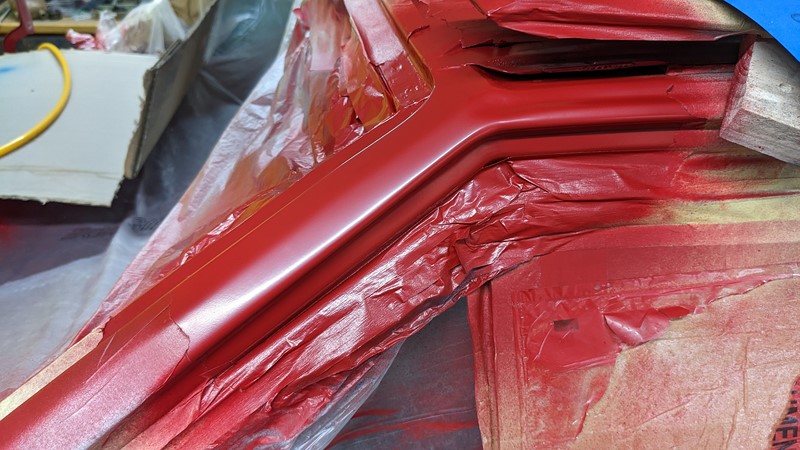
However, once cured, the joint in the two paints is almost invisible. And the polished-up A-pillar looks almost like it came out of the factory.
Finishing the Windscreen Surround Repair
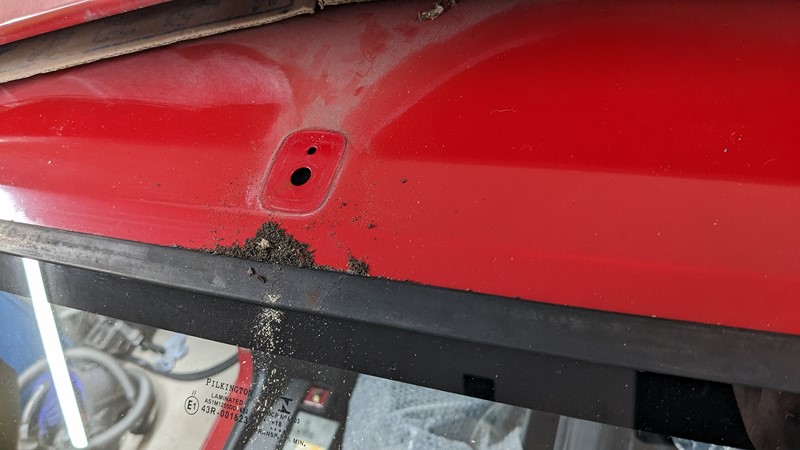
The only thing left to finish on the windscreen surround repair was the glass installation. Many years ago, I picked up the correct green-tinted screen manufactured by Pilkington Classic division. Fortunately, the glass fits the repaired surround perfectly. The local glass installer was also made up to see the car and that I had my own glass. However, they were a bit baffled when they found Jazz on the drive, with a windscreen still fitted.
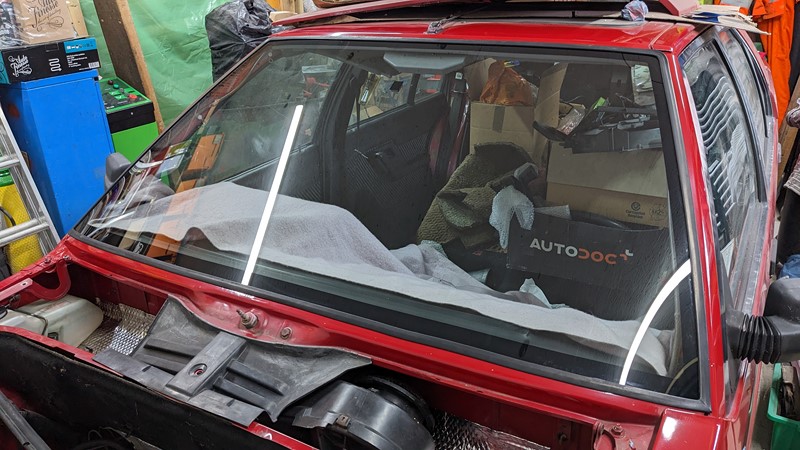
This was far from the fastest repair on the car, having started in January and only just being completed, but it’s another huge milestone in the restoration of XPO. For the first time in decades, the cabin is (relatively) sealed and watertight. I doubt the car will get outside anytime soon, but when it does, hopefully, the interior won’t drown.
And one more thing!
While we are talking about the windscreen surround area, a few other things have happened!
A-pillar wax oiling.
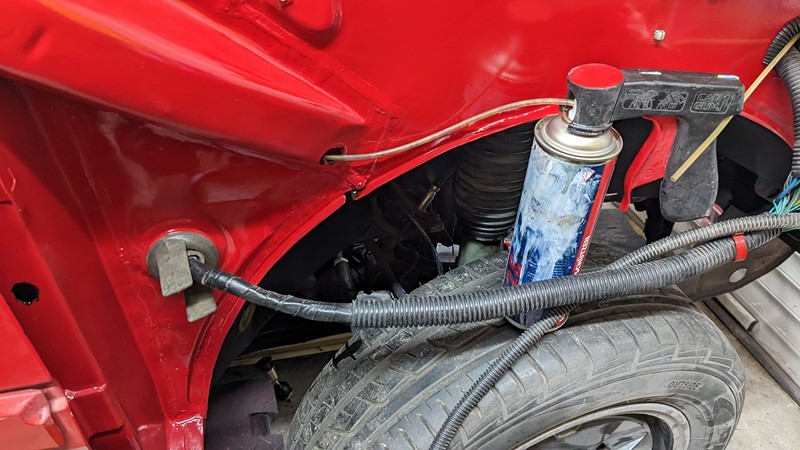
First up, both A-pillars have been doused in Dinitrol wax oil. Half a can up each side was probably a little excessive. I had a blockage problem with the can, which the supplier didn’t want to know about. A good dose of thinners in the top of the can seemed to unblock things.
Care was taken to rotate the nozzle while spraying to ensure a good 360-degree dose was applied to all the new and repaired metalwork. I really hope I don’t have to cut into it again! I should add that I did take over the holes into the cabin before I started. Hopefully, I found them all.
There is a chance I might have sprayed a little too much in. But too much is better than too little, right?
I’m sure the GFRP body kit will benefit for years to come as the body gets warm and the wax oil migrates!
New Radio Aerial Base
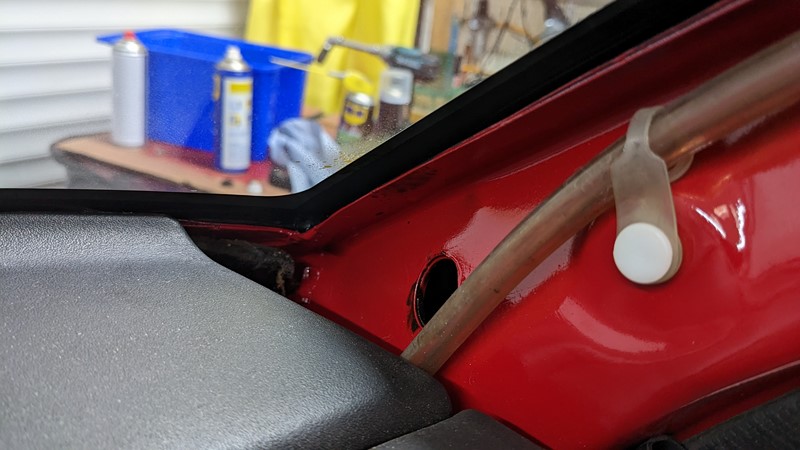
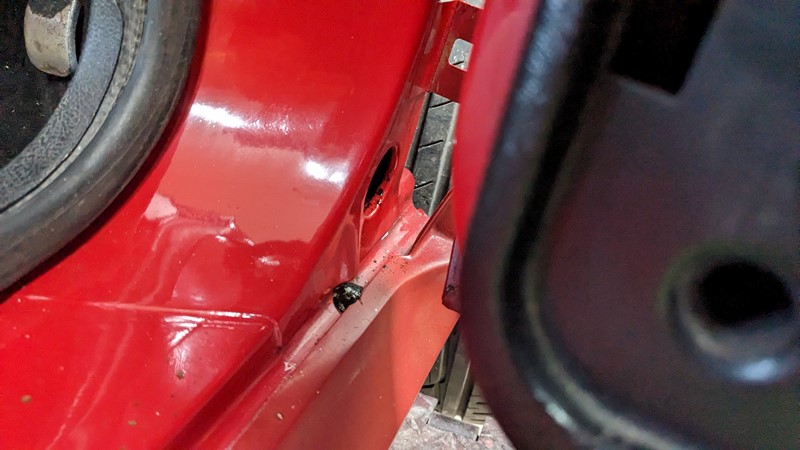
Another job tackled loosely in the windscreen surround area was the replacement of the radio aerial base.
The old one was an absolute pig to get out. In the end, the bolt inside the cabin snapped off, and I still had to hammer (gently) the remains out. I was amazed at how much mess came out from under the old base. Had I known, it would have come off a long time ago.
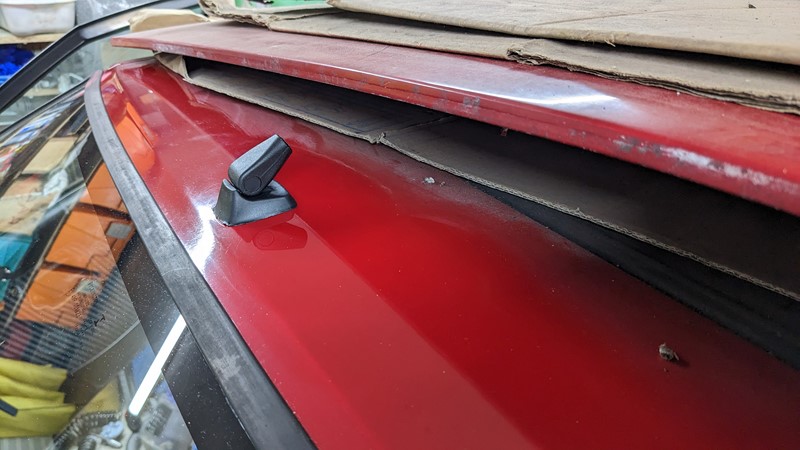
The replacement base is just a cheapo from Amazon. It doesn’t have a rubber base like some of the earlier chromed types but instead has a flexible lip. While most certainly not a genuine Citroen part, the quality is reasonable, and a little flange sealant before installation should keep the worst of the dirt and moisture out.
Starting to look like a car again!
And that’s all for this episode. I’m struggling with the idea that I’ve written 30 articles about this car, and anyone is still reading. Equally, I’m fearful it might never end! My solution is to try to fit more into each article but maybe leave some excessive detail out. Everyone loves more pictures, right?
Personally, this has marked a significant milestone, getting the cabin sealed, and it really helped me to see the finish is in sight. The pace has continued through this year, and if you see my Twitter, Instagram or Threads feeds, you’ll know I’m not far off getting the engine back in and running!
Until next time!
M
NEXT – Eps30 Steering Rack Boots
PREV – Eps28 A-pillar Painting. Again!
Back to Citroen articles
Back to Automotive articles
Amazon Affiliate Links – Things used in this article
BXProject is using Amazon Affiliate Links. It’s a quick way to show you what I have used in this article.
“As an Amazon Associate, I [may] earn from qualifying purchases.”
Since January 2024, Amazon has blocked embedding images, but I think the links are still valuable.

Now that is a great repair nicely carried out but I was a little surprised the meat cleaver didn’t come out for the rail capping : )
[…] NEXT – Eps29 – Windscreen Surround RepairPREV – Eps27 Wheel Arch Repairs […]
[…] NEXT – Eps31PREV – Eps29 Windscreen removal […]
[…] as swimming! So, we return to the XPO rebuild story from about the point we left off. The windscreen surround was complete in the previous episode, and new glass had been installed. This episode focuses on the […]