

Mechanical, steering and hydraulic issues seemingly sorted, XPO was not far off ready for the government inspection. However, before presenting the car for test, I thought it best that the car be a little more presentable. Having been stored outside since 2008, in a range of tight car parks, the bodywork was a little worse for wear. The time had come for bodywork revival.
WARNING: THIS IS A LONG ARTICLE, HOWEVER, MOSTLY JUST PICTURES
How bad can the paint be?
Casting our minds back to the original XPO articles, we recollect that XPO had become a spares car, destined to live on in many other BX projects. However, the overall condition made the then-owner reluctant to part the car out. The roller coaster nature of XPO’s survival, from scrap to saved to parts car to likely restoration, had more than taken its a toll on the bodywork, which was in need of some revival.
Storage Rash
After more than a decade of storage, shunting and sitting in car parks, XPO has suffered more that a little storage rash.

Dents in both wheel arches had been present for some time. The likelihood of my getting them out perfectly was slim, but I was able to push some of them out with my hands. The worst, on the tight radius of the drivers wheel arch was something I would only make worse, so I stayed well away.

A gouge in the passenger side wing was through the colour coat but not through the primer. Gentle persuasion from behind removed the worst of the dent. However, a full respray would be needed to cure the rash.
Creating optimism
An age-old trick to selling cars is to throw on some thin oil or silicon. As the liquid works into any scratches or surface imperfections, the reflected light starts to give the best possible result, until the first wash.

While I’m not one for pouring snake oils onto cars to pass them off as better than they really are, in this case, it was useful to see if the car could be brought up before investing in a professional polish. A small amount of WD40 and a gentle cloth started to reveal the paint wasn’t as bad as I had feared.

On the wing with the big gauge, I had been contemplating getting the wings resprayed. However, before jumping in with the expense, I hit the wing with a dual-action polisher. Working from 1000 grit to 3000 grit in a small area, the results were fantastic. The decision was clear: preserve as much of the original paint as possible!
Fuel Filler Flap
Ah, the fuel filler flap. What a nightmare this was. Predictably with no engine, I’d never tried to open the flap until it came to fully cleaning the car. Previous access to the fuel tank, to check for contamination, had been through the inspection port under the back seats.

Imagine my surprise when I tried to put the key into the lock, and it wouldn’t move. Some time with various lubricants and I could get the key into the lock, but it absolutely would not turn. Eventually forcing the flap off the cap (they’re usually stuck together) and a bit of brute force was used to get the fuel cap out of the filling port.

In the process of getting the cap out, I received a rather health bath of accumulated crap. Given that the car hadn’t been on the road for a very long time and had been pressure washed to death since it arrived at BXP HQ. This pile just goes to show how much filth gets trapped up behind the long range fuel tank!
Fule Filler Cap

Despite resorting to excess force to get the cap out and the snapped plastic locking ring, the fuel cap was in surprisingly good condition. It turns out that there should be a sealing ring between the lock and the housing, which stops rain from getting into the lock. This had long since perished and the aluminium lock housing had oxidised into a solid lump

Sourcing a replacement fuel cap took months. However, in that time, I managed to free off the lock barrel. Amazingly, the corrosion wasn’t too bad, so with some gentle cleaning, I managed to get all the tumblers in the lock moving again. Well-lubricated,, the revived lock was installed in the new fuel cap. The fuel cap was reinstalled in the fuel flap, and suddenly, it was like there had never been a problem! Frustratingly, the lock is far smoother than my own BX
Replacing the Side Trim
When XPO arrived, it was missing the trim that sits between the rear upper wings and the 16v body kit. This isn’t too unusual as the solid trim pieces become stiff and brittle with age, then warp in the sun.

While XPO’s original trim had come with the car, it was snapped in two. Fortunately, I still had the trim from J603 LLP. The plastic profile had, not surprisingly, warped. However, with some gentle encouragement and a length of stiff alluminium, I was able to strighted out the trim.
Preparation

The old foam trim tape had become brittle and partially removed, but it was still clinging on. The worst was removed with a plastic trim tool, and the remaining glue residue was removed with isopropyl alcohol and panel wipe.
Re-affixing

Some 3M foam backed Very High Bond (VHB) trim tape holds the painted trim to the body. A roll of frog tape and some foam packing hold the pressure onto the trim to ensure an even stick. An often missed application requirement with VHB is that it is pressure activated. The zip-type taping to hold everything in place might look ridiculous, but is works.

The finished trim doesn’t look too bad at all. You might notice the body areas above and below the trim where it was polished before being glued down. The tape will need to sit for a few weeks before the polisher comes out again, to save ripping the trim back off.

And while were sticking and glueing, the roof trim was bonded back on with Sikaflex where it had been moved to allow the windscreen repair.
Rear Vents
Next up, the body air extractors needed to be tackled. These vents are a major design feature of the BX, but they look really naff when they get old and rusty.

The red paint work around the vent was masked off with the wax-coated ProDec tape, which seems to overspray running to the painted part. The grill area has unstick from the GFRP body kit, which means we can get paint over the whole surface, top to bottom.

The wider area is maked off and then sprayed with a generic black acrylic aerosol from KRAMP. The fast-drying 1K paint works really well here. Thin enough to not block the holes and matte like the original finish.

I’ve been using the KRAMP aerosols more and more on the tractors, and the finish is really durable. Another job i need to do on my own BX!
Bumpers
Ah, the bumpers. When buying XPO, I knew the rear bumper was missing and the front a little tatty. Fortunately, I had some replacement bumper options. Although I didn’t know at the time that XPO’s original bumper lived on at the back of BAH
Bumper Painting
I had a few rear bumper options, but a chance visit to a local Citroen Specialist gave me the opportunity to buy a good condition rear 16v bumper.

This replendent white bumper made a great start point for a replacement for XPO and saved me a trip to the garage loft!

A friend and professional painter had already offered to paint up the bumpers and made up a swatch to check the colour match. Pretty good I thought!

While painting the rear bumper, the front bumper was also repaired, tidied and repainted.
Bumper Brackets
Before going off for a repaint, new brackets were attached to both the front and rear bumper with Sikaflex. The reproduction of the bumper brackets has been covered in a previous article, so I won’t labour the topic here. Instead, enjoy a montage.


Bumper Trim
One of the most satisfying parts of the XPO project has been bringing the bumpers back to life. This is more than just a bit of paint but years of getting parts remanufactured for just this moment.

The sides of the trim inlay are lined with ProDec before the 3M VHB tape is offered up. From past experience, the tape is super sticky and will make a mess of the paint if I slip while offering the paint to the channel.

You can see in this close up just how snug the tape fit is and the potential for getting it all wrong!

The finished result is blooming marvelous. Fresh paint, fresh bracket and fresh trim. Now i just have to make sure i dont damage them!

One finishing touch for the bumpers is new spot lights, and new stickerd for the false inlets. These stickers where cut from a roll of matt black vinyl using a plotter and came out rather well!
Bath Time
Before a full machine polish is carried out, the paintwork needs a thorough deep clean to remove any dirt, debris or more likely oils.

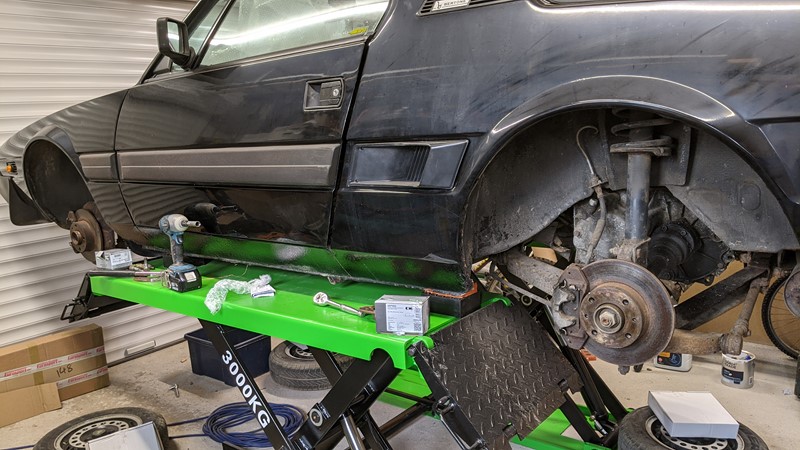
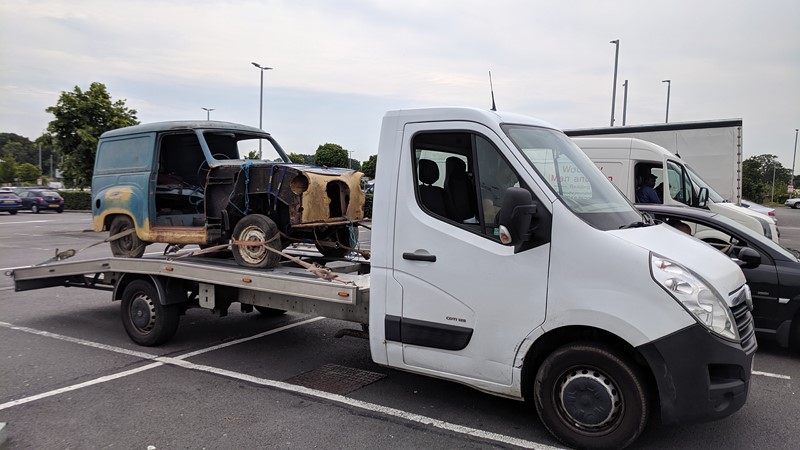
A warm but over cast day made for the perfect weather to get the bucket and hose out. And why wash one BX when you can wash two?

It would be fair to say that after a few years in the garage, XPO had picked up a bit of dirt. This was the FOURTH wash bucket and still the filth was pouring off the car.

Back in the garage, a clay bar was used to drag out the worst imperfections on the larger areas. The difference was night and day when running a cloth over the bonnet.
Roof Graffiti
Before the bodywork revival could be completed, there was one area I needed to tackle on the roof. Remembering that XPO as once going to be scrapped, it had been used to test out some paint. Some less-than-subtle black paint.

It turns out the paint was some sort of black engine enamel. The dual action polisher made a notable impact on removing the paint with 1000 grit polish. However, I was concerned that the DA would eventually cut through the red paintwork.

And so began the manual process. Over several nights, I slowly removed the enamel paint with some 3000 grit wet and dry paper and water. At the end of day one, the task seemed like it would never end.

By the second day, the roof trim finishers where starting to look pretty good. A glimmer of hope was forming that I would not need to respray the roof.

Then, by day forty twelve, more than 95% of the paint was removed. A few bits still remained at the bottom of joints where the wet and dry wouldn’t fit. But from the face of defeat, I had clutched a victory!
Cut and polish
In the early days of the XPO project, I had the full intention of giving the car a full cut and polish myself. I’d bought the kit and the product and practised in a few areas. But that was the start of the project, and when the guy who had painted the bumpers offered to polish it for a relatively low hourly rate, I couldn’t say no!

An early morning start on a cool morning was expected to be followed by a whole day of polishing.

But not long after mid day, and a solid four hours of machining, and the polished car emerged from it’s slumber.

Even now, I can’t get over just how well the paint cleaned up on XPO. Despite years of semi-neglect and living outdoors. Despite being red in finish with a factory single stage paint. And despite all the odds, the paint came out gleaming!
Finishing Touches
Now I was into the finishing touches. Freshly painted bumpers and windscreen grill to go on, and pretty soon an MOT beckoned.
Tailgate
I debated what to do with the tailgate for a while. The black paint around the registration plate was faded and battered. I had planned to just polish it up as best as possible. However, after polishing the rest of the car, a quick touch up wasn’t going to cut it!

So, the badges came off, after careful measurement! I certainly wouldn’t want them to be stuck back on in the wrong place.

The KRAMP matt black paint came out again and several coats applied.

The ABS badge was cleaned and new tape applied while the paint was curing.

And a few days later, the bade was reapplied to the near perfectly finished tailgate.
Bumper bracket
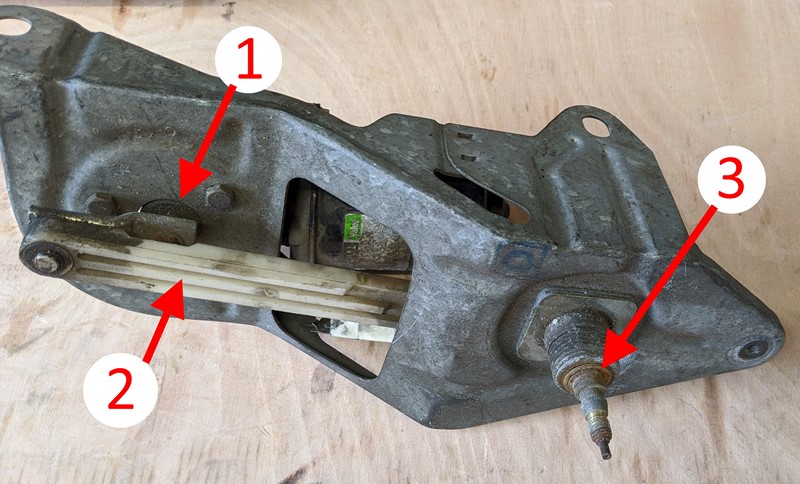
Once the front bumper was back on, I had to make up a retaining plate. The original plate had rotten away and ripped out the mounting holes in the fibreglass bumper.

After some CAD engineering and careful marking and cutting, a replacement bracket was made up in aluminium sheet. I’d love to tell you this was because the material is light weight and this is a race car, but it was simply what was lying around!

Stainless pan heads fix the plate to the bumper, almost looking like teeth. I did contemplate painting the fixings black, but the ‘teeth’ rather amused me!
Next Stop, MOT!
Well, that was an epic article, and the longest in the series. Fortunately, the final two articles will be shorter. Will XPO pass the MOT? And where will her first outing be to? Find out in the next and penultimate article!
Until next time!
M
Love that car, well done on an epic build.
I suspect it might be THE most written about BX ever. Eps22 to 48 is over 55,000 words!